Flowers for Mom: Easy to make Paper Flowers with only 4 Materials
[ad#ahc]
After a long winter with a lot of snow (Canada lived up to its reputation as the cold white snow), I am overjoyed to see my green grass and the lovely green shoots of spring flowers bursting from my garden. They are simply beautiful in a range of purples, oranges and pinks and it definitely puts me in the mood to bring in a few spring blooms. Unfortunately, I hate to wreck the scenery in my yard but I have found an excellent way to add a little color to your house.
It is simply to make some pretty flowers with paper. Kids love this and what is even better is that they are so easy to make, a child of almost any age can make. You can also do a multitude of things such as mounting them on a Popsicle stick or use them to decorate pictures or cards. What is even better is the fact that these little flowers can be made with only a few items that can be found around the house.
How to Make The Paper Flowers for Mom :
Start of The Kids’ Crafts Instructions
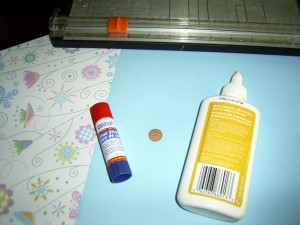
Gather all the Craft Supplies That You Will Need:
- Paper (Two colors, I like to use a printed paper and then a solid but you can use any combination you would like)
- Straight Edged Cutter
- Glue (Glue Stick but you may want to use a little dab of white glue for one step)
- Button (or any other type of embellishment such as a small shell or little seeds)
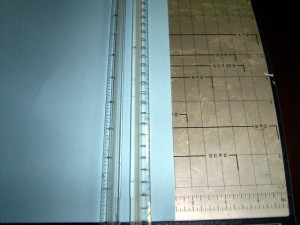
- Take the paper and the straight edged cutter (or scissors if you don’t have the latter) and cut 2- 1 inch strips from each sheet of paper. Cut more if you plan on doing multiple flowers. I like to use an 11 to 12 inch length for a bigger flower.
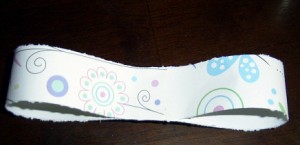
- Now that you have the sheets, take one strip and place the side you want showing face down.
- Fold the one edge to the middle of the strip to make a loop with the paper, repeat with the other edge.
- Once you have determined the center of the paper and the best loop size, glue the edges down to the center of the strip so that it overlaps slightly. You will end up with three layers of paper in the center with a loop on either side.
- Repeat the process with the second sheet of paper in the same color. (In this instance, I used two strips of printed paper.)
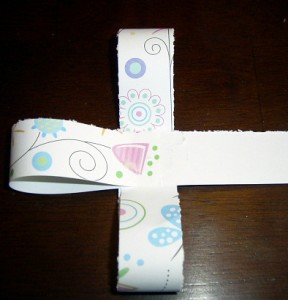
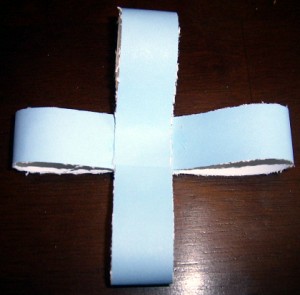
- Take one looped paper and place a dab of glue on the middle.
- Firmly place the second looped paper onto the first to create a “t” with the two papers.
- Repeat steps 2 to 7 with the other paper (in this case the blue paper for me).
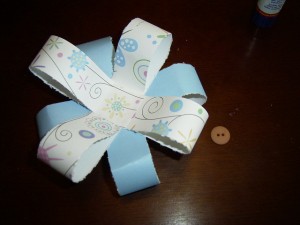
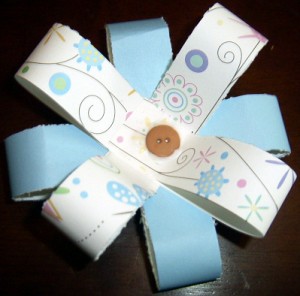
- Glue the two “t’s” together the same way that you did the individual papers. Since the paper is heavier, this is when I recommend using the white glue for extra support. You will want the papers to be diagonal to each other to give the look of a full flower.
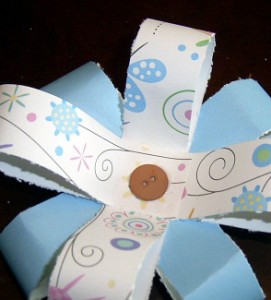
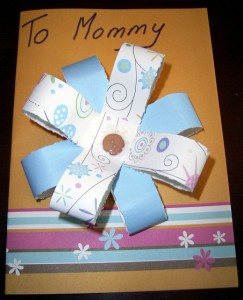
- Using the white glue, attach your embellishment to the flower and you are ready to use for decorations.
A great way to use this craft is either on a Mother’s Day Card or on a pipe cleaner to give with other flowers as a bouquet for Mother’s Day or any other day that you want to make mom feel special.
Technorati Tags: flower craft, flowers craft, flower crafts, flower arts and crafts, flower projects, flower craft for kid, craft for kids, arts and crafts, flower activities, paper flowers, paper flower crafts

A great way to use this craft is either on a Mother’s Day Card or on a pipe cleaner to give with other flowers as a bouquet for Mother’s Day or any other day that you want to make mom feel special. I saw the similar crafts works in toddlercrafts. You want to more craft works see toddlercrafts.net.