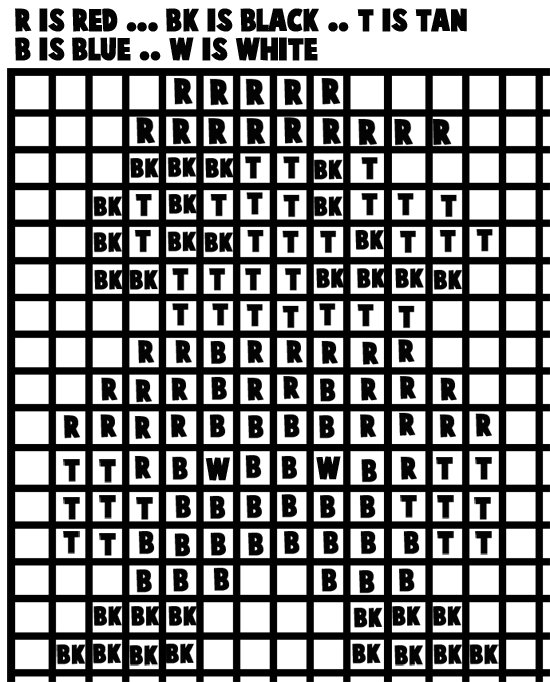
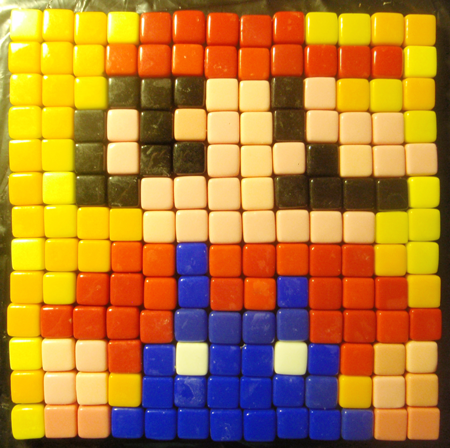
Today we will show you how to make a really cool, pixelated Super Mario. This is the Mario from the 1980’s when he just looked like a bunch of squares….this is the classic Nintendo Mario. We have included a pattern for Mario’s complete body…or you can do just part of his body like I did. (and I know that I messed up on Mario’s thumbs…put the pattern below, reflects the correct pattern).
Click here for more mosaic tutorials
Materials Needed:
Glue
Cardboard or Wood
Tiles or Cut up Squares from Paper or Foam
Here is a pattern for you to print or just look at while you are making your mosaic Mario.
You can make the surrounding color of Mario, any color that you want. You can also do only part of Mario, like I did, or Mario’s entire body.
Step 1:
Put Glue on First tile.
[ad#ahc]
Step 2
Place square firmly on cardboard or wood.
Step 3
Now continue thru the pattern until finished. Place a heavy book over tiles overnight to make sure that tiles are firmly placed. By morning you should have your finished craft. Your parents will look fondly at the Mario picture.
Technorati Tags: mario, super mario, mario picture, mario art, pixelated mario, mosaic mario, tiled mario


