Thanksgiving is just around the corner. Thanksgiving is a day to give thanks for all that you have… for all the love and support you have around you. What better way to show your loved ones you are thankful for them than to give them a gift you made yourself. Today I’m going to show you how to make a “Thank You” Bookmark perfect for giving as a gift for Thanksgiving.
Check out our other Thanksgiving Crafts and Bookmark Crafts.

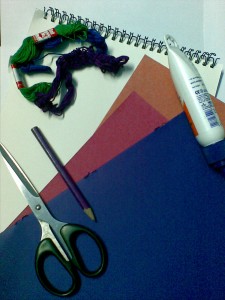
Materials Needed
Thick White Paper
Colored Paper to Make Letters (you could also use stickers)
Glue
Scissors
Thread – Different Colors ( I used 6 stranded embroidery thread)
Hole Punch
Pencil
Step 1
Cut out letters in different colors (or use stickers, or print out letters and cut them out)

[ad#ahc]
Step 2
Arrange them in a row and glue to the white paper as shown

Step 3
Draw a line around the letters according to the shape of the letters as shown

Step 4
On the top, make a semi circle and draw as shown

Step 5
Cut along the line and punch a hole in the top.

Step 6
Take threads of different colors
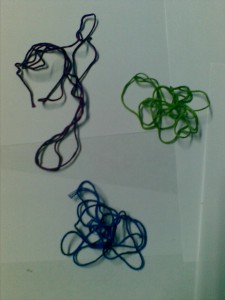
Step 7
Cut them out into pieces 6 inches long, and fold them in the middle as shown
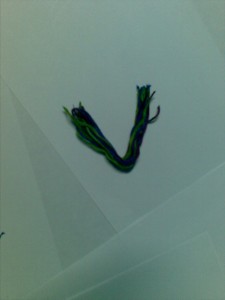
Step 8
Push the folded end through the punched hole on top of the bookmark as shown
Step 9
Pull the loose ends of the threads up and put them into the loop that is formed as shown.

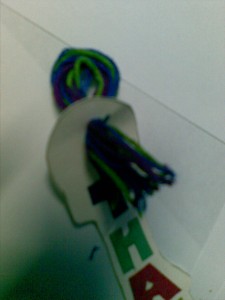
Step 10
Pull tightly, till it looks like this.

And, that’s it. It is a simple craft, but it will go over big as a gift. So, whose the lucky person who is going to get this gift from you?
Technorati Tags: fall crafts, autumn crafts, Thanksgiving activities, thanksgiving activity, thanksgiving crafts, thanksgiving, thanksgiving crafts for kids, thanksgiving activities for kids, thanksgiving gifts, thanksgiving gift crafts, bookmarks, bookmark crafts

love it now i know what to do when my nieces and nefuies (spelled wrong)ome to visit..
Awesome!! I’m glad you love the craft. 🙂