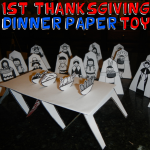
How to Make Paper Thanksgiving Table Toys

Many people wonder how to keep the kids at the children’s Thanksgiving table entertained.  Sure, you will have the Thanksgiving meal which will occupy them for a little bit.  But, what about all the other time they will spend at the table?  How do you keep them entertained and safe from boredom?  Well, today I have a craft for you and the children that will keep the little ones entertained.  In this post I will show you how to make Paper Thanksgiving Table Toys.  This will surely keep them happy…. for a little while anyway.
Check out our other Thanksgiving Crafts.


How to Make Paper Thanksgiving Table Toys


Materials Needed

Printer & Paper

Scissors

Tape

Glue

Cereal Box

White Paper


Click on template images below to make larger and to print.

People Template 1


People Template 1


People Template 2


People Template 2


People Template 3


People Template 3


People Template 4


People Template 4


People Template 5


People Template 5


Pilgrims Table Food Template


Pilgrims Table Food Template


Step 1


Print out the templates.


Print out the templates.


Step 2


Cut out each individual piece.


Cut out each individual piece.


Step 3


Fold on each line.


Fold on each line…


Fold like this.


Fold like this.


Step 4


Tape in back.


Tape in back.


Step 5


Now it stands.


Now it stands.


Step 6


For the two guys who have arms... glue together.


For the two guys who have arms… glue together.


Glue basket on hands.


Glue basket on hands.

Step 7


Print template.


Print template.


Step 8


Cut out each of the legs.


Cut out each of the legs.


Step 9


Glue on cereal box cardboard.


Glue on cereal box cardboard.


Step 10


Cut out and fold and crease very well.


Cut out and fold and crease very well.


Step 11


Cut out cardboard long and wide enough for legs.


Cut out cardboard long and wide enough for legs.


Step 12


Glue on white paper.


Glue on white paper.


It should look like this.


Like this.


Step 13


Have an adult cut a few slits on the table top... spaced out.


Have an adult cut a few slits on the table top… spaced out.


Step 14


Cut out bowls of food and put tabs into slit.


Cut out bowls of food and put tabs into slit.


On bottom of table push tabs in.


On bottom of table push tabs in.


It should look like this.


Like this.

Step 15


Finished Paper Thanksgiving Table Toy


And, there you go…. you just finished your Paper Thanksgiving Table Toy.  This will be perfect for the children at the Thanksgiving kids table to play with.  They will really enjoy it.

Technorati Tags: , , , , , , , , , , , , ,

14 Fun and Festive Thanksgiving Place Card Ideas


14 Fun and Festive Thanksgiving Place Card Ideas


If you are like me you are having a lot of people over at your house for Thanksgiving.  And, with a large amount of people around a table it can sometimes mean a lot of confusion as to where everyone is sitting.  To relieve the stress from you dealing with that during your fun Thanksgiving festivities one way to do this is to have place cards around the table.  This way your guests can easily go to the table and find their seats easily.  Well, with that in mind today’s post will be about fun and festive Thanksgiving place card ideas.  Sure, you can easily just buy place cards in the store, but where is the fun in that?  Today I have put together 14 awesome Thanksgiving place card ideas I have found around the internet.  Surely, you will find the one that is perfect for you and your Thanksgiving get together.

Check out our other Thanksgiving Crafts.

14 Fun and Festive Thanksgiving Place Card Ideas

(1)  Nutshell Place Cards


Nutshell Place Cards


We are going to get right into this Place Card post with this festive Thanksgiving Place Card Idea.  Here Martha Stewart shows us how to take an average walnut and make it into a beautiful Place Card.  Make enough for your entire Thanksgiving party.  I love this idea because it is a beautiful way to give your Thanksgiving table some style without spending too much money.


(2)  Paper Pumpkin Place Cards


Paper Pumpkin Place Cards


These pumpkins are so beautiful.  Made from card stock or patterned paper these pumpkins can be as stylish or simple as your would like.  Passionately Artistic shows us how you could even fill the pumpkin with treats if you want to give the kids at the Thanksgiving Table an extra smile.


(3)  Leaf Place Card


Leaf Place Card


Here is one of our Thanksgiving Place Card Crafts.  Here we use some cardboard and gold paint to give the leaf an authentic look.  We even use a little gold paint on the edges of the cardboard to have the place cards look very elegant.  Check out How to Make Leaf Place Cards.


(4)  Pilgrim Hat Place Cards


Pilgrim Hat Place Cards


These adorable Pilgrim Hat Place Cards are actually made out of black plastic cups.  This Thanksgiving Place Card craft is super easy and the kids will love to make them.  Use a little gold paint to write the names of the people attending on the lip of the hat.  Check out all the craft details at Me and My Insanity.


(5) Terra-Cotta Pilgrim Hat Place Cards


Terra-Cotta Pilgrim Hat Place Cards


Here is a fantastically unique Place Card idea.  Here Mrs. DesignHer shows us how to take some miniature flowerpots and make them into a unique Place Card.  Plus, your guests will have a little treasure to take home to remember your wonderful Thanksgiving party.


(6)  Fun Turkey Place Cards


Fun Turkey Place Cards


Here is a simple and perfectly festive idea for Place Cards.  After all, these place cards have everything you need including a wonderful Thanksgiving Turkey to make both children and adults smile.  I found this place card idea over at Meg Bee Designs.  Here she uses Cardstock and Alphabet Stickers to make her creation.


(7)  Thankful Pilgrim Place Cards


Thankful Pilgrim Place Cards


Here is another one of our Thanksgiving Place Cards crafts.  Here we combine two wonderful things together into this place card.  Firstly, the obvious… it’s a place card.  And secondly, it’s reminds us what Thanksgiving is all about…. being thankful.  On these place cards your guests will write down what they are thankful for and share their thoughts during the festivities.  Make sure to check out how to make these Thankful Pilgrim Place Cards craft.


(8)  Book Page Turkey Place Card


Book Page Turkey Place Card


Oh boy, do I really love these!!  They are just so original and completely unique.  Your guests are sure to love them.  Fiskars shows us how to take discarded book pages or any type of pages you wish and make them into these awesome Place Cards.  Imagine how much your guests will love these.


(9)  Cork Turkey Place Card


Cork Turkey Place Cards


How cool is this Turkey?  So cool!!  And, this turkey is a place card.  Make a whole bunch and you have yourself some Cork Turkey Place Cards.  Made from actual corks…. Parents came up with this splendid idea to make these cork turkeys into place cards.  They are sure to be a big hit at any  Thanksgiving party.


(9)  Whimsical turkey place cards


Whimsical Turkey Place Cards


I know this image is small, but I think you can get the idea that this turkey is awesome.  What is even more awesome about these Turkey Place Cards is that it is made from recycled material.  Got to love that!  Canadian Living shows you how to take yogurt containers and transform them into these cute Place Cards.


(10)  Apple Turkey Place Cards


Apple Turkey Place Cards


Womans Day has the right idea with this one.  Here they take small apples, almonds, fruit lifesavers and some other items and turn it into this awesome looking turkey.  I love the idea…. and I know your guests will too.  Check out their site for the step-by-step how to.


(11)  Rustic Napkin Ring Place Cards


Rustic Napkin Ring Place Cards


Here is another festive and quite elegant Place Card idea from Womans Day.  And, if you don’t mind breaking out the electric drill for a craft… then this is the Place Card craft for you.  Here they take a birch branch and cut them into disks…. write the guest’s name on your disks and your well on your way to replicating these beautiful napkin ring place cards at your house.


(12)  Burlap Button Turkey Place Cards


Burlap Button Turkey Place Cards


I absolutely love these Thanksgiving Place Cards.  I know exactly what it is I like about them…. it is the burlap button.  I love the texture and warmth it gives these place cards.  I found this place card craft over at Factory Direct Craft and I must say you need to check it out for yourself.


(13)  Recycled Paper Place Cards


Recycled Paper Place Cards


This Thanksgiving place card craft is simply adorable.  And, I love that it is made from recycled paper…. that just makes it even better.  I found this craft over at Alpha Mom.  Here she uses junk mail for the feathers.  I love how the junk mail gives the feathers a 3D look.   Make sure your children help you with this place card craft…. they will love helping.


(14)  Finger Stamp Place Cards


Finger Stamp Place Cards


Now, these Thanksgiving Crafts are really festive and cute.  Plus, they are perfect for your children and their little fingers to make.  You can even make these place cards a fun activity for the kids to do before the Thanksgiving meal begins.  Check out Spoonful for all the fun crafty details.

Technorati Tags: , , , , , , , , , , , , , , ,

My Favorite Mayflower Craft Ideas for Thanksgiving

Thanksgiving will be here in no time at all.  And, one of the lessons we try to teach our children about the Thanksgiving Holiday is the Pilgrims and the Mayflower.  What I found during lessons is that teaching them visually is the easiest way to get them to understand…. hence doing a craft.  So, today I thought I would show you my Favorite Mayflower Craft Ideas for Thanksgiving.  I found these Mayflower crafts while searching the internet.  They are all really incredible and a ton of fun.  Surely, you will be able to find some Mayflower craft ideas from this list….. use them to help teach your children about the Pilgrims and their travel on the Mayflower.

Check out our other Thanksgiving Crafts.


My Favorite Mayflower Craft Ideas for Thanksgiving


My Favorite Mayflower Craft Ideas for Thanksgiving

(1)  Model Mayflower


Model Mayflower


Here is a wonderful way to make a model Mayflower.  Made from disposable coffee cups and coffee stirrers this is a great way to recycle items as well as teach your children about the Mayflower.  I found this Mayflower craft over at Parenting.  Make sure to check it out.


(2)  Hand Print Mayflower


Hand Print Mayflower


I love this Mayflower craft.  It is just simply adorable.  And, any young crafter will have a lot of fun making it.  I found this Thanksgiving craft over at Almost Unschoolers.  Make sure to check out her site to get all the Mayflower craft details.


(3)  Mayflower Walnut Boat


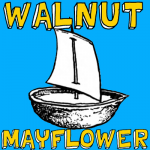
Mayflower Walnut Boat


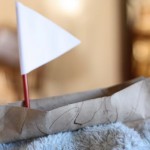
Even we have our own Mayflower crafts.  Here is our first one.  We will show you how to make a Mayflower out of a walnut.  And, what is really cool about this Mayflower craft is that the boat will actually float in water.  Check out How to Make a Mayflower Walnut Boat to make one for yourself.


(4)  Mayflower Paper Plate Craft


Mayflower Paper Plate Craft


Here is a fun Mayflower craft that your little ones will really enjoy.  The Crafty Classroom will show you how to take two paper plates and a popsicle stick and make it into this awesome Mayflower.  Oh boy, this sounds like fun.


(5)  The Mayflower Simplified


Mayflower Simpliefied


I love this bloggers idea.  Her idea was to come up with a Mayflower craft that she could make with young children.  I Can Teach My Child came up with this idea and it is a great one.  Made from a paper towel roll, a straw and some other materials this craft will take on a life of its own.  Share it with your child…. they will love it.


(6)  Mayflower Sandwich


Mayflower Sandwich


I just couldn’t pass this one up.  I know it’s not technically a craft, but it is a Mayflower recipe that you and your little ones can have fun putting together.  Little Nummies put this one together and it is just precious.  Made from bread, cream cheese and pretzels this yummy recipe will be a whole lot of fun to put together… almost as much fun as eating it.


(7)  Mayflower Photo Craft


Mayflower Photo Craft


This is a great Thanksgiving craft to enhance your teachings of the Pilgrims, Mayflower and the first Thanksgiving.  Here Classified Mom adds actual photos of her own children to better engage her children in the lesson.  You can do the same.


(8)  Mayflower Crayon Holder


Mayflower Crayon Holder


I love, love, love this idea.  Made from a creamer container this Mayflower actually holds crayons.  I think this Mayflower craft will be perfect for the Thanksgiving Kids Table.  Imagine every child having one of these Mayflower Crayon Holders on Thanksgiving…. the fun they will have.  Check out It’s Overflowing for all the craft details.


(9)  Mayflower Milk Carton Craft


Mayflower Milk Carton Craft


Made from a milk carton and some tissue paper this Mayflower Craft is sure to be a fun one.  Hidden underneath the tissue paper are some apples…. perfectly festive for the fall season.  Check out Creative Holiday Gift Ideas to find out how you too can make this with your children.


(10)  Mayflower Hats


Mayflower Hats


What kid doesn’t love hats?  They just all do.  And, these Mayflower hats will be no exception.  Spoonful shows you step-by-step how to make these adorable and festive hats.  Make a few and have them ready for the kids table at Thanksgiving.  All the children will love to wear them.


(11)  Mayflower Centerpiece


Mayflower Centerpiece


Why not center your entire Thanksgiving Meal around the Mayflower…. or perhaps the kids table.  Martha Stewart shows you how to with these very detailed instructions on how you too could have a Mayflower Centerpiece.


(12)  Mayflower Cut, Tape & Play


Mayflower Cut Tape Play


Homespun With Love shows you how you can print off this really cool Mayflower and let your kids cut, tape and then play with this Mayflower.  Use this as a visual tool when teaching your children about the Mayflower, the Pilgrims and the first Thanksgiving.


(13)  Mayflower Popsicle Craft


Mayflower Popsicle Craft


Here is a fun Mayflower craft that all the children will love.  Made from Construction Paper and Popsicle Sticks it is very likely you have all the craft materials needed right in your home.  Ramblings of a Crazy Woman will show you in detail how to make this craft…. she even shows you how to make waves to remind us how the Pilgrims endured a lot to find their way here.


(14)  Moving Mayflower


Moving Mayflower


Here is another of our Mayflower crafts from our very own site.  This Mayflower craft is a little bit different than the others because it can actually move.  Made with items like a paper towel roll, craft sticks and string this moveable mayflower will make the kids smile.  Gotta love something that actually moves.  Check out our site to find out how to make this Moveable Mayflower.


(15)  Mini Mayflower


Mini Mayflower


Get the kids excited about the Pilgrims and the Mayflower with this mini mayflower craft.  Made from a milk container this mayflower is the perfect size for little kids hands.  The kids will love to play with this mayflower and it also makes the perfect Thanksgiving decoration.  Check out Parents Connect for all the details.


(16)  Cardboard Tube Mayflower


Cardboard Tube Mayflower


When I found this Mayflower craft I thought it was quite original.  I found this Thanksgiving craft over at Naturally Educational.  Here she uses a cardboard tube along with some twigs to make her original Mayflower craft.  Make sure to check out her site for all the step-by-step details.  She also adds some Mayflower book choices to help you teach your children about the Mayflower.

Technorati Tags: , , , , , , , , , , ,

How to Make a Decorative Corn Filled with Treats for Thanksgiving

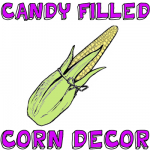
Today I am going to continue with the fun Thanksgiving crafts.  In this post I’m going to show you how to make a decorative corn filled with treats for Thanksgiving.  If you are having Thanksgiving dinner at your house then this is a great craft for you.  You can make these treat filled corns for the children attending your Thanksgiving feast.  Sure, they can’t eat the treats before dinner, but these festive corns will be perfect for the children to take home with them.  They will truly get a kick of out them.  So, let’s get started.

Check out our other Thanksgiving Crafts.


How to Make a Decorative Corn Filled with Treats for Thanksgiving


Materials Needed

Two 12 Inch Pieces of Manilla Paper

Pen or Pencil

Scissor

Green & Yellow Crayons, Markers or Colored Pencils

Glue or Paste

Treats or Candy

String


Step 1


Take a 12 inch piece of manilla paper and draw a pattern like this.


Take a 12 inch piece of manilla paper and draw a pattern like this.


Step 2


 Cut out the pattern like this.


Cut out the pattern like this.


Step 3


Color this green.


Color this green.


Step 4


From a piece of about 5 inches square make a roll similar to a cone.


From a piece of about 5 inches square make a roll similar to a cone.  Before rolling color paper yellow.  Make sure to not get it too pointed.  Paste.


Step 5


You can fill corn with treats or candy.  Fold green part around cone and tie with a string.


You can fill corn with treats or candy.  Fold green part around cone and tie with a string.


Step 6


Lightly draw little ovals for corn kernels.


Lightly draw little ovals for corn kernels.

And there you have it.  You have just made a decorative corn filled with treats.  These are a great idea if you are having a Thanksgiving dinner with children.  They will love these.

Technorati Tags: , , , , , , , , , , , ,

Giving Thanks Thanksgiving Crafts Roundup


Giving Thanks Thanksgiving Crafts Roundup


Thanksgiving is coming up quickly.  This month wouldn’t it be a great idea to fill it with crafts that remind us what this Holiday is all about….. being thankful.  We all have so much to be thankful for.  So, in this link roundup I have scoured the internet to find crafts that all have to do with being thankful.  Each craft is a lot of fun and all can be used as a Thanksgiving decoration…. but most of all they remind us to be thankful.  With these crafts you will be doing them as a family…. and family is one of the most important reasons to be thankful.  So, get ready to spend some time looking at some amazing Thanksgiving “Giving Thanks” Crafts….. you are sure to find one that you will love.

Check out our other Thanksgiving Crafts.

Giving Thanks Thanksgiving Crafts Roundup

(1)  Thanksgiving Countdown Calendar


Thanksgiving Countdown Calendar


This Thanksgiving craft is kind of like a Holiday Advent Calendar.  You and your family can express your thanks and gratitude simply by writing your thanks on your color piece of paper and adding it to the envelopes.  Look at them each day to remind each other what you are Thankful for.  I found this great Thanksgiving craft at Parents.com.


(2)  Give Thanks Napkin Rings


Give Thanks Napkin Rings


In this Thanksgiving thankful craft Jeanne Winters shows you how to create these amazing napkin rings that inspire your Thanksgiving guests to go around the Thanksgiving table before the feast and let everyone know what they are thankful for.


(3)  Give Thanks Yarn Turkey


Give Thanks Yarn Turkey


This Thanksgiving thankful craft was one of our crafts posted last Thanksgiving Season.  It’s a craft that your children will love putting together.  Plus, it is part finished when it is presented at the Thanksgiving table and finished by the guests adding to each feather what they are thankful for.  Check it out.


(4)  Gratitude Tree Advent Calendar


Gratitude Tree Advent Calendar


Here is another advent calendar idea using this time a tree.  Trees are great for this Thanksgiving craft because they have many branches to add your thankful ideas to…. plus trees are perfect for this fall craft.  Oopsey Daisy came up with this Thanksgiving craft and I love it.  Check it out to see how she uses a magnetic sheet and bottle caps for this craft.


(5)  Give Thanks Board


Give Thanks Board


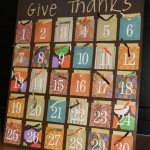
This Thanksgiving thankful craft is similar to the first one, but instead of it being a garland it is actually all out on a board.  What is really cool about this Thanksgiving thankful craft is the use of  a variety of coordinating scrapbook paper giving it an amazing look.  Check it out for yourself at JellybeanJunkyard.


(6)  Thankful Bucket


Thanksgiving Thankful Bucket


Here one family shows you how they use a Thankful Bucket to remind each other what they are thankful for this Thanksgiving season.  Here The Idea Room shows us how to put together this festive bucket.  Have the family fill it with things they are thankful for…. after dinner share these things with the rest of the family.  Great idea.


(7)  Changeable Frames for Thankfulness


Changeable Frames for Thankfulness


Here is a clever idea by Flamingo Toes.  Here the writer of this post shows you how to make a place that your family can write down what they are thankful for.  This particular Thanksgiving thankful craft is made with glass over the embroidery so they can write different things all month long.  They can wipe it clean and start over as often as they would like.


(8)  Thankful Leaf Garland Decoration


Thankful Leaf Garland Decoration


Here is a cute Thanksgiving thankful craft.  And, one that looks awesome as a Thanksgiving decoration.  Full Circle shows you how to make this festive craft.  Simply string together construction paper leaves and have family members write on the leaves what they are thankful for.  String together as garland for all to see.


(9)  Thankful Tree


Thanksgiving Thankful Tree


Here is a great Thanksgiving thankful craft that is perfect for even the youngest of crafters with just a lit bit of help from you.  Playful Learning shows you how to make one of these Thankful Trees for your houses.  Simply have the kids make leaves, color them and cut them out.  Have the children write down what they are thankful for.  She will show you how to finish it off with a tree branch.  Check it out for yourself.


(10)  Thanksgiving Hat


Thanksgiving Hat


Here is a fun Thanksgiving thankful craft that the little kiddies will love.  Dim Sum, Bagels and Crawfish shows you how to make this craft.  The kids will love making it, but even more so love wearing it.  If you are having a Thanksgiving dinner at your house considering doing this craft with the little ones at your feast…. they will love it.


(11)  Paper Cornucopia of Thanks


Paper Cornucopia of Thanks


Flip Flops and Applesauce shows you how to take some paper and posicle sticks and make it into a beautiful and meaningful table centerpiece for Thanksgiving.  Make sure to involve the whole table…. have your guests each write down what they are thankful for and read them out loud.


(12)  Thanksgiving Clothespin Wreath


Thanksgiving Clothespin Wreath


Here is a cool Thanksgiving thankful craft that also works as an awesome Thanksgiving wreath decoration for the Holidays.  I found this Thanksgiving craft over at Chica and Jo.  This amazing Thanksgiving wreath is made from Clothespins.  Add a sharpie to your wreath and let your visitors add what they are thankful for.  Save it for years to come.

Technorati Tags: , , , , , , , , , , , , ,

How to Make Pinecone Turkeys

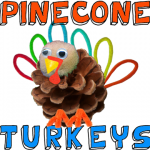
Oh boy, do I have a fun craft for you today perfect for the Thanksgiving season.  Today I’m going to show you how to make Pinecone Turkeys perfect for Thanksgiving.  These pinecone turkeys will look great around the house as Thanksgiving decorations.  Plus, your kids will love to make them.  They are a lot of fun and your kids will have great pride in knowing they made items you could actually put around the house as decorations.  So, grab the materials needed and let’s get started.

Check out our other Thanksgiving Crafts.


How to Make Pinecone Turkeys


Materials Needed

Pinecone

Tan Puffball

Glue

Googly Eyes

Yellow Felt or Foam

Red Felt

Orange Pipe Cleaner

Different Color Pipe Cleaner, Construction Paper or Craft Feathers


Step 1


Get a pinecone.


Get a pinecone.


Step 2


Glue a tan puffball to the top of pinecone.


Glue a tan puffball to the top of pinecone.


Step 3


Glue googly eyes on.


Glue googly eyes on.


Step 4


Cut yellow triangle out of felt or foam and glue on face.


Cut yellow triangle out of felt or foam and glue on face.


Step 5


Draw a #7 like shape on red felt like above picture.  Glue red felt on top of beak.


Draw a #7 like shape on red felt like above picture.  Glue red felt on top of beak.


Step 6


Wrap orange pipe cleaner around pinecone.


Wrap orange pipe cleaner around pinecone.  Then take smaller pieces of pipe cleaner to make claws.


Step 7


Loop pipe cleaners and stick into back of pinecone for feathers.


Loop pipe cleaners and stick into back of pinecone for feathers.  Or, use paper or craft feathers.

And, now you are all finished.  You just made your Pincone Turkey.  Now, use it to decorate your house for Thanksgiving.  Actually, make a few to put around the house….. everyone will love it!!

Technorati Tags: , , , , , , , , , , , ,

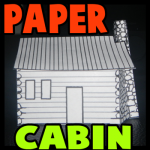
How to Make Paper Log Cabins for Thanksgiving

Whether you want to teach your children about the Pilgrims or whether you are just looking for some Thanksgiving decorations to put around the house…. I have a great Thanksgiving craft for you.  Today I’m going to show you how to make Paper Log Cabins for Thanksgiving.  This would be a great craft to help teach your children about Thanksgiving and how important the Pilgrims were to that…. plus, the craft is a lot of fun.  Use the finished Log Cabin to put around the house as a Thanksgiving decoration.  Let’s get started.

Check out our other Thanksgiving Crafts.


How to Make Paper Log Cabins for Thanksgiving


Materials Needed

Printer & Paper

Scissors

Ruler

Butter Knife

Glue


Click on template image below to open up new page and to print.


Log Cabin Template


Step 1


Print out the cabin template.


Print out the cabin template.


Step 2


Cut out both parts.


Cut out both parts.


Step 3


Score on lines by using a ruler and dull side of butter knife.  Then fold.


Score on lines by using a ruler and dull side of butter knife.  Then fold.


Step 4


Glue together with side tab.


Glue together with side tab.


Step 5


The chimney folds into a 3D rectangle.


The chimney folds into a 3D rectangle.


Step 6


Paste chimney on top tabs.


Paste chimney on top tabs.


Step 7


Let dry.


Let dry.

There you go…. you just finished making one of your Paper Log Cabins for Thanksgiving.  Make a few and use them for a Pilgrim Lesson for your kids and as Thanksgiving decorations for around your house.

Technorati Tags: , , , , , , , , , , , , ,

How to Make a Mayflower Walnut Boat

I have a fun craft for you…. it is a Thanksgiving craft.  Today I’m going to show you how to make a Mayflower Walnut Boat.  This boat will actually float.  So, it is a craft that will not only be a ton of fun making, but will also be loads of fun playing with.  You will need a bit of help from an adult.  Have an adult break open the walnut with a nutcracker.  It needs to be broken in half…. not crushed.  So, an adult will be able to help you with this.  Let’s get started with this fun craft…. grab the materials needed and we will get to it.

Check out our other Thanksgiving Crafts.


How to Make a Mayflower Walnut Boat


Materials Needed

Walnut

Nutcracker

Paper

Pen or Pencil

Scissors

Clay, Play Doh, Gum or Wax

Toothpick


Step 1


Get a nice walnut.


Get a nice walnut.


Step 2


Adult should split shell without cracking.


Adult should split shell without cracking.


Step 3


Draw a shape that is like a square, but wider at the bottom.


Draw a shape that is like a square, but wider at the bottom.  Now cut it out.


Step 4


Fill with clay, play doh, gum or wax


Fill with clay, play doh, gum or wax (with help).


Step 5


Now take a toothpick and stick it into the gum (or clay or wax) as well as thru the paper twice (as seen).


Now take a toothpick and stick it into the gum (or clay or wax) as well as thru the paper twice (as seen).


Step 6


The boat actually works.... set it to sail in the bathtub.


The boat actually works… set it in the bathtub and blow on its sail.

Technorati Tags: , , , , , , , , , , , ,

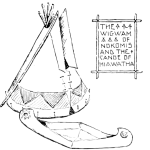
How to Make Wigwams and Canoes for Thanksgiving

Today I’m going to show you how to Make Wigwams and Canoes for Thanksgiving.  These items are perfect to use as decorations for Thanksgiving.   Actually, add these items to our Indian Village Craft and have an entire Indian Village to Display for Thanksgiving.  Wouldn’t that be wonderful?  You can use both of these crafts to talk about the Native Americans and what they have given our Country.  Remind the children about the story of Thanksgiving.  Do a fun craft and a wonderful lesson at the same time.

Check out our other Thanksgiving Crafts.


How to Make Wigwams and Canoes for Thanksgiving


Materials Needed

Printer & Paper

Scissors

Paste

Twigs

Crayons, Markers or Colored Pencils (optional)


Template 1

Black & White Template

Indian Canoe Template black & white


Colored Template


Indian Canoe Template Color


1.  Click on one of the images above.  Click on the black and white image if you want to color it later.  Or, print off the colored image and there is no need to color it later.   Once the new page opens up print off the template.

2.  Cut out the canoe.

3.  Slit at ‘A’.

4.  Fold in half along center line.  And, paste both halves together at ‘B’.

5.  Where you slit at ‘A’, fold towards each other and paste together.


Template 2

Black & White Template


Template 2 Black & White


Colored Template


Template 2 Colored


1.  Click on one of the images above.  Click on the black and white image if you want to color it later.  Or, print off the colored image and there is no need to color it later.   Once the new page opens up print off the template.

2.  Cut out the Wigwam.

3.  Cut on the slits that are noted.

4.  Cut out portion ‘A’.

5.  Bend back the flaps ‘D’, bring ‘C’ flaps together and paste together.

6.  Optionally, get a few twigs (or some raffia) and glue at the top of the Wigwam.


Finished Wigwams and Canoes for Thanksgiving


And, there you have it…. that’s how you make Wigwams and Canoes for Thanksgiving.  Use these as Thanksgiving Decorations…. everyone will surely love them.

Technorati Tags: , , , , , , , , , , , , , , , , , , , ,

11 Cool Door Decorating Crafts for Halloween


11 Cool Door Decorating Crafts for Halloween


Halloween door decorations are so important….. After all, this is the first thing people will see when they come trick or treating at your house.  Sure, you can purchase a nice door decoration for Halloween, but if you are a crafty person or just want to save some money why not make a Halloween door decoration yourself?  I have searched the internet for what I thought was some of the coolest door decorating crafts for Halloween.  I came up with 11 of them….. you are sure to find at least one you love.  So, without further ado….

Check out our other Halloween Crafts.

11 Cool Door Decorating Crafts for Halloween

(1)  Candy Corn Door Decoration


Candy Corn Door Decoration


There is one candy in particular that is very popular during the Halloween season.  Can you guess which candy it is that I’m talking about?  Candy Corn, of course.  Better Homes and Gardens shows you how to make this adorable Candy Corn Door Decoration.  It is very festive!!


(2)   Wriggling Snake Wreath


Wriggling Snake Wreath


Isn’t this wreath dark and scary?  It is perfect for Halloween.  I found this Door Decorating craft over at Martha Stewart and I thought it was really beautiful…. in a dark, morbid way.  I love the snakes that are wriggling all over this wreath.  Check out the site for all the craft details.


(3)  Felt Bats


Felt Bats


I love these bats…. they are very realistic looking.  I love how they have them gathered all around the front door.  This is perfectly scary….. just like Halloween should be.  Check out Country Living for all the batty details.


(4)  Halloween Welcome Sign


Halloween Welcome Sign


Halloween isn’t about scaring people away….. It is about bringing them closer.  Sure we like to scare people and creeping them out during this Holiday…. but it is also about welcoming them to your house and offering them either a Trick or a Treat.  Why not welcome them with this Welcome Door Sign I found over at the DIY Network.


(5)  Gaudy Halloween Wreath


Gaudy Halloween Wreath


This is a really cool Halloween Door Decorating Craft.  It looks like something you could buy at a store, but it’s not.  It’s completely hand made and the items that were used for this craft you can pick them up at a Dollar Store…  making this craft very cheap to make.  Get all the details at La La Bliss.


(6)  Felt Flower Halloween Wreath


Felt Flower Halloween Wreath


I love this wreath….. it is absolutely beautiful.  No one will believe you actually made it yourself…. they will think you bought it.  I found this gorgeous Halloween Wreath at Living Locurto…. you need to check it out for yourself.


(7)  BOOtiful Burlap Wreath


BOOtiful Burlap Wreath


Here is another awesome Halloween Door Decorating Craft…. it is a BOOtiful Burlap Wreath.  The black burlap is perfect for Halloween.  I found this Halloween craft over at Craftaholics Anonymous and I love it.  You will be using this Halloween Wreath for years to come.


(8)  Spooky “EEK” Wreath


Spooky EEK Wreath


Isn’t this Halloween Wreath cool?  It is made from wired ribbon with skulls on it.  She cut them into strips and ties them on a wreath.  I love the idea…. not only fun, but it turned out to be a really awesome wreath.  Check out The Evolution of Home for all the crafty details.


(9)  Frankenstein the Door


Frankenstein the Door


Ok, this door is just AMAZING!!  I found this door decorating idea over at Mel Designs and I love, love, love it!!  She took her green colored door and made it into Frankenstein.  I know, not everyone’s door is green…. but with just a little bit of imagination any door can be a Halloween Character.


(10)  Witches Broom Door Decoration


Witches Broom Door Decoration


I love this Halloween door decoration.  I like that it isn’t the usual Halloween Wreath…. instead Martha Stewart shows us how you can take 2 brooms and wire them together to make an “unwelcoming” door decoration.  Great idea!!


(11)  Eyeball Wreath


Eyeball Wreath


This craft made from glow-in-the-dark eyeballs is a cool Door Decorating Craft…. it is PERFECT for Halloween.  Kids will love staring at this eerie Eyeball Wreath.  But, more than that…. kids will love making this wreath.  You can get all the craft details at at Country Living.

Technorati Tags: , , , , , , , , , , , ,

10 Awesome Zombie Crafts for Halloween


Awesome Zombie Crafts for Halloween


Just like Vampires started to become popular a few years back Zombies are now super popular.  We can thank shows like “The Walking Dead” for that.  Well, being that Halloween is just around the corner I thought that we can celebrate the popularity of zombies by listing some of the best Zombie Crafts I found on the internet.  Some of these zombie crafts are meant for children and others are meant for adults.  But, most of these zombie crafts are best done together…. both adults and kids.  Those are the best kinds of crafts…. the kind that you do together.  Take the time to look at these 10 awesome zombie crafts for Halloween I found while roaming online.  You are sure to find a few you like.

Check out our other Halloween Crafts.

10 Awesome Zombie Crafts for Halloween

(1)  Zombie Knitpocalypse


Zombie Knitpocalypse


These dolls are absolutely adorable….. if you are into the zombie kind of dolls.  These are completely hand crafted.  If you are interested in getting the pattern and directions for this zombie craft make sure you check out Joey’s House.


(2)  Zombie Pin Cushion


Zombie Pin Cushion


I absolutely love this zombie pin cushion.  And, if you are into zombies then you are going to totally love this Zombie Pin Cushion as well.  I found this zombie craft over at Art Threads and it’s a great one.  She shows you tons of detail when explaining this zombie craft.


(3)  Zombie Jack-O-Lantern


Zombie Jack-O-Lantern


I found this zombie craft over at Colt Monday.  I found this Zombie Jack-O-Lantern to be extremely creepy and wonderfully perfect for an outside Halloween decoration.  The site does not have detailed directions, but I thought maybe you could look at the large picture they have and model the cutting of your Jack-O-Lantern from the original picture.


(4)  Undead Pumpkins


Undead Pumpkins


Ok, I know what you are thinking…… these pumpkins are just way too cute to be zombies.  But, you would be wrong.  These are the undead pumpkins and you can find this craft over at Martha Stewarts’s website.  Check out the site for all the craft details.


(5)  Zombie Eyeballs


Zombie Eyeballs


Are you having a Halloween Party?  Well, then I have the perfect Zombie Craft for you.  Actually, it is a edible craft…. or rather a recipe.  I found this recipe over at Recipe Tips and I thought it was wonderful!!  The kids might be too scared to actually eat them, but isn’t them being scared the whole idea?!


(6)  Zombie Dog Craft


Zombie Dog


This dog  is no longer alive….. or maybe I should say he is, but he is the undead.  I found this zombie craft over at Sadie Hart.  I loved it enough to include it.  You can find all the zombie details there….. she is very detailed.  It is an excellent step-by-step tutorial.


(7)  Zombie Brain Bowl


Zombie Brain Bowl


This is a great bowl for storing items in….. like jewelry or coins.  Really, it can be used for anything small.  But, I thought this craft was very fitting as we are listing all zombie crafts.  I found this zombie craft over at Cut Out and Keep.  I think it is a creepy little craft…. perfect for Halloween.


(8)  Zombie Arm


Zombie Arm


I have a great way to hand out candy…. and it continues with our Zombie topic.  Here is a craft that is a Masking Tape Zombie Arm perfect for holding candy.  Yummy!!  Plus, the Trick-or-Treaters will love reaching for their candy into this Zombie Arm.  Check out Hand Make My Day for all the zombie craft details.


(9)  Zombie Barbie


Zombie Barbie


A Zombie Barbie makes perfect sense to me.  After all, if Barbie feels she can lead a glorious and glamorous life…. why couldn’t she also  be bitten and become a zombie?  I t could happen.  I found this craft over at Geekologie and there you can find out how you too can take your barbie and make her into a zombie.


(10)  Zombie Marshmallows


Zombie Marshmallows


Aren’t these zombie marshmallow’s just absolutely adorable?  What child (or adult for that matter) wouldn’t enjoy eating one of these.  They are colorfully morbid…. perfect for Halloween.  These Halloween Zombie Marshmallow’s will be perfect for any Halloween party.  Check out The Decorated Cookie for all the fun details.

Technorati Tags: , , , , , ,

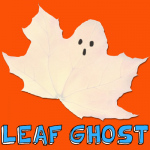
How to Make Leaf Ghosts for Halloween

I have a fun Halloween craft for you today.  And, the cool part is you probably already have the craft materials around your house.  In this post I’m going to show you how to make Leaf Ghosts for Halloween.  Make a bunch of these and you can easily decorate your house this year for Halloween.  It is best to use a Maple Leaf for this craft as this is the one we used for the craft.  With just some minor cutting they can look like a ghost.  The kids will love collecting the leaves and even more so making the craft.  So, let’s get started.

Check out our other Halloween Crafts.


How to Make Leaf Ghosts for Halloween


Materials Needed

Maple Leaf

White Paint

Black Paint

Scissors


Step 1


Find a nice maple leaf.


Find a nice maple leaf.


Step 2


Paint leaf white.


Paint leaf white.


Step 3


Paint 3 black ovals.


Paint 3 black ovals.


Step 4


Cut the top of the head to be more rounded.


Cut the top of the head to be more rounded.


Step 5


Cut off the stem.


Cut off the stem.

And, there you have it…. you have just made a Leaf Ghosts.  Make a few and decorate your house for Halloween.

Technorati Tags: , , , , , , , , ,

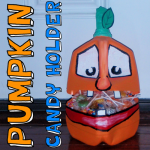
How to Make a Pumpkin Milk Jug Candy Holder

Last week I showed you how to make a Milk Jug Vampire Candy Holder.  Well, you seemed to have loved that idea, so I thought I would show you another cool Milk Jug Halloween Craft.  Today I’m going to show you how to make a Pumpkin Milk Jug Candy Holder perfect for handing out candy this Halloween.  Kids will love reaching inside this Pumpkin for the treats…. almost as much as your kids will love making it.  Keep in mind you will need some Adult Help for this craft as a knife and/or a scissor will be needed to cut open the milk jug.  So, let’s get started.

Check out our other Halloween Crafts.


How to Make a Pumpkin Milk Jug Candy Holder


Materials Needed

Milk Jug

Scissors

Knife (for adult only)

Orange, White, Green, Black & Red Paint

Brass Fasteners

Black Marker

Green Foam, Felt or Paper

Paper Plate

Glue

Candy


Step 1


Peel labels off milk jug.


Peel labels off milk jug.


Step 2


Cut milk jug in half.


Cut milk jug in half.


Step 3


Paint both sides orange.


Paint both sides orange.


Step 4


Use brass fasteners to attach both sides... to look like mouth is open.


Use brass fasteners to attach both sides… to look like mouth is open.


It should look like this.


Like this.


It looks like this from the back.


It looks like this from the back.


Step 5


 Draw eyes and nose.


Draw eyes and nose.


Step 6


Paint eyes white.


Paint eyes white.  I painted nose a lighter color.


Step 7


Paint red for lips.


Paint red for lips.


Step 8


Draw a leaf on foam, felt or paper.


Draw a leaf on foam, felt or paper.


Cut it out.


Cut it out.


Step 9


Roll some foam on a triangle like angle.


Roll some foam on a triangle like angle… like this.


It should look like this.


Like this.


Push top in and it stays in place on its own.


Push top in and it stays in place on its own.


Step 10


Push into open spout.


Push into open spout.


Step 11


Paint spout green.


Paint spout green.


Step 12


Outline features with black paint.


Outline features with black paint.


Step 13


Draw a letter C for each eye's pupil.


Draw a letter C for each eye’s pupil.


Step 14


 Draw rectangles on paper plate.


Draw rectangles on paper plate.


Glue in mouth.


Glue in mouth.


Step 15


Shove leaf in the spout.


Shove leaf in the spout.


Step 16


Fill with candy.


Fill with candy.

Wonderful!!  Wasn’t that fun?!  But, the fun doesn’t end there.  Use it to hand out candy to the Trick-or-Treaters….. they will love it!!

You might also like the How to make a Milk Jug Vampire Candy Holder ….. both crafts are perfect for Halloween.

Technorati Tags: , , , , , , , , , , , , ,

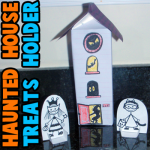
How to Make a Haunted House Treat Holder for Halloween

Halloween is coming up quickly.  Before you know it it will be the end of the month and Halloween will be here.  Today we are going to make a Halloween craft.  In this post I’m going to show you how to make a Haunted House Treat Holder for Halloween.  Load it with candy and use it as a Halloween party favor.  Or, if you would prefer…. use it as a Halloween decoration for inside the house.  The kids will love putting on display something they made themselves.  So, let’s get started.

Check out our other Halloween Crafts.


How to Make a Haunted House Treat Holder for Halloween


Materials Needed

Milk Carton

Candy

Tape

A Couple Pieces of White Paper

Colored Construction Paper

Paste / Glue

Scissors

Pencil

Crayons, Markers or Colored Pencils


Step 1


If your milk carton has a circle spout, we will take that out.


If your milk carton has a circle spout, we will take that out.


Step 2


Open up the carton


Open up the carton like this…


Step 3


Push out circle spout.


Push out circle spout.  Then add candy.  Tape shut.


It should look like this.


Like this…


Step 4


Wrap paper around base of carton.


Wrap paper around base of carton.  Paste in place.


It should look like this.


Like this…

Step 5


If there is a lot of excess paper at bottom... cut most of it off.


If there is a lot of excess paper at bottom… cut most of it off.


Push two opposite sides inwards and glue in place.


Push two opposite sides inwards and glue in place.


Then push other 2 sides in and paste.


Then push other 2 sides in and paste.


Step 6


Push corner of paper into triangle on milk carton.


Push corner of paper into triangle on milk carton.  Draw a line where you need to cut.


Cut off excess and glue triangle in place.


Cut off excess and glue triangle in place.

Step 7


 Cut out a long, thinnish piece of paper.


Cut out a long, thinnish piece of paper.  It should be long enough to be the roof.


Fold in half.... draw line on fold.  Then draw squiggly lines for roof's design.


Fold in half…. draw line on fold.  Then draw squiggly lines for roof’s design.


Center roof on top of carton


Center roof on top of carton.  Glue in place.


Step 8


Draw a design on the haunted house.


Draw a design on the haunted house.


Step 9


Finished Haunted House Treat Holder


And there you have you…. you just finished your Haunted House Treat Holder for Halloween.  If you want to use your Haunted House as a toy…. no problem.  You can even go to How to Make a Trick-or-Treat Paper Toy craft and print off the Trick-or-Treat figures you see in the above picture.

Technorati Tags: , , , , , , , , , , , , , , , , ,

18 Cool Mummy Craft Ideas for Halloween


14 Cool Mummy Craft Ideas for Halloween


You are in for a treat today.  I have searched the internet to find what I thought was the best in Mummy crafts for Halloween.  I came up with 18 of my favorite Halloween Mummy crafts.  They are all totally creative and equally creepy.  Some of them are edible, some are meant to be used as decorations and others are actually moveable mummies.  But, I’m sure you will find them all fun and festive.  I hope you have a blast looking at all of these cool mummy craft ideas for Halloween…. I know I did.  So, without further ado…. let’s get started.

Check out our other Halloween Crafts.

18 Cool Mummy Craft Ideas for Halloween

(1)  Craft Stick Mummy


Craft Stick Mummy


I found this silly craft over at First Palette.  This Halloween Mummy Craft is made out of craft sticks and guaze.  And, the finished item is perfectly creepy for Halloween.  Make a few and put them around the house this Halloween.


(2)  Mummy Candy Holder


Mummy Candy Holder


Are you having a Halloween Party this year?  If you are I have the perfect decorations and party favors for you.  How about making this Halloween Mummy Craft.  It’s a Mummy Candy Holder…. the kids are sure to love it.  Check out Parents for all the craft details.


(3) Printable Paper Mummy Toy


Printable Paper Mummy Toy


Here is a paper toy craft from this site…for a paper mummy. This is very easy to make and a lot of fun to play with. Find out how here.

(4)  Bendable Mummy


Bendable Mummy


Here is a great Halloween craft that is made from an old shirt.  This is a great craft to recycle those old T-shirts.  Got to love recyclable crafts.  You want the craft details?  Check out Family Sponge.


(5)  Mummy Cupcakes


Mummy Cupcakes


Ok, I love the yummy crafts…. the edible ones.  Well, these Mummy Cupcakes are certainly no exception.  They are adorable…. and they look delicious.  Get the entire Mummy recipe at The Craft Patch….. make sure to check it out.


(6)  Mummy Sign


Mummy Sign


If you are looking for an outside Halloween decoration craft…. then you have found it here.  I found this Mummy craft over at Woman’s Day.  It is so terribly cute…. I just adore it.  This craft is for the more mature as there is a Saber Saw being used.   Adult Supervision is a must for this craft.

 (7) Mummy Bowling


Mummy Bowling


My daughter’s Girl Scouts troop made these for a Halloween Fair party they had. The Brownies and Daisies loves playing Mummy Bowling. Find out how to make these out of water bottles here.

(8)  Mummy Cookies


Mummy Cookies


Are you throwing a Halloween Party?  If so, you know that you cannot have a Halloween Party without some Halloween Cookies.  And, Halloween is just not Halloween without some Mummy treats.  So, make sure to check out this Mummy Cookie recipe I found over at Crystal and Comp….. the kids are sure to love them!!


(9)  Origami Mummy


Origami Mummy


Here is a simple fun Halloween Mummy craft you are sure to enjoy.  It is an Origami Mummy.  You simply need some origami paper, googly eyes and magic marker and you are good to go.  Make a few and decorate your room for Halloween.  Check out the entire craft at Activity Village.


(10)  Mummy Pumpkins


Mummy Pumpkins


Check out this awesome Halloween Mummy craft.  It combines two of the most popular items for Halloween…. a Pumpkin and Mummy.  It is just so fitting for a Halloween decoration.  You can see the Halloween craft in its entirety by going to Celeb Baby Laundry.

(11) Bead Pipe Cleaner and Bandages Mummy


Bead Pipe Cleaner and Bandages Mummy


Find out how to make these mummies with movable arms and legs. All you will need is bandages, pipe cleaners, and a bead. Learn how to make these mummies with the following instructions.

(12)  Juice Box Mummy


Juice Box Mummy


If you are anything like me…. you have tons of juice boxes at home.  I always try to come up with crafts that use empty juice boxes because I hate just throwing the empty juice boxes away.  Well, when I found this Mummy craft made from recycled juice boxes I was overjoyed.  Check it out for yourself at Kaboose.


(13)  Mummy Jars


Mummy Jars


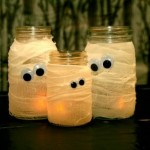
This is one of my favorite Mummy crafts i found.  It seems to be really easy, but a ton of fun.  Plus, look at the outcome…. you have these glowing mummy jars that can be placed around the house as a Halloween Decoration.  You can take a look at the craft for yourself over at Crafts reDesigned.


(14)  Mummy Door Hanger


Mummy Door Hanger


This Mummy craft is pretty darn cute.  I found the craft over at TLC and I think it is perfect for Halloween.  It can be put on your front door for all the Trick-or-Treaters to see or simply place it on one of your many indoor doors as an inside Halloween Decoration.


(15)  Aged Mummy


Aged Mummy


I love this Mummy craft.  Do you know why?  Because Craftaholics Anonymous made it look pretty authentic by dirtying up the gauze around the mummy’s body.  I love that.    Make sure to check out her site as she will show you too how to make this Aged Mummy.


(16)  Tissue Paper Mummies


Tissue Paper Mummies


I found this great Halloween Mummy craft over at Happy Hooligans.  And, it is super cute!!  They simply used recycled empty toilet paper rolls and white tissue paper…. and these mummies turned out amazing.  They are perfect for decorating…. the kids will love telling everyone they made the mummies themselves.

 (17) Mummy Trick-or-Treat Baskets


Mummy Trick-or-Treat Baskets


Find out how to make these trick-or-treat baskets – it is a lot easier than you would think. They come out looking really unique and fun. Find the instructions here.

(18)  Egyptian Mummy


Egyptian Mummy


Now, I know this isn’t exactly the kind of Mummy you think of when you think of Halloween mummies.  But, I love this craft and had to include it once I found it.  Check it out over at 123 Peppy…. I think you will like it too.

Technorati Tags: , , , , , , ,

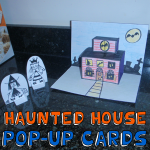
How to Make Haunted House Pop-Up Cards for Halloween

I have a super duper fun Halloween craft for you today.  In this post I’m going to show you how to make a Haunted House Pop-up Card.  People love receiving cards from their loved ones.  But, what they especially love are the homemade cards.  And, this homemade card will be no exception.  Do you know what makes this Haunted House card so special?  It’s the 3-D look of the card.  I will show you how to easily make a 3-D Haunted House Pop-up Card.  Once the Halloween Card is opened it can be displayed nicely with all the other Halloween decorations.  So, let’s get started.

Check out our other Halloween Crafts.


How to Make Haunted House Pop-Up Cards for Halloween


Materials Needed

Piece of White Paper

Colorful Piece of Paper

Scissors

Black Marker

Colorful Crayons, Markers or Colored Pencils


Step 1


Get a piece of paper.


Get a piece of paper.


Step 2


Fold in half.


Fold in half.


It should look like this.


Like this.


Step 3


Cut on the fold on the red lines.


Cut on the fold on the red lines.


It should look like this.


Like this.


Step 4


Unfold.


Unfold.  Then put your fingers into slits and fold the inside part in opposite direction.


It should look like this.


Like this.


Step 5


Fold in the spot on the above image.


Fold in the spot on the above image.


Fold here too.


Fold here too…


Step 6


Pinch the top fold and cut on the red lines.


Pinch the top fold and cut on the red lines.


It should look like this.


Like this.


Step 7


Fold here like in above picture.


Fold here like in above picture.


If you fold it down again it will look like this.


If you fold it down again it will look like this…


Open.


And, open…. like this….


Step 8


Outline edges in black.


Outline edges in black.


Step 9


Draw windows, doors and other details.


Draw windows, doors and other details.


Step 10


Color it too.


Color it too.


Step 11


Draw other details.


Draw other details.


Step 12


Add background and a sidewalk.


Add background and a sidewalk.


Step 13


Paste just the outside edges to a colorful piece of paper.


Paste just the outside edges to a colorful piece of paper.


Step 14


You can decorate the outside of the card too.


You can decorate the outside of the card too.


Step 15


Finished Haunted House Pop-up Card


Didn’t this Halloween pop-up card turn out amazing?  Anyone receiving it will love it!!  To make the Trick-or-Treat figures seen here simply print them off at How to Make a Trick-or-Treat Paper Toy.  The Trick-or-Treat figures go perfectly with today’s Halloween craft.

Technorati Tags: , , , , , , , , , , , , , , , , , , ,