
|
|

|
|
Home > Arts and Crafts Projects > Metal Crafts > How to Make Tin Can Bookends
(TIN IS VERY SHARP AND REQUIRES ADULT SUPERVISION / ASSISTANCE. ALWAYS WEAR PROTECTIE GLOVES WHEN WORKING WITH TIN) Before you start this craft, you should familiarize yourself with Techniques for Crafting with Tin. This craft is for older children or teens that have an adult with them to assistast or supervise. Here is a great craft for making tin can bookends. These turn out looking like store-bought bookends and would make a great gift or a great addition to your homework desk or shelf.
Tin Can
Mallet
Hammer and Nail
Ruler
Tracing Paper
Tin Snips
1/2 Inch Plywood
Glue
(TIN IS VERY SHARP AND REQUIRES ADULT SUPERVISION / ASSISTANCE. ALWAYS WEAR PROTECTIE GLOVES WHEN WORKING WITH TIN)
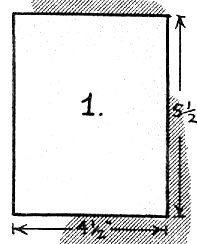
1. Use two identical, medium-sized cans. Remove tops and bottoms of cans. Wash and dry. Cut cans open along seams and flatten out with a mallet. With pencil and ruler, make pattern following dimensions in Figure 1.
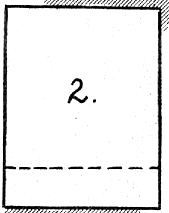
2. Mark off 1" margin, as shown by broken line in Figure 2. (This margin will be bent to slide under books.)
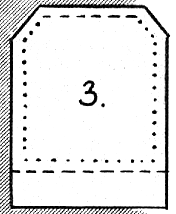
3. Snip off top corners and file rough edges. Scratch a 1/2" margin on wrong side, with a nail and ruler. Tap evenly spaced dots along 1/2" margin with hammer and nail set, as in Figure 3.
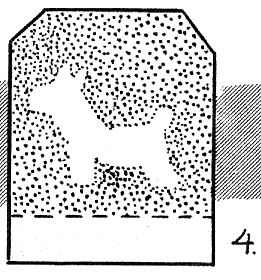
4. Draw a design on paper and transfer to wrong side of metal. With nail set and hammer, fill in background around design with evenly spaced dots, as in Figure 4. Design will stand out in relief.
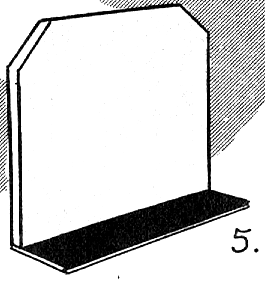
5. Cut two shapes, same size as metal, from 1/2" plywood, omitting 1" margin at base. Fasten wood to wrong side of metal with 1/2" nails. Bend 1" margin at right angles. Glue strip of felt under 1" margin to protect table surface, as in Figure 5.