
|
|

|
|
Home > Arts and Crafts Projects > Metal Crafts > How to Make Tin Turtles
(TIN IS VERY SHARP AND REQUIRES ADULT SUPERVISION / ASSISTANCE. ALWAYS WEAR PROTECTIE GLOVES WHEN WORKING WITH TIN) Before you start this craft, you should familiarize yourself with Techniques for Crafting with Tin. Here is a basic tin craft for making a standing turtle. These turn out pretty cute, especially if you love turtles.
Tin Can
Tracing Paper
Tin Snips
Solid Rubber Ball
Paint & Brush
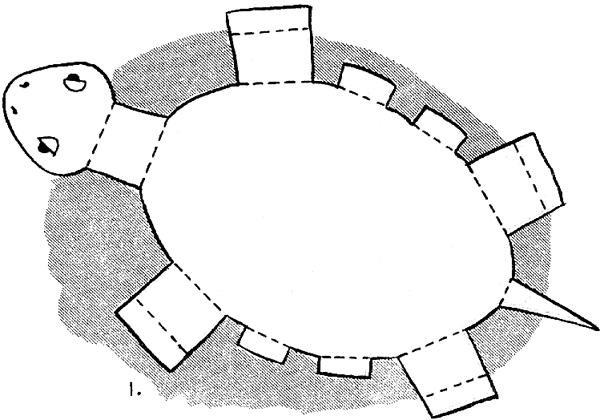
1. Open and flatten out a medium-sized tin can. Trace pattern for turtle on strong tracing paper, and transfer to tin. Cut out turtle, as in Figure 1.
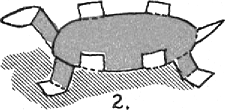
2. Following directions for folding tin on the Tin Crafting Techniques Page, fold parts of turtle (flaps, legs, feet, neck and head) up or down, as shown by broken lines in Figure 2.
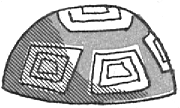
3. Cut a solid color rubber ball in half and paint on design, with poster paint, as in Figure 3.
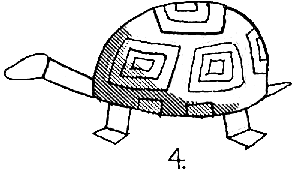
4. Place the half ball on the tin base, inside the flaps. Paint on features and allow to dry, as in Figure 4.