
|
|

|
|
Home > Arts and Crafts Projects > Musical Instruments Crafts> Drum Crafts > Wooden Bottle Cap Tambourines
If you are really into rhythm and tapping your feet all your time, you should really try to use a tambourine. You would love this musical instrument. Here are instructions for making a real wooden tambourine. This is a great first-time woodworking project with one of your parents or grandparents. This would also be a great Summer camp or Woodshop project for groups. (This craft requires parental assistance and / or supervision)
2 Pieces of plywood 6" x 6"
32 Metal bottle caps
8 Nails
Enamel
Sandpaper
Hammer
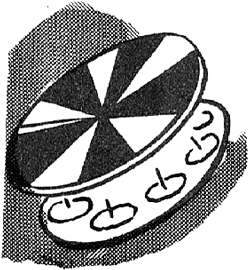
1. (With supervision or assistance from an adult) Ask an adult to cut two circles of plywood 5" in diameter. Sandpaper smooth. Mark off edge of one circle into eighths. Paint and decorate both circles and allow to dry.
2. (With supervision or assistance from an adult) Flatten bottle tops with a hammer. Punch a hole through the center of each.
3. (With supervision or assistance from an adult) Drive a nail completely through each mark on circle that was devided into eighths. Place circle, nail side up, on the work table, and place four bottle caps over each nail. Place other circle over nail ends and hammer into place, as in picture above.