My husband is a toy sculptor and he can do some pretty amazing things with his sculpting medium and at times it can be rather depressing when my sculpting abilities are very basic. I mean, I can create with paper but I have a bit of a hard time creating anything that is three dimensional, which is why I always delight when I can create something that is worthy of even a little bit of praise. For this reason, I love working with fimo or clay and I enjoy the time spent with my kids as we make little critters that can be hardened into masterpieces that I can enjoy for a lifetime.
Sculpting is a wonderful activity for children and most have some experience with it through playdough. While I love playdough, I find that not being able to really keep the finished product can be disheartening at times so I find that giving children an opportunity to make some lasting pieces is worth the extra expense that clay or fimo can present (although fimo isn’t that expensive, usually around 5 dollars for a small block that goes a long way).
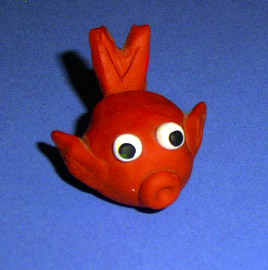
In this craft, I will teach you how to create a very basic fimo sculpture fish that most children will enjoy making again and again.
Sculpting with Fimo: The Goldfish : How to Make a Goldfish with basic supplies
[ad#ahc]
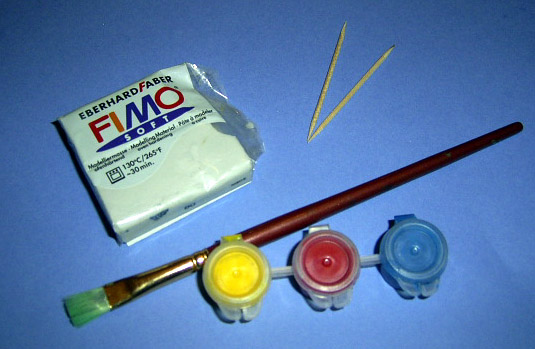
Gather all the materials you need:
- Fimo (you can use any color, in the step by step I use grey so I can paint it later but in the finished product I used orange, white and black.)
- Toothpicks
- Paint Brush or a round chopstick (if you have any)
- Paint (optional)
1. Remove a 2 or 3 inch piece of the Fimo from the block and knead it until it softens. Usually this doesn’t take too long but if the Fimo is harder, you should expect about 5 minutes of kneading to soften it enough.
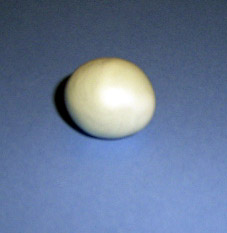
2. Take a small piece from the softened Fimo and roll it into the a ball to form the body of your goldfish. This will be the biggest piece and the size you take will depend on how big you want your goldfish to be. Once you have rolled it into a ball, flatten the bottom slightly so it will rest on the table without falling over.
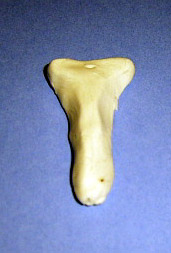
3. Now that you have the body, it is time to make the fins of your goldfish. To do this, create a small triangle with the Fimo.
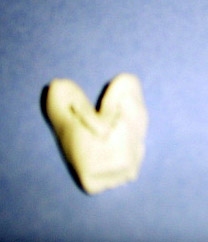
4. When the triangle is formed, cut away a small “v” in the largest part or base of the triangle and then cut away the excess from the top of the triangle.
5. Using the toothpick, carve a small “v” design into the tail and then attach it to the end of the ball by gently pressing it into
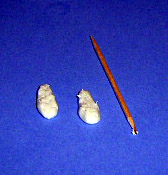
6. Once the tail is attached, it is time to work on the fins. To do this, create two small tear drop shapes with the Fimo and then draw a few lines on your fins before you attach them.
7. Attach the fins to the ball and smooth the Fimo with the flat side of the toothpick. Fix any of the lines that were erased.
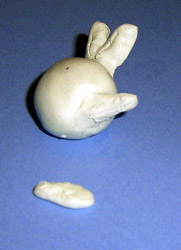
8. Roll a small ball with the Fimo for the mouth and place it onto the front of the ball.
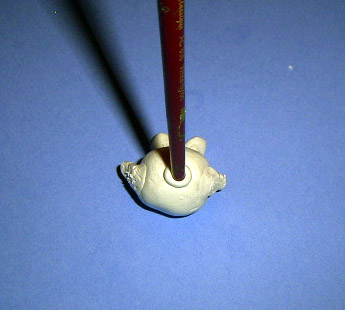
9. Using the rounded tip of a paint brush or chopstick, gently press it into the small ball until you have an indent that looks like fish lips.
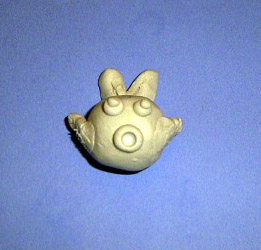
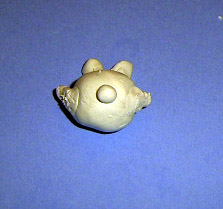
10. Roll two more small balls, smaller than the mouth, and carefully press them into the large ball above the mouth. These are the eyes. Finish them off with a smaller ball that works as the pupil. If you are painting, you can do all of this in one color but if you don’t want to paint the finished piece, use white Fimo for the eyes and black Fimo for the pupils.
11. Bake in the oven according to the package until the sculpture hardens.
12. At this point you will be done, unless you used all one color. If you did, take the time to paint the sculpture with acrylic paints.
Fimo is an excellent craft for children that are 8 and up but I have seen children as young as 4 make some truly spectacular sculptures with this medium. One word of advice; however, is to make sure that the children wash their hands after they are finished using it.
Technorati Tags: fish crafts, fish arts and crafts, clay crafts, sculpting crafts, sculpting instructions, fimo, fimo crafts, fimo projects, craft sculpture, kids crafts, crafts for kids, playdough crafts

Leave a comment