How to Sculpt Clay Heads & Bodies and a Turtle and Mouse

It is so much fun to sculpt with clay but without the right techniques and methods, it is all a guessing game. This tutorial will show, with illustrated steps, how to sculpt human heads and bodies, as well as a clay turtle and a clay mouse. You won’t need to guess any more, follow these directions and you will be on your way to a great sculpture in no time. Have fun!
How to Sculpt Clay Heads & Bodies and a Turtle and Mouse


How to Sculpt Clay Heads & Bodies and a Turtle and Mouse


A HEAD CLAY SCULPTURE


sculting-clay-heads


(1) An egg-shaped roll joined to a cylinder-shaped roll. Meld pieces together by rubbing with thumb. Cut sides away.

(2) Divide head into thirds.

(3) Cut away eye sockets.

(4) Add ears, lips and chin.


SCULPTING CLAY BODIES


SCULPTING CLAY BODIES


(1) A large ball joined to a cylinder-shaped roll.

(2) Add a small ball for the head.

(3) Meld together by rubbing with thumb.

(4) Add clay rolls for arms.

(5) Work in details.

SCULPTING CLAY RABBITS


SCULPTING CLAY RABBITS


(1) A large ball for body

(2) a small ball for head

(3) and a smaller ball for tail.

(4) Meld together with thumb.

(5) Work in details.

SCULPTING CLAY TURTLES


SCULPTING CLAY TURTLES


(1) A half ball for body and a small ball for head

(2) a tiny triangle for tail. Scratch in design on shell.

SCULPTING CLAY MICE


How to Sculpt a Clay Mouse


(1) A ball for body; two smaller flattened out balls for ears; a string for the tail. Meld together by rubbing with thumbs.

(2) Make a triangle shape for snout and smooth into body with thumbs. Make a little ball for nose. Use floss for whiskers.

Technorati Tags: , , , , , , , , , ,

Soap Carving for Kids and Making Soap Sculptures Safely

Soap can be a great first-time sculpting activity as soap is soft enough for small hands to work with. Your child can have fun and be creative without worrying that he might mess up the soap, since soap is cheap enough to replace.  Your child will be able to find his or her inner artist and find out about new skills that they didn’t know they even had. One of the first times I realized that I had any sort of artistic skills was when someone put clay in front of me and I sculpted Abe Lincoln’s face and it ACTUALLY looked like him. Let your child have that Ah-Hah moment too.

Soap Carving for Kids and Making Soap Sculptures Safely


Soap Carving for Kids and Making Soap Sculptures Safely


CRAFTS MATERIAL NEEDED

Ivory Soap

Pencil

Either Clay Sculpting Tools or Pumpking Carving Tools

(Optionally) Toothpicks

Instructions About Safely Carving Soap

Instead of using a paring knife to sculpt soap, kids should use safer options. I suggest using either Child-Safe Pumpkin Carving Tools or Clay Sculpting Tools. A toothpick can be used for fine carving. This way if the child slips or makes a mistake, he or she won’t get too hurt. However, whenever a child is carving, an adult should always be present in order to ensure the child is carving in a safe fashion.

There are two ways of applying a design to soap.

1. With a pencil or pointed tool, draw design directly on soap.

2. Place a cake of soap on a piece of paper and draw outline of soap on paper. Draw design on paper, within the pencilled outline. Trace drawing on soap.

For large projects join two cakes of soap. In carving soap keep the silhouette simple. Don’t carve too long in one place; turn the work often. Hold in different lights and at different angles. Keep the heavy masses at the bottom. Soap may be colored with waterproof India ink.

Safely Carving Soap for Soap Sculptures

1. Scrape lettering from one side of soap, removing only enough to reveal a smooth even surface.


2. Allow soap to dry for about an hour before starting in to work.


Trace design on soap


3. Trace design on soap (see above instructions)


Rough out design by cutting away small pieces at a time


4. Rough out design by cutting away small pieces at a time, within 1/4 ” of the outline.


Round out figure, turning project as you work


5. Proceed slowly. Round out figure, turning project as you work. Work in details.

6. Polish by rubbing.

(Optional) Joining Two Cakes of Soap

1. Scrape down sides that are to be joined.

2. (Parent or Adult Should Complete this Step!) Place soap, scraped sides down, into a shallow pan over low heat.

3. Insert toothpicks where they will not interfere with the carving.

4. After 30 minutes, press cakes together. Wait 24 hours to carve

Technorati Tags: , , , , , , ,

How to Make Papier Mache Bowls

Today I’m going to show you how to make Papier Mache Bowls.  Using a wooden, glass or ceramic bowl for your armature for this project as well as newspaper strips and the papier mache paste we will make together you will be able to make a beautiful bowl that you can actually hold stuff in.  Once dry you will paint the bowl in the beautiful colors of your choice…. it is an all around fun project.  So, grab the materials needed and let’s get started.

Check out our other Sculpting Crafts.


How to Make Papier Mache Bowls


Materials Needed

Wooden, Glass, or Ceramic Bowls

Grease, Lard or Salad Oil

Newspaper Strips

1 Cup Water

4 tsp Salt

1 Cup Flour

Elmer’s Glue (optional)

Tempera or Acrylic Paint

Shellac or Lacquer (optional)


Step 1


Select simple wooden, glass, or ceramic bowls to serve as the armature for this project.


Select simple wooden, glass, or ceramic bowls to serve as the armature for this project. Make sure that the bowl you have selected is free from undercuts so that no problems arise in the removal of the following papier mache forms. Go over the surface of the bowl lightly with grease, lard, or salad oil to facilitate removal of the finished papier mache form.


Step 2


In beginning this project, tear newspaper strips.


In beginning this project, tear newspaper strips.


Step 3


Make Papier Mache Paste.


Make Papier Mache Paste…it should be the consistency of light cream. Soak newspaper strips in prepared paste.  To make Papier Mache paste mixture…. mix 1 cup water… 4 tsp salt… and 1 cup flour.  Mix together.  Or, mix together 1/2 Elmer’s Glue and 1/2 water.  Mix together.


Step 4


Dip / soak each newspaper strip in the papier mache mixture


Dip / soak each newspaper strip in the papier mache mixture and then you will place them on the bowl. Build up a shell of about six layers of newspaper strips around the outside of the bowl.


Step 5


When the papier mache is dry, lift the shell from the original bowl


When the papier mache is dry, lift the shell from the original bowl and build up the lip on the papier mache bowl as illustrated above. This will provide extra strength and will give a more finished appearance to the bowl.


Step 6


When the papier mache is dry, paint with tempera or acrylic paint.


When the papier mache is dry, paint with tempera or acrylic paint. You can finish with an application of shellac or lacquer for final, durable surface conditioning.

And, there you have it….. that’s how you make Papier Mache Bowls.  How did your bowl turn out?  Let me know in the comments below?  Also, take a picture of your finished Papier Mache Bowl and share it with your comment as well.  I’d love to see it.

Technorati Tags: , , , , , , , , ,

How to Make Crepe Paper Mache Rock Sculptures

HAVE you ever wished you could suggest a use for the interesting stones that children bring home? Here is an idea. By adding crepe-paper mache to these rocks, the children can produce interesting creatures of the imagination. These can be used for paperweight gifts, but the experience of making them has its own reward. With crepe-paper mache children can make rocks into birds, animals, vehicles, fruit, vegetables, holiday novelties.  Sounds fun, right?  Sure does.  So, let’s get started.

Check out our other crafts made from stones and rocks.


How to Make Crepe Paper Mache Rock Sculptures


Materials Needed

Crepe Paper of Different Color

1 Cup Measuring Cup

Bowl

Water

Mixing Spoon

Flour

Salt

Rock


Step 1


Cut up crepe paper into tiny pieces.


Cut up crepe paper into tiny pieces.


Step 2


Make about one cupful of crepe paper.


Make about one cupful of crepe paper.


Step 3


Add enough water to cover paper... soak overnight.


Add enough water to cover paper… soak overnight.


Step 4


Mix and rub wet paper into into fine pulp.


Mix and rub wet paper into into fine pulp.


Step 5


Mix in 4 or 5 tablespoons of flour and 2 tablespoons of salt.


Mix in 4 or 5 tablespoons of flour and 2 tablespoons of salt.  Work until texture of clay.  Add more flour or salt as needed.  Make a different batch for each color.


Step 6


Use the mixture as if it were clay.


Use the mixture as if it were clay.  Use rock as base, and crepe clay as head, wings, feet, tails, or whatever else your sculpture needs.  It will dry as hard as the rock.


Here are more ideas


Here are some more ideas.


And, there you have it.  A great way to mold many different items simply by making Crepe Paper Mache Rock Sculptures.  What did you land up sculpting?  Let me know in the comments below.  And, don’t forget to take a picture of your item as well…. you can add the picture to the comment.  I’d love to see it.

Technorati Tags: , , , , , , , ,

15 Cool Crafts Made with Altoid Tins


15 Cool Crafts Made with Altoid Tins


If you ever had an Altoid mint you know that the mints come in this wonderful little tin.  But, who would have thought all the imaginative things you could do with this little tin.  By scouring the internet I came across a bunch of Altoid crafts you can make.  In this post I am listing 15 of the coolest crafts you can make with Altoid Tins.   The crafts range in skill level between easy and more challenging.  But, you can count on each of them being a lot of fun.   So, scroll through the different Altoid Tin crafts and you are sure to find one that you will like.  So, grab your Altoid Tin Containers and let’s get started on some fun crafts.

15 Cool Crafts Made with Altoid Tins

 (1)  Altoids Mini Flashlight


Altoids Mini Flashlight


This Altoid Tin craft is a little more complicated than we typically list in this blog, but how can I make a post about Altoid Tin Crafts without putting this one in it.  I found this craft over at Instructables and it is an awesome one.  Check out their site to find out how you too can make this Altoid Tin Mini Flashlight.


(2)  Altoids Turtle Keepsake Box


Altoids Turtle Keepsake Box


Check out this elaborate Keepsake Box…. and it is made from an Altoid Tin container and Super Sculpey.  I found this fun Altoid Tin craft over at Sculpey Club….. check out her site for all the fun crafting details.


(3)  Altoids Pincushion


Altoids pincushion


I absolutely love this Altoid Tin Pincushion idea.  What you can’t see here is that inside she added magnets so that inside you can hold pins, needles and such.  Make sure to check out My Recycled Bags so you too can make this Altoid Pincushion.


(4)  Altoid Tin Wallet


Altoid Tin Wallet


Altoid Wallet


Here is a great way to keep your cash….. keep it in an Altoid Tin Wallet.  Roxy Craft shows us how to make this wallet from an Altoid Tin Container…. she explains the craft in a very detailed step-by-step “how-to”.  Check out the site for yourself.


(5)  Magnetic Travel Board Game Set


Magnetic Travel Board Game Set


This Altoid Tin Craft is from our very own site.  I previously posted How to Make a Magnetic Travel Board Game Set from an Altoid Tin Container.  It is a fun craft and the outcome is you will have 8 games to play in the car while traveling.  Make sure to check this one out.


(6)  Altoids Tin Garden


Altoids Tin Garden


Here is another great way to use those extra Altoid Tin Containers…. use them to make a beautiful garden.  Gomi Style shows us how to do just that.  Just by adding a bit of potting soil to the tin you can have your very own small little garden.


(7)  Travel Candle


Travel Candle


I found this idea over at Design Sponge and what a great idea it is.   Here she gives you all the step-by-step details on how to make a travel candle out of an Altoid Tin Container.  She points out how great these can come into handy during an emergency… after all, you never can have enough candles.


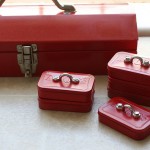
(8)  Altoid Tin Mini Toolboxes


Altoid Tin Mini Toolboxes


I found this awesome Altoid Tin craft over at Alpha Mom.  She came up with this super creative idea to surprise Dad for Father’s Day.  She made a few so that Dad could hold the bits and bolts of his choice.  Make sure to check out the website for all the crafting details.


(9)  Altoid Tin Gift Card Holder


Altoid Tin Gift Card Holder


Here is a clever way to keep a hold of all those Gift Cards you have accumulated.  Store them in this Altoid Tin Gift Card Holder.  I found this Altoid Tin Craft over at Yahoo Voices and I dig the idea.  Check out the website for the tutorial.


(10)  Altoid Tin Jewelry Box


Altoid Tin Jewelry Box


You would never believe it by looking at it, but this beautiful jewelry box is made from an Altoid Tin and Polymer Clay.  I found this fun Altoid Tin craft over at TLC and I love it.  Get the full crafting “how-to” over at the website.


(11)  Pocket Yard Pool Table


Pocket Yard Pool Table


Ok, how cute is this pool table?  So cute!!  And it is small enough that you can take it pretty much anywhere.  How many other pool tables can you say that about?  You can find the tutorial over at Instructables.   This is just so creative.


(12)  Business Card Holder


Business Card Holder


What a clever way to hold your business cards…. and I must say quite attractive too.   This is a great way to use your left over Altoid Tin for something useful.   Check out Better Homes and Gardens for all the crafting details.


(13)  Altoid Earbud Case


Altoid Earbud Case


This is a fantastic idea.  Did you ever put your earbuds somewhere and when you wanted to use them you found they were tangled up?  Well, this Altoid Earbud Case will prevent that…  put your Earbuds inside and find that they will never tangle again.  Charlotte’s Fancy came up with this brilliant idea.  Check out her site for the details.


(14)  Doll Suitcase


Doll Suitcase


Isn’t this an adorable suitcase for your doll….. and, your doll will surely love it.  Made from an Altoid Tin and masking tape this suitcase has an aged look to it…. like a suitcase that is well traveled.  Check out Crafty Crafts for the full instructions on how to make this.


(15)  First Aid Kit


First Aid Kit


Everyone needs a first aid kit.  You don’t know when you will need some first aid treatment…. so having a kit is very important.  But, sometimes a first aid kit can be bulky and when you are “out & about” you can’t carry a bulky one…. well, how about making a first aid kit out of a Altoid Tin.  Check out Instructables for all the details.

Top image by Alpha Mom

Technorati Tags: , , , , , , , , , , ,

Ideas for Kids to Make Seder Plates for Passover


Ideas for Kids to Make Seder Plates for Passover


Passover will be here in just a couple of days.  And with Passover comes the wonderful Passover Seder.  And, even though we know how fantastic Passover Seder is…. we know how difficult it is to get the kids to sit still and enjoy the Passover Seder.  Well, how about if they help out with the Seder?  The kids can make the Seder Plate for Passover.  Even if it isn’t the main Seder Plate you use for the Seder they can at least work on the Children’s table Passover Seder Plate.  Beings that the children helped make the Passover Seder Plate will hold their attention a little more as they will want to pay attention to see how it will be used during the Seder.  So, scroll through the many Passover Seder Plates crafts below…. you are sure to find the one that works for you and your children.  Have a Happy Passover.

Ideas for Kids to Make Seder Plates for Passover

(1)  Spring Seder Plate


Spring Seder Plate


I found this awesome Seder Plate over at Kaboose.  Here they keep the color green to remind you of spring and all the good times ahead.  What a clever idea!!


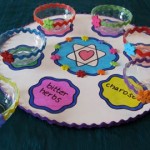
(2)  Star of David Seder Plate


Star of David Seder Plate


 Nick Jr. has this Seder Plate Craft all figured out.  They use 6 six inch paper plates to create the Passover Seder Plate…. not to mention a Star of David Coloring Page.  Put it all together to create this awesome Passover Seder Plate.


(3)  Printable Seder Plate Craft


Printable Seder Plate Craft


If you are looking for a super easy Passover Seder Plate Craft then this is the one for you.  Free Kids Crafts gives you this craft that is simply a printable…. print off and cut.  Doesn’t get much easier than that.


(4)  Bright Passover Seder Plate


Bright Passover Seder Plate


Isn’t this a beautiful Passover Seder Plate?  I love the use of bright colors.  Nothing keeps the attention of the little ones more than bright colors.  Parent Dish shows you step-by-step how to make this Seder Plate.


(5)  Porcelain Passover Seder Plate


Porcelain Passover Seder Plate


Family Fun uses an ovenproof plate and glaze paint to prepare their Passover Seder Plate.  They have the right idea as once baked this item is quite durable.  These Seder Plates become special to the child as they will be painting them themselves.


(6) Model Clay Passover Seder Plate


Model Clay Passover Seder Plate


Crayola has an original spin on the traditional Passover Seder Plate.  Their craft is constructed from Model Clay.  Check out their site to get the full details and make this Passover Seder Plate yourself.


(7)  Jeweled Passover Seder Plate


Jeweled Passover Seder Plate


This is a beautiful Passover Seder Plate.  In case you can’t see it, there are lovely stones all around the outside of this plate.  My Activity Maker shows you how you too can make this beautiful Passover Seder Plate.


(8)  Paper Seder Plate


Paper Seder Plate


If you are looking for an easy Passover Seder Plate than this is the craft for you.  Made from a Paper Plate and pictures of the Ceremonial Food this craft doesn’t get any easier.  Check out Joyful Jewish to see how to do this craft.


(9)  Tissue Paper Passover Seder Plate


Tissue Paper Passover Seder Plate


Here is a fun craft to do with the youngest of kids for Passover.  Kids love to work with tissue paper and this Passover Seder Plate Craft has plenty of tissue paper.  Check out Delicate Construction for the full details of the craft.


(10)  Denture Cream Passover Seder Plate


Denture Cream Passover Seder Plate


Yes, you read this right…. this craft was made with Denture Cream.  Holidash used Denture Cream to hold the dishes to the Seder Plate.  Check out the full details on their site… you will have to scroll to the 2nd slide.


(11)  Passover Prep


Passover Prep


I found this Passover Seder Craft over at Maybe Sew.  She has the right idea on how to teach the kids a little bit about each of the foods on the Seder Plate…. she uses different items other than the norm and has the kids guess what they should be.  Check out the site for the full details.

Technorati Tags: , , , , , , , , , , ,

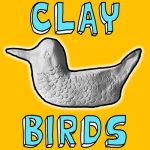
How to Make Clay Birds

I have a fun clay activity for you.  Today I’m going to show you how to make Clay Birds…. or really any Clay Animal you would like to make.  The only material you will need for this craft is clay…. that’s it.  The first sight of clay as it is taken from a crock or plastic bag is enough to get kids interested. Show them to roll, flatten, remove air bubbles, and what to do so the clay will not dry too fast and crack.  This first clay project serves to give kids experience with the clay, and incidentally endears it to them.  So, grab some clay and let’s get started.

Check out our other Clay & Sculpting Craft Ideas


How to Make Clay Birds


Materials Needed

Clay


Step 1


Start with a ball or an egg-shaped lump of clay


Start with a ball or an egg-shaped lump of clay, modeling it with the palms of the hands – but not working over long on it.


Step 2


Model in a solid mass with no detail.


Model in a solid mass with no detail.


Step 3


Begin shaping the clay into an animal.


Begin shaping the clay into an animal.


Step 4


Give the animal some detail


Give the animal some detail…. Shape head, wings, and tail if you are making a bird. If an animal, keep legs and ears close to the body.


How to Work with Clay

STORE natural and water-base clays in galvanized garbage buckets, earthenware crocks, jars with screw-top lids, or plastic bags. Avoid high temperatures, but do not let the clay freeze.

WHEN WORKING with clay, keep the excess covered with a damp cloth, or return it to the covered crock or can in which it is kept. Pieces will soften if soaked in water.

CLAY SHRINKS during the drying process, preventing the use of any type of permanent framework. Children can note shrinkage in drying and make things large enough to allow for this.

LIMIT the child to making compact, bulky figures without delicate appendages—unless there is plenty of time for him to experiment and find out these appendages fall off. Show him how to pull out head, arms, and legs for figures of people and animals.

COVER tables or desks with paper or cardboard when clay work is being done. For the surface of a permanent clay area, a piece of hall-runner linoleum looks well and is practical. Wooden boards are sometimes used for working surfaces.

Technorati Tags: , , , , , , , , , ,

How to Make a Clay Pinch Pot

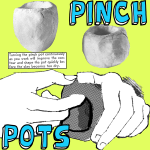
I have a fun and creative craft for you today.  In this post I’m going to show you how to make a Clay Pinch Pot.  Actually, in this post I don’t show you how to make this pot step-by-step…. instead I just direct you.   This way you are using your own creative juices to make this clay pinch pot yourself.   Use the image and instructions below to give direction on how to make your own Clay Pinch Pot.  So, grab some clay and let’s get started.

Check out our other Clay & Sculpting Craft Ideas


How to Make a Clay Pinch Pot


Materials Needed

Clay

Sponge & a bit of Water

Paint (optional)


How To:

The simplest clay dish to make is fashioned from a ball of clay into which the thumb is pressed as the clay is turned in the palm of one hand and guided with the other. From this thumb hole, the sides are slowly pressed out uniformly. This is called a pinch pot. Make sure that there is at least 1/4 inch thickness on the bottom of the pot.  **Note** Turning the pinch pot continuously as you work will improve the contour and shape the pot quickly before the clay becomes too dry.

Pinch pots should be dried on a hard and clean surface. When the surface is hard, the children can sponge their pieces gently to remove irregularities. Caution them to use water, sparingly. Under glaze colors can be applied with a clean paintbrush. Dry the pinch pot until completely dry and then you can paint it.

Alternatively:

If you are with a teacher or an artist who has access to a kiln…then this adult can fire your pinch pot in a kiln. When the pieces are cold, they may be dipped or sprayed with transparent glaze and fired a second time in the kiln. This makes them glossy. Such pottery will hold water and can be used as vases.

Technorati Tags: , , , , , , , , , , , , ,

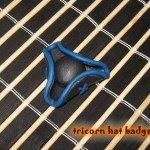
How to make a Tricorn Hat Badge

Today I’m going to be showing you how to make a Tricorn Hat Badge.   The Tricorn Hat was a very popular hat in the 18th Century.  The turned-up portions of the brim formed gutters that directed rainwater away from the wearer’s face, depositing most of it over his shoulders.  Well, in this post I’m going to show you had to make this style Hat into a brooch that you can wear.  Because we’ll use oven-hardening polymer clay you’ll need a little help from an adult.

Check out our other Jewelry Pin Crafts.

Laura from Dacian Moon Handmade will show you, step by step how to make this tricorn hat badge.


Materials Needed

– toothpick
– black and blue polymer clay
– roll (you can use anything tubular – I used a vitamins container)
– baking paper
– baking tray
– cutter
– brooch base
– craft glue


Step 1

Cut a piece of black clay.


Condition it by hand, simply mix it and squish it with your fingers. You may want to roll it into a log between your palms, fold it in half, and then roll again.
Finally, make a ball with it.


Step 2

Cut another piece (about the same size as the first).


Condition it too and make another ball.


Place it on a piece of baking paper and flatten it.


Use the roll to flatten it well, until is thin enough.


Like this.


Step 3

Place the ball on the flatten one, in the center.


Step 4

Lift the margins around the ball to form three corners.


Step 5

Take the blue polymer clay…


… and condition it.


Make a roll from it, moving your fingers forward and backward, as in the picture.


Do that until your roll is as thin as the toothpick.


Step 6

Gently, place the blue roll on the edge of the hat, pressing a little bit.


It will look like that.


Cut the extra blue clay…


… and with it make another roll, thinner than the first.


Step 7

Cut the new roll in 6 pieces.


Step 8

Place them two by two into “x’s” on the hat’s sides.


It will look like that.


Step 9

Now you’ll need the help of an adult.
Place the hat (with it’s piece of baking paper) on the baking tray, and bake it according to the instructions on the polymer clay package (they depend on the brand you use: fimo, cernit, sculpey…, but usually it is one half of hour at 230 F or 110 C)


Step 10

Let it cool down.


Step 11

Apply a layer of craft glue on the brooch base…


… place it on the back side of the hat. Let it dry well, and…


… the badge is ready !


And, there you have it…. you just finished making your Tricorn Hat Badge.  How did your badge turn out?  Let me know in the comments below.  And, make sure to take a picture of it too and add it to the comment…. I’d love to see it.  Now, go wear your Tricorn Hat Badge proudly.

Technorati Tags: , , , , , , , , , ,

How to Make a Wooden Beads Bracelet with an African Mask Charm

Black History Month will be coming to a close in the next couple of days.  With that being said…. I thought we could use this opportunity to make a craft for Black History Month.  Today I’m going to show you how to make a Wooden Beads Bracelet with an African Mask Charm.  The bracelet turns out just absolutely beautiful…. it truly does.  And, when using the ochre paint it ages the charm to give it an authentic look.   Because we’ll use oven-hardening polymer clay for the mask, you’ll need a little help from an adult.  So, grab the materials needed and let’s get started.

Check out our other Jewelry Crafts

Laura from Dacian Moon Handmade will show you how to make this craft.


Materials Needed

– toothpick
– brown polymer clay (I placed the toothpick beside it to show you how much polymer clay you’ll need)
– thread and needle
– scissor
– wooden beads
– paints (ochre, red and green)
– paintbrush
– baking paper
– baking tray


Step 1

Condition polymer clay by hand, simply mix it and squish it with your fingers. You may want to roll it into a log between your palms, fold it in half, and then roll again. Part it in two:  a small part and a bigger part.


Step 2

Take the bigger part and make a roll with it.


Gently squish one part, to have a pointy end.


Do the same with the other part.


Step 3

Place it on a piece of baking paper and flatten it.


Step 4

Using the toothpick, start to sculpt the eyes…


… like this.


Add eyebrows.


Make an outline of a nose.


Step 5

Take a small part of polymer clay and make it as a shape of a tear.


Place it inside the nose markings. Press gently to “glue” it.


Step 6

Sculpt the mouth.


Step 7

With the toothpick make a hole in the upper part of the mask.


Take care that the toothpick goes through the mask and gets out on the other side.


Step 8

Place the mask on the baking paper again and take another small part of polymer clay.


Roll it and place it under the hole.


Flatten it and make an “x” on the lower part of it.


Step 9

Sculpt the markings on the forehead, like in the picture.


Step 10

Now you’ll need the help from an adult.  Place the mask (with it’s piece of baking paper) on the baking tray, and bake it according to the instructions on the polymer clay package (they depend on the brand you use: fimo, cernit, sculpey…, but usually it is one half of hour at 230 F or 110 C).


Step 11

Let it cool down.


Step 12

With the ochre paint… coat the markings on the sides.


Make points around the bar on the forehead…


… and on the face, like this:


Step 13

With red paint coat the upper part …


… and add a line on the middle of the lower lip.


Step 14

With green paint mark the lines between the red and ochre. Let it dry.


Step 15

Now we’ll need the beads, needle and thread and the mask.


Make a knot near the end of the thread…


… and start adding beads on it (using the needle, of course).


Step 16

Measure on your hand to know when you are at the middle of the bracelet.


Put a jump ring on the mask and put it on the thread too (or just knot it on the thread).


Step 17

Continue to add wooden beads to complete the other half of the bracelet, then make a knot.


Now, you can wear your bracelet.


Isn’t this bracelet just absolutely gorgeous?  The ochre paint makes this African Mask Charm look very old, doesn’t it?  Just like it should.  I hope you had fun making it…. now enjoy wearing it.

Technorati Tags: , , , , , , , , , , , , , , ,

How to Make a Sailor Moon Wand

Do you like the Sailor Moon cartoon?  If so, then I have a fun craft for you today.  In this post I will show you how to make a Sailor Moon Wand from the Sailor Moon cartoon.  Isn’t that a treat?  The craft is not complicated at all and it is a ton of fun.  Made with Play Dough and a Crystal this craft turns out looking exactly like the Sailor Moon Wand on TV.  So, grab the materials needed and let’s get started on this fun craft!!

Check out our other Clay & Play Dough Crafts.

Laura from Dacian Moon Handmade will show you how to make it.


Materials Needed

– one piece of yellow play dough
– one piece of pink play dough
– transparent crystal
– pin


Step 1

Take ¾ of the yellow play dough (you’ll need a little bit of yellow later)…


… and make a roll with it.


It is ok for the edges to be thinner because we’ll make a Moon of it. Just bend it like a backwards “C” for that.


Step 2

Take the pink play dough, condition it… Put down a little piece …


… and from the rest make another roll.


Step 3

Condition the little piece of pink …


… and make a ring of it, to link the pink roll to the Moon.


It will look like this.


Step 4

Now we’ll start decorating.
With a small part of yellow make a little ball. Flatten it and then squish it with two fingers, like in the picture.


Make a crease on the opposite site of it and you’ll have a little wing.


Make another one and place them on the pink ring.


You’ll need another small flattened ball…


… to place on top of the two wings.


Add three more little flatten balls on the pink roll and we are almost done.


Step 5

Put the pin through the crystal…


… and place it through the moon and the pink roll.


That’s it! A perfect Sailor Moon wand.


And, there you have it…. you just made a Sailor Moon Wand.  Isn’t it pretty?  It’s probably powerful too.  Now, enjoy imagining that you are part of the Sailor Moon team.

Technorati Tags: , , , , , , , , , , , , , , ,

How to Make a Crab Ring

Oh boy…. do I have a fun craft for you right now.  I am going to be showing you how to make a Crab Ring out of Clay.  Yep…. and it’s going to be a lot of fun.  You might need a little bit of adult help as the clay will need to be baked for a little bit to harden the clay.  But, other than that you should be good on your own.  This crab ring will be perfect for you to wear this coming Spring….. or better yet, give it as a gift.  Either way…. this crab ring is sure to be loved.  So, let’s get started.

Check out our other Clay & Sculpting Crafts.

Laura from Dacian Moon Handmade will show you how to make this crab ring.


Materials Needed

– toothpick
– polymer clay : white, black, red – I used transparent red for this project, but any red will do
– acrylic paints (white, black and red/pink)
– metallic ring base
– baking paper
– baking tray


Step 1

Take a small piece of red clay and condition it.

(Condition polymer clay by hand – simply mix it and squish it with your fingers. You may want to roll it into a log between your palms, fold it in half, and then roll again.


Press it well on the back of the base.


This way we will incorporate the base in the clay and we don’t risk breaking it.


Step 2

Take a little bit more than a half of the red clay, condition it …


… and make a ball with it.


Step 3

Place the ball over the base…


… and raise one part. This will be the face.


Take care to merge the sides of the clay from the back of the base with that new ball of clay, to incorporate the base.


Step 4

Let’s make the claws.


Take the remaining red clay and part it in half. Make an oval shape from one half…


… and press on head with your fingers.


On the other head make a crease – you can use the toothpick for that.


Now we have a claw. Place it on the crab body, like in the picture.


Step 5

Repeat the previous step to make the other claw, then place it on the crab body too.


Step 6

Part the small piece of black clay in half.


Condition it and make the eyes from it.


Then add small white circles to the eyes…


… like that.


Step 7

Place the ring on the baking tray, and bake it according to the instructions on the polymer clay package (they depend on the brand you use: fimo, cernit, sculpey…, but usually it is one half of hour at 230 F or 110 C) – this is the part when you could use a little help.

Let it cool down.


Step 8

If you used transparent red clay, like me, you’ll notice that the color has become more alive and intense because of the baking.


Step 9

Use black paint to draw the crab mouth.  Make it cute … or fierce! Just have fun.


And, there you have it…. you just finished making your Crab Ring.  How did it turn out for you?  Let me know in the comments below.  And, take a picture of your crab ring and share that in the comments as well.  I’d love to see it.

Technorati Tags: , , , , , , , , , , , ,

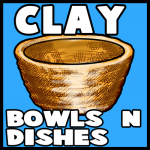
How to Make Clay Bowls and Dishes

If you love sculpting with clay….. then I have a fun craft for you.  Today I’m going to show you how to make Bowls and Dishes made out of Clay.  You will need some adult supervision for this craft as the clay will need to be baked once you have finished forming your Bowls and Dishes.  Simply bake the clay according to the clay’s instructions.  Are you ready to get started?  Simply grab some clay and we will move on with the craft.

Check out our other Clay & Sculpting Crafts.


How to Make Clay Bowls and Dishes


Materials Needed

Clay


Step 1


Roll a lump of clay between your hands and the table until it forms a coil.


Roll a lump of clay between your hands and the table until it forms a coil.


Step 2


Flatten a lump of clay to form a round cookie shape.


Flatten a lump of clay to form a round cookie shape.  It is called a disk.


Step 3


Lay the coil of clay on and around the edge of the disk.


Lay the coil of clay on and around the edge of the disk.  Overlap the tapering edge.


Step 4


With the tip of your index finger, rub the coil on the outside and inside.


With the tip of your index finger, rub the coil on the outside and inside.  This should make a firm edge and the object resembles a small dish.


Step 5


Let dry.


Let dry.  Bake or place in kiln depending on your clay’s instructions.


Step 6


Add coil upon coil to form a higher edge like a bowl.


Add coil upon coil to form a higher edge like a bowl.


Step 7


After building up the straight edge bend it wavy.


After building up the straight edge bend it wavy.  Be sure it is moist or it will crack.


Step 8


Fasten a coil to the cup for a handle.


Fasten a coil to the cup for a handle.

So, there you have it…. now you know how to make Bowls, Cups and Dishes out of Clay.  What did you make?  Let me know in the comments below.  Don’t forget to take a picture and post that in the comment as well…. I’d love to see what you made.

Technorati Tags: , , , , , , , , , , ,

How to Make Chalk Sculptures

I have a fun and creative craft for you today.  I’m going to show you how to make Chalk Sculptures simply with a pin and some blackboard chalk.  I give you some examples of things to make with your chalk sculptures, but please feel free to use your imagination to make whatever you would like with your chalk sculptures.  The choices are virtually endless of the things you can make.  So, grab the materials needed and let’s get started.

Check out our other Sculpting Crafts.


How to Make Chalk Sculptures


Material Needed

Chalk

Pin


How To

Get a piece of chalk…any size…although I would say younger children would have an easier time with a thicker piece of chalk though.  Scrape away unwanted portions of blackboard chalk with a pin, Work slowly, exerting very little pressure so that chalk will not crumble.

Robed Women

Here are four views of a robed woman figurine.


Robed Woman Figurine


Don’t feel as if you need to make sculptures of images that are on this page…try anything…even flowers, stuffed animals, or whatever you want to make.


Other Examples of Figurines

Here are some more examples….


More Examples of Figurines


And, there you have it….. that is how you make a Chalk Sculpture simply with a pin.  How did your Chalk Sculptures turn out?  Let me know in the comments below.  Also, take a picture of your sculptures and post them in the comments as well…. I’d love to see them.

Technorati Tags: , , , , , , , ,

How to Make a Whistling Birdie Toy

I have a fun craft for you today.  I’m going to show you how to make a Whistling Birdie Toy.  This Whistling Birdie toy is a traditional toy from Romania.  It is common to see the children of Romania playing with a Whistling Birdie toy like the one I’m going to show you how to make today.  And, believe it or not…. it will actually whistle.  And, if you add a little water to the whistling birdie it will sound like it is a real bird.  Because you will be using polymer clay you will need a little help from an adult.  So, grab the materials needed and let’s get started.

Check out our other Toy Crafts.

Laura from Dacian Moon Handmade will show you, step by step, how to make this toy.


Materials Needed

– toothpick
– a piece of polymer clay (the color you want your bird to be)
– two little tubes (I use two little pieces from a flexible straw)
– baking paper
– baking tray


Step 1

Take a small part of clay…


… and condition it by hand, simply mix it and squish it with your fingers.


Roll it into a log using your fingers, like that:


The log will look like that.


Make a circle with the roll, by pressing the ends together.


Step 2

Take a little less than half of the remaining clay, condition it by hand.


Make it a ball and flatten it.


Using your big finger press the center of the clay piece.


Place the piece on the circle, like in the picture.


Step 3

Take a half of the remaining clay, condition it …


… and make it the same.


Later we will place it on top of the other one, reverted, so it should fit there.


Step 4

Place the tubes near the edges of the top piece, taking care to get off the clay that will get on the tubes.


Step 5

Use a half of the remaining clay to cover one tube, taking care to be higher than the tube, like in the picture.


Completely cover the tube.


Use the toothpick to make a hole like in the picture (that’s the reason we need the covering to be higher than the tube)


Step 6

Use all remaining clay to cover the second straw.


Completely cover it (not on top, of course.)


Try to make it look, as much as possible, like a bird’s head with an open beak.


Step 7

Place the top on the bottom of the figure, like in the picture.


Step 8

***Now you’ll need the help of an adult.
Place the bird (with it’s piece of baking paper) on the baking tray, and bake it according to the instructions on the polymer clay package (they depend on the brand you use: fimo, cernit, sculpey…, but usually is one half of hour at 230 F or 110 C)


Step 9

Let it cool down.


Step 10

You can use paints to make the bird beautiful.  I used a toothpick and silver paint.


And… This is our bird.


You can fill it half with water…


… and whistle. Without water it will simply whistle, with water it will make sounds like real birds.


Have fun whistling with your Whistling Birdie Toy.  How did your Whistling Birdie Toy turn out?  Did you paint it differently than me?  Let me know in the comments below.  And, take a picture of your birdie too…. you can leave it in the comments as well.  I’d love to see it.

Technorati Tags: , , , , , , , , , ,

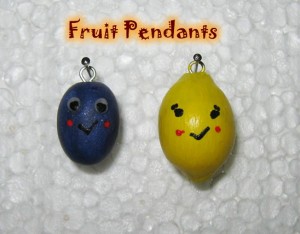
How to Make Cute Fruit Pendants

If you were looking for a super fun craft that turns out equally super cute…. then I have the craft for you today.  I’m going to show you how to make Cute Fruit Pendants.  These pendants are made from Polymer Clay, so they turn out really durable…. another words, they will last.  Add a little paint and a couple of eye pins and you have the materials needed to do this craft.  Keep in mind that the polymer clay will need to be baked, so you will need an adult for this part.  So, grab the materials needed and let’s get this craft started.

Check out our other Jewelry Crafts.

Step-by-step tutorial offered by Laura from Dacian Moon Handmade.


Materials Needed

– toothpick
– polymer clay: blue and yellow – we will make a plum and a lemon
– cutter
– acrylic paints (white, black and red/pink)
– 2 eye-pins
– baking paper
– baking tray


Step 1

Let’s start with the plum. Take the blue clay.


Condition polymer clay by hand, simply mix it and squish it with your fingers. You may want to roll it into a log between your palms, fold it in half, and then roll again.


Step 2

Make a little egg with it by rubbing it gently between your hands.


Step 3

Take one pin…


… and fix it on top of the blue egg.


Press until only the eye stays outside.


Step 4

Because we don’t bake every piece separately, we must do the lemon too. So, take the yellow clay…


… and condition it.


Step 5

Repeat the 2nd and 3rd steps: make a yellow egg…


… and place the pin on top of it.


Step 6

With three fingers squish the head.


Now it looks like a lemon.


Step 7

Place the fruits on the baking tray, and bake them according to the instructions on the polymer clay package (they depend on the brand you use: fimo, cernit, sculpey…, but usually it is one half of hour at 230 F or 110 C) – this part you need a little help from an adult.

Let them cool down.


Step 8

Use the toothpick to paint them. Add two white circles…


… then two black smaller circles to complete the eyes


Draw the mouth – make them smile.

That is the plum.


Now take the lemon…


… and paint it too. Be creative.


You can add red cheeks, for a drop of color.


Now, you can attach them to a chain or a thread or a bracelet… even to a key chain. Either way it will be super cute.  What way did you decide to display your Cute Fruit Pendants?  Let me know in the comments below.  And, take a picture of your fruit pendants and share that in the comment at well… I’d love to see how they turned out.

Technorati Tags: , , , , , , , , , ,