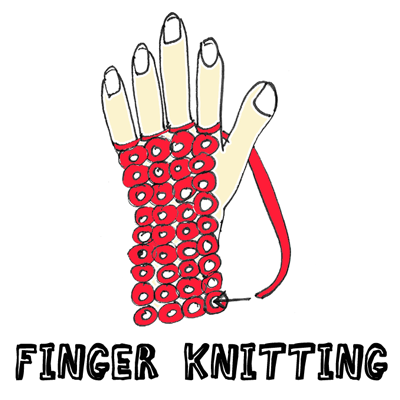
When I was a child my Grandma tried teaching me how to knit. I wanted to learn, but it was so complicated. I never did master the craft of knitting. Knitting can be a difficult thing to learn, but I am going to show you a much easier method of knitting… Finger Knitting. You are actually going to use your fingers to knit. No knitting needles need. All you are going to need is yarn and your hand. So, let’s do it.
Materials Needed
Yarn
Step 1
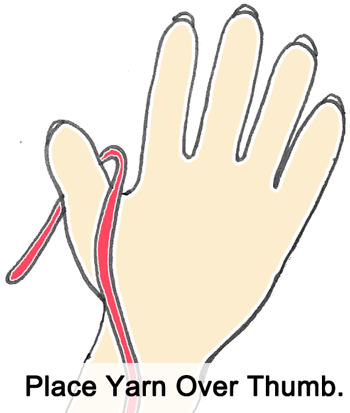
Place yarn over thumb.
[ad#ahc]
Step 2
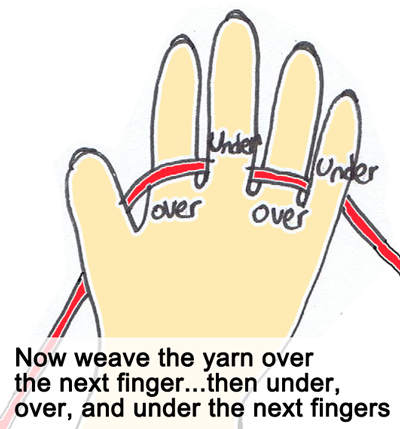
Now weave the yarn over the next finger… then under, over, and under the next fingers.
Step 3
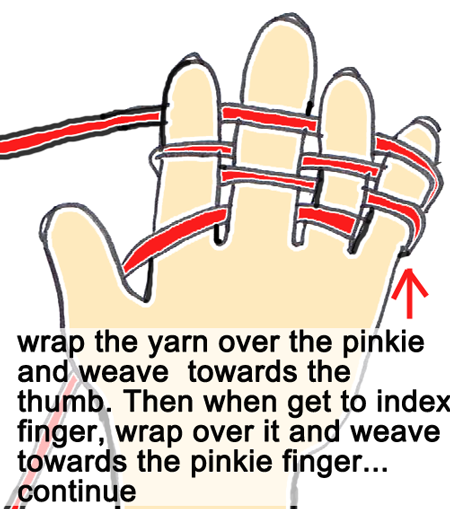
Wrap the yarn over the pinkie and weave towards the thumb. Then when get to the index finger, wrap over it and weave towards the pinkie finger… continue.
Step 4
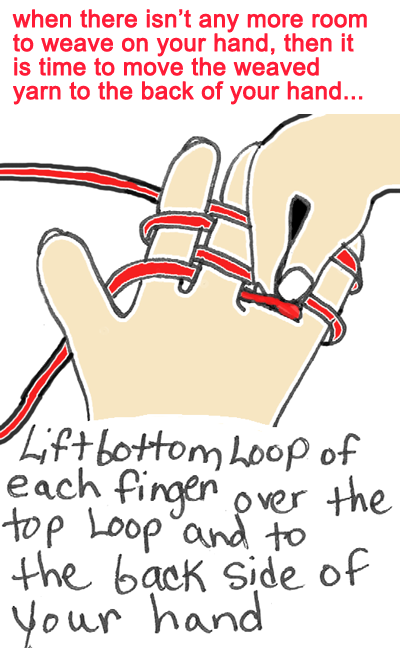
When there isn’t any more room to weave on your hand, then it is time to move the weaved yarn to the back of your hand… Lift bottom loop of each finger over the top loop and to the backside of your hand.
Step 5
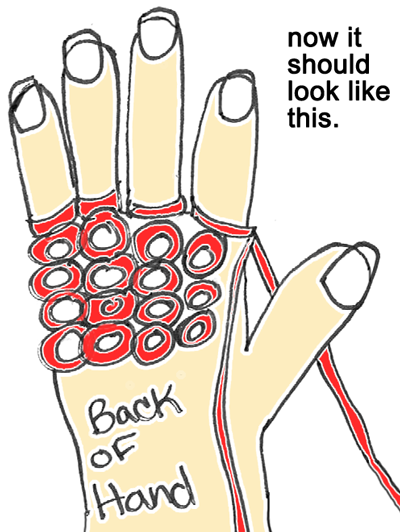
Now your knitting should look like this.
Step 6
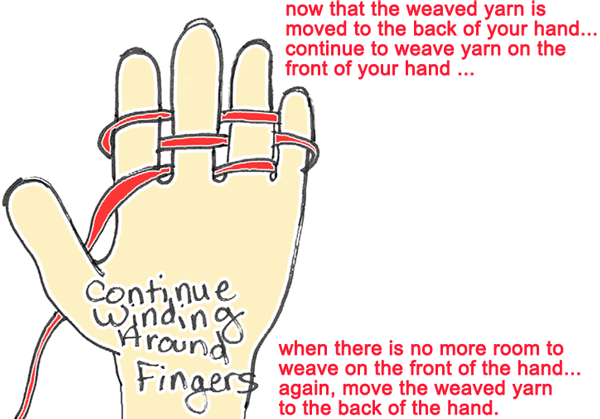
Now that the weaved yarn is moved to the back of your hand… continue to weave yarn on the front of your hand. When there is no more room to weave on the front of your hand… again, move the weaved yarn to the back of your hand.
Step 7
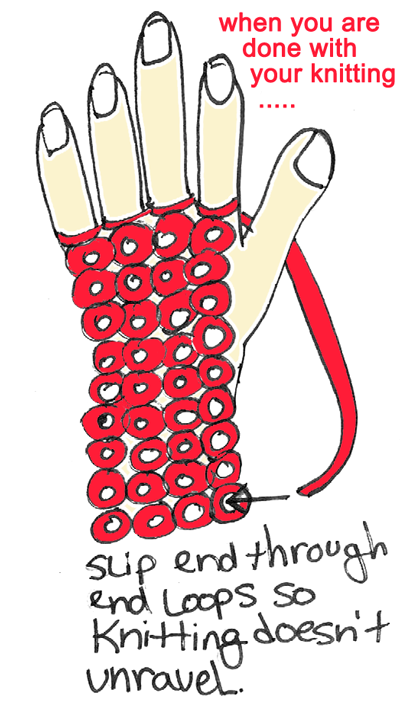
When you are done with your knitting… slip end through end loops so knitting doesn’t unravel.
And there you have it…. you just finished your first Finger Knitting craft. How did it turn out for you? Let me know in the comments below…. you can even add a picture of your Finger Knitting. I would love to see how it turned out.
Technorati Tags: knitting, finger knitting, finger knit, knitting crafts, yarn, yarn crafts, finger knitting crafts, how to knit, how to finger knitting

I loved your pics and how they describe how to finger knit. I would like to mention that you can also bind off the knit item by moving the pinky stitch to the third finger and then taking the bottom loop over the top and then move the loop from the third finger over to the second and bring that bottom loop over the top and so on until the last loop where you will bring the yarn through it and pull, cut the yarn from the ball and voila!!!