How to Make a Stand-Up Dress-Up Doll

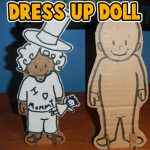
When I was a little girl I would have so much fun dressing up paper dolls.  You know…. the paper dolls you buy in a book at the store where you cut out the clothes to put on them?  I loved them.  I used to spend hours dressing up the paper dolls and changing their clothes over and over again.  Well, today I’m going to show you how to make with your children a stand-up dress-up doll.  I got the idea from a post I saw on another site ( ikatbag.com). You are going to make the doll out of cardboard… it is much stiffer and will hold up to many, many clothes changes.  Also, in this craft you will find 4 different template sheets of different accessories for your dress-up doll.  That means hours of fun for you and your children dressing up the doll.  So, grab the few materials needed and let’s get started.

Check out our other Doll Making Crafts.


How to Make a Stand-Up Dress-Up Doll


Materials Needed

Printer & Paper

Scissors

Black Marker

Cardboard

Paste or Glue (optional)

Glue Dots


Click on template images below to open and to print off.

Accessories Template 1


Accessories Template 1


Accessories Template 2


Accessories Template 2


Accessories Template 3


Accessories Template 3


Accessories Template 4


Accessories Template 4


Stand Up Dress Up Doll Template


Stand Up Dress Up Doll Template


Step 1


Print out template.  Cut it out.  Then trace it or paste it onto cardboard.


Print out template.  Cut it out.  Then trace it or paste it onto cardboard.


Step 2


Draw a face on the doll.


Draw a face with ovals for eyes.  A letter “C” for the nose.  A curved line for the smile.


Step 3


Cut around the figure.


Cut around the figure.


Step 4


 Cut two cardboard rectangles out.  Cut slits as the image shows you.


Cut two cardboard rectangles out.  Then cut the following slits out…. On one cardboard cut a slit on the top and a slit on the bottom.  On the other cardboard rectangle cut two slits on the top.


Step 5


Now put the cardboard rectangle's slits into the doll's feet slits.


Now put the cardboard rectangle’s slits into the doll’s feet slits.


Step 6


Turn doll around.  Put these two slits into each other.


Turn doll around.  Put these two slits into each other.  One rectangle has a slit on the bottom and one has a slit on the top.


It should look like this.


Like this.


Here is a different view.


Here is a different view.


Step 7


It should stand.


It should stand.


Step 8


Print out accessories.


Print out accessories.


Step 9


Cut them out.


Cut them out.


Step 10


I used glue dots to stick the clothes on the doll.


I used glue dots to stick the clothes on the doll.  They stay sticky time after time of changing clothes.


Here are some examples of how to dress up your new stand up dress up doll.

Example 1


Example 1


Example 2


Example 2


Example 3


Example 3


Example 4


Example 4


Example 5


Example 5


I bet you and your children had fun making these stand up dress up dolls….. but wait till you see the amount of fun they have dressing them up too.  They will love it.  I gave you 5 examples of ways to dress up your doll…. How many other ways can your child come up with?  Have fun!!

Technorati Tags: , , , , , , , , , , , , , , , , , ,

Cool Candy Valentine’s Day Card Ideas for Kids


Cool Candy Valentine’s Day Card Ideas for Kids


Valentine’s Day will be here before we know it.  Kids love handing out Valentine’s Day Cards…. they just love it.  Plus, they love receiving them as well.  I don’t know about you, but every year I try to help my kids come up with different Valentine Card ideas than the year before.   It gets difficult after a while to keep coming up with unique ideas.  Well, I thought I would help you with that by showing you some really cool Candy Valentine’s Day Card Ideas for Kids.  I found them all while scrounging the internet for you.  Each are unique and a ton of fun to make.  I’m sure you and your kids will find something here that they will enjoy making and giving to their friends and family.  So, let’s get started.

Check out our other Valentine’s Day Crafts.


Cool Candy Valentine’s Day Card Ideas for Kids

 (1) Now or Later Valentines Cards


Now or Later Valentines Cards


Better Homes and Gardens shows you how to combine these tasty treats with a clever written label to make a wonderful Valentine’s Day Card.  “Will You Be Mine Now or Later?”  How clever is that?!  The receivers will love it.


(2)  Dynamic Duo Valentine Cards


Dynamic Duo Valentine Cards


We’re two of a kind.   That is the saying you can use when you are putting together this tasty Valentine Card.  I found this cool candy Valentine’s Day card over at Spoonful.  They also offer some other clever sayings to use on other Valentine Cards so you don’t say the same thing to everybody.


(3)  Candy Doggy Card


Candy Doggy Card


Made with Tootsie Rolls this Candy Dog Valentine Card is sure to be a big hit in the classroom this year.  This is one of our fun crafts.  It is an easy craft and is inexpensive too…. gotta love that.  Check it out to find out how to make this Candy Doggy Card.


(4)  Candy Rings


Candy Rings


Here is a fun Candy Valentines craft that the children will love…. both the receiver and the giver.  These are Candy Rings…. perfect for Valentine’s Day.  I found this over at Kaboose.  Here they use a chenille stem per ring plus a wrapped candy.  These are so cute!!


(5)  Cupcake Goodies


Cupcake Goodies


These are simply brilliant…. and I’m sure absolutely delicious.  Made with cupcake liners and your favorite candy these are sure to be a big hit with your family and friends.  Add a special Valentine’s note to add a loving touch.  Check out this craft at Martha Stewart.


(6)  You Rock Valentines


You Rock Valentines


Show somebody how much you love them with this unique Valentines idea.  Made with Pop Rocks candy this Valentines sends out an awesome message…. that the receiver “Rocks”.  I found this Candy Valentines Card at Fiskars.  Check it out for yourself.


(7)  You Make Me Snicker


You Make Me Snicker


This Candy Valentine’s Day card is just simply adorable.  I found this craft over at Craft-O-Maniac.  Here she uses pictures of her daughter with the words, “I Like You, You Make Me Snicker!” on it.  Add a snicker candy and you have yourself a Valentine’s Card.


(8)  Valentines Critter


Valentines Critter


Here is another one of our very own Candy Valentine’s Day Cards.  It is an adorable little critter holding a yummy lollipop and a heart that reads, “Happy Valentine’s Day”.   That pretty much says it all, right?  Check out our How to Make a Valentines Critter for yourself.


(9)  Butterfly Valentines


Butterfly Valentines


This butterfly is so super cute!!  And, it is really a fun and easy Candy Valentine’s Day Card to make.  You can find the craft details at Skip To My Lou.  At that site they offer a printable template that you can print off on card stock.  Do a bit of cutting and add a lollipop.  You will be good to go.


(10)  I’ve Got a Crush on You


I've Got a Crush on You


I just love this Valentine’s Day Card idea…. I just couldn’t pass up adding it to this post.  It is not quite a Valentine Card, but it is definitely an adorable Valentine message to give to a special someone.  Use Crush soda along with a special message…. “I’ve Got a Crush on You”  They will surely love it.  Check out all the details at Design Aglow.


(11)  M&M Tic Tac Toe


M&M Tic Tac Toe


This Candy Valentine’s Day Card is really awesome.  And, it is sure to be so much fun for anyone who receives it.  I found this great Valentine idea at Shim & Sons.  Here they used 2 different color M&M’s and placed plenty in resealable bags.  They also used card stock to create the Tic Tac Toe Valentine Cards.  These are sure to be a ton of fun.


(12)  Lip & Mustache Lollipops


Lip & Mustache Lollipops


This is an awesomely clever idea.  Here Blonde Designs shows you how to use craft foam to trace some mustaches and lips.  Add them to a lollipop with a Valentine note and you have a fun Candy Valentine’s Day Card.  Watch how silly everybody looks sucking on the lollipop… they will look like they have mustaches and funny looking lips.  It is sure to get a lot of laughs.


(13)  Valentine Mice


Valentine Mice


I know what you are thinking…. when you think of Valentine’s Day you don’t think of mice.  I understand that.  But, take a look at these delicious mice made from Hershey Kisses and think again.  The receiver of this special Valentines gift will surely love it.  So much so that they probably will not want to eat it.  Check out Floral Showers for all the details.


(14)  Valentine’s Fuzzy Cake Balls


Valentine's Fuzzy Cake Balls


I found this yummy Valentine’s Day treat at Hungry Happenings and just had to share it with you.  Here they use shaved coconut to make these adorable creatures.  But, as they share with you if you do not like coconut feel free to use shaved chocolate instead.  Add a cute and loving message to your fuzzy cake ball and you have yourself the perfect Valentines.

Top photo by StuartWebster

Technorati Tags: , , , , , , , , , ,

Awesomely Cool Valentine’s Day Mailbox Craft Ideas


Awesomely Cool Valentine’s Day Mailbox Craft Ideas


Valentine’s Day is next month.  Now is the time to start getting your Valentine’s Day Mailboxes ready for February.  Valentine’s Day mailboxes are a great way to collect your Valentine’s Day cards from all your friends and family members.  I have searched the internet and found some really wonderful and awesomely cool Valentine’s Day Mailboxes.  Surely, out of all the Valentine’s Day mailbox crafts I have listed in this post you will find one that fits your needs…. plus, it promises to be tons of fun for you and the kids.

Check out our other Valentines Day Crafts.


Awesomely Cool Valentine’s Day Mailbox Craft Ideas

(1)  Valentine Stick Box


Valentine Stick Box


Here is a super cute way to hold all your Valentine’s Day cards this year.  Made from 65 skill sticks this Valentine’s Mailbox will surely be a ton of fun to make.  I found this craft over at Making Friends…. check it out for yourself.


(2)  Cardboard Box Valentine Mailbox


Cardboard Box Valentine Mailbox


Now, isn’t this Valentine Mailbox super cute?  It really is.  Spoonful shows us how to take a rectangular cardboard box and make it into something very useful…. collecting your Valentine’s Day cards.  Sounds like a lot of fun to me.


(3)  Robot Valentine’s Day Box


Robot Valentine's Day Box


Oh boy…. this Valentine Mailbox is outrageously adorable.  I found this craft at eHow and I just love the idea.  Here they use recycled materials… like shoe boxes and toilet paper rolls to make this mailbox.  Gotta love that!!


(4)  Crepe Paper Flowers Valentine Box


Crepe Paper Flowers Valentine Box


Wow…. what girl wouldn’t just love this Valentine Box.  Plus, it is so much fun to make.  Using crepe paper streamers of different shades of pink Todays Fabulous Finds shows you step-by-step how to make this beautiful Valentine Mailbox.


(5)  Valentine’s Day Suitcase Mailbox


Valentine's Day Suitcase Mailbox


Here is a unique Valentine’s Day Mailbox craft…. and it is one of ours from a previous year.  In this post we show you how to take a recycled cereal box and transform it into this functional suitcase Valentine Mailbox to hold all your cards.  Check out How to Make this Valentine’s Day Suitcase Mailbox for yourself.


(6)  Valentine’s Day Card Holder


Valentine's Day Card Holder


Here is a great way to make a Valentine’s Day card holder using a couple of plastic plates.  Plastic plates are very durable and a great way to hold all of your Valentine’s Day cards.  Plus, this craft is not only easy, but also a lot of fun to make.  Check out Free Kids Crafts for all the details.


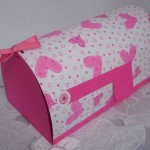
(7)  Card Stock Mailbox


Card Stock Mailbox


Wow, this mailbox is really beautiful…. and perfect for holding your Valentine’s Day cards.  Splitcoast Stampers shows you how you too can make this Card Stock Valentine Mailbox.  Check out the site to find the link to her very own template to make one for yourself.


(8)  Conversation Heart Mailbox


Conversation Heart Mailbox


Here is another Valentine Mailbox that is made from a cereal box.  I love the crafts that use recycled materials…. it just makes me feel so good.  Kaboose shows us how to make this adorable Valentine Mailbox that promises to be not only easy, but a lot of fun as well.


(9)  Paper Doily Heart Valentine Box


Paper Doily Heart Valentine Box


Here is another Valentine Mailbox that came from our site last Valentine’s Day.  Here we show you how to take some paper doilies that you can get at a dollar store or discount store and also use our printable template to make this fully functional and adorable heart mailbox.  Check out How to Make a Paper Doily Heart Valentine Box for all the craft details.


(10)  Valentine Card Holder Purse


Valentine Card Holder Purse


Okay, I know that most girls are just going to love this Valentine card holder.  Made from a half gallon ice cream container this card holder purse is simply adorable.  I found this craft over at AllCrafts.net and it is amazing.  What a great way for any little girl to hold on to her Valentine’s Day cards.


(11)  Crazy Card Carrier


Crazy Card Carrier


Here is a wonderful way to carry your Valentine’s Day cards to and from your Valentine’s Day party destination.  Made from card stock and a gift bag this Valentine’s Day Mailbox Craft is just simply adorable.  Check out Spoonful for all the fun details.


(12)  Bear Valentine Bag


Bear Valentine Bag


This bear is a cutie patootie and will surely be helpful carrying your Valentine’s Day cards back and forth.  Made from a small brown gift bag it will surely be a lot of fun to make.  The kids can use their imagination to decorate the bear bag as they wish.  Check out All Kids Network to see the craft for yourself.


(13)  Tin Valentine Boxes


Tin Valentine Boxes


Here are some Tin Valentine Mailboxes…. a craft I found at The Dating Divas.  They are super cute and perfect to have for each one of your family members to collect their Valentine’s Day cards.  Make one for each of the members in your family.  They are durable enough to use every Valentine’s Day.


(14)  Kleenex Box Valentine’s Day Mailbox


Kleenex Box Valentine's Day Mailbox


Here is another fun and easy Valentine’s Day Mailbox that you can make with your kids.  Made from an empty tissue box it is another great way to make something from recycled materials.  Education.com shows you how to make this adorable Valentine’s Day mailbox step-by-step.

Technorati Tags: , , , , , , , , , , , , ,

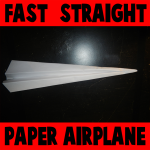
How to Make a Fast Straight Paper Airplane

I have a wonderfully fun craft for you today.  And, you only need one material for this craft…. paper.  I’m going to show you how to make a fast straight paper airplane.  It’s so much fun and it will give you hours of enjoyment well after you are finished making it.  Here I will show you step-by-step how to make this paper airplane.  Also, if you scroll down to the bottom of the steps you will see there is a video on how to make this paper airplane as well.  So, grab a piece of paper and let’s get started.

Check out our other Paper Folding Crafts.


How to Make a Fast Straight Paper Airplane


Materials Needed

Paper


Step 1


Fold a piece of paper in half the long ways.


Fold a piece of paper in half the long ways.


Fold a piece of paper in half the long ways.


Like this.


Step 2


Open the paper back up


Open the paper back up…. like this.


Step 3


Fold the top corners in towards the center.


Fold the top corners in towards the center.


Step 4


 Fold in towards center line another time.


Fold in towards center line another time.


Step 5


Fold inwards again.


Fold inwards again.


Step 6


Now fold the entire plane in half.


Now fold the entire plane in half.


Step 7


Now fold down both sides as shown above.


Now fold down both sides as shown above.


And the other side too.


And the other side too.


Step 8


There it is.  Watch the video below if you have any issues.


There it is.  Watch the video below if you have any issues.

Here is our video on How to Make a Fast Straight Paper Airplane

Technorati Tags: , , , , , , , , ,

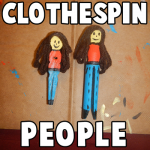
How to Make Clothespin People Figures

I have a fun craft for you today that you can make out of any kind of wooden clothespin.  In this post I’m going to show you how to make a Clothespin People Figure.  Grab a few clothespins and you can even make an entire clothespin family.  Simply use your imagination to make each figure a little bit different.  The kids will love this craft because it is so much fun and you will love how your children use their imagination to create their clothespin figures.

Check out our other Clothespin Crafts.


How to Make Clothespin People Figures


Materials Needed

Wooden Clothespin (Any Type)

Glue

Paint (Colors for Face, Clothes & Skin)

Black Paint

Paintbrush

Yarn


Step 1


Get either type of clothespin


Get either type of clothespin as above picture.


Step 2


If you have the clothespin with the metal parts take it apart like above.


If you have the clothespin with the metal parts take it apart like above.


glue the pieces like this.


And then glue the pieces like this.


If you have the above type you don't have to do anything.


If you have the above type you don’t have to do anything.


Step 3


 Paint clothes and skin.


Paint clothes and skin.


Step 4


Paint a face.


Paint a face.


Step 5


It looks good to outline shirt in black.


It looks good to outline shirt in black.


Step 6


Draw three sides of rectangle for sleeve.


Draw three sides of rectangle for sleeve.


And a circle for hand.  Color it the same color as face.


And a circle for hand.  Color it the same color as face.


Step 7


Paint details you want.


Paint details you want.


Step 8


Wind some yarn up like above.


Wind some yarn up like above.


Step 9


Wind some yarn up like above.


Glue on top of head and cut loops at bottom.

And, there you have it…. you just finished a Clothespin people figure.  Make a few more and you got yourself a Clothespin family.

Technorati Tags: , , , , , , ,

Some Really Cool Perpetual Calendar Crafts for the New Year


Some Really Cool Perpetual Calendar Crafts for the New Year


Today I am going to show you a bunch of some really cool perpetual calendar crafts perfect for the upcoming New Year.  What is great about perpetual calendars is that they can be changed to show any combination of day, month, and year….. which means that the same calendar can be used year after year after year.  Sure, you can purchase a perpetual calendar at a store or online, but I am pretty sure you would spend way too much money and they wouldn’t be as awesome as the perpetual calendars I have listed here.  I have scoured the internet to find you some really cool perpetual calendar crafts.  You will surely find one here that will fit your needs.

Check out our other New Years Crafts and Calendar Crafts.

Some Really Cool Perpetual Calendar Crafts for the New Year

(1)  Nut Can Perpetual Calendar Craft


Nut-Can-Perpetual-Calendar


This is a super cool Perpetual Calendar.  Made from a nut can this perpetual calendar is quite unique.  If you look closely at the image above this perpetual calendar even has a choice for mood.  In this case they chose nutty.  Check this craft out at Design Sponge.


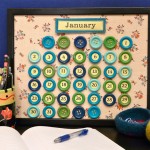
(2)  Perpetual Button Calendar


Perpetual-Button-Calendar


This perpetual calendar is super duper cute.  Make it once, and you can use it forever – just move the numbers to their correct location each month, and change the nameplate!  How fun is that?!  I found this craft over at MakeZine.  Check it out for yourself.


(3)  Paper Box Perpetual Calendar


Paper Box Perpetual Calendar


This is one of our very own perpetual calendar crafts.  Here we use some colorful templates that you glue together to make boxes.  Add some popsicle sticks and you have yourself a perpetual calendar.  Check out our Paper Box Perpetual Calendar for all the details.


(4)  Corkboard Perpetual Calendar


Corkboard Perpetual Calendar


I love the idea of this corkboard perpetual calendar.  Here they use a corkboard and foam to give this perpetual calendar a colorful look.  The corkboard is a wonderful material to use as you can easily thumbtack your notes and errands to the corkboard perpetual calendar to remind you what you need to get done.  Check out Michaels for all the craft details.


(5)  Scrapbooking Paper Perpetual Calendar 


Scrapbooking Paper Perpetual Calendar


I found this perpetual calendar craft at Our Big Earth and it is a wonderful idea.  Here they use coordinating scrapbooking paper to give this a unique look.  This is a flip chart type of calendar…. so it would be great for any desktop.  Check out the site for all the details.


(6)  Magnetic Perpetual Calendar


Magnetic Perpetual Calendar


This is actually a cookie sheet perpetual calendar.  For this craft she spray painted the cookie sheet, duct tape the edges and used playing card numbers for the days.  She also attached a dry erase board for notes and special events.  Being that everything is on magnets things can be easily moved.  Check out A Creative Princess for the info.


(7)  Colorful Perpetual Calendar


Colorful Perpetual Calendar


Look how beautiful and colorful this perpetual calendar is.   Here she uses 31 pictures to represent the days of the month…. you can cut out these pictures from scrapbooking paper or just use stickers.  I found this perpetual craft at Sandy’s Space.  Check it out for yourself.


(8)  Thrifty Box Perpetual Calendar


Thrifty Box Perpetual Calendar


Aren’t these perpetual calendars just absolutely beautiful?  No one would believe that you not only made them yourself, but also they are extremely thrifty.  I found this craft at Amazing Paper Grace.  Here she uses $1.00 boxes that she found at Michael’s.  Check out all the details on how she puts these perpetual calendars together.


(9)  Perpetual Calendar / Memo Board


Perpetual Calendar Memo Board


This is such a clever idea!!  I found this craft over at Curbly and I love it.  Here they use six steel bars painted with punchy colors, numbered magnets, plus seven days of the week and twelve months combine to make a perpetual calendar, which also serves as a memo board.  This would look amazing above anyone’s desk.


(10)  Perpetual Family Photo Calendar


Perpetual Family Photo Calendar


This is just absolutely brilliant…. and you will surely get so many compliments on this perpetual calendar.  What you might not be able to tell from the above picture is that there are 31 pictures on the twine.  You will simply flip each day/photo as the days pass.  Check out Shaken Together to see it for yourself.


(11)  Flipping Perpetual Calendar


Flipping Perpetual Calendar


I found this perpetual calendar craft at MomClick.    This is a really neat perpetual calendar because it uses the flip-chart idea.  Easily flip between day of the week, months and number days.  This perpetual calendar will look terrific on any desk.


(12)  Perpetual Chalkboard Calendar


Perpetual Chalkboard Calendar


This perpetual calendar is so awesome…. not just because it is obviously a wonderful perpetual calendar.  But, the materials to make this perpetual calendar is really thrifty.  Gotta love that!!  I found this perpetual calendar craft at I Will Craft.   Here she shows you how she made a perpetual calendar with metal flashing, game pieces and some scrabble tiles all in a framed vintage chalkboard.

Technorati Tags: , , , , , , , , , , ,

A Collection of Fun Nativity Scene Crafts for Kids


A Collection of Fun Nativity Scene Crafts for Kids


One thing you see at most houses at Christmas time is a Nativity Scene.  But, the problem with the store bought Nativity Scenes is that they are usually very delicate…. too delicate for the children to actually play with.  And, the thing about that is…. children love to play with the Nativity Scenes.  I mean, what’s not to want to touch…. there are small people, animals and a manger.  There is an entire scene for the kids to want to act out with the characters.  Well, why not make a Nativity Scene craft ….. put together a Nativity Scene of your very own that the children can actually play with.  So, today I have put together a bunch of Fun Nativity Scene Crafts that I have found around the internet.  All are a ton of fun…. and they are all meant to be played with.

Check out our other Christmas Crafts.

A Collection of Fun Nativity Scene Crafts for Kids

(1)  Pipe Cleaners & Yarn Nativity Scene


Pipe Cleaners and Yarn Nativity Scene


Here Spoonful shows us how to make an entire Nativity Scene using such materials as yarn and pipe cleaners.  She is very detailed, so this nativity craft is very enjoyable.  This Nativity Scene would look wonderful as a Christmas decoration and it surely will be so much fun to make.


(2)  Printable Nativity Scene


Printable Nativity Scene


I love this idea.  I found this Nativity Scene Craft at Catholic Icing and it is so cute.  Here you will be able to print off about 8 pages of templates.  Cut them out, decorate them and glue them to toilet paper tubes.  It’s so much fun.  check it out.


(3)  Flower Pot Nativity Scene


Flower Pot Nativity Scene


Ok, this is really cute, right?!  Suite 101 shows us how to transform 3 terra cotta flower pots (along with some other materials) into a ridiculously cute Nativity Scene.  The craft promises to be a lot of fun.  Plus, no doubt, you will be tempted to keep this Nativity Scene out year round.


(4)  Basket Nativity Scene


Basket Nativity Scene


This Nativity Scene craft is one of ours from last Christmas.   This Nativity surely will be one that you will keep for years to come.  We show you how to make each of the figures in great detail including the Three Wise Men, Baby Jesus & Cradle, Mary & Joseph, sheep and the donkey.  It’s so much fun.  Check it out for yourself.


(5)  Rock Nativity Scene


Rock Nativity Scene


Here is another super cute and original Nativity Scene Craft.  Here Roper 5 shows us how to make this fantastic Nativity Scene completely out of backyard rocks and markers.  So, no need to buy any craft materials…. you can have fun with the kids hunting in the backyard for the perfect rocks.


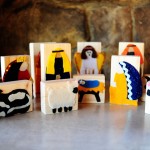
(6)  Wooden Block Nativity Scene


Wooden Block Nativity Scene


Here is an awesome Nativity Scene craft you can make with your kids with some wooden blocks, felt, glue and a few embellishments.  Imagine the fun you will have putting this craft together with your kids.  Fun part is that they are durable enough the kids can even play with this Nativity Scene.  Check out The Pioneer Woman for all the details.


(7)  Lego Nativity Scene


Lego Nativity Scene


This is such a clever idea for all you Lego fans.  Here Johan van Benthem shows us all how to make an entire Nativity Scene out of Legos.  Imagine the excitement of your kids as well as anyone who sees your Nativity Scene made completely out of Legos.  They will absolutely love it!!


(8)  Nativity Hand Puppets


Nativity Hand Puppets


What child doesn’t love hand puppets?  They all love them.  Here eHow shows us how you and your children can make these Nativity Hand Puppets for yourself.  Imagine the fun Christmas show your kids can put on with these hand puppets?  They will love using their imaginations to put on their very own program.


(9)  Nativity Blocks


Nativity Blocks


These blocks are just simply adorable.  I am a Momma – Hear Me Roar came up with this idea and I love it!!  She used homemade blocks, stickers and modge podge to make her Nativity Scene, but you can also print off Nativity Scene characters from the computer and do it that way as well.


(10)  Sun Catcher Nativity Scene


Sun Catcher Nativity Scene


Here is a clever idea by Peace Creek on the Prairie.  She uses wax paper, crayon shavings and an iron to make this beautiful Sun Catcher Nativity Scene.  Because of some of the materials used in this craft it does require some adult help.  You will have so much fun doing this Nativity Scene with your kids.


(11)  Gingerbread Nativity Scene


Gingerbread Nativity Scene


This Nativity Scene is absolutely delicious!!  Made from some of my most favorite treats this Nativity Scene craft is sure to be a big hit with the kids.  I found this craft at AOK Corral and it looks like so much fun.  You and your kids will surely enjoy putting this together.


(12)  Cardboard Tubes Nativity Scene


Cardboard Tubes Nativity Scene


Here is a simple yet fun Nativity Scene craft that all children will love putting together…. plus they can even play with this Nativity Scene once they are done.  Nurture Store shows us how to make this Nativity Scene out of toilet paper rolls.  How fun is that?!


(13)  Clothespin Nativity Scene


Clothespin Nativity Scene


This is truly a clever idea and almost all the materials used in this Nativity Scene craft can already be found in your home.  Our Dish shows us how to use a cardboard box, sharpie and a couple of clothespins (as well as a few other things) to put together this fun Nativity Scene craft.


(14)  Foam Nativity Craft


Foam Nativity Craft


Craft foam is a wonderful material that children love working with.  And, this Nativity Scene craft will be no exception.  Piggy Giggles shows us how to make a unique Nativity Scene out of craft foam.  The craft is wonderfully detailed, so believe me when I say they have covered everything.


(15)  Egg Carton Nativity Scene


Egg Carton Nativity Scene


Made from egg carton bottoms and beads this Nativity Scene is really cute.  Plus, the great thing about it is the kids will have just as much fun playing with this Nativity Scene as they had making it.  I found this craft at April Showers.  Check it out for all the craft details.

Technorati Tags: , , , , , , , , , , , , , , , ,

Fun Kwanzaa Crafts for Kids


Fun Kwanzaa Crafts for Kids


Top Image by TheBlackHour.com

Oh boy…. do I have a treat for you today.  In this post I have compiled 14 Kwanzaa crafts from around the internet.  They are all perfect for your children to make.  Whether you celebrate Kwanzaa or not these crafts are great to help teach your children about Kwanzaa and the African culture.  Many of them not only incorporate the three colors of Kwanzaa (red, green & black), but they also help teach you about the 7 Principles of Kwanzaa…. Unity, Self Determination, Collective Work & Responsibility, Collective Economics, Purpose, Creativity and Faith.   These are wonderful principles to have and to teach your children.  So, check out these Kwanzaa crafts…. you are sure to find a few to do with your children.

Fun Kwanzaa Crafts for Kids

(1)  Kwanzaa Flag Garland


Kwanzaa Flag Garland


Here is a festive Kwanzaa craft perfect to help teach your children about Kwanzaa.  Here Kaboose shows you how to make this Kwanzaa Flag Garland in great detail.  It uses the symbolic colors of the holiday… red, green and black.


(2)  Kwanzaa Greeting Card


Kwanzaa Greeting Card


Here is one of our very own Kwanzaa crafts.  In this Kwanzaa Greeting Card craft we will show you how to make a greeting card for the Holiday Kwanzaa.  It is a very easy craft, so even young children will enjoy this craft.  You simply need some paper , scissors and glue.


(3)  Kwanzaa Mobile


Kwanzaa Mobile


I found this Kwanzaa craft over at Spoonful.  Here they use the 3 colors of Kwanzaa as well as the 7 principles of Kwanzaa to make this adorable mobile.  This will make an awesome Kwanzaa decoration as well as teach your children about Kwanzaa.


(4)  Handprint Kinara


Handprint Kinara


Here is a fun craft that children of all ages will love to make.  Activity Village shows us how to take your handprint and make it into a very cute Kinara.  It’s a quick, fun and messy Kwanzaa craft for kids!  They will love it.


(5)  Doll Pin Kinara


Doll Pin Kinara


I have another fun Kinara craft for you.  This one came from Kaboose and it promises to be tons of fun.  Here they use doll pins, spools, paint and some other materials to make this festive Kinara.  Kaboose even has tons of information to teach you more about the Holiday of Kwanzaa.


(6)  Kwanzaa Placemat


Kwanzaa Placemat


Here is another entertaining Kwanzaa craft.  In this craft Making Friends shows you how to incorporate the 3 colors of Kwanzaa into this colorful placemat.  Your kids will have fun weaving strips of red, green and black craft foam into this festive Kwanzaa placemat.


(7)  Kwanzaa Bracelet


Kwanzaa Bracelet


Here is a great Kwanzaa craft that both boys and girls will love making.  I found this craft at Yahoo! Voices and it’s a good one.  Make these Kwanzaa bracelets with the colors of Kwanzaa and give them to your family and friends as gifts.  They will love it.


(8)  Bubble Wrap Corn


Bubble Wrap Corn


Kwanzaa is about the festival of the first harvest of the crops.  So, this Bubble Wrap Corn just makes sense as a craft for Kwanzaa.  Give your child all the details about Kwanzaa as you make this fun bubble wrap craft with them.  Check out No Time for Flashcards for all the details.


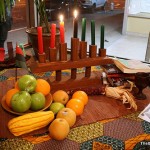
(9)  Kwanzaa Bead Candles


Kwanzaa Bead Candles


Here Spoonful shows us another wonderful Kwanzaa craft.  This time they make these cute Kwanzaa bead candles.  Here they use craft cubes, oval beads as well as other materials to make these festive candles.  This is a great way to introduce the seven principles of Kwanzaa.


(10)  Kwanzaa Flag Decoration


Kwanzaa Flag Decoration


Family Education shows us a great way to teach your children a little bit about Kwanzaa and the African culture.  Here they use different flags of Africa to make a great decoration for Kwanzaa.  As you are making these flags of Africa with your children it is a great time to teach them about Kwanzaa.


(11)  Corn Necklace


Corn Necklace


Remember Kwanzaa is the festival of the first harvest of the crops.  Corn was a very important crop.  So, this Corn Necklace craft is perfect for Kwanzaa.  Here Better Homes & Gardens explains how each ear of corn represents a child in the family.  Check out the craft for all the details.


(12)  Papier Mache Bowl


Papier Mache Bowl


Check out this gorgeous and super festive Papier Mache Bowl perfect for Kwanzaa.  I found this at Crafts Holidays site and thought it was beautiful.  Here they use Papier Mache to make this bowl…. so it is sure to be a lot of fun for the kids.  Use this bowl to hold the Mazao (or fresh fruits and vegetables) at your Kwanzaa table.


(13)  Kid-Friendly Kinara


Kid Friendly Kinara


Nick Jr. has the right idea with this Kinara Kwanzaa craft.  It is just adorable and the children will love making it.   Here they use craft sticks as well as clothespins to put this Kinara together.  They also don’t forget the colors of Kwanzaa with this Kinara.


(14)  Cardboard & Tissue Paper Kinara


Cardboard & Tissue Paper Kinara


Kids love to do crafts with tissue paper and cardboard rolls.  And, this Kwanzaa craft will be no exception.  I found this craft over at PBS and thought it was a great one to include.  Make sure to check this Kinara craft out.  Plus, they also go into great detail of the 7 Principles of  Kwanzaa…. great to teach your children.

Technorati Tags: , , , , , , , ,

How to Make a Christmas Paper Toy

I have a fun Christmas craft for even the youngest of crafters.  Today I’m going to show you how to make a Christmas Paper Toy.  With just some paper, printer, scissors and a few other materials you and your child will be able to make this cute Christmas paper toy that they will enjoy playing with…. just as much fun as they will have making the craft.  If you want, feel free to color the templates before cutting them out to add even more fun to this craft.  So, let’s get started.

Check out our other Christmas Crafts.


How to Make a Christmas Paper Toy


Materials Needed

Printer

White Paper

Green Paper

Scissors

Tape

Pen

Glue

Cereal Box


Click on the template images below to open a new page and to print.

Christmas Background Template


Christmas Background Template


Christmas Presents Template


Christmas Presents Template


Christmas Table Template


Christmas Table Template


Christmas Characters Template


Christmas Characters Template


Christmas Tree Extras Template


Christmas Tree Extras Template


Step 1


Print templates


Print Templates.


Step 2


Cut out items from template.


Cut out items from template.


Step 3


This is the background.


This is the background.


Bend both dotted lines away from you.  Crease.


Bend both dotted lines away from you.  Crease.


Now fold the next line (solid) towards you.


Now fold the next line (solid) towards you.  Crease.  Do this on both sides.


Fold both of these tabs away from you so it acts as a stand.


Fold both of these tabs away from you so it acts as a stand.


Cut slits.


Cut slits.


Fold tabs up.


Fold tabs up.


Place the paper in the slits on both sides.


Place the paper in the slits on both sides.


Step 4


 Place each character in the stands.


Place each character in the stands.


Step 5


To make the Christmas tree... get some green paper and... Fold green paper in half twice.


To make the Christmas tree… get some green paper and… Fold green paper in half twice.


Use the template to... draw half of the tree along fold.


Use the template to… draw half of the tree along fold.


Cut both trees apart between both of them.


Cut both trees apart between both of them.


Cut down center... one on top of one and one at bottom of the other.


Cut down center… one on top of one and one at bottom of the other.


Now use the slits to slide the tree together to look like the tree above.


Now use the slits to slide the tree together to look like the tree above.


Tape some seams together.  Draw on tree if you want to.


Tape some seams together.  Draw on tree if you want to.


Write family member's names on ornaments or draw a design on each one.


Write family member’s names on ornaments or draw a design on each one.


Glue both stars together and put on top of tree.  Glue ornaments on tree.


Glue both stars together and put on top of tree.  Glue ornaments on tree.


Step 6


Cut out each of the legs.


Cut out each of the legs.


Glue on cereal box cardboard.


Glue on cereal box cardboard.


Cut out and fold and crease very well.


Cut out and fold and crease very well.


Cut out cardboard long and wide enough for legs.


Cut out cardboard long and wide enough for legs.


Glue on white paper like this.


Glue on white paper like this.


Have adult cut slits in the top of the table.


Have adult cut slits in the top of the table.


Put the food tabs in the slit.


Put the food tabs in the slit.


On the bottom of table push tabs in opposite directions.


On the bottom of table push tabs in opposite directions.


Step 7


 Cut out presents.


Cut out presents.


Fold on dotted lines and cut on slits.


Fold on dotted lines and cut on slits.


Put tab in slit.


Put tab in slit.


Completed present.


Completed present.


Step 8


Finished.


Finished.

Awesome job!!  You just finished making your Christmas Paper Toy.  Have fun playing with it…. Christmas will be here in no time.

Technorati Tags: , , , , , , , , , , , , , , , ,

A Collection of Awesomely Yummy Edible Christmas Crafts


A Collection of Awesomely Yummy Edible Christmas Crafts


Crafts come in all different kinds of forms.  Today I’m going to write about Edible Crafts.  And, not just any edible crafts, but Edible Christmas Crafts.  YUMMY!!  Whether you are planning a Christmas party, Christmas decorations or just want to have fun with your kids…. Edible Christmas Crafts will be enjoyed by all.  I scoured the internet looking for yummy edible crafts and I came up with 16 awesome ones that will get your stomach growling.  So, without further ado here is a collection of awesomely yummy edible Christmas crafts for your enjoyment.

Check out our other Christmas Crafts.

A Collection of Awesomely Yummy Edible Christmas Crafts

(1)  Reese’s Peanut Butter Cup Trees


Reese's Peanut Butter Cup Trees


Ok, I love Peanut Butter Cups, so I couldn’t resist this Edible Christmas Craft.  Here Sweet Simple Stuff shows you how to take my favorite candy, Reese’s Peanut Butter Cups and transform them into these adorable Christmas Trees.


(2)  Sipping Snowman


Sipping Snowman


This edible Christmas craft is so cute!!  Busy Bee Kids Crafts shows us how to take marshmallows, white icing, chocolate chips and a straw and create an adorable Sipping Snowman that is delicious!!  It would taste so good in some hot chocolate.


(3)  Gumdrop Penguins


Gumdrop Penguins


I love these crazy pair of penguins!!  And, I bet they are delicious.  I found this edible Christmas craft over at Spoonful.  Not only will your kids love making these gumdrop penguins, but they will absolutely love eating them too.


(4)  Stained Glass Cookie Ornaments


Stained Glass Cookie Ornaments


What a yummy and clever idea.  Kaboose gives us all the details how to take store bought cookie dough and some Lifesaver hard candies and transform them into these beautiful Stained Glass Cookie Ornaments.  Sure, you could just eat the cookies, but imagine how wonderful they would look on your Christmas tree.


(5)  Gingerbread Star Tree


Gingerbread Star Tree


I love how beautiful this Gingerbread Cookie Christmas Tree looks.  But, imagine how your guests at your Christmas party will enjoy this.  They can simply grab a cookie off the tree and nibble on it while they chat with the guests.  How fun!!  Check out Taste of Home for the details.


(6)  Holiday Garland


Holiday Garland


Oh this garland looks so beautiful!!  I love how the colors of the red cranberries contrast against the white popcorn.  It’s just wonderful.  Craft Elf shows you how you too can do this.  This edible Christmas craft takes you back to a simpler time.  And, it makes the Christmas tree just absolutely gorgeous.


(7)  Holiday Fiesta Spread


Holiday Fiesta Spread


I’ve actually had this at a Christmas party before and it is absolutely delicious.  And, it is so cute.  Kraft will show you in great detail how to make this edible Christmas craft for your guests.    This fiesta spread is decorated like a Christmas tree…. so colorful too.


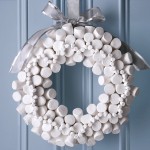
(8)  Marshmallow Wreath


Marshmallow Wreath


Who would have thought marshmallows could look this beautiful as a wreath?  But, it truly does.  It reminds me of a Winter Wonderland.  I found this beautiful wreath at Three Pugs & a Baby.  She explains how the Marshmallow Wreath only takes about 30 minutes.  Can you imagine creating this beautiful wreath in just a half hour?  How wonderful.


(9)  Snowmen Treats


Snowmen Treats


Better Homes & Gardens shows us how to take Hostess Snowballs and transform them into these cutie-patootie Snowmen Treats.  What child wouldn’t love eating this snowmen?  They are just precious…. and I bet absolutely delicious too.


(10)  Gumdrop Wreath


Gumdrop Wreath


I love, love, love the beautiful colors of this wreath.  And, I would imagine the people at your front door will too.  A Pretty Cool Life shows you how to make this beautiful Christmas Wreath in great detail.  If you aren’t crazy about all the colors…. you can even just make a green and red wreath or any color wreath you choose.


(11)  Rudolph the Red Nosed Rein-Pear


Rudolf the Red Nosed Rein Pear


The Lead Chandelier created this adorable Rudolph the Reindeer out of a pear…. hence the name Rudolph the Red Nosed Rein-Pear.  I love the idea!!  It is super cute and the kids will love making it along with you.  Use it as a yummy Christmas decoration.


(12)  Holiday Tree Brownies


Christmas Tree Brownies


Oh these are so festive!!  And, I bet delicious too.  Betty Crocker Recipes gives you all the yummy details on this edible Christmas craft.  I love the miniature candy canes that are stuck into the brownie as a tree stand… it’s just so creative.


(13)  Donut Christmas Tree


Donut Christmas Tree


I know this Donut Tree was used at a Halloween party.  But, I was thinking…. imagine how wonderful this tree would be if it was white powered donuts!!  It would be perfect as a Donut Christmas Tree for a Christmas Party.  Check out One Charming Party for all the details.


(14)  Krispie Treat Christmas Tree


Krispie Treat Christmas Tree


Oh my kids would love this!!  After all, they love Krispie Treats.  Here Cookies & Cups takes some green food coloring and transforms ordinary looking Krispie Treats into a beautiful green Christmas tree.  Add some M&M’s and imagination and your Holiday Christmas tree is born.


(15)  Strawberry Christmas Tree Brownies


Strawberry Christmas Tree Brownies


These adorable bite-size brownies look so tasty…. and so festive too!!  I would have no doubt that they would be a huge hit at any Christmas party.  Erica’s Sweet Tooth shows you how you too can make this yummy edible Christmas craft for yourself.


(16)  Tortilla Christmas Tree


Tortilla Christmas Tree


If you are looking for something yummy and festive to serve your guests at your Christmas party that isn’t sweet…. this is the edible Christmas craft for you.  Better Homes & Gardens shows you how to take mini-wraps or tortillas and create a Christmas Tree.  Let the guests at your party pick at the tree until it’s gone.  Yummy!!

Technorati Tags: , , , , , , , , , , , ,

A Collection of Hanukkah Menorah Crafts


A Collection of Hanukkah Menorah Crafts


Hanukkah is just days away.  And, with the beginning of Hanukkah comes the lighting of the candles.  How about making a unique and creative Menorah yourself?  Don’t think you can?  Well, take a look at the following 15 Hanukkah Menorah Crafts I found on the internet.  All are amazing and you are sure to love them all.  Some are easier than others, but surely you can find one that will meet your needs…. and you will enjoy making them yourself no doubt.

Check out our other Hanukkah Crafts.

A Collection of Hanukkah Menorah Crafts

(1)  Styrofoam Hanukkah Menorah Craft


Styrofoam-Menorah-Craft


This is a super cute craft.  It’s made from Styrofoam and some birthday candles.   It’s a whole lot of fun and it’s not difficult to make at all.  I found this craft over at All Kids Network and it is definitely worth checking out.


(2)  Plastic Toy Menorah


Plastic Toy Menorah


Isn’t this Hanukkah Menorah craft adorable?!  It really is.  I found this craft over at Aunt Peaches and I just love it.  Here she shows you how to take a toy, some clay, paint and glitter and presto you can make a super cute Hanukkah Menorah.


(3)  Plaster of Paris Hanukkah Menorah 


Plaster of Paris Hanukkah Menorah


Here with this creative Hanukkah Menorah craft you will be making 9 individual candle holders.  You and your children will be able to arrange them any way you would like to celebrate the 8 nights of Hanukkah.  Check out Kveller for all the craft details.


(4)  Birthday Candle Menorah


Birthday Candle Menorah


This might look like you are celebrating a child’s birthday that is turning 9, but it’s not.  This is a Birthday Candle Hanukkah Menorah.  Made from Birthday candles, clay and paint you and your kids will have a blast making this Hanukkah Menorah.  I found this craft over at Activity Village.  Make sure to check it out for yourself.


(5)  Tot Friendly Hanukkah Menorah


Tot Friendly Hanukkah Menorah


Here is a kid-friendly Menorah that everyone in the family will enjoy making… and lighting.  Instructables shows you how to take a few recycled materials, some Mod Podge and LED tea lights and make your very own tot friendly Hanukkah Menorah for your home.  Check it out.


(6)  Handprint Menorah


Handprint Menorah


Well, I know this isn’t exactly a Hanukkah Menorah you can light…. but it is a super fun Menorah craft for the youngest of Crafters.  This is one of our very own Menorah crafts and the kids love it.  Simply made from paint and your child’s hands your little one will love making this Handprint Menorah.


(7)  Baby Food Jar Menorah


Baby Food Jar Menorah


Here is a unique spin on the traditional Hanukkah Menorah.  Aparently Speaking shows us how to take some baby food jars and make them into a beautiful Hanukkah Menorah.  I love the way this Menorah looks.  Check out her site for all the craft details.


(8)  Glass Bottle Menorah


Glass Bottle Menorah


I love this Hanukkah Menorah craft.  I just love how natural and clean the white bottle look against the blue candles.  This is an easy craft that is sure to be a lot of fun.  Ready Made shows you how to get this same Menorah look for yourself in great detail.


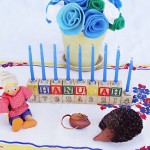
(9)  Alphabet Blocks Menorah Craft


Alphabet Blocks Menorah Craft


If you have little ones at home you surely have some alphabet blocks.  Your kids will get a kick out of this Hanukkah Menorah Craft.  Here Creative Jewish Mom shows you how to take ordinary alphabet blocks and transform them into this creative Hanukkah Menorah.


(10)  Wood Menorah


Wood Menorah Craft


I love this creative Menorah Craft.  It’s so colorful and just makes me happy to look at it.  I found this Menorah craft at Better Homes & Gardens.  Here they use different sized wooden beads and spools to create the individualized candlesticks used for this Menorah.  Check it out for yourself.


(11)  Cookie Menorah


Cookie Menorah


Here is a tasty Menorah you are sure to love.  Using a lollipop stick attached to the cookies you are able to attach them to a Menorah.  This Hanukkah Menorah craft looks beautiful finished and added as a centerpiece to any table.  Go to Sweet Designs to check it out.


(12)  Spool Menorah


Spool Menorah


This is a cool idea.  Here Parents explains how you can make this adorable and colorful Hanukkah Menorah for yourself.  Made from spools, colored pencils and yellow erasers (and some other materials) you can create this same look for yourself.  And, there is no flame…. so this Menorah your child can touch.


(13)  Macaroni Menorah


Macaroni Menorah Craft


I love macaroni crafts…. and so do kids.  Here is a Hanukkah Menorah Macaroni craft.  Free Kids Crafts shows you how you can take macaroni and lentils and make a festive Menorah.  Hang it up proudly during Hanukkah for all to see.  You can even talk about the Festival of Lights while doing this craft.


(14)  Sparkly Hanukkah Menorah


Sparkly Hanukkah Menorah Craft


Here is a fun Hanukkah Menorah craft that you and your kids are sure to love.  Upper West Side Mom shows us how to take a block of wood, hex nuts and some other materials and create these elegant looking Menorahs.  Check out the site for all the craft details.


(15)  Manzanita Branch Hanukkah Menorah


Manzanita Branch Hanukkah Menorah


How beautiful is this Hanukkah Menorah?  So beautiful.  And, Martha Stewart shows us how you too can have this Manzanita Branch Hanukkah Menorah.  I love how this Menorah looks as a centerpiece at the table.  It’s breathtaking.

Technorati Tags: , , , , , , , , , , , , ,

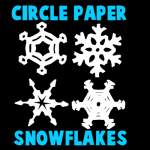
How to Make Circle Paper Snowflakes – 4 Patterns

When you think of winter what do you think of?  I know what I think of….. snow.  Today I’m going to show you how to make circle paper snowflakes.  And, not just one type…. I will show you four different patterns.   These snowflakes are a lot of fun to make.  But, what is really cool about paper snowflakes…. they look great as winter decorations around your house.  Put them up in your windows to add to your Winter Holiday decorations.  So, let’s get started.

Check out our other Winter crafts.


How to Make Circle Paper Snowflakes - 4 Patterns


Materials Needed

Lid or Bowl

Paper

Pencil

Scissors


Step 1


Trace a lid or a bowl to make a perfect circle.


Trace a lid or a bowl to make a perfect circle.


Step 2


Fold circle in half.


Fold circle in half.


Step 3


Fold in half again.


Fold in half again.


Step 4

Draw a pattern.  Here are 4 pattern ideas….


Pattern 1


Pattern 1


Pattern 2


Pattern 2


Pattern 3


Pattern 3


Pattern 4


Pattern 4


Step 5


Cut out patterns and open up.


Cut out patterns and open up.

Aren’t these snowflakes great?!  And, you don’t have to limit yourself to the patterns we are showing you here.  Feel free to use your imagination and create some of your very own unique snowflakes.

Technorati Tags: , , , , , , , , , , , , , ,

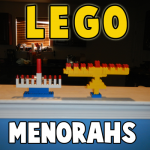
Ideas for Making a Lego Hanukkah Menorah

Ideas for Making a Lego Hanukkah Menorah

My Nephew loves playing with Legos.  He is so amazing at making just about anything out of Legos.  Well, with Hanukkah coming up very shortly he thought it would be a terrific idea to make a couple of Hanukkah Menorahs out of Legos.  I’m hoping you can take a look at these Lego Menorahs and give them a try for yourself.  Or better yet…. make up one of your very own and share them in the comments below.  You can even take a picture of your Menorah and share that with us as well.  So, below you will find my Nephew’s Lego Menorahs as well as a few others I found around the internet.

Check out our other Hanukkah Crafts.


Ideas for Making a Lego Hanukkah Menorah

My Nephew’s Lego Hanukkah Menorahs


Lego Menorah 2


Aren’t these both awesome Lego Hanukkah Menorahs?  They really are.  Now, let’s look at a few from around the web.


 Happy Hanukkah Menorah


Happy Hanukkah Menorah


Wow, this Lego Hanukkah Menorah is pretty amazing…. it is taller than she is.  I found this Lego Menorah over at Gadgets.


Candle Lit Hanukkah Menorah


Candle Lit Menorah


Here is a Lego Menorah I found over at ChabadHamilton.com.  Here they use real candles in the Lego Menorah.  I’m not real fond of this idea as legos aren’t meant to hold candles…. so please don’t try doing that at home.


Colorful Lego Hanukkah Menorah


Colorful Lego Menorah


Here is a super colorful Lego Hanukkah Menorah.  I found this Lego Menorah over at The Crumb Factory.  She was on entertainment duty and made the Menorah with her kids.


 Happy Face Lego Hanukkah Menorah


Happy Face Lego Hanukkah Menorah


Doesn’t it look like there is a “happy face” in the middle of the Menorah?  It looks that way to me.  I found this Lego Menorah over at Rony Pony.  I like the ideas here because not only did she make a Menorah, the kids did too.  Go to the site to check out the other Menorahs.


Dragon Flames Lego Hanukkah Menorah


Dragon Flames Lego Hanukkah Menorah


Here one clever lego maker used dragon flames to create a flamed Menorah look.  I love it.  I found this unique idea over at Bible Belt Balabusta.  It is really cool looking, but looks pretty easy to make.  You should make one too.


9-Foot Lego Hanukkah Menorah


9 Foot Lego Hanukkah Menorah


Here is one mammoth size Menorah…. and it made completely out of legos.  It was built by children at the Ocean County Mall.  It is amazing.  Not sure you have enough legos to make this, but I still think you should check it out at Chabad Jewish Center’s website.

Technorati Tags: , , , , , , , , , , , , , , , ,

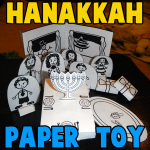
How to Make a Hanukkah Dinner Paper Craft Toy

Hanukkah will be here before you know it.  After all, Hanukkah begins on the evening of December 8th.  Today I will show you how to make a craft that is perfect for Hanukkah.  I’m going to show you how to make a Hanukkah Dinner Paper Craft Toy that any child will enjoy playing with.  Your children will enjoy cutting out all the characters and images from the template…. folding them and gluing them together.  Even the youngest of crafters will enjoy this craft…. with just a little help from an adult.  So, let’s get started.

Note to everyone…I know in the picture the menorah only has 7 candles…I used the wrong type of menorah. A Hanukkah menorah has 9 candles…I updated it in the template. Thank you!

Check out our other Hanukkah Crafts.


How to Make a Hanukkah Dinner Paper Craft Toy


Materials Needed

Printer & Paper

Scissors

Glue


Click on template images below to open a new window and to print off.

Hanukkah Paper Characters Template


Hanukkah Paper Characters Template


Hanukkah Presents Template


Hanukkah Presents Template


Hanukkah Room Template


Hanukkah Room Template


Hanukkah Table & Menorah Template


Step 1


 Print out templates.


Print out templates.


Step 2


Fold the background scene.


Fold the background scene.


Step 3


Cut out characters and rectangles.


Cut out characters and rectangles.


Cut slits.


Cut slits.


Fold tabs up.


Fold tabs up.


Put a character in the slits... This is a stand for the character.


Put a character in the slits… This is a stand for the character.


Step 4


Cut out table, rug and menorah.


Cut out table, rug and menorah.


Fold on dotted lines.  Cut on slits.


Fold on dotted lines.  Cut on slits.


Glue together.


Glue together.


Step 5


Fold and glue together bottom of table.


Fold and glue together bottom of table.


Here it is from the side.


Here it is from the side.


Have an adult cut a slit in middle of table.


Have an adult cut a slit in middle of table.


Place menorah in the slit.


Place menorah in the slit.


Bend one tab forward and one tab back.


Bend one tab forward and one tab back.


Now the menorah should stand up.


Now the menorah should stand up.


Step 6


Cut out presents.


Cut out presents.


Fold on dotted lines and cut on slits.


Fold on dotted lines and cut on slits.


Put tab in slit.


Put tab in slit.


Completed present.


Completed present.


Step 7


Completed present.


Finished paper toy.

And there you have it…. you just made a Hanukkah Dinner Paper Craft Toy.  Enjoy it.

Technorati Tags: , , , , , , , , , , , , , ,

How to Make a Pop-Up Hanukkah Dreidel Greeting Card

Now is the time to start to get your Holiday greeting cards ready to be given out.  Well, today I’m going to show you how to make a Pop-Up Hanukkah Dreidel Greeting Card.  Anyone who receives this Hanukkah greeting card will love the 3D look of this card.  With some simple paper, scissors and some markers for decorating you too can make this Hanukkah Dreidel Greeting Card.  Your kids will love making this pop-up card.  Plus, they will be preparing a special card for someone they love…. they will truly get a kick out of that.

Check out our other Hanukkah Crafts.


How to Make a Pop-Up Hanukkah Dreidel Greeting Card


Materials Needed

Piece of Paper

Colorful Piece of Paper

Scissors

Markers, Crayons or Colored Pencils to Decorate Card


Step 1


Get a piece of paper.


Get a piece of paper.


Step 2


Fold in half.


Fold in half.


Step 3


Cut slits on fold.


Cut slits on fold.


Step 4


Open up page.


Open up page.


Step 5


Fold this part in.... the other direction.


Fold this part in…. the other direction.


Step 6


Now turn card in this direction.


Now turn card in this direction.


Cut down in a V shape, but don't cut all the way!


Cut down in a V shape, but don’t cut all the way!!!


Step 7


Fold right here upwards to make a crease.


Fold right here upwards to make a crease.


Step 8


Bring top part of card down on this square


Bring top part of card down on this square (not bottom of card).


Cut 2 slits.  As you can see... You are NOT cutting bottom of card as seen here.


Cut 2 slits.  As you can see… You are NOT cutting bottom of card as seen here.


 Step 9


Fold this part in opposite direction.


Fold this part in opposite direction.


Step 10


Make a crease here.


Make a crease here.


Step 11


Glue down the outer edges of white paper onto colorful paper


Glue down the outer edges of white paper onto colorful paper (the side that doesn’t pop out).


It should look like this.


Like this.


Step 12


Decorate the card.


Decorate the card.

Anyone who receives this Hanukkah card will love it!!  I love the 3D look of this greeting card…. as will the receiver.

Technorati Tags: , , , , , , , , , , , , ,

How to Make a Magnetic Hanukkah Menorah

Hanukkah begins on the night of December 8th.  Which means it is coming really quickly.  Today I’m going to show you how to make a Magnetic Hanukkah Menorah.  This menorah is perfect for your children’s room, so they can light their own menorah.  Or, if you have cats or toddlers in your house this menorah is perfect for you…. no need to worry about anyone knocking over the menorah and starting a fire.  Light it every night of Hanukkah…. 8 wonderful nights.

Check out our other Hanukkah Crafts.


How to Make a Magnetic Hanukkah Menorah


Materials Needed

Printable Magnetic Sheet

Printer

Scissors

Fridge or Metal Door


Click on the template image below to open up a new window and to print.


Magnetic Hanukkah Menorah Template


Step 1


Print out the template on a magnetic sheet.


Print out the template on a magnetic sheet.


Step 2


Cut out the menorah and the flames.


Cut out the menorah and the flames.


Step 3


Place on fridge or a door.


Place on fridge or a door.  Light the candle everyday.  Great for houses with cats or toddlers… No worries about knocked over lit candles.


Step 4


Until all the candles are lit.


Until all the candles are lit.

And there you have it.  That’s all you have to do to make a magnetic Hanukkah menorah.  Perfect for celebrating Hanukkah every night for 8 nights.

Technorati Tags: , , , , , , , , , , , , , ,