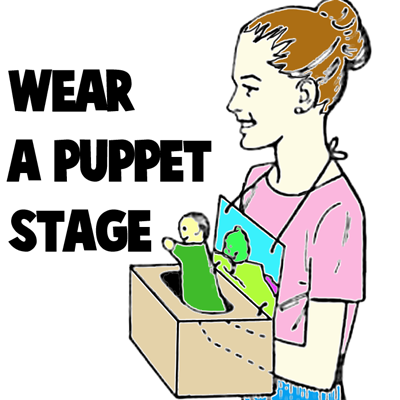
Oh boy…. do I have a fun craft for you today!! In this post I’m going to show you how to make a Wearable Puppet Stage. Kids love putting on puppet shows. Well, why not wear a puppet stage? It just makes sense…. carry this puppet stage on your chest and you are all ready to put on a puppet show for your family and friends. Keep in mind you will need a bit of help from an adult with the cutting of the box. So, grab the materials needed and let’s get started.
Check out our other Puppet Crafts.
Materials Needed
One cardboard box approximately 7″x9″x16″ with all flaps intact (small appliance boxes are good)
scissors
2 lengths woven nylon or cotton rope or clothesline 36″ long
large staples and stapler or glue
paint or something to decorate the box with
Step 1
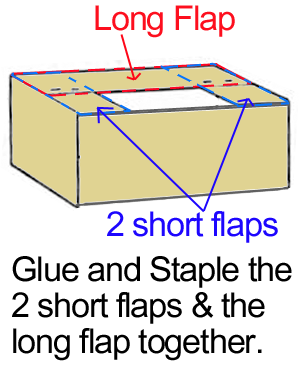
Cut one flap off one long side of the box. Cut flaps on short sides in half, as seen in above sketch.
[ad#ahc]
Step 2
Staple or glue half flaps and remaining long flap together.
Step 3
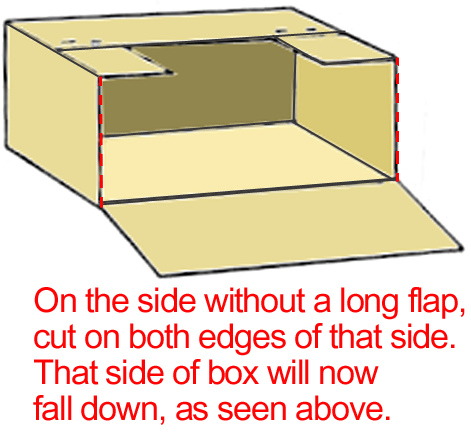
Cut side (with flap removed) down at both corners and fold down as in above illustration.
Step 4
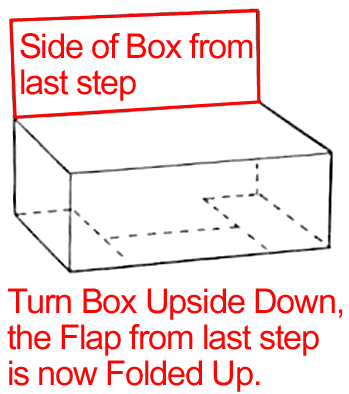
Turn box upside down so the hole is now on the bottom.
Step 5
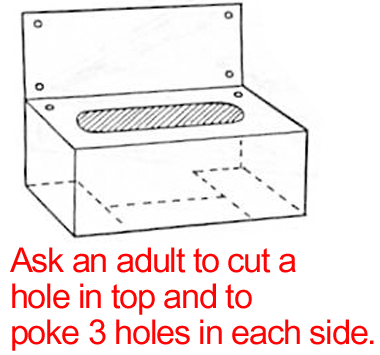
Ask an adult to help you cut an opening that is about 4 1/2″ wide and 10″ or 11″ long. Also ask an adult to punch 3 holes in each side, as seen in picture.
Step 6
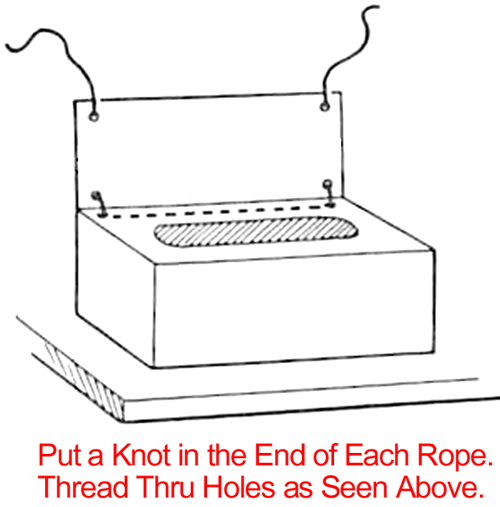
Tie a knot in one end of each piece of rope. Put rope through the 3 holes as in sketch above.
Step 7
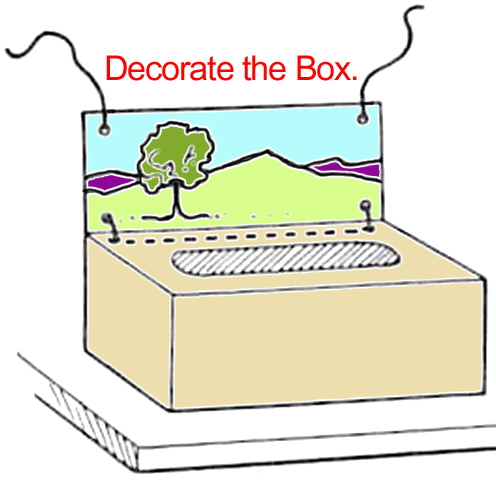
Draw a Background on the back panel … as seen in the picture.
Optionally, you can Cover outside of puppet stage with adhesive plastic, paint it, cover it with colorful duct tape, cover with wall paper, or just leave it as is.
Step 8
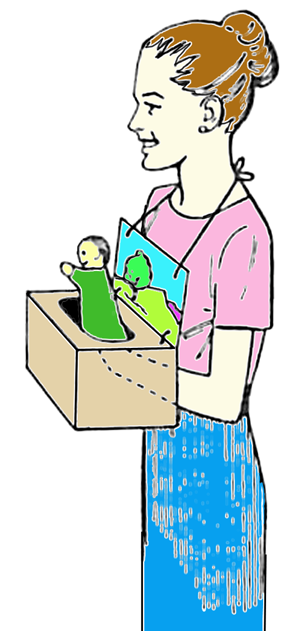
Now you can Wear puppet stage as in above illustration. Or you can optionally set it on the table. This is a fun way to put on a puppet show!
Technorati Tags: puppet crafts, puppet activities, puppet crafts for kids, puppet activities for kids, cardboard box crafts, cardboard box activities, puppet stage, puppet stage crafts, kids crafts, kids activities


Leave a comment