How to Make Abe Lincoln Finger Puppets for Presidents Day

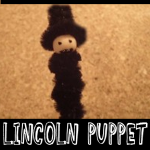
It is February which means that it is time for Presidents Day again. How about celebrating this great holiday with an Abe Lincoln Finger Puppet? Laura from Dacian Moon Handmade  will show you today how to make a Lincoln puppet out of pipe cleaners.

How to Make Abe Lincoln Finger Puppets for Presidents Day


How to Make Abe Lincoln Finger Puppets for Presidents Day


CRAFTS MATERIALS NEEDED:

– black pipe cleaner
– wooden bead (~1 cm diameter)
– instant glue
– scissors
– 2 toothpicks
– black and red paints


IMG_4060


Step 1.

Glue the wooden bead on top of one toothpick – this will be the head.

Start wrapping the pipe cleaner around the toothpick.


IMG_4061


You stop when you go over the middle. Cut the extra pipe cleaner.


IMG_4062


Like this.


IMG_4063


Step 2.

Make a spiral of pipe cleaner…


IMG_4064


Like this.


IMG_4065


Expand bottom to form the hat.


IMG_4066


Step 3. 

Apply glue on the head…


IMG_4067


… and quickly fix the hat there. (Quickly because we use instant glue)


IMG_4068


Step 4.

Use paints to add a beard…


IMG_4069


… eyes …


IMG_4070


… nose and hair.

Your puppet is ready 😀


IMG_4072


I hope that you enjoyed making this finger puppet for Presidents Day. Come back for more crafts.

Technorati Tags: , , , , , ,

How to Make a Mini Puppet Theater with a Matches Box

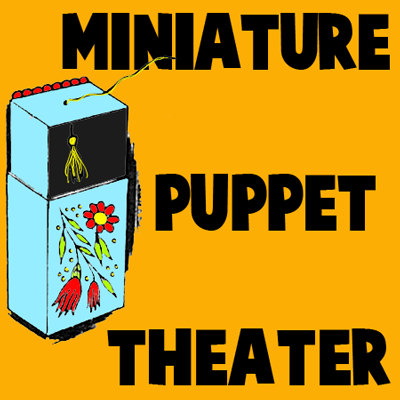
I be you will want this miniature puppet playhouse and its tiny dancing puppet for a pocket toy or to use  in your doll houses. This is a mini yarn puppet that is controlled with a matches box puppet theater. Find out how to make this little mini toy below.


How to Make a Mini Puppet Theater with a Matches Box


CRAFTS MATERIALS NEEDED:

Sliding drawer matches box

Scissors

Nail

Black paint or ink

Black thread

Paints  & brush

Colored yarn

Screw eye

How to Make These Miniature Puppet Shows

Step 1


Remove the sliding drawer from the matchbox.


Remove the sliding drawer from the matchbox. Paint the inside of the drawer with black paint or ink and allow it to dry thoroughly. Paint the outside of the drawer and the matchbox cover with a neutral color paint, and allow them to dry thoroughly.


Step 2


make the dancing puppet


To make the dancing puppet, cut several 2-inch pieces of colored yarn. Fold the yarn over the head of an ordinary screw eye, and wind a piece of black thread under the head to make the neck.

Step 3


Tie a short piece of black thread to the top of the puppet's head to make the control-thread.


Tie a short piece of black thread to the top of the puppet’s head to make the control-thread.

Step 4


Slip the end of the control-thread attached to the puppet through the hole.


With a nail, punch a small hole in the center of one of the short ends of the sliding drawer. Slip the end of the control-thread attached to the puppet through the hole. Replace the sliding drawer in the matchbox cover so that the control-thread is at the top, and the puppet is in the drawer.

Step 5

Decorate the front of the puppet playhouse with paints or wax crayons. To make the puppet perform, slide the drawer about halfway out of the cover and pull the control-thread up and down. If you want to make a larger playhouse for more puppets, use a kitchen size matchbox with a sliding drawer, and make 2 or 3 yarn puppets the same way.

Technorati Tags: , , , , , , ,

Puppets for Thumb wrestling: Father’s Day Gift

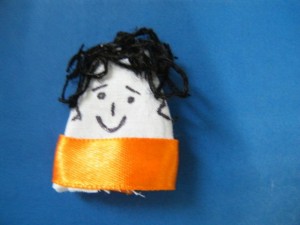
Here’s a Father’s day gift that guarantees hours of fun. Make a set of thumb puppets for your dad and yourself, and play thumb wrestling. The simple illustrated instructions to make the thumb puppets follow:


Craft materials required:

-White fabric

-black yarn

-ribbon

-scissors

-needle and thread

-fabric glue

-Permanent marker


Step 1:

Cut out a piece of cloth double the length of your thumb and about an inch wider than the width of your thumb.


Step 2:

Fold it into half and stitch along the two sides as shown.


Step 3:

Fold it inside out as shown:


Step 4:

Glue small pieces of yarn to make hair


Step 5:

Glue a strip of ribbon along the bottom as shown


Step 6:

Add facial features with a marker.


Make another one for your dad in the same way. Make sure its big enough for your dad’s thumb. Your dad is sure to enjoy this Father’s day gift.

Technorati Tags: , , , , , , , , , ,

How to Make a Wearable Puppet Stage

Oh boy…. do I have a fun craft for you today!!  In this post I’m going to show you how to make a Wearable Puppet Stage.  Kids love putting on puppet shows.  Well, why not wear a puppet stage?  It just makes sense…. carry this puppet stage on your chest and you are all ready to put on a puppet show for your family and friends.  Keep in mind you will need a bit of help from an adult with the cutting of the box.  So, grab the materials needed and let’s get started.

Check out our other Puppet Crafts.


How to Make a Wearable Puppet Stage


Materials Needed

One cardboard box approximately 7″x9″x16″ with all flaps intact (small appliance boxes are good)

scissors

2 lengths woven nylon or cotton rope or clothesline 36″ long

large staples and stapler or glue

paint or something to decorate the box with


Step 1


Cut one flap off one long side of the box.


Cut one flap off one long side of the box. Cut flaps on short sides in half, as seen in above sketch.


Step 2


Staple or glue half flaps and remaining long flap together.


Staple or glue half flaps and remaining long flap together.


Step 3


Cut side (with flap removed)  down at both corners and fold down as in above illustration.


Cut side (with flap removed) down at both corners and fold down as in above illustration.


Step 4


Turn box upside down so the hole is now on the bottom.


Turn box upside down so the hole is now on the bottom.


Step 5


Ask an adult to help you cut an opening


Ask an adult to help you cut an opening that is about 4 1/2″ wide and 10″ or 11″ long. Also ask an adult to punch 3 holes in each side, as seen in picture.


Step 6


Tie a knot in one end of each piece of rope. Put rope through the 3 holes as in sketch above.


Tie a knot in one end of each piece of rope. Put rope through the 3 holes as in sketch above.


Step 7


Draw a Background on the back panel ... as seen in the picture.


Draw a Background on the back panel … as seen in the picture.

Optionally, you can Cover outside of puppet stage with adhesive plastic, paint it, cover it with colorful duct tape, cover with wall paper, or just leave it as is.


Step 8


Now you can Wear puppet stage as in above illustration.


Now you can Wear puppet stage as in above illustration. Or you can optionally set it on the table. This is a fun way to put on a puppet show!

Technorati Tags: , , , , , , , , ,

How to Make a Paper Bag Bunny Puppet

I have a fun and creative craft for you today.  I am going to show you how to take a paper bag and make it into a bunny puppet.  Sounds like fun, right?  It really is.  And, the timing of it couldn’t be any more perfect.  After all, Easter is in just a few weeks.  Made with string or yarn the arms and legs of the puppet actually move.  When you aren’t using it as a puppet hang the Paper Bag Bunny up as an Easter decoration.  People are sure to love it when they see it.  So, let’s get started.

Check out our other Easter Crafts and Puppet Crafts.


How to Make a Paper Bag Bunny Puppet


Materials Needed

Paper Bag

Newspaper

String or Yarn

Several Sheets of Paper

Scissors

Glue

Pencil


Step 1


Wad up several sheets of newspaper and put in paper bag until 3/4 full.


Wad up several sheets of newspaper and put in paper bag until 3/4 full.


Step 2


Close the open end of bag with string or yarn.


Close the open end of bag with string or yarn.


Step 3


Cut 8 strips of paper each approximately 3/4 inch by 18 inches long.


Cut 8 strips of paper each approximately 3/4 inch by 18 inches long.


Step 4


Glue ends of 2 strips of paper together at right angle


Glue ends of 2 strips of paper together at right angle (so it looks like a letter L).


Step 5


Keep folding each strip over the other strip until entire strips are used.


I colored each strip a different color to help you visualize how to fold these.  1)  did #1 in last step.  2)  fold blue strip over and crease.  3)  fold red strip over and crease.  4)  fold blue strip down and crease.  Keep folding each strip over the other strip until entire strips are used.  Glue last fold together.


Step 6


You will need 4 all together.


Now you have a springy arm or leg.  You will need 4 all together.


Step 7


Draw and cut out bunny hands, feet, ears, eyes and mouth.


Draw and cut out bunny hands, feet, ears, eyes and mouth.


Step 8


On each side of the bag, glue on arms.


On each side of the bag, glue on arms.  Spread out extra edges of the top of the bag to form a skirt.  Under skirt, glue legs.  Glue on hands and feet to legs and arms.


Step 9


Glue string to hands and feet.


Glue string to hands and feet.

There you go….. you just finished your paper bag bunny puppet.  Isn’t it adorable?  Now move the strings and watch the the bunny dance.  What else can you make him do?

Technorati Tags: , , , , , , , , , , , , , , ,

How to Make a Leprechaun Finger Puppet for St. Patrick’s Day

Oh boy, do I have a fun craft for you today!!  I don’t know if the craft is more fun or the playing with the finished craft once it is done.  Today I’m going to show you how to make a Leprechaun Finger Puppet.  We give you the template… you just simply print it off and your craft is halfway done.  You can choose to print off the black & white template and color the Leprechaun yourself…. or, if you would prefer, you could print off the color template and continue with the craft from there.  The choice is yours.  So, let’s get started.

Check out our other St. Patrick’s Day Crafts.


How to Make a Leprechaun Finger Puppet


Materials Needed

Printer & Paper

Scissors

Cardboard

Glue


Click on the template image to make larger and to print.

Black & White Template


Black & White Template


Color Template


Color Leprechaun Template


Step 1


Print out template.


Print out template.


Step 2


Cut out Leprechaun.


Cut out Leprechaun.


Step 3


Glue him to cardboard.


Glue him to cardboard.


Step 4


Let dry.... then cut out.


Let dry…. then cut out.


Step 5


Finished Leprechaun


Now put your fingers thru the finger holes.  Your fingers are the little guy’s legs.  Have fun playing.

Technorati Tags: , , , , , , , , , , , , , ,

Chinese New Year Crafts – Year of the Dragon


Chinese New Years Crafts


Chinese New Year falls on January 23rd this Year.  And, in honor of Chinese New Year I put together a list of crafts just about the Chinese New Year.  You will find that most of them are Dragon Crafts and you might wonder why….. well, I will tell you why.  This year is the Year of the Dragon.  So, to honor that fact the majority of the crafts I have listed here will be Dragon Crafts.  Not all of them…. there are plenty of fun other crafts that have nothing to do with Dragons.  So, check out the post and pick a few Chinese New Year Crafts to do with the kids….. they are sure to love them.  So, let’s get started.

Here are Even More Chinese New Years Crafts

Chinese New Year Crafts – Year of the Dragon

(1) Festive Ribbon Dragon


Festive Ribbon Dragon


Here is an adorable dragon perfect for this years Chinese New Years.  This is the mini sized version of the huge size dragon they use in parades for Chinese New Years.  Check out FamilyFun for all the crafting details.


(2) Pop-Up Greeting Card


Pop-Up Greeting Card


Isn’t this Chinese Pop-Up Greeting card gorgeous?  I think it is really beautiful.  Imagine giving this to someone to celebrate the Chinese New Year.  Go to FreePaperCraftTemplate for all the details on how to print off this free template.


(3) Origami Dragon


Origami Dragon


Since this Chinese New Year is the year of the Dragon how could I not include an Origami Dragon in this post.  And, look how awesome this Origami Dragon turns out.  You can get the full instructions for this Origami by going to Origami-Instructions.


(4) Chinese New Year Fish


Chinese New Year Fish


Fish is a very popular dish on Chinese New year.  Fish is a sign of prosperity…. so it is very common to see people eating fish on Chinese New Year.  With that being said I thought it was a good idea to include Fish in this Chinese New Year Post.  Go to Julie K in Taiwan for all the craft details.


(5) Chinese Dragon Door Hanger


Chinese Dragon Door Hanger


Here is a cute craft for the youngest of crafters.  If you go to NickJr they show you how to make a simple Chinese Dragon Door Hanger that is perfect for any kid’s room.  Plus, making this craft with them is the perfect time to explain to your kids a little bit about the Chinese New Year.


(6) Dragon Mask


Dragon Mask


Now, isn’t this Dragon Mask incredible?  What little one wouldn’t love wearing this Dragon Mask all over the house.  After all, children love dressing up.  Find all the Dragon Mask “how-to’s” over at AlphaMom.  This is such a great Chinese New Year craft!!


(7) Pull-A-Long Dragon Craft


Pull-A-Long Dragon Craft


Here is a great way to make a Dragon for Chinese New Year….. made out of paper cups.  How awesome is that?!  It turns out so cute too.  This is a great way to teach your children about the Chinese culture.  Make sure to check out the craft in its entirety over at FreeKidsCrafts.


(8) Toy Spinning Hand Drum


Toy Spinning Hand Drum


Here is a fun toy for the Chinese New Year.  Not only fun to play with…. but also fun to make.  This toy is a great way to make lots of noise during the Chinese New Year.  Make sure to check out 4CrazyKings for all the fun details.


(9) Paper Dragon


Paper Dragon


This is a fun craft for the Chinese New Year.  This Paper Dragon turns out so beautiful…. I just love the colors.  I found this craft over at CraftJr and I just love it.  She explains how this craft is really so easy that a toddler can do it.  And, trust me…. the kids will love maneuvering around the dragon with the sticks.


(10) Marbled Red Vinasse Eggs


Marbled Red Vinasse Eggs


This Marbled Egg  is an extremely popular Chinese snack…. and it is extremely popular during Chinese New Year as the egg represents fertility.  To get this marbled effect you first crack the egg and then simmer the egg in colored liquid.  Get the full details at Pig Pigs Corner.


(11) Paper Chain Dragons


Paper Chain Dragons


One of the easiest crafts to teach a young child is how to make a paper chain.  So, let’s use that technique to make a Paper Dragon.  The kids will have such a fun time making this craft.  The Chinese tradition is a rich tradition….. why not show this to your kids by creating this craft.  Check out NaturallyEducational for all the craft details.


(12) Flying Dragon Puppet


Flying Dragon Puppet


Okay, I officially love this craft…. I just love how it turns out.  It turns out so colorful and festive…. just like any New year should be.  Check out JellyFishJelly for the craft details and put this Flying Dragon Puppet together.  I don’t know what your kids will love more…. putting the craft together or playing with the puppet.

Technorati Tags: , , , , , , , , ,

How to Make Pilgrim Girl Puppets

Pilgrims are an important part of Thanksgiving.  After all, if it wasn’t for the Pilgrims we would have no Thanksgiving at all.  Today I will show you how to make a Pilgrim Girl Puppet perfect for the Thanksgiving Holiday.  It is a fun craft that you can make out of things that you probably already have in your home…. such as a shirt sleeve, sock and glove.  So, let’s get started.

Check out our other Thanksgiving Crafts and Puppet Crafts.


How to Make Pilgrim Girl Puppets


Materials Needed

Shirt Sleeve

Sock

Cotton, Filling or Laundry Lint

Rubber Band, String or Yarn

Yarn

Permanent Marker

Glove

White Fabric or Felt

Ribbon

scissors

Glue


Step 1


Cut shirtl sleeve.


Measure 12 – 15 inches from the end of a shirt sleeve…. cut the sleeve.


Step 2


Cut part of sock off.


Cut part of sock off.


Step 3


Fill sock with cotton, filling or laundry lint.


Fill sock with cotton, filling or laundry lint.  Then close with rubber band or tie closed with yarn or string.


Step 4


Glue yarn on top of head for the hair.


Glue yarn on top of head for the hair.  Use permanent marker to draw eyes, nose and mouth.


Step 5


Glue head to top of sleeve.


Glue head to top of sleeve.  Cut a slit on both sides of the sleeve.


Step 6


Push thumb and pinky of glove into slits you made in the sleeve.


Push thumb and pinky of glove into slits you made in the sleeve.


Step 7


Cut a 6 inch by 6 inch piece of white fabric or felt.


Cut a 6 inch by 6 inch piece of white fabric or felt.  Then cut an X shaped slit in the center of this square.


Step 8


Pull square over girl's head


Pull square over girl’s head (that is why we cut the letter X slit).  Glue square to sleeve.


Step 9


Glue white rectangle of felt or fabric to long ribbon for girl's apron.


Glue white rectangle of felt or fabric to long ribbon for girl’s apron.


Step 10


Cut white rectangle of felt.


Cut white rectangle of felt.


Step 11


Curl the ends of the felt.


Curl the ends of the felt.  Now place the white rectangle to top of head as the bonnet and glue into place.  Glue or tie apron to sleeve.


Finished Pilgrim Girl Puppet.


Place hand in puppet.  Use center finger to tip the head.  Use pinky and thumb to move the puppet’s hands.

Now you have your finished Pilgrim Girl Puppet.  Isn’t she a cutie?!  How did you puppet turn out?  Make sure to let me know in the comments below.  You can even take a picture of your puppet and share it with me in the comment.  I’d love to see it.

Technorati Tags: , , , , , , , , , , , ,

How to Make a Spooky Spider Glove Puppet

Today I have a fun craft for you.  I am going to show you how to make a spooky Spider Glove Puppet.  It’s going to be so much fun.  Plus, this spooky spider is so cute.  I know a spooky spider shouldn’t be cute.  But, it just is.  Something about seeing a spider as a puppet that makes it so cute.  So, find an old pair of gloves and grab your kids because they are going to love this craft…. and for sure playing with the finished puppet.

Check out our other Halloween Crafts.


How to Make a Spooky Spider Glove Puppet


Materials Needed

Pair of Black Gloves (old or new)

Needle

Black Thread

Cotton

Styrofoam Ball (1 1/4″ in diameter)

Scissors


Step 1


Buy a pair of black gloves....or even better, find an old pair of black gloves


Buy a pair of black gloves….or even better, find an old pair of black gloves. Decide if you want to wear this puppet on your right hand or left hand. Set one of the gloves in the pair aside…the one that you will not be wearing on your hand. For the purposes of this tutorial, we will assume that you are right handed. You are now going to cut up the glove that is NOT your good hand. If you are right handed, cut up the left glove…and vice versa if you are left handed. Now, cut off the bottom of the left handed glove(the cuff) if you are right handed. And then cut the thumb and first two fingers from the left glove as well… as shown in the picture above.


Step 2


Now you will have a piece of the left glove that included 3 fingers without the cuff


Now, you will have a piece of the left glove that included 3 fingers without the cuff. You will slip the middle finger of this left glove over the little finger of the right glove.


Step 3


You will now sew the 2 pieces together


You will now sew the 2 pieces together.  Sew the seams together carefully so that a finger still will fit into opening (see sketch above).


Step 4


Now, stuff other finger and thumb of left glove with cotton and sew to right glove


Now, stuff other finger and thumb of left glove with cotton and sew to right glove. Cut another finger from left glove and stuff it with cotton. Sew it fast between the thumb and forefinger on the right handed glove (see sketch above).


Step 5


Cover a styrofoam ball


Cover a Styrofoam ball ( about 1 1/4″ in diameter) with some of the left-over left glove cuff and sew on to the right hand glove (see x on sketch above).


Step 6


Put it on and wear it as a scary black spider


Put it on and wear it as a scary black spider. Creep people out with your scary Halloween spider.  Hey, you can even make a few and put on a Halloween spider puppet show.  How fun would that be?!

Technorati Tags: , , , , ,