This is a great woodworking project for children to do with Dad or Mom. And it makes a terrific weaving loom to be used over and over again. So this craft is one of those crafts that you only have to do once…but you can use it forever to make new crafts with. This loom will be a great first-time weaver loom for your kids to learn about weaving with. Have fun making it and have a great time weaving on it later on. Here are More Weaving Crafts.
How to Make Square Wood Weaving Looms
Crafts Materials Needed:
1/4″ plywood 4″ x 4″
Coping saw (adult assistance required)
60 wire brads 1/2″ long
Hammer
Sandpaper
Pencil
Ruler
How to Make a Square Weaver
Step 1 : Making the Loom
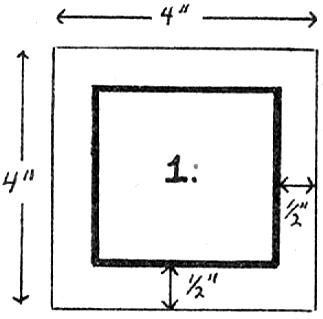
On 4″ x 4″ plywood square, measure and mark off 1/2″ border from the edge, as heavy line (see pic above).
Step 2 : Making the Loom
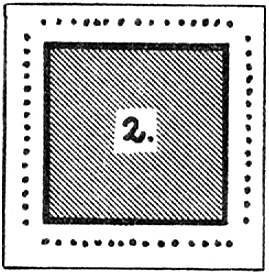
(This portion requires adult assistance / supervision) Cut out center portion with coping saw (shaded area) and sandpaper edges smooth. Measure and mark off a line 1/4″ from edge all around. Divide line into 1/4″ spaces. Drive 1/2″ brads into each 1/4″ space. There will be 15 brads on each side, but no brads in corners, as in illustration above.
[ad#ahc]
Step 3 : How to Weave with this Loom
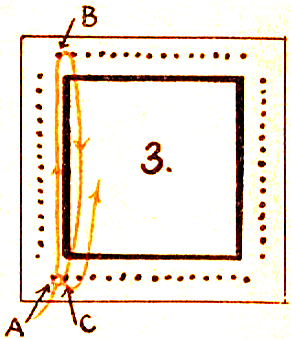
Fasten end of a 4-yard piece of yarn to brad at lower left-hand corner (A). Carry yarn across weaving loom and around brad on opposite side (B). Bring yarn down again to brad next right on lower side of loom (C). Continue until entire loom weaver is strung, as in illustration above.
Step 4 : : How to Weave with this Loom
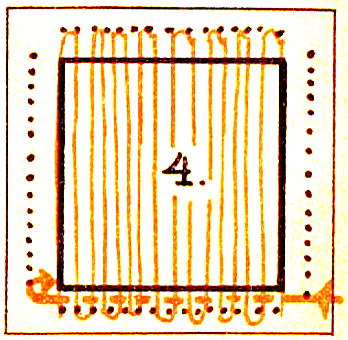
Thread end of same yarn through a 5″ weaving needle. Weave from right to left with an over-and under stitch, and from brad on one side of weaver to brad directly opposite on the other side, as in picture above.
Have fun Weaving!
Technorati Tags: weaving, weaving crafts, looms, loom crafts, wood crafts, woodworking crafts, make a loom, making looms, crafts with wood

Leave a comment