How to Make Macaroni Weavers or Looms for Kids

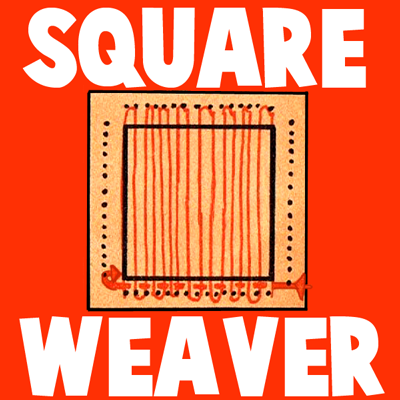
This is a very unique weaving loom craft…and you probably haven’t seen it anywhere else. Here is a craft idea for making weaving looms out of 3 inch long macaroni noodles, string, buttons, and a few other items. Macaroni noodles work perfectly for making a loom as the noodles are hallow and allow string to be pushed through them. Find out how to put this unique loom together…the sooner you start, the sooner you can begin your weaving projects.

Here are More Weaving Crafts.

How to Make Macaroni Weavers or Looms


How to Make Macaroni Weavers or Looms


Crafts Materials Needed:

5 pieces of macaroni each 3″ long

5 pieces of heavy string each 3-feet long

5 buttons slightly larger than hole in macaroni

yarn

5″ needle

How to Make the Macaroni Loom

Step 1


Pull a length of string through each of the macaroni pieces.


Pull a length of string through each of the macaroni pieces.

Step 2


Fasten a button to the top end of each string to prevent string from slipping through macaroni hole.


Fasten a button to the top end of each string to prevent string from slipping through macaroni hole.


Step 3


Thread the needle with yarn, and starting with the middle macaroni piece, weave the yarn over and under the macaroni pieces.


Thread the needle with yarn, and starting with the middle macaroni piece, weave the yarn over and under the macaroni pieces.

Step 4


Slide yarn onto strings as weaving progresses, pulling macaroni downward.


Slide yarn onto strings as weaving progresses, pulling macaroni downward. Add additional yarn by overlapping ends.


Woven scarf


When desired length of belt is reached, remove macaroni pieces and tie ends of yarn

Here are More Weaving Crafts.

Technorati Tags: , , , , , , ,

Pixelated Shamrock with Paper Weaving Craft for Saint Patricks Day

This is a great craft for Saint Patrick’s Day. Have you ever heard of pixel art…well it is drawing with blocks (pixels)…this is how graphic images that you see on the screen are made. Anyways, it is sort of like mosaics with tiles because tiles are square blocks as well. Even if you don’t understand what I’m trying to say, you can appreciate this craft for its coolness factor. This is an interesting form of paper weaving as you will see when you take a look at the steps. Happy St. Patrick’s Day everyone.


Pixelated Shamrock with Paper Weaving Craft for Saint Patricks Day


Crafts Materials Needed:

White Paper

Green Paper

Scissor

Tape

Template to Print


Pixelated Shamrock Template


Click on Image and It Will Open Larger. Then Save Image to Your Computer.

Step 1


step1


Firstly, cut strips of paper. You can cut them to any width, but I cut them each 1/2 inch wide. Cut about 15 of each color.

 Step 2


step2


Now lay strips of white paper down as seen above. Tape either the right or left side down. I taped it down on the right.


 Step 3


step3a


Then start weaving. You just look at the paper template provided and see how many green are needed on each line. In the pic above, 2 blocks are needed. (I taped too many white strips down and that is why the green starts 5 blocks away instead of 3 like in the template).

 Keep Going


step3b


Keep going.

 Until Completed


step3c


This is what the shamrock looks like when completed.

 Step 4


step4


I taped the white strips to the green strips on the bottom and top ( as seen in the picture ). Now that it is secured, you can turn it over and tape it in place on the back as well. You then have a really cool shamrock. I hope that this was fun for you.

Technorati Tags: , , , , , , , , , , , , , , , ,


How to Make a Pen Holder by Weaving Magazines Together

Each of us have at home a lot of magazines that we do not need anymore, how about you recycle them by making something useful out of them. This is called upcycling. Here’s a useful way to use them…this would make a great gift for Mom or Dad on Mother’s Day or Father’s Day. It would also be good for your desk when you are doing your homework

Tutorial offered by Laura from  Dacian Moon Handmade  .


CRAFTS MATERIALS NEEDED:

– Magazines
– Transparent tape

Step 1


Open the magazine on the middle and take one (double) page.


Start folding it at 1.5 cm …


… until you have this band.


Repeat until you have about 11 – 12 bands.


Step 2.

Place some of them on the table, like this. Initially I started with 6 but I took one out because my support would be too wide. So you can start directly with 5.


Bring another band and place it perpendicular to the others, putting it over a band, then under the next … and so on… like in the picture.


Add another two, in negative. Where the first band is over, the second band will be under.

It will look like this.


Step 3.

Bend up the remaining part of the bands…


… and put another band through them…


… form the corners…


… and where the band is ending, place a little piece of tape to keep it in place.


Continue adding bands until you reach the top.


Step 4.

Add tape on the upper edge to keep it in place…


… and you have a new pen holder 😀


Technorati Tags: , , , , , , , , , , , , , ,


How to Make Square Weaving Looms : Woodworking Craft

This is a great woodworking project for children to do with Dad or Mom. And it makes a terrific weaving loom to be used over and over again. So this craft is one of those crafts that you only have to do once…but you can use it forever to make new crafts with. This loom will be a great first-time weaver loom for your kids to learn about weaving with. Have fun making it and have a great time weaving on it later on. Here are More Weaving Crafts.

How to Make Square Wood Weaving Looms


How to Make Square Cardboard Weaving Looms


Crafts Materials Needed:

1/4″ plywood 4″ x 4″

Coping saw (adult assistance required)

60 wire brads 1/2″ long

Hammer

Sandpaper

Pencil

Ruler

How to Make a Square Weaver

Step 1 : Making the Loom


measure and mark off 1/2" border from the edge


On 4″ x 4″ plywood square, measure and mark off 1/2″ border from the edge, as heavy line (see pic above).

Step 2 : Making the Loom


There will be 15 brads on each side, but no brads in corners


(This portion requires adult assistance / supervision) Cut out center portion with coping saw (shaded area) and sandpaper edges smooth. Measure and mark off a line 1/4″ from edge all around. Divide line into 1/4″ spaces. Drive 1/2″ brads into each 1/4″ space. There will be 15 brads on each side, but no brads in corners, as in illustration above.


Step 3 : How to Weave with this Loom


 Continue until entire loom weaver is strung


Fasten end of a 4-yard piece of yarn to brad at lower left-hand corner (A). Carry yarn across weaving loom and around brad on opposite side (B). Bring yarn down again to brad next right on lower side of loom (C). Continue until entire loom weaver is strung, as in illustration above.

Step 4 : : How to Weave with this Loom


Weave from right to left with an over-and under stitch, and from brad on one side of weaver to brad directly opposite on the other  side


Thread end of same yarn through a 5″ weaving needle. Weave from right to left with an over-and under stitch, and from brad on one side of weaver to brad directly opposite on the other  side, as in picture above.

Have fun Weaving!

Here are More Weaving Crafts.

Technorati Tags: , , , , , , , ,

How to Make a Nativity Scene for Christmas

All week long I have been showing you how to make the characters for a Nativity Scene.  Well, today you are going to set up your Nativity Scene complete with basket.  You have been working hard and today you are going to get to see the results of all your hard work.  If you need to still complete the Nativity character crafts…. not a problem.  I have all the crafts for the Nativity characters below.  So, let’s complete the Nativity Scene for Christmas, shall we….

Check out our other Christmas Crafts.


How to Make a Nativity Scene for Christmas


How to Set up the Nativity Basket

Materials Needed

Basket – large enough to hold the nativity scene

Gold or Yellow Thread

4 Twist Ties

Glue


Step 1


Take 4 twist ties and wrap gold or yellow thread around them.


Take 4 twist ties and wrap gold or yellow thread around them.


Step 2


Fold over corners to keep thread on.


Fold over corners to keep thread on.


Step 3


Twist one of the twist ties over the other, like a letter V.


Twist one of the twist ties over the other, like a letter V.


Step 4


Fold one side down to now look like a cross.


Fold one side down to now look like a cross.


Step 5


Twist another one around the first two.


Twist another one around the first two.


Step 6


Do one more to look like this.


Do one more to look like this.


Step 7


Glue the star on top of basket.


Glue the star on top of basket.  Add gold or yellow thread to the bottom of the basket.

Now that you have the background to the Nativity Scene done it is time to make the characters that will fill this Nativity Scene.


Nativity Scene Character Crafts


Nativity Scene Characters


How to Weave the 3 Wise Men


How to Weave the 3 Wise Men for a Nativity Scene


How to Weave a Baby Jesus and Cradle


How to Weave a Baby Jesus and Cradle for a Nativity Scene


How to Weave Mary and Joseph


How to Weave Mary and Joseph for a Nativity Scene


How to Make Yarn Clothespin Sheep


How to Make Yarn Clothespin Sheep for a Nativity Scene


How to Make Yarn Clothespin Donkeys


How to Make Yarn Clothespin Donkeys for a Nativity Scene


And, there you have it…. you have all the crafts needed to complete your Nativity Scene.  I would love to see how your Nativity Scene turned out.  Please share your Nativity Scene with all of us by leaving a picture in the comments below.  I’d love to see how it turned out.

Technorati Tags: , , , , , , , , , , , , , ,

How to Weave Mary and Joseph for a Nativity Scene

For the past few days I have been showing you how to weave different characters for a Nativity Scene.  First, I showed you how to Weave the 3 Wise Men.  Next, I showed you how to Weave a Baby Jesus.  Today I’m going to continue showing you how to weave a Nativity Scene by showing you how to Weave Mary and Joseph.  So, let’s get started.

Check out our other Christmas Crafts.


How to Weave Mary and Joseph for a Nativity Scene


Materials Needed

2 inch x 4 inch Piece of Cardboard

Ruler

Pencil

Scissors

Tape

String or Yarn (different color yarn, make sure to have some skin color yarn like Peach, Tan, Brown, etc.)

Needle

Fork

Stones, Coins, or Something Else Heavy

Cotton or other Filling

Black Thread

Old Piece of Fabric

4 Hand Shaped Beads


Step 1


Cut out 2" x 4" piece of cardboard.


Cut out 2″ x 4″ piece of cardboard.


Step 2


Mark sides with lines about 1/8 inch apart


Mark sides with lines about 1/8 inch apart… so every two lines on the inches side of the ruler.


Step 3


start cutting slits on lines that we drew in the previous step.


If you think your cardboard will fall apart by cutting slits… firstly, cover with clear tape.  Otherwise, just start cutting slits on lines that we drew in the previous step.


Step 4


Put string in the notch that is alone on one side.


Put string in the notch that is alone on one side.  Tape it down.  Then pull the string all the way up the back of the cardboard.


Step 5


pull the yarn through the first notch


In the last step you brought the yarn up to the top left side notch from behind the cardboard.  Now, pull the yarn through the first notch… now the yarn is in the front again.


Step 6


bring yarn over the next notch and pull down back again


Now, bring yarn over the next notch and pull down back again.


Step 7


Bring the string all the way down to the bottom.


Bring the string all the way down to the bottom.


Step 8


Bring string over from back and up thru the first notch again


Bring string over from back and up thru the first notch again.


Step 9


pull the yarn behind and thru the 2nd tab


Now, pull the yarn behind and thru the 2nd tab so that there is now a loop in front and behind the first tab.


Step 10


bring the yarn down behind cardboard and up thru the next slit.


Now, bring the yarn down behind cardboard and up thru the next slit.  Make loop in front of tab and bring down back of cardboard again.


Step 11


bring yarn down back and up bottom and thru the slit and make a loop in back and down next slit and down front again


Now, bring yarn down back and up bottom and thru the slit and make a loop in back and down next slit and down front again… continue this pattern.


Step 12


When done... tape string down


When done… tape string down.


Step 13


Thread a needle with yarn or string.


Thread a needle with yarn or string.


Step 14


Pull the yarn over and under each piece of yarn and leave a short tail


Make your yarn as long as you want it to be.  Pull the yarn over and under each piece of yarn and leave a short tail.


Step 15


turn the cardboard over and you will weave on this side too


Now, turn the cardboard over and you will weave on this side too.  On the other side you went UNDER the last thread… so here go OVER the first thread.  ***Don’t go under the taped string.


Step 16


Every few times or so, take a fork and push the threads down


Keep weaving on both sides of the cardboard.  Every few times or so, take a fork and push the threads down.


Step 17


When the thread is nearing an end, then push the needle down thru loops in past rows


When the thread is nearing an end, push the needle down thru loops in past rows.


How to start a new string


To start a new piece of yarn… just put the string in where you left off… like you see in the above image.


Step 18


Weave back and forth with skin color only in center strings


Weave back and forth with skin color (tan, brown, peach, etc.) only in the center strings.  So, you will NOT be turning cardboard over and weave along back.


start by pushing the yarn through the same loop that the bottom left side of the face used


Choose the color that will be around face.  You will be using this yarn to weave around the face for a hood.  We start by pushing the yarn through the same loop that the bottom left side of the face used.


weave around back.


Now, weave around back.


come over on the right side of the face.


Now, come over on the right side of the face.  Loop thru the string on the right side of the face and then go over it and weave around back again.


Keep going.


Keep going.  At the top of the figure you can weave all around it again.


This is what your figure should look like now


This is what your figure should look like now.


Step 19


Use your needle to pull loops off of cardboard.


Use your needle to pull loops off of cardboard.


Step 20


pull the woven fabric off of the cardboard


Now, loops are off… You can now pull the woven fabric off of the cardboard.


Step 21


Tie any loose threads into a knot.


Tie any loose threads into a knot.


Step 22


You should now stuff with stones, coins or something else heavy.


You should now stuff with stones, coins or something else heavy.  Only fill enough to look like she is kneeling.  Then fill the rest of the figure with cotton.


Step 23


Use black thread to sew on hair and eyes


Use black thread to sew on hair and eyes.


Step 24


For Joseph.... sew on a beard.


For Joseph…. sew on a beard.


Step 25


Bend figures into an L shape


Bend figures into an L shape like above.  Sew them in this position with same color yarn as shirt.


Step 26


Somehow I lost the pictures of the last few steps....


Somehow I lost the pictures of the last few steps…. Basically, just cut a bit of fabric and wrap around (like in image) and sew to head (just a few stitches will do).  Then just glue two hand shaped beads to the bottom of their face to look like praying hands.


Step 27


Sit Joseph and Mary around Baby Jesus


Sit Joseph and Mary around Baby Jesus from our Baby Jesus craft tutorial.

Awesome job…. you just finished weaving Mary and Joseph for a Nativity Scene.  How did they turn out for you?  Let me know in the comments below.  And, if you haven’t already done so…. make sure to complete the entire Nativity Scene by weaving the 3 Wise Men, Baby Jesus, Clothespin Donkey and the Clothespin Sheep.

Technorati Tags: , , , , , , , , , , , , , ,

How to Weave a Baby Jesus and Cradle for a Nativity Scene

Yesterday I showed you how to Weave the 3 Wise Men for a Nativity Scene…. well, today I’m going to continue the weaving fun by showing you how to Weave a Baby Jesus and Cradle.  Imagine how proud you will be to have made an entire Nativity Scene yourself… so proud!!  So, let’s get started.

Check out our other Christmas Crafts.


How to Weave a Baby Jesus and Cradle for a Nativity Scene


Materials Needed

2 Pieces of Cardboard Measuring 3 inch x 1 1/2 inch

Ruler

Scissors

Tape

String or Yarn (Brown, Yellow & Skin Color Yarn like Pink, Tan, Brown, etc.)

Needle

Black String or Thread

Cotton or other Filler

Burp Cloth or Similar Fabric

Fork


Step 1


Cut a piece of cardboard about 3 inches x 1.5 inches.


We will start by making a cardboard loom to weave the basket with. Cut a piece of cardboard about 3 inches x 1.5 inches.


Step 2


Cut slits about 1/4 inch apart on one of the long sides.


Cut slits about 1/4 inch apart on one of the long sides.  Cut one slit on the other side.


Step 3


Put string in slit that is alone.


Put string in slit that is alone.  Tape down.


Step 4


Pull string around back and down thru top slit.


Pull string around back and down thru top slit.


Step 5


Wrap string around front of tab to the next slit.


Wrap string around front of tab to the next slit.  The string will now be hanging down back of cardboard.


Step 6


Bring string down back of cardboard and up around to the front


Bring string down back of cardboard and up around to the front and slide thru the first slit.


Step 7


Bring string around back and thru second slit.


Bring string around back and thru second slit.


Step 8


Bring string around back and then thru next slit


Bring string around back and then thru next slit… now it’s hanging down front again.


Step 9


Put string into next slit so string hanging down back to make loop in front.


Put string into next slit so string hanging down back to make loop in front.


Step 10


Bring down back of cardboard and then up around the front.


Bring down back of cardboard and then up around the front.  Place in the slit and make a loop in back by putting in 2nd slit.


Step 11


When done winding... tape last string down.


When done winding… tape last string down.


Step 12


Thread some yarn or string.


Thread some yarn or string.


Step 13


Basics of Weaving


We will now start weaving. Above in the illustration, O is over and U is under. Basically, put the needle under and over the strings. For the first string, you can pull the yarn all the way through, leaving just a bit of yarn left under the first string. When you get to the edge of cardboard, turn over the cardboard. Then start weaving again. if you ending going under the last string on the other side, then this time go over.


Stick needle with yarn under and over strings.


Stick needle with yarn under and over strings.


You can leave a bit of a tail on the yarn you are weaving with.


You can leave a bit of a tail on the yarn you are weaving with.


Step 14


go under the first string on the other side.


Turn over the cardboard… we ended by going over the last string, so go under the first string on the other side.  Make sure to skip taped down string.  ***Always weave on the side with OUT the loops… as seen above.


Step 15


take a fork and push the threads down.


Keep weaving on both sides of the cardboard.  Every few times or so take a fork and push the threads down.


Step 16


When the thread is nearing the end, then push the needle down thru loops in past row.


When the thread is nearing the end, then push the needle down thru loops in past row.


Step 17


To start a new piece of yarn... just put the string in where you left off


To start a new piece of yarn… just put the string in where you left off… like you see in the image above.


Step 18


Fill up the entire piece of cardboard with brown yarn.


Fill up the entire piece of cardboard with brown yarn.


Step 19


Use your needle to pull loops off of cardboard.


Use your needle to pull loops off of cardboard…


pull the weaved fabric off of cardboard


… Now the loops are off like this and you can pull the weaved fabric off of cardboard.


Step 20


You now have a little basket.


Take the woven fabric off the cardboard.  Tie any loose threads.  You now have a little basket.


Step 21


Cut a piece of cardboard that is about 1.5 inches by 3 inches


Cut a piece of cardboard that is about 1.5 inches by 3 inches.


Step 22


Wind string around it like you did with the other cardboard loom.


Cut slits on one of the short ends.  Then cut one slit on the other side.  Wind string around it like you did with the other cardboard loom.  Make skin color such as pink, tan, brown, etc.


Step 23


Then weave with the skin color you chose when winding string.


Then weave with the skin color you chose when winding string.  Weave all the way to the top.  Use needle to take the loops off of top.  Take woven fabric off of cardboard.


Step 24


Tie loose threads into knots.


Tie loose threads into knots.


Step 25


Get some black string or thread and tie a knot.


Get some black string or thread and tie a knot.


step 26


Start sewing the eyes.


Bring the needle up thru unclosed end and pull it out where you want one of the eyes to be.


Step 27


Sew second eye.


Then just push the needle back down where you want the eyes shape to end.  From underneath push up where you want 2nd eye to be.


Step 28


Fill with cotton or other filler.


Fill with cotton or other filler. Then sew the bottom of the figure shut with skin colored yarn that you used previously.


Step 29


Cut a piece of burp cloth or other similar fabric.


Cut a piece of burp cloth (ask Mom or Dad if they saved any from when you were a baby) or other similar fabric.  Make it a rectangle.  Fold down a triangle on the left top corner.


Step 30


Place woven baby on it with head all the way to top of triangle.


Place woven baby on it with head all the way to top of triangle.


Step 31


Push bottom of fabric up to below eyes.


Push bottom of fabric up to below eyes.


Step 32


Push the left side of fabric over the baby.


Push the left side of fabric over the baby.  The push it under right side of baby.


Step 33


Bring right side of fabric over the baby


Bring right side of fabric over the baby and push it down under the left side of baby.


Step 34


Baby should look like this now.


Baby should look like this now.


Step 35


Place baby in cradle.


Place baby in cradle.  Cut up some yellow yarn and stick in basket if you want to.


Finished Baby Jesus in Cradle Craft.


And, there you have it…. you finished weaving a Baby Jesus and Cradle for a Nativity Scene.  Awesome job!!  This woven Baby Jesus goes perfectly with the woven 3 Wise Men we made yesterday. Make sure to also do the Mary & Joseph craft, Yarn Clothespin Sheep craft  and the Yarn Clothespin Donkey craft to complete your Nativity Scene.

Technorati Tags: , , , , , , , , , , , , , ,

How to Weave the 3 Wise Men for a Nativity Scene

Today I have a great craft perfect for the Christmas Holiday Season.  I am going to show you how to Weave the 3 Wise Men for a Nativity Scene.  There are a lot of steps to this craft, but I don’t want you to be intimidated by that.  The craft isn’t too complicated…. there are just a lot of steps because I wanted to be detailed in my instructions for you.  And, keep an eye out… I will be showing you how to Weave a Baby Jesus for this Nativity Scene in the next day or so too.

Check out our other Christmas Crafts.


How to Weave the 3 Wise Men for a Nativity Scene


Materials Needed

2″ x 4″ Piece of Cardboard

Pencil

Ruler

Scissors

Yarn or String  (Different colors for skin, beard, hair, clothes and crowns)

Needle

Fork

Black and Gold String or Thread

Rock, Stones, or Coins (something heavy)

Cotton for Filling

Safety Pin

Fabric from Old Clothes or Baby Clothes

Tape

Twist Tie

Sturdy Cardboard Box

Small Beads


Step 1


Cut out 2" x 4" piece of cardboard


Cut out 2″ x 4″ piece of cardboard.


Step 2


Mark sides with lines about 1/8 inch apart


Mark sides with lines about 1/8 inch apart… so every two lines on the inches side of the ruler.


Step 3


start cutting slits on lines that we drew in the previous step.


If you think that your cardboard will fall apart by cutting slits… firstly cover with clear tape.  Otherwise, just start cutting slits on lines that we drew in the previous step.


Step 4


Put string in the notch that is alone on one side


Put string in the notch that is alone on one side.  Tape it down.  Then pull the string all the way up the back of the cardboard.


Step 5


pull the yarn thru the first notch


In the last step you brought the yarn up to the top left side notch from behind the cardboard.  Now, pull the yarn thru the first notch… now yarn is in front again.


Step 6


bring the yarn over the next notch and pull down back again


Now, bring the yarn over the next notch and pull down back again.


Step 7


Bring the string all the way down to the bottom.


Bring the string all the way down to the bottom.


Step 8


Bring string over from back and up thru the first notch again


Bring string over from back and up thru the first notch again.


Step 9


pull the yarn behind and thru the 2nd tab


Now, pull the yarn behind and thru the 2nd tab so that there is now a loop in front and behind the first tab.


Step 10


bring yarn down behind cardboard and up thru next slit.


Now, bring yarn down behind cardboard and up thru next slit.  Make loop in front of tab and bring down back of cardboard again.


Step 11


bring yarn down back and up bottom and thru the slit and make a loop in back and down next slit and down front again


Now, bring yarn down back and up bottom and thru the slit and make a loop in back and down next slit and down front again… continue this pattern.


Step 12


When done... tape string down.


When done… tape string down.


Step 13


Thread a needle


Thread a needle with yarn or string.


Step 14


Pull the yarn over and under each piece of yarn and leave a short tail.


Make your yarn as long as you want it to be.  Pull the yarn over and under each piece of yarn and leave a short tail.  ***Notice that you start weaving on the side that does not have loops.


Step 15


go OVER the first thread


Now, turn the cardboard over and you will weave on this side too.  On the other side, you went UNDER the last thread…. so here go OVER the first thread.


Step 16


Keep weaving on both sides of the cardboard


Keep weaving on both sides of the cardboard.  Every few times or so, take the fork and push the threads down.


Step 17


push the needle down thru loops in past rows


When the thread is nearing the end, then push the needle down thru loops in past rows….


To start a new piece of yarn... just put the string in where you left off


… To start a new piece of yarn… just put the string in where you left off… like you see above.


Step 18


When you get to about the half way point... change the yarn to skin color - which could be brown, tan, pink, cream, etc.


When you get to about the half way point… change the yarn to skin color – which could be brown, tan, pink, cream, etc.  Go as far to the top as you can.


Alternative Way to Make the Face

Step A


Weave back and forth on center strings if you want to make skin only in the center.


An alternative way to make these figures are to make the face only in the center (like small image above).  Weave back and forth on center strings if you want to make skin only in the center.  So, don’t go around the back for making the face.


Step B


We start by pushing the yarn through the same loop that the bottom left side of the face used.


Choose the color that will be around the face.  You will be using this yarn to weave around the face for a hood.  We start by pushing the yarn through the same loop that the bottom left side of the face used.


Step C


weave around back.


Now, weave around back.


Step D


Loop thru the string on the right side of the face


Now, come over on the right side of the face.  Loop thru the string on the right side of the face and then go over it and weave around back again.


Step E


Keep going


Keep going.  At the top of the figure you can weave all around it again.


Step 19


Use your needle to pull the loops off of cardboard.


Use your needle to pull the loops off of cardboard.


Step 20


you can now pull the weaved fabric off of cardboard


The loops are now off like this… you can now pull the weaved fabric off of cardboard.


Step 21


Take fabric off of cardboard


Take fabric off of cardboard…. it now looks like above image.


Step 22


Fold inside out and then tie loose threads into knots.


Fold inside out and then tie loose threads (the ones that were taped down in the beginning) into knots.  Turn back to right side.


Step 23


Get some black string or thread.


Get some black string or thread.  Tie a knot at one end.


Step 24


Make the eye.


Put needle inside of hole on top of the head… and then put the needle where the eye should be and pull it out the front of the face.  This way the knot is inside the figure and can’t be seen.


Step 25


just sew in eyes by pulling string in and out of the fabric until they look like eyes.


Then just sew in eyes by pulling string in and out of the fabric until they look like eyes.  To sew in the 2nd eye… pull needle under fabric and up in the spot where the 2nd eye should be.


Step 26


Tie a knot inside of figure.


Tie a knot inside of figure.


Step 27


Place a rock, coins or something else heavy in the bottom and make sure figure stands.


Place a rock, coins or something else heavy in the bottom and make sure figure stands.  Then fill the rest of the figure with cotton or something soft.


Step 28


Sew top of head closed


Sew top of head closed… with knot on the inside.


Step 29


To make belt... tie 3 pieces of string together and braid them.


To make belt… tie 3 pieces of string together and braid them.  Pin it to your pants to keep it down while you braid.  Tie knot when done with belt.


Step 30


Cut a piece of fabric from old shirt or baby clothes


Cut a piece of fabric from old shirt or baby clothes (ask Mom or Dad first).  Then wrap around figure and tie shut with belt.


Step 31


Use cardboard loom to make the beard.


Use cardboard loom to make the beard.  Wrap string around the short side of the loom.


Step 32


push a 2nd string under all the wrapped strings


When done wrapping string around side of loom… push a 2nd string under all the wrapped strings… like so.


Step 33


Take it off of cardboard.


Take it off of cardboard.


Step 34


Fold it in half and then sew it on below the eyes.


Fold it in half and then sew it on below the eyes.


Step 35


To make hair, push needle thru top of head


To make hair, push needle thru top of head, until just a bit of string is sticking out.


Step 36


with tail of string still out, push the needle back into the head somewhere else.


Then, with tail of string still out, push the needle back into the head somewhere else.


Step 37


When you have a loop of string... don't pull any further.  You just made a curl.


When you have a loop of string… don’t pull any further.  You just made a curl.  Now, stick the needle thru again… and the curl will stay now.


Step 38


When your figure has enough curls... then tie a knot and you are finished with the hair.


When your figure has enough curls… then tie a knot and you are finished with the hair.


Step 39


Tie a twist tie and wrap colored thread around it.


Tie a twist tie and wrap colored thread around it.  I used gold thread… you can use any color you wish.


Step 40


Fold ends of twist tie over to keep threads on and then push it onto your figure's head.


Fold ends of twist tie over to keep threads on and then push it onto your figure’s head.


Step 41


The 2nd crown is beaded on a cardboard loom.


The 2nd crown is beaded on a cardboard loom.  Just make slits 1/2 inch apart on both sides of a sturdy box.  The loom is threaded by putting string in first notch… taping it down.  Then just pull over to other side and put thru that notch.  Then put thru 2nd notch and pull to other side and continue.  When done… wrap around extra notches to keep in place.


Step 42


Tie thread to first string.


Tie thread to first string. ***Make sure to leave extra room on strings so you can tie knots at end.


Step 43


Put some small beads onto the needle and thread.


Put some small beads onto the needle and thread.  If you have 6 strings, you need 5 beads…. If you have 5 strings, you need 4 beads.


Step 44


Pull threads and beads under all 6 strings


Pull threads and beads under all 6 strings, so they are on the opposite side now.


Step 45


Push all the beads so that each bead is in between 2 strings.


The first row is the trickiest… and then each row gets easier.  Push all the beads so that each bead is in between 2 strings.


Step 46


push the needle thru all of them so that the needle is now on the opposite side again.


Then, while beads are up above the strings (because you are pushing below them)… push the needle thru all of them so that the needle is now on the opposite side again.


Step 47


Now, do this for all the rows.


Now, do this for all the rows.  Make as many as you feel fit.


Step 48


I took some gold thread and wove it over and under all of the strings a few times


Optionally, as an added touch… I took some gold thread and wove it over and under all of the strings a few times to make the crown surrounded in gold.


Step 49


Cut off string on both sides.


Cut off string on both sides.


Step 50


Tie it shut to make a crown.


Tie it shut to make a crown.


Step 51


Place crown on figure.


Place crown on figure.


Step 52


For the 3rd crown, you can use the same loom that you used for beading.  Thread it the same way.


For the 3rd crown, you can use the same loom that you used for beading.  Thread it the same way.  Weave over and under.


Step 53


When you have woven a long strip, then take loops off.


When you have woven a long strip, then take loops off.


Step 54


Cut loops in half.


Cut loops in half.


Step 55


Tie these strings into knots.


Tie these strings into knots.


Step 56


Roll this woven fabric lengthwise


Roll this woven fabric lengthwise…. like above image.  Sew it so it stays like that.


Step 57


Then sew into donut shape and place on figure's head.


Then sew into donut shape and place on figure’s head.


Finished 3 wise men craft


You have just finished weaving the 3 Wise Men for a Nativity Scene…. How did they turn out?  Please let me know in the comments below.  Also, take a picture of your Wise Men and share them in the comment as well.  I’d love to see them.  Come back to check out how to Weave a Baby Jesus for a Nativity Scene as well the Mary & Joseph craft, Yarn Clothespin Sheep craft and the Yarn Clothespin Donkey craft to complete your Nativity Scene.

Technorati Tags: , , , , , , , , , , , , , ,

How to Make a Woven Coaster

I have a super fun and easy craft for you today.  I’m going to show you how to make a Woven Coaster.  This coaster is one of the simplest ways to learn weaving.  With some paper and some pretty ribbon you will have the Woven Coaster finished in no time.  Why not make 3 more….. make a set of 4 Coasters.  It will make for a wonderful Holiday Gift.  Let’s get started.


Craft materials required:

Thick paper

Satin ribbon- 1 inch thick

Tape

Ruler

Scissors


Step 1

Cut a square piece of thick paper about 8 in x 8 in.


Step 2

Draw 4 lines to make a border 1 inch thick on each side.


Step 3

From the top draw horizontal lines one inch away from the top line as shown.


Step 4

Cut along the lines.


Step 5

Take a ribbon about 6.5 in long and place it as shown.


Step 6

Tape one end close to the first line as shown.


Step 7

Take the ribbon through to the other side, through the slit.


Step 8

The back will look like this.


Step 9

Take the ribbon back again through the next slit. Repeat the process to get a woven design as shown below. Tape the end in place.


Step 10

Take another piece of ribbon 4.5 in long.


Step 11

Repeat the process, but this time insert through the alternate slits as shown below.


Step 12

In this way, weave 6 ribbon pieces into place. The coaster will look like this.


For a neat finish, cover the back with a piece of paper the same size.

And there you have it…. a Woven Coaster.  How did your coaster turn out?  Let me know in the comments below.  Make sure to add a picture of your woven coaster to the comment, so I can check it out.

Technorati Tags: , , , , , ,

How to Make and Weave a Woven Heart Basket for Valentines Day

If you want to make this beautiful paper or felt woven heart basket, then you are in luck. Below you will find the instructions. You can bring this into school to hold all of your classroom friends’ Valentine’s day cards or you can fill it with flowers or treats to give to somebody you love. Enjoy.

Here are Even More Valentines Day Crafts Ideas


How to Make and Weave a Woven Felt or Paper Heart Basket for Valentines Day


Crafts Materials Needed

– Felt or Colored Paper of 2 Different Colors (7 inches x 2 inches)

– Scissors

Difficult Woven Heart (Easier One is Below)

Step 1


fold paper in half


Take the 2 pieces of paper (each 7 x 2 inches) and fold it in half as you see above so that it looks like the image below.

Step 2 (Do This Step Twice … One Time on Each Paper)


Step 2 : Weaving Paper Felt Hearts Craft Idea for Children


Now cut on the dotted lines…which means round the side that opens (while it is closed). On the creased edge, cut 4 slits, equally spaced out as you see in the diagram above.


Step 3


Step 3 : Weaving Paper Felt Hearts Craft Idea for Children


Now this is the weaving part of the craft. Take strip ‘A’ on the yellow paper and weave it through the pink one. Notice that you don’t simply weave it…you slip the openings over the fingers (they look  like hands / fingers to me). Then after you have done this, go to letter ‘B’ and do the same thing, except this time go over number ‘1’. Take a look at the image below to see how it should turn out.

Step 4


How to Make and Weave a Woven Felt or Paper Heart Basket for Valentines Day


If you want a handle, then take a felt or paper strip of paper that is 7 inches by 1/2 inches long. Glue or staple this strip of paper to the top / back of the heart.

Easier Woven Heart

Step 1


Step 1 : Weaving Paper Felt Hearts Craft Idea for Children


Take the 2 pieces of paper (each 7 x 2 inches) and fold it in half as you see above so that it looks like the image below.

Step 2 (Do This Step Twice … One Time on Each Paper)


Step 4 : Weaving Paper Felt Hearts Craft Idea for Children


Cut on the dotted lines as you see in the paper above….so on the opening end (closed though) cut a rounded edge. On the creased edge, cut one slit down the center.

Step 6


Step 5 : Weaving Paper Felt Hearts Craft Idea for Children


Just weave yellow heart’s letter ‘A’ under red heart’s number 1 and then slip the loop over number ‘2’. Then take ‘B’ and slip the loop over number ‘1’ and under number ‘2’. Below is how it should look.

Step 7


This is what the easier heart should look like. You may put a handle on this one as well, if you want to. If you want a handle, then take a felt or paper strip of paper that is 7 inches by 1/2 inches long. Glue or staple this strip of paper to the top / back of the heart.

Here are Even More Valentines Day Crafts Ideas

Technorati Tags: , , , , , , , , , , , ,

Making Unity Placemats Craft for Martin Luther King Day Activity

This is a great project to do while thinking about Martin Luther King Jr’s famous “I Have a Dream” speech. Specifically the quote “I have a dream that my four little children will one day live in a nation where they will not be judged by the color of their skin, but by the content of their character.” This craft can help remind us that all colors, whether they be the colors on a piece of paper, or the colors of our skin, can work well together and create wonderful things. This would be a good project for parents and kids to do together while they discuss the importance of Dr. King’s words. It involves a lot of cutting so I would not suggest this as an “all-by-myself” craft for children under the age of 10.

You Might Like Our Other Martin Luther King Day Crafts as well.

Making Unity Place Mats Craft for Martin Luther King Day Activity

The crafts materials you will need are:

  • Safety Scissors (or have an adult use sewing scissors)
  • 5 sheets of construction paper (I just picked mine randomly)
  • Tape
  • Laminating sheets (if you want it to last longer)

You will pick one color to be the base of your placemat and you will cut it so that one edge is untouched and there are eight strips coming off of it.  You will take the other four colors and cut them so you have 8 pieces that are one and a quarter inches by nine inches (or however wide your construction paper is) and weave them together.  Follow these instructions:

Step 1 : Prepare your base color


Fold base paper in half lengthwise and cut, leaving about one inch at one end.


If unfolded it should look like this. Notice how it's not quite cut in two?


Fold in half again lengthwise and cut, leaving the same amout on the same end.


If unfolded it should now look like this, with four strips.


Fold in half one more time and cut, you may need an adult to help since you will be cutting through 4 thicknesses of paper by now. Make sure to leave the inch at the end!


Now it should look like this and you're ready to start weaving. If it doesn't look like this, see if you can figure out where you went wrong and try again. This may take a time or two to get right, so don't get discouraged!

Step 2 : Prepare your accent colors


Now take the four remaining colors, square them up, fold in half SHORT way and cut. Set aside one half, you won't need it. Then fold again the same way (shown here) and cut again. Set one of those halves aside. Now, fold the last piece you have in half again the same way and cut. You will need all eight of these. Square them up.


You should be left with a pile that looks like this. 4 large rectangles and 4 medium rectangles which you can set aside to use another time, and 8 thin rectangles for this craft. But they're still just a little too big.


So cut just a little off of one side of the eight rectangles you have. About a quarter of an inch. The pieces you are left with should be 1 and a quarter inches. If it's not exact, that's ok.

Step 3 :Weaving


Now we're going to start weaving. Take your first strip and put it under the top strip of the base color, then over the second strip on the base color and so on. Slide it as close to the begining of the base color as possible. You may find that your base color strips aren't quite even and now is a good time to snip a little more so the strips you're weaving can fit in there snugly.


Now you're going to take your second color and put it OVER the first strip in your base, and then under the second and so forth. Push it as close as you can to the first color.


Keep weaving back and forth so you end up with a checkerboard pattern. You may find it easiet to start at the open end of the base color and wiggle it across to the side with the rest of the colors. You will find your own favorite weaving technique, but be careful not to tear the paper.

Step 4 :Taping the base


When you have finished weaving tape the open end of your base color so your alternating color strips won't fall out. Then straighten your color strips as best you can. Don't worry, no one can get them to look perfect.

Step 5 : Taping the accents


Once they are all in the right places tape each one in place at the ends.

Step 6 : Laminating (if you wish)


And there you have it. All the colors working together to make a beautiful placemat. If you would like it to last longer you can have an adult laminate it for you. Mine is not laminated, I'd rather just make a new one next year.

You Might Like Our Other Martin Luther King Day Crafts as well.

Technorati Tags: , , , , , , , , , , , , , , , ,

How to Weave Purses / Handbags for Mom’s Gift on Mothers Day

Here is a great Mother’s Day crafts project for kids to make for Mom or Grandma. Below, you can find out how to make a cardboard loom to weave beautiful handbags / purses to give as gifts or to keep for yourself. Either way, it is a lot of fun and the results are beautiful. This is a great crafts project for older kids and girls, as well as teens.

How to Weave Purses / Handbags for Mom’s Gift on Mothers Day


Crafts Materials Needed:

– Stiff Piece of Cardboard
– Scissors
– Heavy String
– Zipper
– Thread

(1) Notch both top and bottom of a thin stiff piece of cardboard.


(2) Loop heavy string around top notches (A) and between bottom notches (B) around the cardboard. See Picture Below.


Click on the Image Above to See it Bigger.

(3) Weave yarn over and under strings (C).

(4) Skip a string at one end to keep the weave in proper sequence around the cardboard.

(5) Overlap new yarn (B).

(6) When weaving is finished, remove cardboard. Turn the purse inside out and sew in zipper.

Technorati Tags: , , , , , , , , , , ,