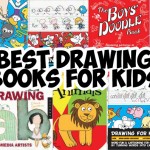
List of Best Drawing Books for Kids : Beginners and Homeschoolers

Here are a list of some of my daughter’s favorite drawing books. Please tell us your favorites and share with your fellow parents and teachers what the best children’s drawing books are.


list of best drawing books for young kids, preschoolers, homeschooled kids


List of Top Drawing Books for Kids (Preschoolers and Elementary School Kids and Homeschoolers)

Drawing for Kids Turn Numbers into Cartoons


Drawing for Kids with Numbers


With this book, the child learns how to turn numbers 0-25 into cute cartoons.

Drawing for Kids : How to Turn Words into Cartoons


Drawing for Kids : learn how to draw cartoons by turning words into cartoons


This amazing drawing book shows children how to turn words, such as cat, boy, girl into their respective cartoon. Cool!

Drawing for Kids : Turn Alphabet Letters into Cartoons


kids can learn how to draw with numbers and letters


With this book, the child learns how to turn capital alphabet letters A-Z into cute cartoons.

Learn How to Draw 101 Animals


drawing101animals


Kids can learn how to draw these cartoon animals with easy, step by step instructions.

Tangle Art – Find Your Creativity


51IXuqP8dbL._SX423_BO1,204,203,200_


Just be silly and creative – this book sneaks some creativity into your kids life.

2o Ways to Draw a Tree (Part of a series of 20 Ways to Draw a ….)


20 ways to draw


In this series of books (other things…not just trees)…there are stylized drawings of what you want to draw. These aren’t step by step, but rather a way to show the child that they can draw things in many, many different ways…instead of just copying.

The Boys Doodle Book


Boys' Doodle Book


Also, not a step by step book, but rather a book full of incomplete drawings that they can creatively complete.

The Girls’ Doodle Book


girls' doodle book


This is just like the Boys’ Doodle Book, but for girls.

Art Start Animals


how to draw animals with basic geometric shapes


This book teaches very basic cartoon drawing with the most basic of shapes.

Drawing Lab for Mixed-Media Artists


drawing-lab for mixed media artists


Here is a book filled with fun art project ideas…if your child likes to draw, she/he will love this book.

I Can Draw Animals


icandrawnaimals


A simple step by step drawing book, show in crayon, for young children.

Now Tell Us What Your Kids’ Favorite Drawing Books in the Comments!

Technorati Tags: , , , ,

How to Make a New Years Cube Dice Time Capsule to Celebrate the New Year

Bored and don’t know what to do on New Years Eve or New Years Day? 
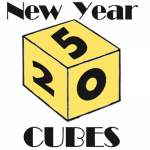
How about making a cube with the numbers 2015 (or whatever year it happens to be when you see this tutorial). A fun thing to do is to write a letter about what you hope for the following year. Put it inside the cube. Don’t look at it until the following year.
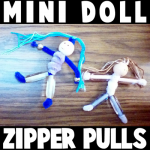
 See how things have changed or if things turned out the way you hoped they would. Or you can just roll it around, toss it around, or just put it up on a shelf.

You Might Also Like Our Other New Years Crafts

How to Make a New Years Cube Dice to Celebrate the New Year


How to Make a New Years Cube Dice to Celebrate the New Year


Step 1

Print out the correct template. This year, you would print out 2015 (but I also included up to 2020) for future New Years. You can either choose, aqua, pink, yellow, or black and white.

2015 Templates


2015-new-years-dice-aqua


2015-new-years-dice-bw


2015-new-years-dice-pink


2015-new-years-dice-yellow


2016 Templates


2016-new-years-dice-aqua


2016-new-years-dice-bw


2016-new-years-dice-pink


2016-new-years-dice-yellow


2017 Templates


2017-new-years-dice-aqua


2017-new-years-dice-bw


2017-new-years-dice-pink


2017-new-years-dice-yellow


2018 Templates


2018-new-years-dice-aqua


2018-new-years-dice-bw


2018-new-years-dice-pink


2018-new-years-dice-yellow


2019 Templates


2019-new-years-dice-aqua


2019-new-years-dice-bw


2019-new-years-dice-pink


2019-new-years-dice-yellow


2020 Templates


2020-new-years-dice-aqua


2020-new-years-dice-bw


2020-new-years-dice-pink


2020-new-years-dice-yellow


How to Put These New Year Cubes Together

After you print out the cube template with the right color and year, then you are going to want to cut it out and then fold on the dotted lines and on the tabs. And then glue the cube together. We already made cubes in another New Years tutorial, why don’t you check out the pictures on that folding tutorial, it is exactly the same. BEFORE YOU CLOSE THE CUBE: Write a note and place it inside the cube. Don’t peek until the following year. See how things have changed since you wrote the note.

There really isn’t much that you can do with this cube, other than put it up somewhere or toss it around with your friends. It is just a cute craft that gives you time to think about the year gone past and the year yet to come. I hope that you enjoy it.

You Might Also Like Our Other New Years Crafts

Technorati Tags: , , , , , , , , , , , ,

How to Make Mini People or Dolls as Zipper Pulls as Back to School Craft for Kids

This makes a great back to school craft as this can be used to decorate your backpack! My daughter and I made a few of these to give to her special friends at school. We landed up having to make more than 20 of them to give out to everyone who was asking for them. She couldn’t make enough of them because they were so popular. I think you will love these too. They are very easy to make and you can use different materials each time. Any bead size or thread color will work. Just have fun and be creative with it!

How to Make Mini People or Dolls as Zipper Pulls as Back to School Craft for Kids


mini doll zipper pulls


Crafts Materials Needed:

– beads

– embroidery thread, yarn, string, or thread

– pipe cleaners

– scissors

– (Optional) metal snap spring hooks

Step 1


finished-step01-beaded-people-zipper-pulls


I started off with a round bead that already had a face drawn on it. You can use paint or a Sharpie to draw 2 eyes and a mouth on a round bead if you don’t have face beads already.

Then put a pipe cleaner thru the bead. The  beaded head should be in the center of the pipe cleaner, as seen above.

Step 2


finished-step02b-beaded-people-zipper-pulls


– Now put the pipe cleaner that is thru the top of the head back down into the top of the head again until there is a loop….as seen above. The legs (bottom 2 pieces of the pipe cleaner) should match up too.


Step 3


finished-step03-beaded-people-zipper-pulls


Take some embroidery thread (or whatever you have available) and fold it in half a few times (as you see that I did above). Then stick it in the loop hole, as seen above.


finished-step04a-beaded-people-zipper-pulls


If you want to make this a zipper pull, put a metal hook on it (optional…only for zipper pulls). Then Pull the pipe cleaner legs downwards so that the pipe cleaner on top of the head closes down on the hair and hook.

Step 4


finished-step04-beaded-people-zipper-pulls


Cut the loops that are in the embroidery thread so that it resembles hair.

 Step 5


finished-step05a-beaded-people-zipper-pulls


Cut a pipe cleaner in half. Wrap it around the top of the body, so you will have arms.

 Step 5 b


finished-step05b-beaded-people-zipper-pulls


Like in the above picture.

Step 6


finished-step06-beaded-people-zipper-pulls


Take the other half of the pipe cleaner and wrap it around the chest area as I did above.

Step 7


finished-step07-beaded-people-zipper-pulls


– Now we can place beads on the arms and legs. I have long beads, but you can also use multiple small round or oval beads. Then just push the pipe cleaner back into the bead to make it so the beads can’t fall off.

 Step 7 b


finished-step08-beaded-people-zipper-pulls


– This is what it looks like when all the beads are on there.

Finished Bead People


Finished Mini Figures


– My daughter originally only made a few of these for her to give to her closest friends. It lands up everyone in the class were BEGGING her to give them one. We landed up making enough for the entire class. Kids do Love these! Even boys! I hope that you had fun!

Technorati Tags: , , , , , ,

How to Make Paper Stand-Up Turkey Centerpieces for Thanksgiving

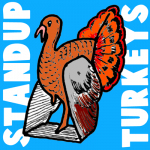
Here is a fun paper craft that isn’t too hard to make. All you have to do is print out our paper template and then paste it together. Then you can just put it in the center of your Thanksgiving dinner table.


Standup Paper Centerpiece Foldable Craft


How to Make Paper Stand-Up Turkey Centerpieces for Thanksgiving

Crafts Materials Needed

Printer

Paper

Scssors

Paste

Print Out a Color or Black and White Template


Color Paper Turkey Template


Click on this image to open up a the template in a new page


Black and White Paper Turkey Template


Click on this image to open up the template in a new page

Instructions for Making These Turkeys


Instructions for Making These Turkeys


All you have to do is cut on the solid lines and fold on the dotted lines. Then just paste it together as you see in the above picture. This turkey is a great decoration for your Thanksgiving table.

Technorati Tags: , , , , , , ,

How to Make Your Own Personal Microphone Broadcast System

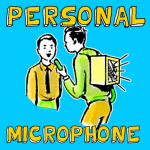
This is a craft to make a simple & personal microphone machine that you wear on your back. There are no wires or technology here, it is made simply with a box, hose, funnel, and a few other items. Any boy or girl can make this simple home broadcasting system, through which you can really “broadcast.” However, mom or dad should probably be there to assist you. This might be good to include with a Halloween costume as you can make creepy sounds broadcast out of your back…depending on what your costume is.

How to Make Your Own Personal Microphone Broadcast System


How to Make Your Own Personal Microphone Broadcast System


CRAFTS MATERIALS NEEDED:

Large cardboard box

Brass paper fasteners

Piece of garden hose (ask mom or dad first)

Piece of window screening (ask mom or dad first)

Funnel

Scotch tape

Old belt or strap

Paints & brush

Scissors

Long nail (ask mom or dad first)

Glue

How to Make Them:

Step 1

Remove the cover from the box and throw it away as you will not need it. On the opposite side of the opening, cut out a window, leaving a 2 inch margin all around.

Step 2


Cut a piece of window screening a little larger  than the window opening, and glue it over the opening from the inside


Cut a piece of window screening a little larger  than the window opening, and glue it over the opening from the inside, as in illustration A.


Step 3


Drive a long nail through the hose to prevent it from slipping out of the hole in the carton


Make a small round hole in the bottom of the box, and pull a piece of garden hose up through the hole. Insert the snout of the tin funnel into the end of the hose inside the carton. Make the hose fit tightly over the funnel snout by wrapping Scotch tape around it. Drive a long nail through the hose to prevent it from slipping out of the hole in the carton, as in illustration B.

Step 4


Fasten the belt shoulder straps to the top and the bottom of the carton with brass paper fasteners


Fasten the belt shoulder straps to the top and the bottom of the carton with brass paper fasteners, as in Illustration C.

Step 5


The person who is broadcasting speaks into the loose end of the hose in the operator's hands


To broadcast thru the system, the user slips the straps over his shoulders, with the open end of the device to his back, and the loose end of the hose in his hand. The person who is broadcasting speaks into the loose end of the hose in the operator’s hands, as in illustration D.  His voice is transmitted through the hose, through the funnel, and out through the screened window at the back of the Walkie-Talkie Like Microphone Machine.

Technorati Tags: , , , , , , ,

How to Make Cellophane Dancers

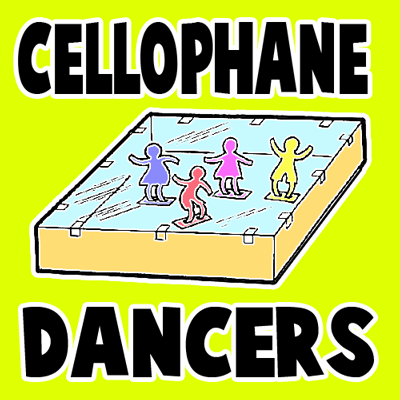
You can make a whole dance studio filled with boys and girls who will jump and dance about as if they were really alive. The trick is causing enough static electricity to make these little guys jump and dance. Find out how to make cellophane dancers below.

How to Make Cellophane Dancers


How to Make Cellophane Dancers


Crafts Materials Needed:

Large deep cardboard box

Light cardboard

Cellophane

Scotch tape

Silk handkerchief

Glue or paste

Scissors

Tissue paper

Pencil

How to Make Them:

Step 1


Fold the strips back and forth


To make the dancers, cut 2 strips of tissue paper, 5 inches long and 3/4 of an inch wide. Fold the strips back and forth, as in illustration A.

Step 2


You will have 2 square tissue paper packets


You will have 2 square tissue paper packets, as in illustration B.


Step 3


Draw Half Figures


Fold each packet down the center. On the fold of one packet, draw and then cut out, the half figure of a girl, and on the other packet, the half figure of a boy, as in illustration C.

Step 4

Open up the strips, you will have one continuous row of girls, and one of boys.

Step 5


you will have one continuous row of girls


Cut 2 strips of light cardboard 1/8 of an inch wide. Glue a standing row of dancers to each cardboard strip, bending back the feet of the dancers about 1/8 of an inch to make them stand firmly, as in illustration D.

Step 6


Glue a standing row of dancers to each cardboard strip


Cut the hands of the dancers apart, and cut the cardboard between them. Each dancer will be standing on a separate cardboard platform, as in illustration E.

Step 7


Cut a piece of celluloid to fit the top of the box, and fasten with pieces of Scotch tape


Stand the dancers in the cardboard box ballroom. Cut a piece of cellophane to fit the top of the box, and fasten with pieces of Scotch tape, as in illustration F.

To make the dancers jump and dance, rub a silk handkerchief over the celluloid top. This will generate enough static electricity to make the dancers come “alive.”

Technorati Tags: , , , , , , , ,

How to Make a Mini Puppet Theater with a Matches Box

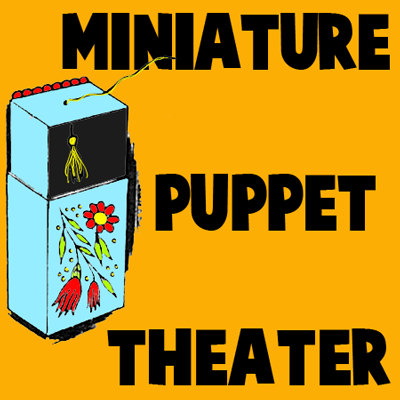
I be you will want this miniature puppet playhouse and its tiny dancing puppet for a pocket toy or to use  in your doll houses. This is a mini yarn puppet that is controlled with a matches box puppet theater. Find out how to make this little mini toy below.


How to Make a Mini Puppet Theater with a Matches Box


CRAFTS MATERIALS NEEDED:

Sliding drawer matches box

Scissors

Nail

Black paint or ink

Black thread

Paints  & brush

Colored yarn

Screw eye

How to Make These Miniature Puppet Shows

Step 1


Remove the sliding drawer from the matchbox.


Remove the sliding drawer from the matchbox. Paint the inside of the drawer with black paint or ink and allow it to dry thoroughly. Paint the outside of the drawer and the matchbox cover with a neutral color paint, and allow them to dry thoroughly.


Step 2


make the dancing puppet


To make the dancing puppet, cut several 2-inch pieces of colored yarn. Fold the yarn over the head of an ordinary screw eye, and wind a piece of black thread under the head to make the neck.

Step 3


Tie a short piece of black thread to the top of the puppet's head to make the control-thread.


Tie a short piece of black thread to the top of the puppet’s head to make the control-thread.

Step 4


Slip the end of the control-thread attached to the puppet through the hole.


With a nail, punch a small hole in the center of one of the short ends of the sliding drawer. Slip the end of the control-thread attached to the puppet through the hole. Replace the sliding drawer in the matchbox cover so that the control-thread is at the top, and the puppet is in the drawer.

Step 5

Decorate the front of the puppet playhouse with paints or wax crayons. To make the puppet perform, slide the drawer about halfway out of the cover and pull the control-thread up and down. If you want to make a larger playhouse for more puppets, use a kitchen size matchbox with a sliding drawer, and make 2 or 3 yarn puppets the same way.

Technorati Tags: , , , , , , ,

How to Make 3D Paper Butterflies Artwork

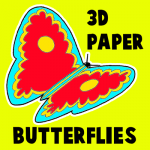
Here is a great craft to make around Springtime. Unfortunately it isn’t Springtime, I just like butterflies. These paper butterflies will add a three-dimensional effect to any display or bulletin board. This is a great classroom or group project as each child can do a butterfly and add it to the board. These butterflies are made out of paper and turn out great as the wings are folded to look as if the butterfly is in flight.

How to Make 3D Paper Butterflies Artwork


How to Make 3D Paper Butterflies Artwork


Crafts Materials Needed:

Paper

Scissor

Coloring Items such as Crayons or Markers

Optional (Decorative Items such as glitter, pipe cleaners, sequins)

Dark Construction Paper

How to Make a Butterfly

Step 1


Fold Paper


Turn a piece of paper so it is on its side like in the picture above. In the center of the sheet of paper, lightly draw 2 lines about an inch apart from each other. Than fold towards you on both of those lines…then unfold.

Step 2


Draw Butterfly


Now draw the butterfly wings on the outside parts (the wings look like a number 3 shape)…and the butterfly;s body in the center.


Step 3


Cut butterfly out


Cut out the butterfly.

Step 4


Decorate the butterfly


Now draw designs on the butterfly wings and body. You can add design elements such as pipe cleaner antennae, or sparkly glitter on the body…I will leave the creative aspects up to you.

After decorating, re-fold the paper along the two sides of the body.

Step 5


The butterfly is ready to be pasted down by either one wing, or the body.


The butterfly is ready to be pasted down by either one wing, or the body. The illustration at the top shows how effective these butterflies appear, mounted on sheets of black paper, and tacked together for a panel. This makes a great group classroom project.

Technorati Tags: , , , , , ,

How to Make Macaroni Weavers or Looms for Kids

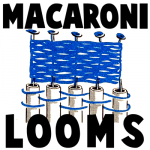
This is a very unique weaving loom craft…and you probably haven’t seen it anywhere else. Here is a craft idea for making weaving looms out of 3 inch long macaroni noodles, string, buttons, and a few other items. Macaroni noodles work perfectly for making a loom as the noodles are hallow and allow string to be pushed through them. Find out how to put this unique loom together…the sooner you start, the sooner you can begin your weaving projects.

Here are More Weaving Crafts.

How to Make Macaroni Weavers or Looms


How to Make Macaroni Weavers or Looms


Crafts Materials Needed:

5 pieces of macaroni each 3″ long

5 pieces of heavy string each 3-feet long

5 buttons slightly larger than hole in macaroni

yarn

5″ needle

How to Make the Macaroni Loom

Step 1


Pull a length of string through each of the macaroni pieces.


Pull a length of string through each of the macaroni pieces.

Step 2


Fasten a button to the top end of each string to prevent string from slipping through macaroni hole.


Fasten a button to the top end of each string to prevent string from slipping through macaroni hole.


Step 3


Thread the needle with yarn, and starting with the middle macaroni piece, weave the yarn over and under the macaroni pieces.


Thread the needle with yarn, and starting with the middle macaroni piece, weave the yarn over and under the macaroni pieces.

Step 4


Slide yarn onto strings as weaving progresses, pulling macaroni downward.


Slide yarn onto strings as weaving progresses, pulling macaroni downward. Add additional yarn by overlapping ends.


Woven scarf


When desired length of belt is reached, remove macaroni pieces and tie ends of yarn

Here are More Weaving Crafts.

Technorati Tags: , , , , , , ,

How to Make Fabric Oatmeal Container Drawstring Bags

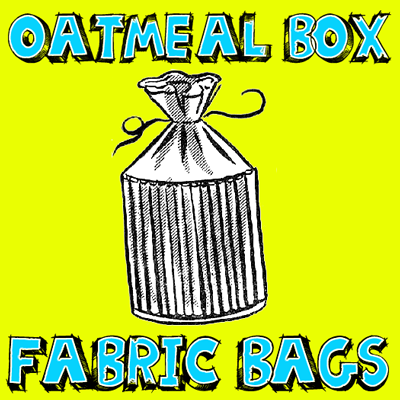
Here is a craft for making a great drawstring bag out of a cylinder oatmeal container, fabric, some cardboard, and a few other items. This bag turns out looking beautiful and would make a great bag for yourself or as a gift to mom, grandma, or someone else you love.


How to Make Fabric Oatmeal Container Drawstring Bags


CRAFTS MATERIAL NEEDED:

Fabric

Oatmeal Container

6″ x 6″ cardboard square

Glue

Magazine pictures

Knitting needle (size 3 or 4)

White shellac

Scissors

Pencil

Ruler

How to Make These Drawstring Bags:

Step 1


fabric-oatmeal-container-drawstring-bags-01


Cut cereal box to 4″ height, as shown by broken line in Figure 1.


Step 2


fabric-oatmeal-container-drawstring-bags-02


Make cardboard pattern, 4″ wide at base and 5″ high to center point, as in Figure 2.

Step 3


fabric-oatmeal-container-drawstring-bags-04


Using cardboard pattern trace triangles on colorful smooth magazine pictures. Cut triangles out, and lay, face down, on work table. Apply glue lightly down middle of triangle, making sure the top point is well covered to prevent unrolling. Place the knitting needle along the 4″ base, and roll triangle tightly around the needle to make a tube, as in Figure 3. Slip the tube off the needle and set aside to dry. It will take about 90 tubes to cover a box, 5 1/2″ in diameter.

Step 4


fabric-oatmeal-container-drawstring-bags-05


fabric-oatmeal-container-drawstring-bags-03


Apply a liberal amount of glue to the outside of the cereal box. Stand tubes, side by side, around the box. Hold in place with rubber bands. When dry, apply several coats of shellac over tubes. Make a drawstring top from a piece of material and sew around top of tube-covered box. Cut a circle of the same material, 1″ larger than bottom of the box. Center and paste circle to bottom of the box with fabric glue. Bend the extra inch of material over and sew to base to cover ends of tubes, as in Figure 4.


Technorati Tags: , , , , , ,

How to Sculpt Clay Heads & Bodies and a Turtle and Mouse

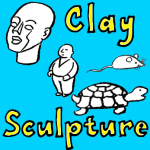
It is so much fun to sculpt with clay but without the right techniques and methods, it is all a guessing game. This tutorial will show, with illustrated steps, how to sculpt human heads and bodies, as well as a clay turtle and a clay mouse. You won’t need to guess any more, follow these directions and you will be on your way to a great sculpture in no time. Have fun!

How to Sculpt Clay Heads & Bodies and a Turtle and Mouse


How to Sculpt Clay Heads & Bodies and a Turtle and Mouse


A HEAD CLAY SCULPTURE


sculting-clay-heads


(1) An egg-shaped roll joined to a cylinder-shaped roll. Meld pieces together by rubbing with thumb. Cut sides away.

(2) Divide head into thirds.

(3) Cut away eye sockets.

(4) Add ears, lips and chin.


SCULPTING CLAY BODIES


SCULPTING CLAY BODIES


(1) A large ball joined to a cylinder-shaped roll.

(2) Add a small ball for the head.

(3) Meld together by rubbing with thumb.

(4) Add clay rolls for arms.

(5) Work in details.

SCULPTING CLAY RABBITS


SCULPTING CLAY RABBITS


(1) A large ball for body

(2) a small ball for head

(3) and a smaller ball for tail.

(4) Meld together with thumb.

(5) Work in details.

SCULPTING CLAY TURTLES


SCULPTING CLAY TURTLES


(1) A half ball for body and a small ball for head

(2) a tiny triangle for tail. Scratch in design on shell.

SCULPTING CLAY MICE


How to Sculpt a Clay Mouse


(1) A ball for body; two smaller flattened out balls for ears; a string for the tail. Meld together by rubbing with thumbs.

(2) Make a triangle shape for snout and smooth into body with thumbs. Make a little ball for nose. Use floss for whiskers.

Technorati Tags: , , , , , , , , , ,

Soap Carving for Kids and Making Soap Sculptures Safely

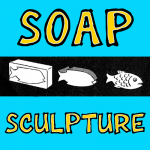
Soap can be a great first-time sculpting activity as soap is soft enough for small hands to work with. Your child can have fun and be creative without worrying that he might mess up the soap, since soap is cheap enough to replace.  Your child will be able to find his or her inner artist and find out about new skills that they didn’t know they even had. One of the first times I realized that I had any sort of artistic skills was when someone put clay in front of me and I sculpted Abe Lincoln’s face and it ACTUALLY looked like him. Let your child have that Ah-Hah moment too.

Soap Carving for Kids and Making Soap Sculptures Safely


Soap Carving for Kids and Making Soap Sculptures Safely


CRAFTS MATERIAL NEEDED

Ivory Soap

Pencil

Either Clay Sculpting Tools or Pumpking Carving Tools

(Optionally) Toothpicks

Instructions About Safely Carving Soap

Instead of using a paring knife to sculpt soap, kids should use safer options. I suggest using either Child-Safe Pumpkin Carving Tools or Clay Sculpting Tools. A toothpick can be used for fine carving. This way if the child slips or makes a mistake, he or she won’t get too hurt. However, whenever a child is carving, an adult should always be present in order to ensure the child is carving in a safe fashion.

There are two ways of applying a design to soap.

1. With a pencil or pointed tool, draw design directly on soap.

2. Place a cake of soap on a piece of paper and draw outline of soap on paper. Draw design on paper, within the pencilled outline. Trace drawing on soap.

For large projects join two cakes of soap. In carving soap keep the silhouette simple. Don’t carve too long in one place; turn the work often. Hold in different lights and at different angles. Keep the heavy masses at the bottom. Soap may be colored with waterproof India ink.

Safely Carving Soap for Soap Sculptures

1. Scrape lettering from one side of soap, removing only enough to reveal a smooth even surface.


2. Allow soap to dry for about an hour before starting in to work.


Trace design on soap


3. Trace design on soap (see above instructions)


Rough out design by cutting away small pieces at a time


4. Rough out design by cutting away small pieces at a time, within 1/4 ” of the outline.


Round out figure, turning project as you work


5. Proceed slowly. Round out figure, turning project as you work. Work in details.

6. Polish by rubbing.

(Optional) Joining Two Cakes of Soap

1. Scrape down sides that are to be joined.

2. (Parent or Adult Should Complete this Step!) Place soap, scraped sides down, into a shallow pan over low heat.

3. Insert toothpicks where they will not interfere with the carving.

4. After 30 minutes, press cakes together. Wait 24 hours to carve

Technorati Tags: , , , , , , ,

How to Make Leather Wallets with Stitching Craft for Kids & Teens

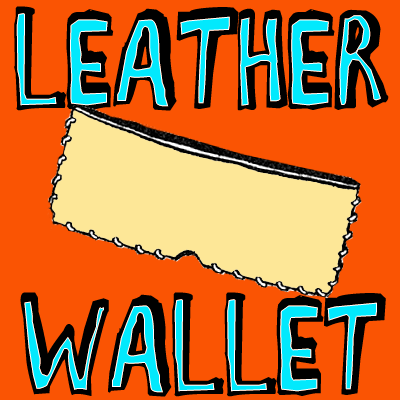
Here is a great project for groups of kids…for Summer Camps, After-school programs, as well as in school settings. This craft is for making a leather wallet that is laced together. This is a very basic leather wallet craft and I think you will be able to follow it with some adult supervision. This craft requires adult supervision and assistance! Please refer to our article about Working with Leather!

You Might Enjoy Our Leather Crafts

How to Make Leather Wallets with Stitching Craft for Kids & Teens


How to Make Leather Wallets with Stitching Craft for Kids & Teens


CRAFTS MATERIALS NEEDED:

Leather

Cutting knife and board (For Adult to Use)

Steel angle (With Adult Supervision)

#0 Punch

3/32″ goatskin (or whatever leather you have on hand)

Rubber cement

How to Make These Leather Laced Wallets

Step 1


leather-wallets-01


(Adult Should Do This Part) Using steel angle and knife, cut two pieces of leather 9″ x 31/2″, as in Figure 1.


 Step 2


leather-wallets-02


Fold one piece of leather in half, and punch a small hole in the center to allow for folding. Open leather up, as in Figure 2.

 Step 3


leather-wallets-03


Run spacing wheel on three sides of both pieces of leather, 1/8 ” from the edge, as in Figure 3.

 Step 4


leather-wallets-04


Skive wrong side of leather on three sides where the pieces are to be joined, as in heavy line in Figure 4. (Here is How You Skive)

 Step 5


leather-wallets-05


Cement skived areas and make holes for lacing using fib and mallet or #0 punch, as in Figure 5.

 Step 6


leather-wallets-06


Lace pieces of wallet together using whip stitch, as in Figure 6.  (Here is How You Use the Whip Stitch)


You Might Enjoy Our Leather Crafts

Technorati Tags: , , , , , , ,

How to Make Wind-Up Moving Cardboard Carousels or Merry-Go-Rounds

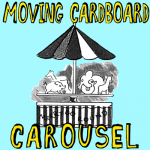
Today we will show you how to make a moving carousel / merry-go-round. You will be able to make this moving toy with some spools, some string, a pencil, and a few cardboard boxes. The motor works by winding string around a spool by spinning the pencil…then it moves on its own. Pretty cool…and you don’t have to use any difficult-to-use materials. Learn how to make your very own working carousel with the following step by step tutorials.


400x400-cardboard-carousel-merry-go-round


How to Make Wind-Up Moving Cardboard Carousels or Merry-Go-Rounds

CRAFTS MATERIALS NEEDED:

2 boxes (A shoe box and a small pill box)

2 spools (A button hole twist spool and a regular size spool)

A new pencil with an eraser

Cardboard

String

Glue

Paints

Step 1


cardboard-carousel-merry-go-round-01


1. Cut a shoe box with cover in half. It will measure 6″ square and about 31/2″‘ high. With a pencil, make a small hole in the center of the shoe box cover (A ). Glue a small pill box with cover (about 1″ high) to the center at the bottom of the shoe box. With a pencil, punch a hole in the cover of the small box, directly under the top hole, as in Figure 1.

Step 2


cardboard-carousel-merry-go-round-02


2. Cut a cardboard circle 6 1/2 ” in diameter. In the exact center, on the underside, glue the small twist spool, as in Figure 2.

Step 3


cardboard-carousel-merry-go-round-03


3. Cut 6 small colored pictures of animals from a magazines or from the Internet (with parental assistance or permission) and mount on coardboard. Make small cardboard easel backs and glue to backs of animals to make them stand, as in Figure 3.

Step 4


cardboard-carousel-merry-go-round-04


4. Glue animal pictures, easel side in, around edge of cardboard circle, as in Figure 4.

Step 5


cardboard-carousel-merry-go-round-05


Tie one end of a four-foot piece of string tightly around the regular sized spool, as in Figure 5.

Step 6


cardboard-carousel-merry-go-round-06


For the canopy, cut a circle of heavy white paper, about 8″ in diameter. Scallop the edges. Paint red stripes radiating from the center of the canopy to the middle of each scallop. (shaded area) Make a straight cut from the edge to the center of the canopy, as shown by the broken line in the illustration. Lap over the cut edges about 1″ and glue together, as in Figure 6.

Step 7


cardboard-carousel-merry-go-round-07


To assemble merry-go-round, stick pencil through center cardboard circle; through the twist spool; through the cover of the large box; through the spool wound with string, and then through the hole in the pill box. Stick a thumb tack through the center of the canopy and pin firmly to the maser at the top of the pencil, as in Figure 7.

Step 8


cardboard-carousel-merry-go-round-08


Paste colored paper around three sides of the merry-go-round, and decorate with paint, as in Figure 8.

Step 9 : MAKING THE MERRY-GO-ROUND TURN!!!


cardboard-carousel-merry-go-round


Pull the string at the open end of the box. To rewind, remove canopy top and twirl pencil so that the string rewinds around spool. Make sure end of string is at the right, otherwise animals will whirl around backwards when string is pulled.

And there you have it…enjoy making your moving merry-go-round carousels!!! Don’t forget to post your pictures!

Technorati Tags: , , , , , , , , ,

How to Make Handprint Elephants and Lions for Preschoolers

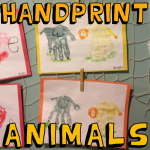
This is an adorable craft for toddlers, Preschoolers, Kindergarteners, and even slightly older children. My friend Erin has a son who goes to Little Monster’s Home Daycare and they made this cute craft today. The bodies of the elephant and lion are created with the child’s hand prints, and they couldn’t come out any cuter. Below you will find the step by step tutorial for making these adorable handprint pictures.

How to Make Handprint Elephants and Lions for Preschoolers


handprint-lions-and-elephants


Crafts Materials Needed:

Paint

Markers

How to Make the Handprint Lion

Lion: Step 1


lion-step1


Paint the child’s hand yellow and then push the child’s hand down onto the paper. Let the handprint dry thoroughly.

Lion: Step 2


lion-step2


After the handprint is completely dry, you can start drawing the features of the lion.  Take out an orange marker and draw curly Qs all around the thumb print for the lion’s hair. Draw 2 black dots for eyes. And with a yellow marker, draw a rectangle tail.

Lion: Step 3


lion-step3


With the orange marker, draw a circle on the tail. Draw black rectangles on the feet. And draw a black dot for a nose and a letter ‘w’ mouth.

Lion: Step 4


lion-step4


Take a green marker and scribble grass below each of the feet. There you have it…an adorable handprint lion.

How to Make the Handprint Elephant

Elephant: Step 1


elephant-step1


Paint the child’s hand gray and then push the child’s hand down onto the paper. Let the handprint dry thoroughly.

Elephant: Step 2


elephant-step2


When you are sure that the handprint is dry, you can then start drawing the elephant’s features. With a grey marker, draw a gray rectangle for the tail. With a black marker, draw 3 lines on the thumb. Draw a letter ‘W’ on the center of the handprint.

Elephant: Step 3


elephant-step3


Draw rectangles on the bottom of the 4 bottom fingers.  Draw a dot for an eye.

Elephant: Step 4


elephant-step4


With a green marker, scribble grass at the bottom of all the feet. And there you have it, an adorable handprint elephant.

The Final Handprint Animal Picture


handprint-lions-and-elephants


Here is what the pictures turn out like (above). Aren’t they adorable!!!! Have fun making these gems.

Technorati Tags: , , , , , , , , , ,

How to Make a Paper Bird Cage Craft Idea for Kids

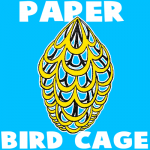
This is another fun paper craft that would be fun to make on a rainy day. These foldable paper bird cages turn out so beautifully, you can even give them away as gifts.

NOTE: The steps might seem simple, but they need to be followed carefully. Don’t be discouraged if you need to try this more than once  to get it just right.


How to Make a Paper Bird Cage Craft Idea for Kids


Crafts Materials Needed:

Paper

Scissors

Step 1


step1


Start with a square piece of paper or cut down a piece of paper into a square.  Then fold the lower right corner inward and upward to the upper left.

Step 2


step2


Now you have a triangle. Now fold its lower left corner inward and upward  to the upper right corner.


Step 3


step3


You now have a smaller triangle. Fold its right corner inward and to the left, as a final fold.

Step 4


step4


The result should look like this triangle. The single edges of the paper running along the top as in the picture above.

Step 5


step5


The folded sheet is now ready to be cut. Cut the paper the way you see it in the above picture. If you need me to verbalize how it is being cut…I have told you below.

(In cutting the paper, start from the diagonal of the triangle and make a cut parallel to the top edge, stopping  just short of the folded edge at the right. Then cut from the folded edge back toward the diagonal, stopping short of the diagonal. Continue with these alternating cuts.)

Step 6


step6


Now, open out the paper carefully  and it will look like this.

 Step 7


gilded paper bird cage papercraft for kids


Gather the corners of the paper and shake the center downward. By twisting the corners, or setting them together  with tape or a rubber band, you form the fancy paper cage as shown in the picture.

Technorati Tags: , , , , , , , ,