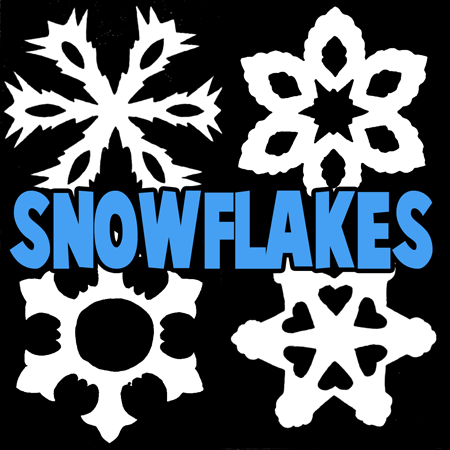
It is Winter time and since we just had a big snowfall, I thought it would be a good idea to show you how to make these fancy 6-pointed snowflakes that look like fancy stars. These can are a bit more complex than the normal stars / snowflakes. I have tried to simplify it for you below by showing you every single step of the process in an illustrated fashion. Have fun.
Arts Materials Needed:
..Paper
..Scissors
Step 1
If you don’t have a square piece of paper, then take a normal sheet of paper and fold the bottom right corner over towards the left until it forms a triangle. Draw a line where the triangle ends. This is where you need to cut the paper to form a perfect square piece of paper.
Step 2
Now fold the square piece of paper in half.
[ad#ahc-1]
Step 3
Now that you have a rectangle piece of paper. You are going to have to fold the piece of paper on the triangle dashed line that you see above. You are either going to have to imagine it or lightly draw it so you can fold it this way…below we have illustrated it.
Step 4 Illustrated in Detail
Step 5
Now this is what your piece of paper should look like after you have folded the piece of paper as detailed in pictures above.
Step 6
Now fold the paper in half lengthwise so it now looks like a kite or diamond.
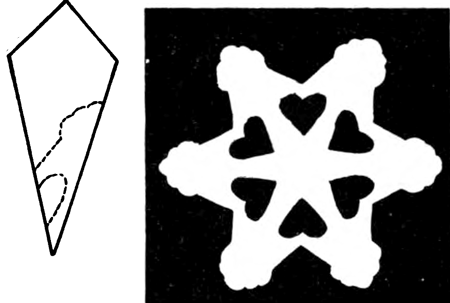
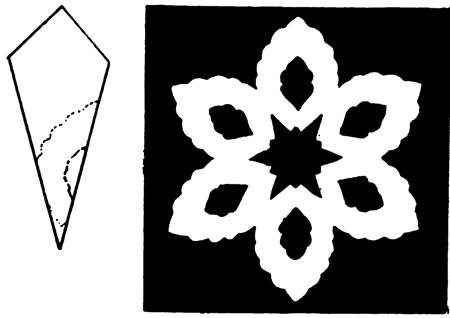
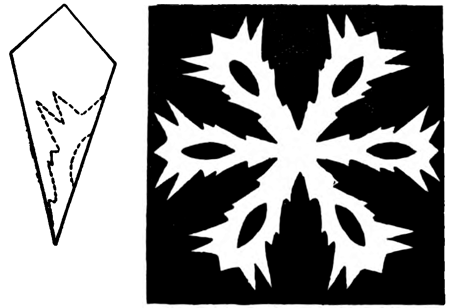
Below we have four different Snowflake designs for you to cut out. Feel free to make your own designs up. The dashed lines are where you should cut.
Snowflake Stars : Design #1
Snowflake Stars : Design #2
Snowflake Stars : Design #3
Snowflake Stars : Design #4
How to Make 6 Pointed Snowflakes and Stars Step by Step Craft for Kids
Technorati Tags: snowflakes, paper snowflakes, stars, paper stars, cutting paper snowflakes, snow flakes, how to cut snowflakes, how to cut snow flakes, paper cutting, winter crafts, snowflake crafts, snow crafts, crafts for kids, kids crafts




I love this!!! I just could not ever figure out how to make a snowflake out of paper! Now I know. Thanks to you! Happy New Year! Marie
Glad you like it! Happy New Year to you too. 🙂
THANKS
great directions will use thank you
thaaaaaaaaaaaaaanks