How to Make a Paper Christmas Tree Craft for Children Tutorial

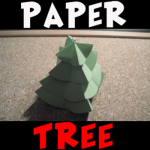
Learn how to use green construction paper and a pin to form a beautiful Christmas tree that really stands.
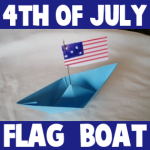
 Laura from Dacian Moon Handmade   will show you how to make a paper Xmas tree, step by step.

Check out our Christmas Crafts.


How to Make a Paper Christmas Tree Craft for Children Tutorial


How to Make a Paper Christmas Tree Craft for Children Tutorial

CRAFTS MATERIALS NEEDED:

– green paper
– scissors
– pencil
– sewing pin


Step 1.

Draw 4 circles on the green paper.


Cut them out.


Step 2.

Take one and fold it in half.


Unfold.


Fold it again in half, on the other side.


Unfold.


Step 3.

Unite two adjacent corners…


… like this.


Repeat for all sides.


Do the same for all discs.


Step 4.

Take the pin…


… and put it through the middle of the littlest one.


Put discs one on top of each other, in increasing order, and the tree is ready.


And there you have it…a stand-up, paper Christmas Tree. You can put it on a table, on a ledge, on a bookshelf, or anywhere else where people can see. Merry Christmas!

Check out our Christmas Crafts.

Technorati Tags: , , , , ,

How to Make a Patriotic American Flag Boat for 4th of July

Are you looking for a unique Fourth of July craft? Here is a fun craft to celebrate America’s birthday…this craft (by Laura from Dacian Moon Handmade)  will show you, step by step, how to make a paper boat with an American flag– a simple craft for 4th July.
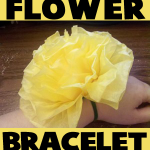


How to Make a 4th of July Patriotic Flag Boat


CRAFTS MATERIALS NEEDED:

– blue paper
– white paper
– red and blue pen
– needle (or toothpick)
– scissors


IMG_5920


Step 1.

Take the blue paper …


IMG_5925


… and fold it in half by bringing the upper part over the lower one.


IMG_5926


Fold again in half by bringing the left part over the right one this time.


IMG_5927


Unfold, because we need only the crease at this point.


IMG_5928


Step 2.

Bring the right upper corner to the center.


IMG_5929


Do the same for the left corner, like this.


IMG_5930


Fold the remaining strip upward.


IMG_5931


Turn over …


IMG_5932


… and fold the strip upward.


IMG_5933


Step 3.

Open…


IMG_5934


… like this…


IMG_5935


… until it became flatten on the other direction.


IMG_5936


Fold the lower parts upward…


IMG_5937


… like this.


IMG_5938


Open again until it became flatten on the other direction.


IMG_5939


Like this.


IMG_5940


Step 4.

Take the upper corners and stretch out.


IMG_5941


Like this.


IMG_5942


Now the boat is ready.


IMG_5945


Step 5.

Let’s make the flag. Cut a rectangle of white paper…


IMG_5947


Draw the contour of the blue part…


IMG_5948


… and the stars.


IMG_5950


Start filling this part with blue color.


IMG_5951


Like this.


IMG_5952


Use red color to draw the lines on the rest of the flag.


IMG_5953


Like this.


IMG_5954


Step 6.

Now we assemble the components. Put the needle through the flag…


IMG_5956


and stick the tip in the middle of the boat, like this.


IMG_5957


The boat is ready to be used as a decoration or as a toy.


IMG_5958


Technorati Tags: , , , , , , , , , ,

How to Make Tissue Paper Flower Bracelets for Mom on Mothers Day or Easter

This versatile, large and beautiful flower can be used as a basket topper, bracelet or hair decoration. They are simple to make and you’ll be amazed to see your own flower bloom right in front of you. Since Mother’s Day is coming up, and we didn’t post this craft for Easter, I thought it might also be good to make as a gift for your Mom.


Flower Bracelets to Make for Mom on Mothers Day or For Easter


How to Make Tissue Paper Flower Bracelets for Mom on Mothers Day or Easter


Crafts Materials list:
  • 1 large sheet of tissue paper (2’6″ X 20″)


  • Pipe Cleaner (Green for the stem, but could be any color)


  • Scissors


  • Ruler


Step 1: Cut sheet into eight equal pieces. Then stack the pieces, putting any smaller ones on top.


Step 2: Fold the stack like an accordion, length-ways


Step 3: Wrap the pipe cleaner around the middle of your folded stack, twisting it tightly.


Step 4: Separate the sheets, pulling up to the center, one piece at a time. This is the fun part and you shouldn’t worry about making it perfect.


Step 5: Marvel at your new flower. Try to hold yourself back from making an entire garden.

Technorati Tags: , , , , , , , , , , , , ,

How to Make a Paper Bird Cage Craft Idea for Kids

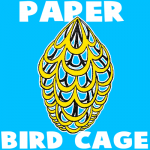
This is another fun paper craft that would be fun to make on a rainy day. These foldable paper bird cages turn out so beautifully, you can even give them away as gifts.

NOTE: The steps might seem simple, but they need to be followed carefully. Don’t be discouraged if you need to try this more than once  to get it just right.


How to Make a Paper Bird Cage Craft Idea for Kids


Crafts Materials Needed:

Paper

Scissors

Step 1


step1


Start with a square piece of paper or cut down a piece of paper into a square.  Then fold the lower right corner inward and upward to the upper left.

Step 2


step2


Now you have a triangle. Now fold its lower left corner inward and upward  to the upper right corner.


Step 3


step3


You now have a smaller triangle. Fold its right corner inward and to the left, as a final fold.

Step 4


step4


The result should look like this triangle. The single edges of the paper running along the top as in the picture above.

Step 5


step5


The folded sheet is now ready to be cut. Cut the paper the way you see it in the above picture. If you need me to verbalize how it is being cut…I have told you below.

(In cutting the paper, start from the diagonal of the triangle and make a cut parallel to the top edge, stopping  just short of the folded edge at the right. Then cut from the folded edge back toward the diagonal, stopping short of the diagonal. Continue with these alternating cuts.)

Step 6


step6


Now, open out the paper carefully  and it will look like this.

 Step 7


gilded paper bird cage papercraft for kids


Gather the corners of the paper and shake the center downward. By twisting the corners, or setting them together  with tape or a rubber band, you form the fancy paper cage as shown in the picture.

Technorati Tags: , , , , , , , ,

How to Make Paper Flowers – Make a Daisy for Mom on Mothers Day

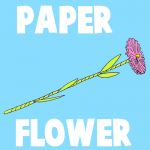
Oh no! Mother’s Day is coming up and you didn’t make your Mom a Mother’s Day present!!! No worries…here is a fun and easy craft that will knock the socks off of your mother. This paper flower craft sort of looks like a daisy, but you can use any colors you want to make it look like any type of flower. Find out how to make this paper daisy below.


How to Make Paper Flowers - Make a Daisy for Mom on Mothers Day


Crafts Materials Needed:

Colorful Paper

Scissors

Step 1


step1


Take a long strip of colorful paper and roll it up as in the picture seen above. Now paste the rolled paper shut.

Step 2


step2


Now cut slits in one end of the rolled paper tube.


Step 3


step3


Now flatten out the slitted side and turn it upside down, as seen in the picture above.

Step 4


step4


This part is a little hard to explain, but basically take a small piece of colorful paper (in the finished picture this part would be orange) and twist it into a rounded stump.

 Step 5


step5


Now put this rounded stump into the center of the flatten flower.

Step 6


step6


Now take a narrow strip of green paper. Paste one end on the short stump below the flower. Start twisting the strip round and round, each time a little more downward, in a spiral fashion…as seen in the pic above.

Step 7


step7


Now get a green piece of paper and fold it forwards/backwards/forwards/backwards, etc like an accordion.

 Step 8


step8


Now draw the shape of half of a leaf on top of the fold and then cut it out. You will now gets tons of leaves out of this.

Step 9


step9


Flatten out the leaves and then work them into the spiral folds on the stem as seen in the picture above.

Finished Paper Daisy Craft


Finished paper flower for mom on mothers day


Now you have a beautiful paper flower or daisy for your Mom on Mother’s Day. I hope you enjoyed this craft!

Technorati Tags: , , , , , , , , ,


Black Cat Foldable Paper Toy Craft for Halloween

Halloween is just around the corner so I put together a bunch of Halloween characters that you can fold out of paper. These are Halloween figurines that are very easy to print out, fold, and paste together. This specific character is a black cat, however I decided to make the cat cute instead of scary. Find out how to make this cute kitty cat below.

More Halloween Crafts.

Here are the Other Halloween Paper Toys in This Collection


black-cat-paper-foldable-toy-first-pic


Materials Needed

Paper or Card Stock

Scissors

Glue


The Template to Print Out:


black-cat-paper-foldable-toy-template


CLICK ON THIS PICTURE TO OPEN TEMPLATE. Then Save the Template to Your Computer and Print.

How To: Step 1


Cut Out Cat Template


Cut Out the Template.

Step 2


Fold Paper Cat Toy on the Lines


Fold on the lines.

Step 3


Fold Paper Cat Toy on the Tabs


Fold the Tabs too.

Step 4


Now Glue Together


Glue the cat together on the tabs.


Foldable Paper Cat Figurine Pasted Together


To look like the above picture.

Step 5


Glue the Tail and Ears on


Glue the ears on the top of the cat. Glue the tail onto the back of the cat.

Now enjoy your black cat for Halloween. Print out the other foldable paper Halloween toys in this collection too.

More Halloween Crafts.

Here are the Other Halloween Paper Toys in This Collection

Technorati Tags: , , , , , , , ,

How to Make a Double Edged Paper Airplane

Paper airplanes are a lot of fun to make and today’s paper airplane craft is no exception.  Put a spin on the traditional paper airplane with this Double Edged Paper Airplane craft.  This paper airplane can not only fly well, but it flies fast too.  Today I will show you step-by-step how to make this plane and if you scroll down towards the end of the post I will even show you how to make this Double Edged Paper Airplane with a video.  So, grab the materials needed and let’s get started.

Check out our other Paper Folding Crafts.


How to Make a Double Edged Paper Airplane


Materials Needed

Standard Printer Paper

Stapler (staples)

Scissors


Step 1


Fold sheet of paper over once.


Fold sheet of paper over once.


Fold sheet a second time.


Fold sheet a second time.


Fold sheet a third time.


Fold sheet a third time.


Step 2


Unfold the paper.


Unfold the paper.


Step 3


Cut center fold about half way down.


Cut a line a little further than half way down the paper


Step 4


Cut a short line... 2 lines up on each side


On the opposite side of the line cut in the last step, you will be making 2 short cuts. Cut 2 short lines on the second line over on both sides.


Here is another look at this step.


Here is another look at this step.


Step 5


Fold triangle on both sides up to the second line


Fold a triangle on each side of the top second line over.


Step 6


Fold over again.... this time to the center.


Fold it over again except to the middle.


Step 7


Fold over tops of each point.


Fold over the tops to the side, as shown.


Step 8


Fold over 2nd top point and then staple together.


Staple over the two flaps, holding the two sides together.


It should then look like this.


It should then look like this.


Step 9


Fold down top third of airplane.


Fold top third of the airplane down.


Like this.


Like this.


Step 10


Fold corner over.


Fold down two triangles from the corners to about the center of the airplane, as shown.


like this.


like this.


Step 11


Now, fold entire flap over.


Fold down two triangles to about the center of the airplane from the sides, as shown.


Fold the other side the same way.


Like this.


Step 12


Fold in half lengthwise.


Fold airplane in half length-wise.


Like this.


Like this.


Step 13


Fold top of each side to bottom of plane.


Fold top of each side to bottom of airplane to make the wings, as shown.


Step 14


now you have your finished Doubled Edged Paper Airplane.


And, now you have your finished Doubled Edged Paper Airplane.  Go fly it and watch it soar.  Enjoy.

Here is our video on How to Make a Double Edged Paper Airplane

Technorati Tags: , , , , , , , ,

How to Make a Folded Paper Windmill

Today I am going to show you how to make a Folded Paper Windmill.  This windmill is so much fun to make and it is simply made from 4 sheets of paper.  The majority of the craft supplies needed can be found in your home so you can get started with this craft right away.  So, grab the materials needed and let’s get started.

Check out our other Paper Folding Activities.


How to Make a Folded Paper Windmill


Materials Needed

4 Sheets of Paper

Scissors

Paste/Glue

Ruler

Pencil

Paper Fastener


Top of Windmill

Step 1


Cut a square piece of paper


Cut a square piece of paper (such as 8 inches x 8 inches).


Step 2


Fold into 16 squares and then unfold.


Fold into 16 squares and then unfold.  Detailed steps are below.


Fold page in half.


Fold page in half.


Fold page in half again.


Fold page in half again.


Open back up.


Open back up.


Fold in half twice in the other direction.


Fold in half twice in the other direction.


Open back up again.


Open back up again.


Step 3


Cut 3 slits on both sides.


Cut 3 slits on both sides.


I am numbering the squares to help show you how to fold it.


I am numbering the squares to help show you how to fold it.


Step 4


This is the top of the windmill.


This is the top of the windmill.  The square will naturally fold into a house shape.  Paste in place as I will show you below.


Fold #8 over #12.  Paste.


Fold #8 over #12.  Paste.


Fold #9 over #5.  Paste.


Fold #9 over #5.  Paste.


Fold #16 over #4.  Paste.


Fold #16 over #4.  Paste.


Fold #13 over #1.  Paste.


Fold #13 over #1.  Paste.


View from one side.


View from one side.


View from other side.


View from other side.


House

Step 1


Start off again with 8x8 inch piece of paper, folded.


Start off again with 8×8 inch piece of paper, folded.


Step 2


Now, cut off the last column of squares.


Now, cut off the last column of squares.


It now looks like this


It now looks like this, above.


Step 3


Now, cut three slits on both sides.


Now, cut three slits on both sides.


Step 4


Fold the house and paste in place.


Fold the house and paste in place.


Windmill

Step 1


For the tall, lower part of the windmill... fold the paper so there are 15 squares


For the tall, lower part of the windmill… fold the paper so there are 15 squares (3 squares in each column).  Follow directions below.


Cut a piece of paper 8 inches x 10 inches.


Cut a piece of paper 8 inches x 10 inches.  Measure out lines 2 inches apart.  Fold on these lines.


Now fold the paper in half twice in the other direction.


Now fold the paper in half twice in the other direction.  Open back up.


Now cut off rectangle so there are 3 columns with 5 squares in each.


Now cut off rectangle so there are 3 columns with 5 squares in each.


Step 2


Now fold the paper into long rectangle, like above picture.  Glue together.


Now fold the paper into long rectangle, like above picture.  Glue together.


Now fold the paper into long rectangle, like above picture.  Glue together.


Like this.


Pinwheel

Step 1


Fold square piece of paper into fours.  Unfold.


Fold square piece of paper into fours.  Unfold.


Step 2


Cut slits on a diagonal.  Don't go thru to center.


Cut slits on a diagonal.  Don’t go thru to center.


Step 3


Bring all corners to center.


Bring all corners to center.  Put brass fastener thru center and into windmill top as seen in next pic.


Finished Windmill


And, there you have it….. you just finished making your Folded Paper Windmill.  How did you Windmill turn out?  Let me know in the comments below.  And, don’t forget to take a picture of your Windmill and share it in the comment as well.

Technorati Tags: , , , , , , , , , ,

How to Make a Lampshade Paper Sculpture – Exercise 2

Earlier today I posted How to Make a Paper Wave Sculpture – Exercise 1.  It shows you the basics of making a Paper Sculpture…. specifically a paper wave sculpture.  Well, in this post I’m going to show you how to make a Lampshade Paper Sculpture…. it’s the 2nd exercise in two showing you how to Paper Sculpt.  It’s a little more complicated than the first, but if you did Exercise 1 you are ready for the challenge of Exercise 2.  So, let’s get started.


How to Make a Lampshade Paper Sculpture


Materials Needed

Paper

Pencil

Ruler

Butter Knife

Tape


Step 1


The paper is ruled off with a pencil and a ruler.


The paper is ruled off with a pencil and a ruler.  Do this in parallel lines an equal distance apart from each other… one on one side of the paper and the next on the other and so on.


Step 2


Now use the lines that you drew as a guide to where to score the paper.


Now use the lines that you drew as a guide to where to score the paper. To score a piece of paper, you can use the dull side of a butter knife. Take a ruler and line it up with one of the pencil lines…then use the dull side of a butter knife and run it along the ruler (on the paper) as if it were a pencil. Now you should have a scored line. The lines are scored on alternate sides of the paper and the paper bent like a fan.


Step 3


The edges of the paper are taped together to achieve a sort of lampshade effect.


The edges of the paper are taped together to achieve a sort of lampshade effect.


Step 4


This is what the item looks like from the top.


This is what the item looks like from the top.

That’s all there is to it…. you just finished making your Lampshade Paper Sculpture.  How did your sculpture turn out?  Let me know in the comments below.  And, add a picture of the Lampshade Paper Sculpture as well to the comment…. I’d love to take a look at it.

Technorati Tags: , , , , , , ,

How to Make a Paper Wave Sculpture – Exercise 1

Believe it or not you can actually make sculptures out of paper.  That’s right, you can actually compose items that are built up from a simple paper and molded into shapely items.  In this post I’m going to show you how to make a Paper Wave Sculpture.  With a little bit of patience and following the steps provided below you too will be able to make a Paper Wave Sculpture.  So, grab the materials needed and let’s get started.


How to Make a Paper Wave Sculpture


Materials Needed

Paper

Ruler

Hole Punch

Thread or Fine Wire


Step 1


Cut a strip of paper, hold the ruler firmly across it and pull it through and upwards.


Cut a strip of paper, hold the ruler firmly across it and pull it through and upwards.


Step 2


the paper becomes flexible and easy to handle.


Keep doing this…. the paper becomes flexible and easy to handle.


Step 3


By doing this on opposite sides of the paper you obtain a waved effect.


By doing this on opposite sides of the paper you obtain a waved effect.


Step 4


A thread or fine wire is drawn through a series of holes along the top edge of the paper.


A thread or fine wire is drawn through a series of holes along the top edge of the paper.


Step 5


The thread is drawn up and the edges of the paper fastened together.


The thread is drawn up and the edges of the paper fastened together.

That’s it…. you just made your own Paper Sculpture called the Paper Wave.  Isn’t it amazing?  I think the most amazing part is that this wave is actually just made from paper.  Very cool!!

Technorati Tags: , , , , , ,

How to Make an Easter Bunny Chain

Have you ever made a people chain with paper?  If so, I have an Easter craft that is very similar to that.  Today I’m going to show you how to make an Easter Bunny Chain out of paper.  This craft can be made by the youngest of crafters.  And, it is so much fun.  Once you are done cutting out the Easter Bunny Chain decorate it and hang it up as an Easter Decoration.  People will love it!!  So, grab the materials needed and let’s get started.

Check out our other Easter Crafts.


How to Make an Easter Bunny Chain


Materials Needed

Printer

2 Sheets of Paper

Pencil

Scissors

Marker


Click on template image to make larger and to print.


Easter bunny chain template


Step 1


Fold piece of paper forward and backwards in accordion fold.


Fold piece of paper forward and backwards in accordion fold.


Step 2


Use template to trace a bunny on the front fold.


Use template to trace a bunny on the front fold… Make sure both arms and feet are along edges.


Step 3


Push folded pages together and cut bunny out.


Push folded pages together and cut bunny out.  Don’t cut on red portions of bunny.


Step 4


Open up the folded bunny.


Open up the folded bunny.


Step 5


Now draw bunny faces on all the bunnies.


Now draw bunny faces on all the bunnies.


Draw an oval for the eyes


Draw an oval for the eyes; A rounded triangle for the nose; A sideways #3 for the mouth.

And there you have it…. you have your Easter Bunny Chain.  Now, go hang it up as an Easter Decoration…. viewers will love it!!

Technorati Tags: , , , , , , , , , , ,

How to Make an Origami Shamrock

St. Patrick’s Day is just days away.  And, when you think of St. Patrick’s Day what do you think of?  I know what I think of…. Shamrocks!!  So, in honor of Shamrocks and St. Patrick’s Day I’m going to show you how to make an Origami Shamrock.  This Origami Shamrock will be perfect to hang up for St. Patrick’s Day or even use as a bookmark.  So, grab some Origami Paper and some glue and let’s get started with this craft.

Check out our other Origami & Paper Folding Activities & St. Patrick’s Day Crafts.


How to Make an Origami Shamrock


Materials Needed

5 Sheets Green Origami Paper

Glue


Step 1


Fold paper in half.


Fold paper in half.


Step 2


Fold in half the other way now.


Fold in half the other way now.


Step 3


Turn over.


Turn over.


Step 4


Fold bottom up to middle crease.


Fold bottom up to middle crease.


Step 5


Turn over.


Turn over.


Step 6


Fold bottom right corner up to center crease.


Fold bottom right corner up to center crease.


Step 7


Fold bottom left corner up to center line too.


Fold bottom left corner up to center line too.


Step 8


Flip over.


Flip over.


Step 9


Bring top right corner to center line.


Bring top right corner to center line.


Step 10


Now bring left top corner over to center line too.


Now bring left top corner over to center line too.


Step 11


Fold top corner down to crease line without folding white triangles on sides.


Fold top corner down to crease line without folding white triangles on sides.


The paper should now look like this.


The paper should now look like this.  Notice white triangles are unfolded.


Step 12


Fold white triangles in on the inner edge of each triangle.


Fold white triangles in on the inner edge of each triangle.


Like this.


Like this.


Step 13


Fold 2 triangles on each side of heart.


Fold 2 triangles on each side of heart.


Like this.


Like this.


Step 14


Now fold down top a bit to make less pointy.


Now fold down top a bit to make less pointy.


Step 15


It should look like this.


It should look like this.


Step 16


Make four hearts and then place them like this.


Make four hearts and then place them like this.


Step 17


For stem, place origami paper green side down.


For stem, place origami paper green side down.


Fold corner A to B to make crease in center.


Fold corner A to B to make crease in center.


Fold both corner A and B to center line.


Fold both corner A and B to center line.


Now bring left and right top sides down to center line


Now bring left and right top sides down to center line like seen here.


Fold in half as seen in next picture.


Fold in half as seen in next picture.


Like this.


Like this.


Fold A down to B.


Fold A down to B.


Like this.


Like this.


Step 18


Now place triangle over hearts.


Now place triangle over hearts.


Step 19


Glue all together.


Glue all together.


Step 20


Turn over.


Turn over.


Finished Origami Shamrock


And, there you have it…. you just finished your Origami Shamrock.  Isn’t it adorable?  How did it turn out for you?  Let me know in the comments below.  And, don’t forget to take a picture of it too and post that as well in the comments…. I’d love to see it.

Technorati Tags: , , , , , , , , , , , , , , , ,

How to Make Paper Strip Belts and Bracelets

In this post I will be showing you how to make a Paper Strip Belt or Bracelet.   The choice is really yours weather you make a belt or a bracelet.  You simply will need to adjust the amount of colored paper you use for the project…. less for the bracelet and more for the belt.  Make a few and give them to your friends or loved ones…. anyone would be sure to enjoy them.  So, grab the materials needed and let’s get started with this fun craft.

Check out our other Friendship Bracelet Instructions.


How to Make Paper Strip Belts and Bracelets


Materials Needed

Thin Colored Paper, Magazine or Cellophane

Cord or Ribbon


Step 1


Thin colored paper, colored magazine pages or cellophane may be used.


Thin colored paper, colored magazine pages or cellophane may be used.  Plan 1 pattern for each inch.


Step 2


Fold on 'A' and 'B' toward 'C'.


Fold on ‘A’ and ‘B’ toward ‘C’.


Step 3


Fold again on 'C'.


Fold again on ‘C’.


Step 4


Fold on center.


Start with about 25 of these.  Fold on center.


Step 5


Fold both ends toward the center.


Fold both ends toward the center.  Completed.


Step 6


Slip one link through the loops of another like a hairpin.


Slip one link through the loops of another like a hairpin.


Step 7


Continue until the length you desire is completed.


Continue until the length you desire is completed.


Step 8


Tie a cord or ribbon on end loops.


Tie a cord or ribbon on end loops.


Completed Paper Link Belt or Bracelet


And, there you go…. you just finished making your Paper Strip Belt or Bracelet.  Wasn’t that fun?  The question I have for you though is…. Did you make a belt or a bracelet?  Let me know in the comments below.  Wear it proudly.

Technorati Tags: , , , , , , , , , , , , , ,

How to Make a Paper Spinner

I have a fun craft for you today.  And, the cool part is it is just made with some standard paper and a pair of scissors.  I am going to show you how to make a Paper Spinner.  When made correctly you simply throw it up in the air and watch it spin gracefully the whole way down.  I don’t know what’s more fun….. the making of the craft or playing with the craft once it is finished.  So, grab some paper and a pair of scissors and let’s get started.

Check out our other Paper Folding Activities.


How to Make a Paper Spinner


Materials Needed

Paper

Scissors


Step 1


cut two slits towards the center


About a quarter of the way down from the top edge of the long paper, cut two slits towards the center, leaving some space between the ends of the slits.


Step 2


Pleat one bottom section to the exact width of that space.


Pleat one bottom section to the exact width of that space.


Step 3


Then fold the other bottom section around it.


Then fold the other bottom section around it.  This produces a folded paper shape exactly like a letter “T,” the one unfolded part being the cross-at the top.


Step 4


To keep the folded segment firmly fixed, cut a short slit upwards from the bottom at the exact center.


To keep the folded segment firmly fixed, cut a short slit upwards from the bottom at the exact center. This should be about 1/2 inch or 3/4 inch in length, or even longer, with a large sheet of paper.


Step 5


Then fold one tab upward to the front, the other upward to the back


Then fold one tab upward to the front, the other upward to the back, as in the image above.  This holds the pleated portion in place, as required.


Step 6


Take the scissors and make a center cut down from the top of the "T" to the folded section.


Take the scissors and make a center cut down from the top of the “T” to the folded section.


Step 7


This forms two rectangular "blades" at the top.


This forms two rectangular “blades” at the top. Fold one of these downwards to the front; the other downwards to the back. These folds are made along the short uncut strip where the cross-bar of the “T” joins the folded upright, or “post” of the spinner. This is shown in the image above.  The fact that the blades are flimsy does not matter. On the contrary, it proves helpful towards the spinner’s flight.


Step 8


give it a short toss straight upward.


Holding the spinner with the post upright and the blades at the top, give it a short toss straight upward. As it descends, it will begin to spin, its rotary action slackening its fall.  The folded tabs at the bottom set like stabilizers during the brief but intriguing flight. When dropped from a window, a spinner may cover more range before reaching the ground.

And, there you have it….. you just made a Paper Spinner.  Isn’t it fun to play with?  How did your Paper Spinner turn out?  Let me know in the comments below.

Technorati Tags: , , , , , , , , , , , , , ,

How to Make Origami Boats

Today I’m going to show you how to make Origami Boats.  When made with waterproof paper like waxed paper or cellophane these Origami Boats will actually float.  Use them in the bathtub or in a puddle outside.  Not only is this craft fun to make, but it is equally fun to play with the Origami Boat once made.  You can even add toothpicks to the boat to give the illusion that the boat has oars.  So, grab the materials needed for this craft and let’s get started.

Check out our other Origami Crafts.


How to Make Origami Boats


Materials Needed

Waxed Paper, Cellophane, or Other Waterproof Paper

Toothpicks (optional)


Step 1


Fold a square in half and crease...then unfold.


Fold a square in half and crease…then unfold.


Step 2


Bring lines A and B to center fold and crease.


Bring lines A and B to center fold and crease.


Step 3


Fold on diagonal dotted lines, bringing points C, D, E and F to the center line and crease.


Fold on diagonal dotted lines, bringing points C, D, E and F to the center line and crease.


Step 4


Fold on dotted lines.


Fold on dotted lines.


Step 5


Fold again on dotted lines.


Fold again on dotted lines.


Step 6


Turn boat inside out, holding folds carefully to prevent tearing.


Turn boat inside out, holding folds carefully to prevent tearing.


Step 7


Finished boat, ready for the bathtub or after-rain puddle.


Finished boat, ready for the bathtub or after-rain puddle.  If you wish, use the toothpicks to make the boat look more authentic…. the toothpicks can be the oars.  Enjoy!!

Technorati Tags: , , , , , , , , , , , ,

How to Make Paper Sculpture Birds

Today I have a fun craft for you.  I’m going to show you how to make a Paper Sculpture Bird.  When made correctly the birds are 3 dimensional and look so cool hanging from a ceiling.  These Paper Sculpture Birds can be used to decorate a classroom or  child’s bedroom.  A great number of birds and animals can be made by using this technique…. so feel free to use your imagination,  Grab the materials needed and let’s get started.

Check out some other Paper Folding Activities.


How to Make Paper Sculpture Birds


Materials Needed

8 1/2″ x 11″ typewriting or mimeograph paper

Scissors

Ruler

Pencil Paper punch

Thread


Step 1


8 1/2 x 11" typewriting paper is folded in half and a freehand cut is made to suggest the bird form.


8 1/2 x 11″ typewriting paper is folded in half and a freehand cut is made to suggest the bird form.


A paper punch is used to make the eyes.


A paper punch is used to make the eyes.


Step 2


Unfolding the paper reveals a symmetrical design.


Unfolding the paper reveals a symmetrical design.


Step 3


Using a ruler as a straight edge, fold upward the wings of the bird at points "A''.


Using a ruler as a straight edge, fold upward the wings of the bird at points “A”.


Step 4


draw two triangular peaks lightly with pencil as shown in Figure 4


In making the pleat, draw two triangular peaks lightly with pencil as shown in Figure 4. Carefully fold the pleats down; this will bring the tail of the bird up.


Step 5


The wing tips are curled by rolling them tightly around a pencil.


The wing tips are curled by rolling them tightly around a pencil.


Step 6


In Figure 6 another pleat is made at the neck; and the bird is suspended from the ceiling with thread.


In Figure 6 another pleat is made at the neck; and the bird is suspended from the ceiling with thread.

And, there you have it…..you just finished making a Paper Sculpture Bird.  This Paper Sculpture Bird would look so cool hanging from your bedroom ceiling.  Where are you going to hang your bird?

Technorati Tags: , , , , , , , , , , , ,