How to Make a Snowman from Socks

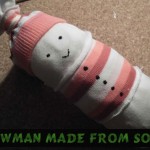
When you think of winter time what do you think of?  Snow, of course.  Well, what is the one thing that children love to make in the snow?  A snowman.   Today I’m going to show you how to make a snowman from socks.  This is an adorable snowman stuffed toy that any child will love to snuggle with.  And, if the child helped your make it…. they will enjoy it even more.  This is a great winter time craft that can be enjoyed by children young and old.

Check out our other Winter Crafts and Sock Crafts.

Step by step tutorial offered by Laura from Dacian Moon Handmade


Materials Needed

– striped sock
– white fabric
– filling material (I used some cotton pads broken into pieces)
– scissors
– ribbon
– black paint
– needle and thread


Step 1

Measure the width of the socks on the fabric folded in two…


… and cut it out.


Sew the two sides together, letting an opening on the upper part.


Like this.


Turn it to the other side.


Step 2

Shred the cotton pads into small pieces…


… and fill the sewed white fabric with it.


Like this.


Tie the open end with the ribbon.


Step 3

Use a thread to separate the 3 snowballs of the snowman.


Like this.


Step 4

Cut off the upper part of the sock …


… then cut that part in half.


Dress the snowman with one, as a shirt.


Put the other one on its head, as a cap.


Use the ribbon to tie the cap to keep it in place.


Draw eyes, mouth and buttons on your snowman using black paint.


Check out this adorable sock snowman.  You can give this to a friend or family member…. or enjoy it for yourself.

Technorati Tags: , , , , , , , , , , , ,

How to Make a Lace Christmas Ornament

I have a wonderful Christmas craft for you today.  I’m going to show you how to make a lace Christmas Ornament for your Christmas tree.  This Lace Christmas ornament is a wonderfully delicate ornament and the crystals will look just absolutely breathtaking against the Christmas lights on the tree.  Let the kids join in on this craft…. after all it is a super fun craft for the whole family.  Plus, imagine how good the kids will feel when they see their handcrafted ornament on the tree.  So, let’s get started.

Check out our other Christmas Crafts.

This delicate ornament will add a note of elegance to your Xmas tree.


Materials Needed

– lace (for best results use one with flowers or some pattern border, like mine)
– needle and thread
– a piece of thick thread
– crystals (I use bicones and one drop)
– scissors
– 1 small bead


Step 1

Look carefully at the lace and choose the best part to use, then cut it out.


I choose a spiral with a tail so I will add the crystals to the tail. You will add them on the lower part of your piece, to dangle.


Step 2

Sew the crystals  to look good…


… I put each one on a part of the tail, letting the middle one free.


In the middle we will sew the drop.


Step 3

Place the drop on the needle, starting with the narrow end.


Then add the bead…


… and pass the needle back through the drop, like in the picture.


It will look like this. Sew it to the lace and make a small knot.


The ornament is almost ready.


The only thing that must be done is to add the thick thread on the upper part, like this.


Now you have an elegant ornament for your Christmas tree.


Isn’t this a beautiful Christmas ornament?  It’s just so delicate…. I love it.  The dangling beads will look so beautiful against your Christmas lights.

Technorati Tags: , , , , , , , , , , , ,

How to Make Circle Paper Snowflakes – 4 Patterns

When you think of winter what do you think of?  I know what I think of….. snow.  Today I’m going to show you how to make circle paper snowflakes.  And, not just one type…. I will show you four different patterns.   These snowflakes are a lot of fun to make.  But, what is really cool about paper snowflakes…. they look great as winter decorations around your house.  Put them up in your windows to add to your Winter Holiday decorations.  So, let’s get started.

Check out our other Winter crafts.


How to Make Circle Paper Snowflakes - 4 Patterns


Materials Needed

Lid or Bowl

Paper

Pencil

Scissors


Step 1


Trace a lid or a bowl to make a perfect circle.


Trace a lid or a bowl to make a perfect circle.


Step 2


Fold circle in half.


Fold circle in half.


Step 3


Fold in half again.


Fold in half again.


Step 4

Draw a pattern.  Here are 4 pattern ideas….


Pattern 1


Pattern 1


Pattern 2


Pattern 2


Pattern 3


Pattern 3


Pattern 4


Pattern 4


Step 5


Cut out patterns and open up.


Cut out patterns and open up.

Aren’t these snowflakes great?!  And, you don’t have to limit yourself to the patterns we are showing you here.  Feel free to use your imagination and create some of your very own unique snowflakes.

Technorati Tags: , , , , , , , , , , , , , ,

14 Fun Snowflake Crafts for Winter


14 Fun Snowflake Crafts for Winter


Winter is well on its way….. and when you think of Winter what do you think of?  I know what I think of….. snow.  So, in honor of Winter and snow today’s craft is all about snowflakes.  I scoured the internet to find some really awesome snowflake crafts.  And, there are some really cool snowflake crafts out there.  So, today I’m going to present you with 14 Fun Snowflake Crafts for Winter.  For some of these crafts you will need to know how to make a snowflake, so check out these great snowflake patterns.

Check out some of our Snowflake Crafts.

14 Fun Snowflake Crafts for Winter

(1) Multicolor Snowflake Wreath


Snowflake Wreath


Here is a really cute Wreath perfect for the Winter Season.  It turns out quite beautiful.  BHG shows you how you too can make this Winter Wreath.  Made from left over card stock from all those Christmas Cards you got during the Christmas Season.  What a great way to recycle those greeting cards.


(2) Sparkly Snowflake


Sparkly Snowflake


Now this is a beautiful snowflake craft.  Made from long and short sparkly beads this winter craft turns out lovely…. perfect for decorating the house for this Winter Season.  CountryLiving shows you how to do this Snowflake craft step-by-step…. you have to scroll to Slide #2.


(3) Wooden Snowflake


Wooden Snowflake


Now this is a fun Snowflake Craft perfect for the youngest of crafters.  Made from Popsicle sticks, glue and fake snow…. this craft promises to be a lot of fun.  You can learn how to do this craft by going to Crafts-for-all-Seasons.


(4) Pipe Cleaner Snowflake


Pipe Cleaner Snowflake


What child doesn’t like a pipe cleaner craft.  Pipe Cleaners are just so much fun to make crafts with…. and this Snowflake craft is no exception.  Check out the MarthaStewart site to get the entire step-by-step tutorial.


(5) Snowflake Window Clings


Snowflake Window Clings


I don’t know about your kids, but I know my kids love window clings.  They love decorating the windows for all the Holidays.  Well, winter is no exception.  Imagine decorating the windows with Snowflakes that you and your child made yourself.  FamilyFun shows you how to achieve this.


(6) Recycled Plastic Ring Snowflake Craft


Recycled Plastic Ring Snowflake Craft


Here is a very cool snowflake craft because it is made out of recycled materials.  FreeKidsCrafts shows you how you can take those 6-pak ring holders from soda and make them into beautiful snowflakes that you can hang proudly this Winter Season.


(7) Q-Tip Snowflakes


Q-Tip Snowflakes


It’s hard to believe that something made from Q-Tips can turn out so beautifully…. but it does.  Made with Q-Tips, glitter and glue this Snowflake craft is not only fun…. but it also turns out perfect to hang up this Winter Season.  Check out AllFreeCrafts for the step-by-step “how-to”.


(8) Snowflake Puzzle


Snowflake Puzzle


Here is an interesting Snowflake Craft.   This easy craft is made from Popsicle sticks and black marker.  BusyBeeKidsCrafts shows you how you can simply take a Snowflake picture and make it into a puzzle just by adding it to a row of Popsicle sticks and cutting the picture with scissors…… this makes it into a puzzle.  Simply mix up the pieces and try to put it back together again.


(9) Woven Snowflake


Woven Snowflake


This woven snowflake is a great craft for kids of all ages.  Made from Popsicle sticks, yarn and glue…. you will have this snowflake craft finished in no time.  Make a few and decorate the whole house this Winter Season.  Check out the “how-to’s” of this craft over at ActivityVillage.


(10) Button Snowflakes


Button Snowflakes


HandMadeBeginnings has the right idea for a Snowflake Craft…. make the snowflakes out of Popsicle sticks and Buttons.  The idea is so easy, but yet very creative.  I love it.  And, I love how the snowflakes turn out.  She explains how taking these snowflakes and adding string will make for great window decorations.  I have to agree.


(11) String Snowflake


String Snowflake


Here is a great snowflake craft for the older children.  Basically this snowflake is made from white string and some fabric stiffener, but look how magnificent it turns out.  The snowflake craft would look awesome hanging in a window by itself or in groups.  Check out FreeCraftUnlimited for the details.


(12) Sparkly Snowflake Mobile


Sparkly Snowflake Mobile


This is a cool craft that when done looks great hung from the ceiling.  Made from paper and glitter this snowflake craft will look festive this Winter Season hung in a classroom or even a child’s bedroom.  Get all the craft details over at Kaboose.


(13) Beaded Snowflake


Beaded Snowflake


I love, love, love this snowflake craft.   I dig that they used pearls in this craft….. it just gives this beaded snowflake a really wintery look.  I found this craft over at Crafts-For-All-Seasons and they did a really beautiful job putting this snowflake craft together.  Make sure to check it out.


(14) Lace Snowflakes


Lace Snowflakes


Who would have thought that Lace can look so much like a snowflake?  But, when put together the right way…. it really does.  AllFreeCrafts did a really great job coming up with this snowflake craft.   They simply added lace to wire to create this beautiful snowflake.  Now, that’s creative.

Technorati Tags: , , , , , , ,

How to Make a Leather Star Brooch

Today I have a very special craft for you.  I’m going to show you how to make a Leather Star Brooch perfect to be worn all Winter long.  Made from two different shades of leather this craft is sure to turn out beautifully.  Imagine how proud you will be to wear a brooch that you made yourself.  Every compliment you will get will make you feel so good…. because you, in fact, made it yourself.  So, grab the materials needed and let’s get started.

Check out our other Leather Crafts and Jewelry Crafts.

Tutorial offered by Laura from Dacian Moon Handmade .


MATERIALS NEEDED

– red and brown leather
– pen
– scissors
– needle and thread
– brooch base
– craft glue


Step 1

Take the red leather and using your pen…


…draw a star on it.


Draw another star, bigger, on the brown leather.


Cut them out…


… like this.


Step 2

Place the red star over the brown one…


… and start sewing them.


You should sew the red star to the brown one, then continue over the edge of the brown one.


It will look like this.


Step 3

Let’s make the center decoration. Start somewhere on the center part…


… and make this snowflake. When you are finished…. make a knot on the back and cut the thread.


Step 4

Apply a layer of glue on the brooch base…


… and place it on the back of the star, over the knot.


Take a small piece of red leather and glue it over the base. Let it dry well.


That’s all! The brooch is ready.


And, there you have it.  You just finished your Leather Star Brooch.  How did your star turn out?  Let me know in the comments below.  And, don’t forget to take a picture and post that too…. I would love to see it.

Technorati Tags: , , , , , , , , , , , ,

How to Make an Origami Snowman

Next week it will be officially winter.  So, today I felt it was appropriate to break out the Winter Crafts.  So, with that being said (drum roll please)…. I’m going to show you how to make an Origami Snowman….. perfect for the Winter season.  The craft isn’t a hard one, but it is sure to be a lot of fun.  So, grab a sheet of origami paper and some crayons or colored pencils and let’s get started.

Check out our other Winter Crafts and Origami Crafts.


How to Make an Origami Snowman


Materials Needed

Origami Paper (any color)

Crayons or Colored Pencils


Step 1


Start off with any color origami paper


Start off with any color origami paper.  It doesn’t matter because we are using the white side.


Step 2


Fold paper in half


Fold paper in half… connecting bottom point to top point.


Step 3


Open back up


Open back up to reveal a crease.


Step 4


Fold paper in half from left corner to right.


Fold paper in half from left corner to right.


Step 5


Now open up to reveal both creases.


Now open up to reveal both creases.


Step 6


Turn over to colored side.


Turn over to colored side.


Step 7


Fold top corner down to center of creases that you made.


Fold top corner down to center of creases that you made.


Crease it.


Crease it.


Step 8


Unfold to reveal crease.


Unfold to reveal crease.


Step 9


Fold top corner down to rest on the crease you made in the last step.


Fold top corner down to rest on the crease you made in the last step.


Step 10


Fold the bottom corner up to crease the center crease line.


Fold the bottom corner up to crease the center crease line.


Step 11


Open back up to reveal creases.


Open back up to reveal creases.


Step 12


Fold triangles down half way between edge and crease.


Fold triangles down half way between edge and crease.


Step 13


First fold right side over and then fold left side over the right side.


First fold right side over and then fold left side over the right side.


Step 14


Now fold bottom triangle back up.


Now fold bottom triangle back up.


Step 15


Turn over to the other side.


Turn over to the other side.


Step 16


A third from the bottom, pull at the paper then push forward to make a pleat


A third from the bottom, pull at the paper then push forward to make a pleat.


Step 17


Do again a third from the top.  Pleat looks like this.


Do step 16 again a third from the top.  Pleat looks like this.


Step 18


start pushing edges in to make corners rounded like snowballs.


It should look like this.  Now start pushing edges in to make corners rounded like snowballs.


Step 19


See how it is rounded now


See how it is rounded now… I just bent the non-rounded edges back to make rounder.


Step 20


Now draw on your origami snowman


Now draw on your origami snowman to make it come to life.

Isn’t your Origami Snowman cute?  How did your snowman turn out?  Make sure to let us know in the comments below.  Take a picture of it too…. you can share pictures in the comments as well.

Technorati Tags: , , , , , , ,

How to Make Paper Snowflakes – Many Snowflake Patterns

When I was a child I used to love making different paper snowflakes simply by cutting folded paper.  Around my bedroom would be the snowflakes I made…. causing my bedroom to look like a winter wonderland.  Today I’m going to show you how to make many different types of paper snowflakes.  I have given you five different snowflake patterns in this tutorial…. all starting from the Basic Snowflake Fold shown below.  Simply start with the basic snowflake fold and cut the folded paper as the patterns below show.  Let’s get started.

Check out our other Christmas Crafts.


How to Make Paper Snowflakes


Materials Needed

Paper

Scissors


Basic Snowflake Fold

Step 1


Fold the left side of the paper over to the right


Use a large sheet of paper, in the shape of a square. This can consist of two or three pieces, plain, colored, or varicolored, which can be pasted in overlapping fashion to form the final square. With the paper square before you fold the left side of the paper over to the right, and crease along the central, vertical line.


Step 2


The next fold is from top to bottom


The next fold is from top to bottom, bringing the upper edge down to the lower and creasing it in place. This simply reduces the square to 1/2-size, with a folded edge at the left and another at the top.


Step 3


Now fold the lower left corner up to the upper right, forming a triangle


Now fold the lower left corner up to the upper right, forming a triangle. Note that the long side of the triangle forms the thickest fold.


Step 4


Fold the triangle that you created downward and forward


Fold the triangle that you created downward and forward until it meets the long side.  Crease the paper firmly, as this makes the final stage of the basic working fold.

You will note that the paper looks now like a half of an arrow, with a projecting tail. Both long edges should consist of folds (as indicated) with the single edges all at the end. The projecting tab (X) is entirely torn or cut away when making the specific snowflake designs, as it serves no purpose in the patterns. As a result, the single edges simply form the outside of the circular snowflake designs which follow.


COG WHEEL SNOWFLAKE

Step 1


Make the cuts as shown in Fig. 1.


Make the cuts as shown in Fig. 1.


Step 2


When opened, the pattern shows the heavy "cog wheel" effect


When opened, the pattern shows the heavy “cog wheel” effect illustrated in Fig. 2. After making a nice one, it can be folded and traced for future use.


FILIGREE SNOWFLAKE

Step 1


Make the cuts as shown in Figure 1


Beginning with the curved lines shown in Fig. 1, a series of cuts will produce a design living up to its “filigree” title.


Step 2


Fig. 2 shows the filigree.


Fig. 2 shows the filigree. For best effect, the finished design should be placed or pinned against a sheet of paper of contrasting color such as red against green or white against black, or vice versa.


GEOMETRIC PATTERN SNOWFLAKE

Step 1


Make the cuts as show in Figure 1


Make the cuts as show in Figure 1.  While all these folds result in what may technically be termed “geometric patterns”, the design cut from the outline shown in Fig. 1, particularly lives up to its geometric claims…


Step 2


The design is shown in Fig. 2.


…The reason is that it comes out in the form of a central star, surrounded by diamonds and a ring of circles outside of that. The design is shown in Fig. 2.


CLASSIC SNOWFLAKE

Step 1


Cut along the lines in Fig. 1.


This design is very much designed after a classic / common snowflake, as seen under a powered microscope. Start, as usual, by cutting along the lines in Fig. 1.


Step 2


Finished classic snowflake technique


When opened out, the pattern is interesting indeed, appearing like the illustration shown in Fig. 2. Here, again, placing it against a contrasting color to make it really pop. Since it is styled as “Snowflake” the logical thing would be from white paper; then place it against a black or very dark background.


ANOTHER SHIP’S WHEEL SNOWFLAKE

Step 1


cut along the lines shown in Fig. 1.


Form your “arrow” cut along the lines shown in Fig. 1.


Step 2


After cutting, your Ship's Wheel design should turn out as in Fig. 2.


After cutting, your Ship’s Wheel design should turn out as in Fig. 2.

And, there you have it…. five different snowflake patterns for you to make paper snowflakes and use as your Holiday decorations.  Which snowflake pattern is your favorite?  Make sure to let me know in the comments below.

Technorati Tags: , , , , , , , , , , , ,

How to Make 6 Pointed Snowflakes and Stars Step by Step Craft for Kids

It is Winter time and since we just had a big snowfall, I thought it would be a good idea to show you how to make these fancy 6-pointed snowflakes that look like fancy stars. These can  are a bit more complex than the normal stars / snowflakes. I have tried to simplify it for you below by showing you every single step of the process in an illustrated fashion. Have fun.


How to Make 6 Pointed Snowflakes and Stars Step by Step Craft for Kids


Arts Materials Needed:

..Paper

..Scissors

Step 1


Step 1 : Making Winter Snowflakes Paper Cutouts


If you don’t have a square piece of paper, then take a normal sheet of paper and fold the bottom right corner over towards the left until it forms a triangle. Draw a line where the triangle ends. This is where you need to cut the paper to form a perfect square piece of paper.

Step 2


Step 2 : Making Winter Snowflakes Paper Cutouts


Now fold the square piece of paper in half.


Step 3


Step 3 : Making Winter Snowflakes Paper Cutouts


Now that you have a rectangle piece of paper. You are going to have to fold the piece of paper on the triangle dashed line that you see above. You are either going to have to imagine it or lightly draw it so you can fold it this way…below we have illustrated it.

Step 4 Illustrated in Detail


Step 4 : Making Winter Snowflakes Paper Cutouts


Step 5


Step 5 : Making Winter Snowflakes Paper Cutouts


Now this is what your piece of paper should look like after you have folded the piece of paper as detailed in pictures above.

Step 6


Step 6: Making Winter Snowflakes Paper Cutouts


Now fold the paper in half lengthwise so it now looks like a kite or diamond.

Below we have four different Snowflake designs for you to cut out. Feel free to make your own designs up. The dashed lines are where you should cut.

Snowflake Stars : Design #1


Step 4 : Making Winter Snowflakes Paper Cutouts


Snowflake Stars : Design #2


Step 3 : Making Winter Snowflakes Paper Cutouts


Snowflake Stars : Design #3


Step 2 : Making Winter Snowflakes Paper Cutouts


Snowflake Stars : Design #4


Step 1 : Making Winter Snowflakes Paper Cutouts


How to Make 6 Pointed Snowflakes and Stars Step by Step Craft for Kids

Technorati Tags: , , , , , , , , , , , , ,

Easy to Make Winter Snowflakes Paper Cutting Crafts Ideas for Kids

This Winter activity is quick, easy and a lot of fun.  It helps the little ones to develop their hand eye co-ordination skills and, if you’re so inclined, you can use it to teach older children about symmetry.  Or you can just have fun making pretty Winter  snowflakes to hang around the house! You can hang snowflakes on your windows, doors, or walls to decorate for Winter time fun.


Easy to Make Paper Snowflakes for Winter That You Cut Out of Paper


Easy to Make Paper Snowflakes for Winter That You Cut Out of Paper

Easy to Make Paper Snowflakes Arts and Crafts Activities for Kids for Kids, Teens, Preschoolers


Craft materials required:

  • Squares of paper
  • Scissors
  • Glue
  • Glitters, sequins, etc


100_0856


1.  Fold your square of paper in half, and then in half again. Rinse and repeat. Be sure you leave the square thin enough to cut.


100_0858


I like to round off the corners; it gives the final product a more snowflake-y look.

2. Cut out different and interesting shapes and designs.  Be careful about cutting too much from the joins.  Unfold… oooh, pretty!


100_0860


100_0861


3. Use your glitter and sequins to decorate your snowflake.


100_0862


These look great grouped together on black cardboard – or, you could thread some ribbon through the top corner and hang it on your tree:


100_0863


Experiment with different shapes and colours.  Before long, you’ll be walking in a winter wonderland!

CHRISTMAS CRAFTS ACTIVITIES & IDEAS FOR KIDS

It is almost Christmas time so check out our Christmas Coloring Pages & Christmas Crafts for Kids Page to find some great Christmas crafts project ideas for kids to celebrate Xmas such as .. Advent Calendar Crafts ..Candy Cane Crafts ..Christmas Angel Crafts ..Christmas Cards Crafts ..Christmas Bells Crafts ..Christmas Coloring Pages .. Santa Coloring Pages .. Christmas Elf Crafts .. Christmas Gift Bags Crafts ..Christmas Gift Tags Crafts .. Christmas Games & Activities .. Christmas Nativity Scenes .. Christmas Soda Can Crafts .. Christmas Placemat Crafts ..Christmas Poinsettias Crafts .. Christmas Sewing Patterns .. Christmas Tree Crafts ..Christmas Tree Ornament Crafts ..Christmas Wreath Crafts ..Gingerbread House Crafts ..Gingerbread Man Crafts .. Mittens and Gloves Crafts ..Recycle Christmas Cards to Make Other Crafts ..Reindeer Crafts .. Winter Penguin Crafts .. Winter Snow Crafts .. Winter Solstice / Yule Crafts ..Santa Clause Crafts .. Santa Hats Crafts .. Santa’s Sleigh Crafts ..Snowflake Crafts ..Snowman Crafts .. Stocking Crafts .. Wrapping Paper Craft

Technorati Tags: , , , , , , , , , , , , , ,