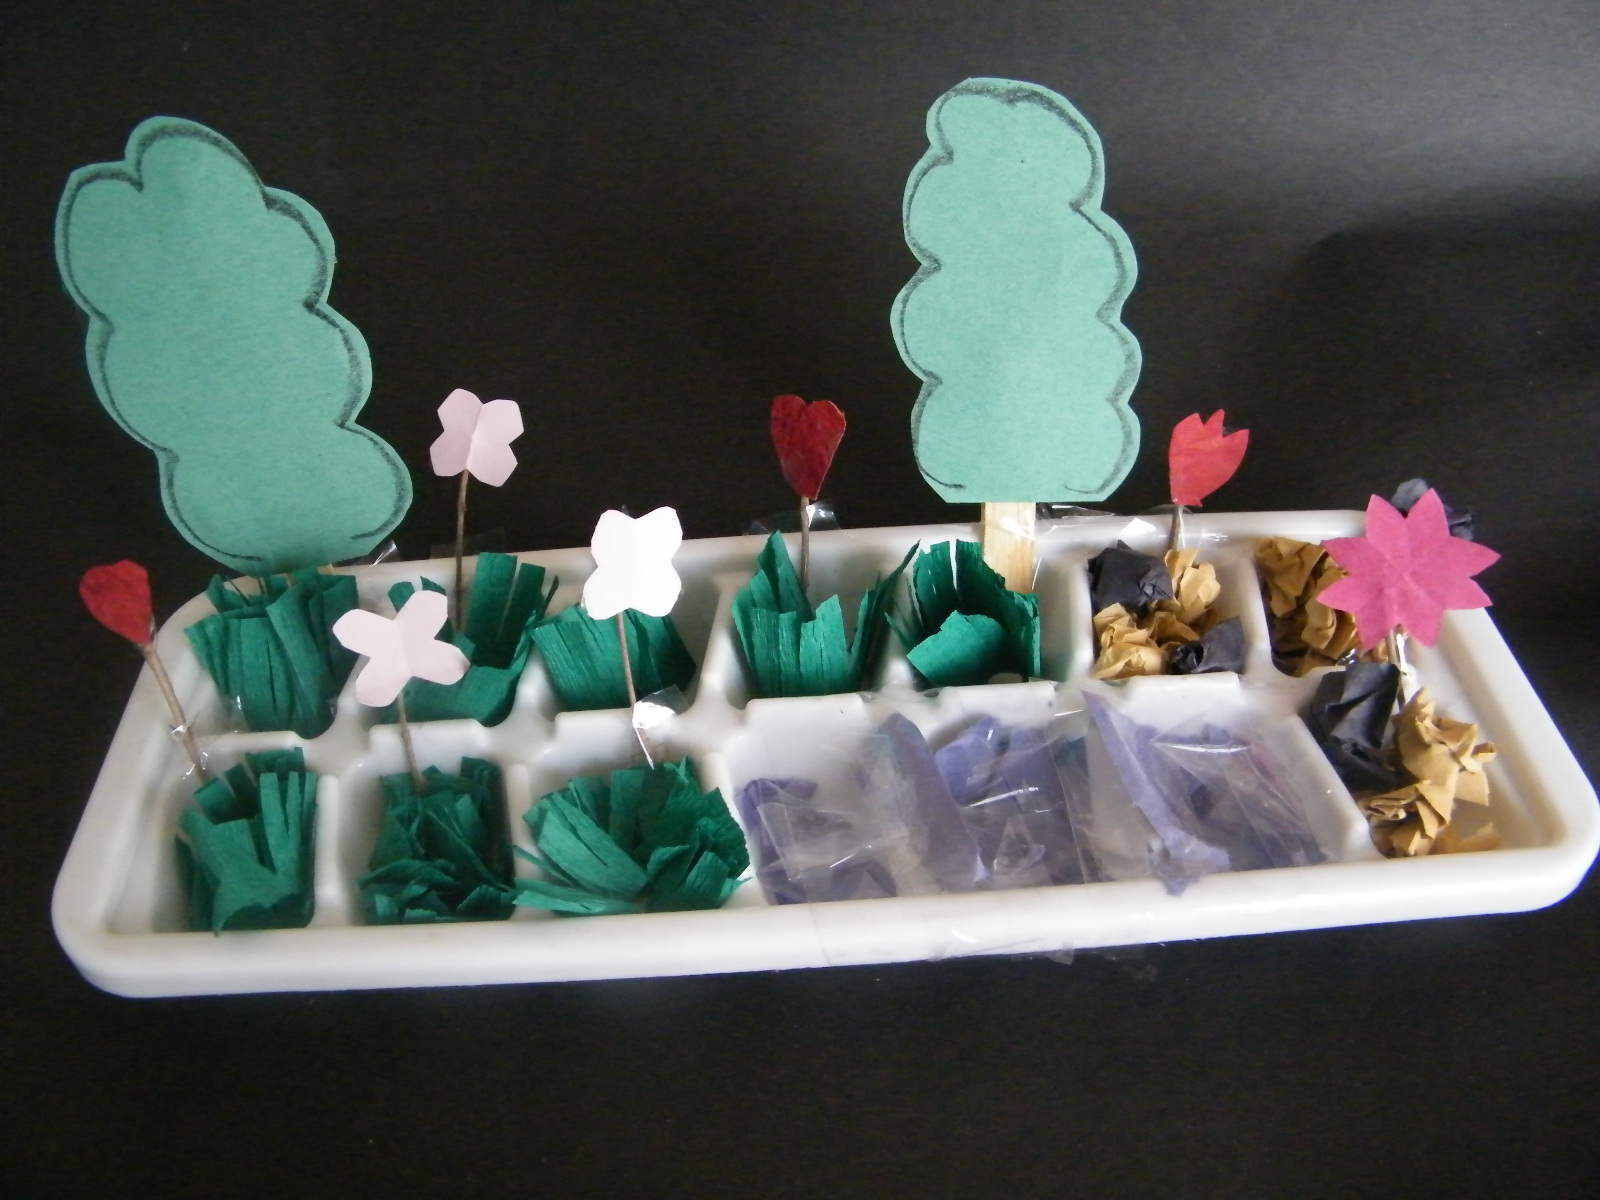
We are right smack in the middle of Winter…. and if you are anything like me you are missing Spring pretty badly about now. Well, I have a way to bring a little bit of Spring into your house. Today I’m going to show you how to make a Miniature Garden for your house. We are going to build this miniature garden in an ice cube tray. So, ask your Mom or Dad if they have an extra ice cube tray for you to borrow. You can follow my miniature garden step-by-step or you can be creative and come up with your own variations. Either way….. let’s get started.
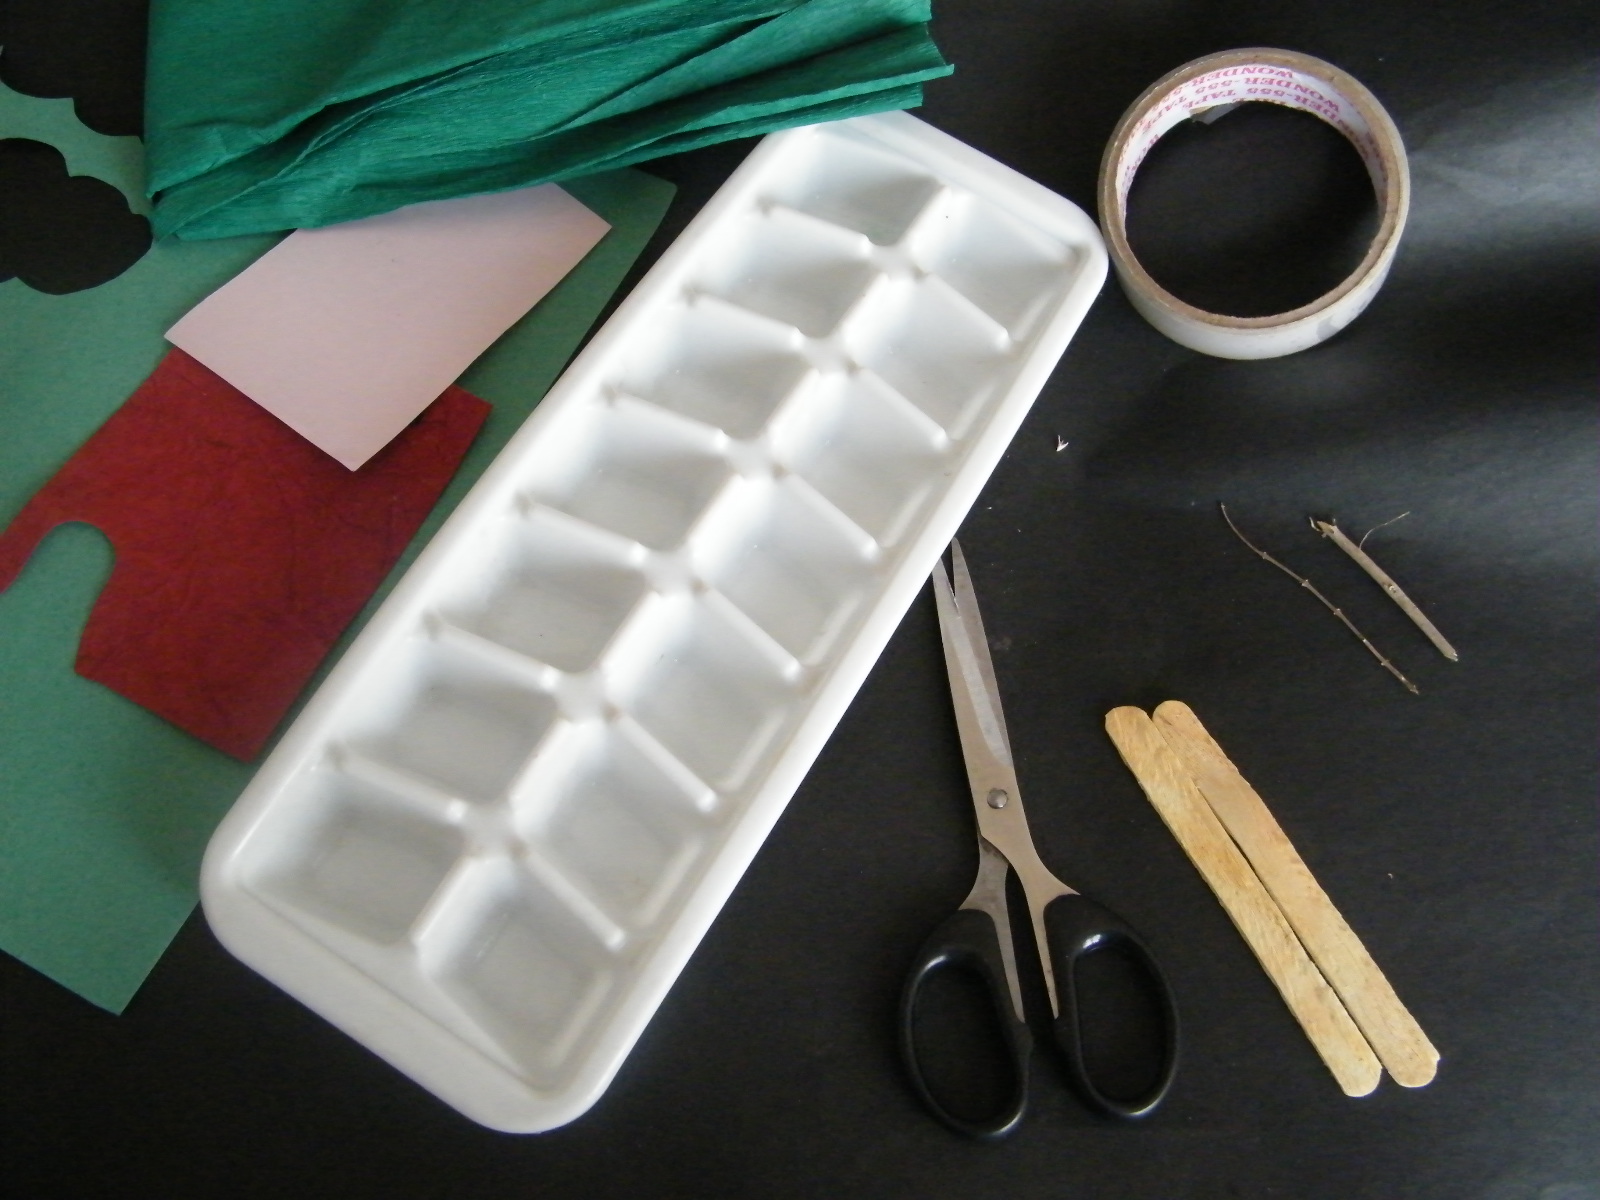
Materials Needed
Ice cube tray
Popsicle sticks
Twigs
Craft paper
Crepe paper- green
Cellophane paper/ transparent plastic
Scissors
Tape
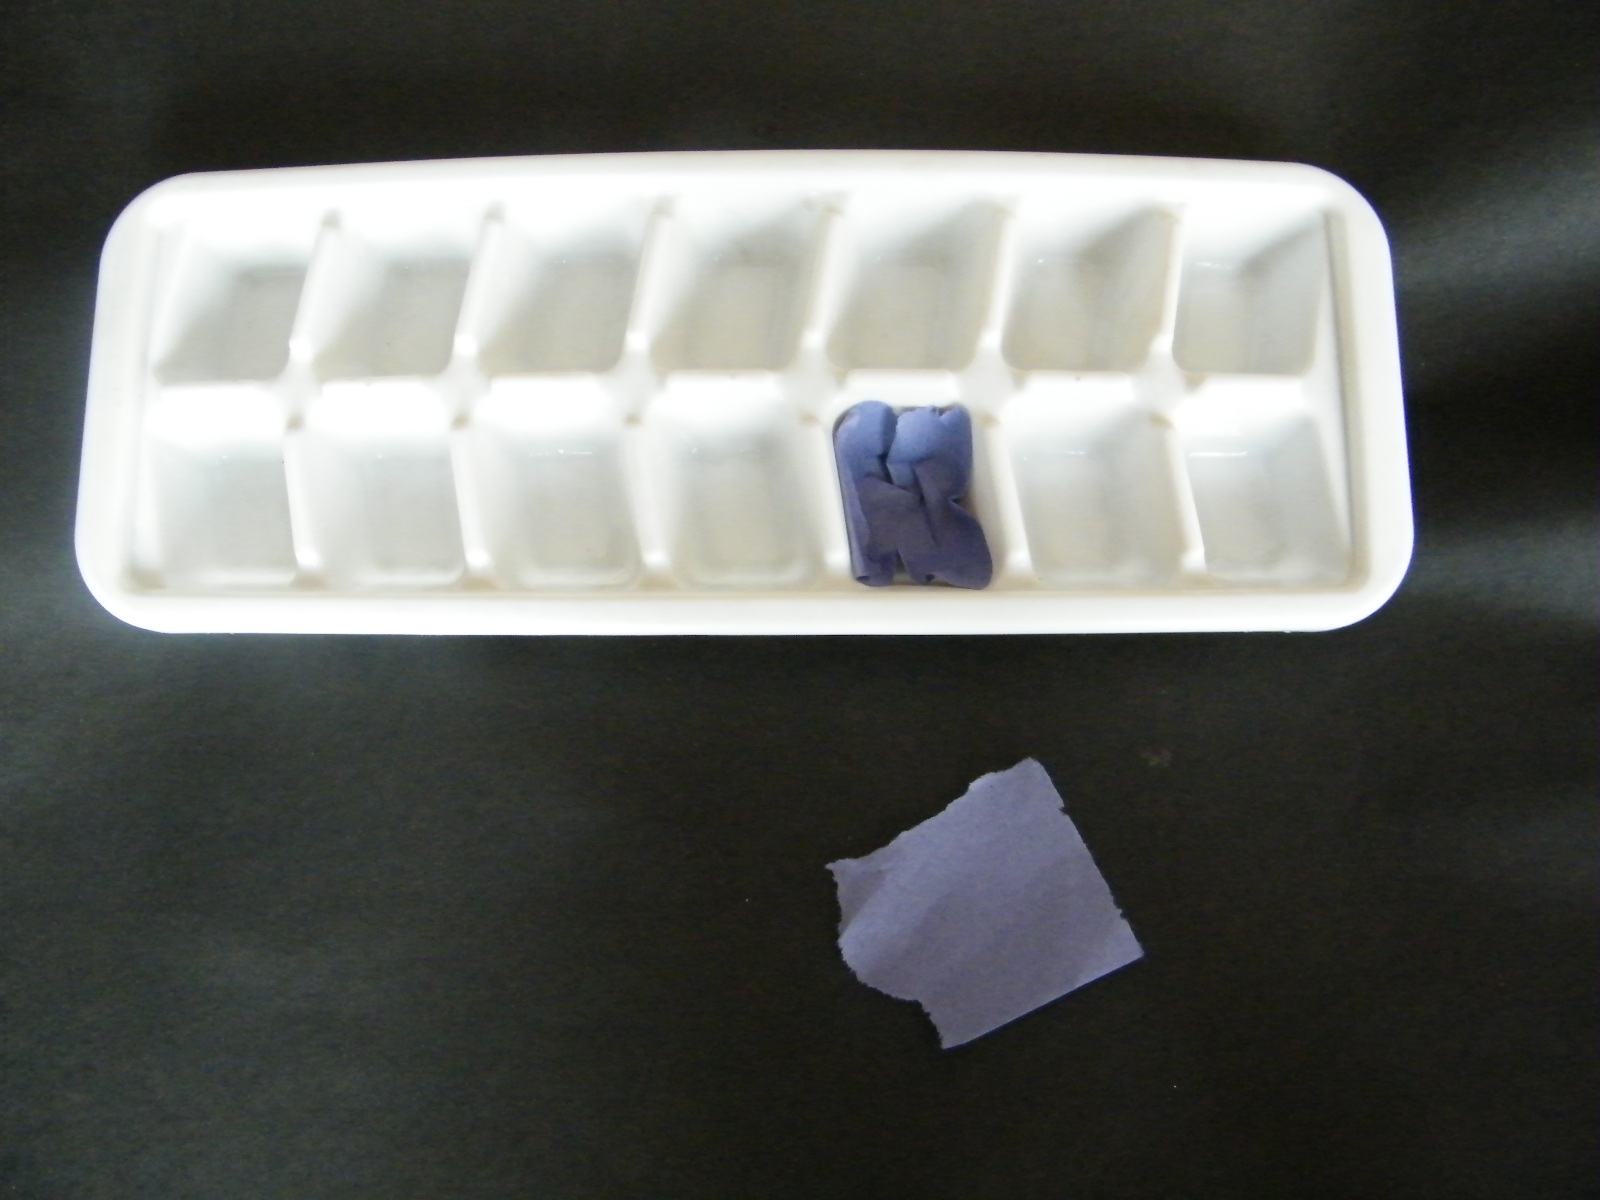
Step 1
Cut bits of blue paper and use it to line a few cubes to make a pond.
[ad#ahc]
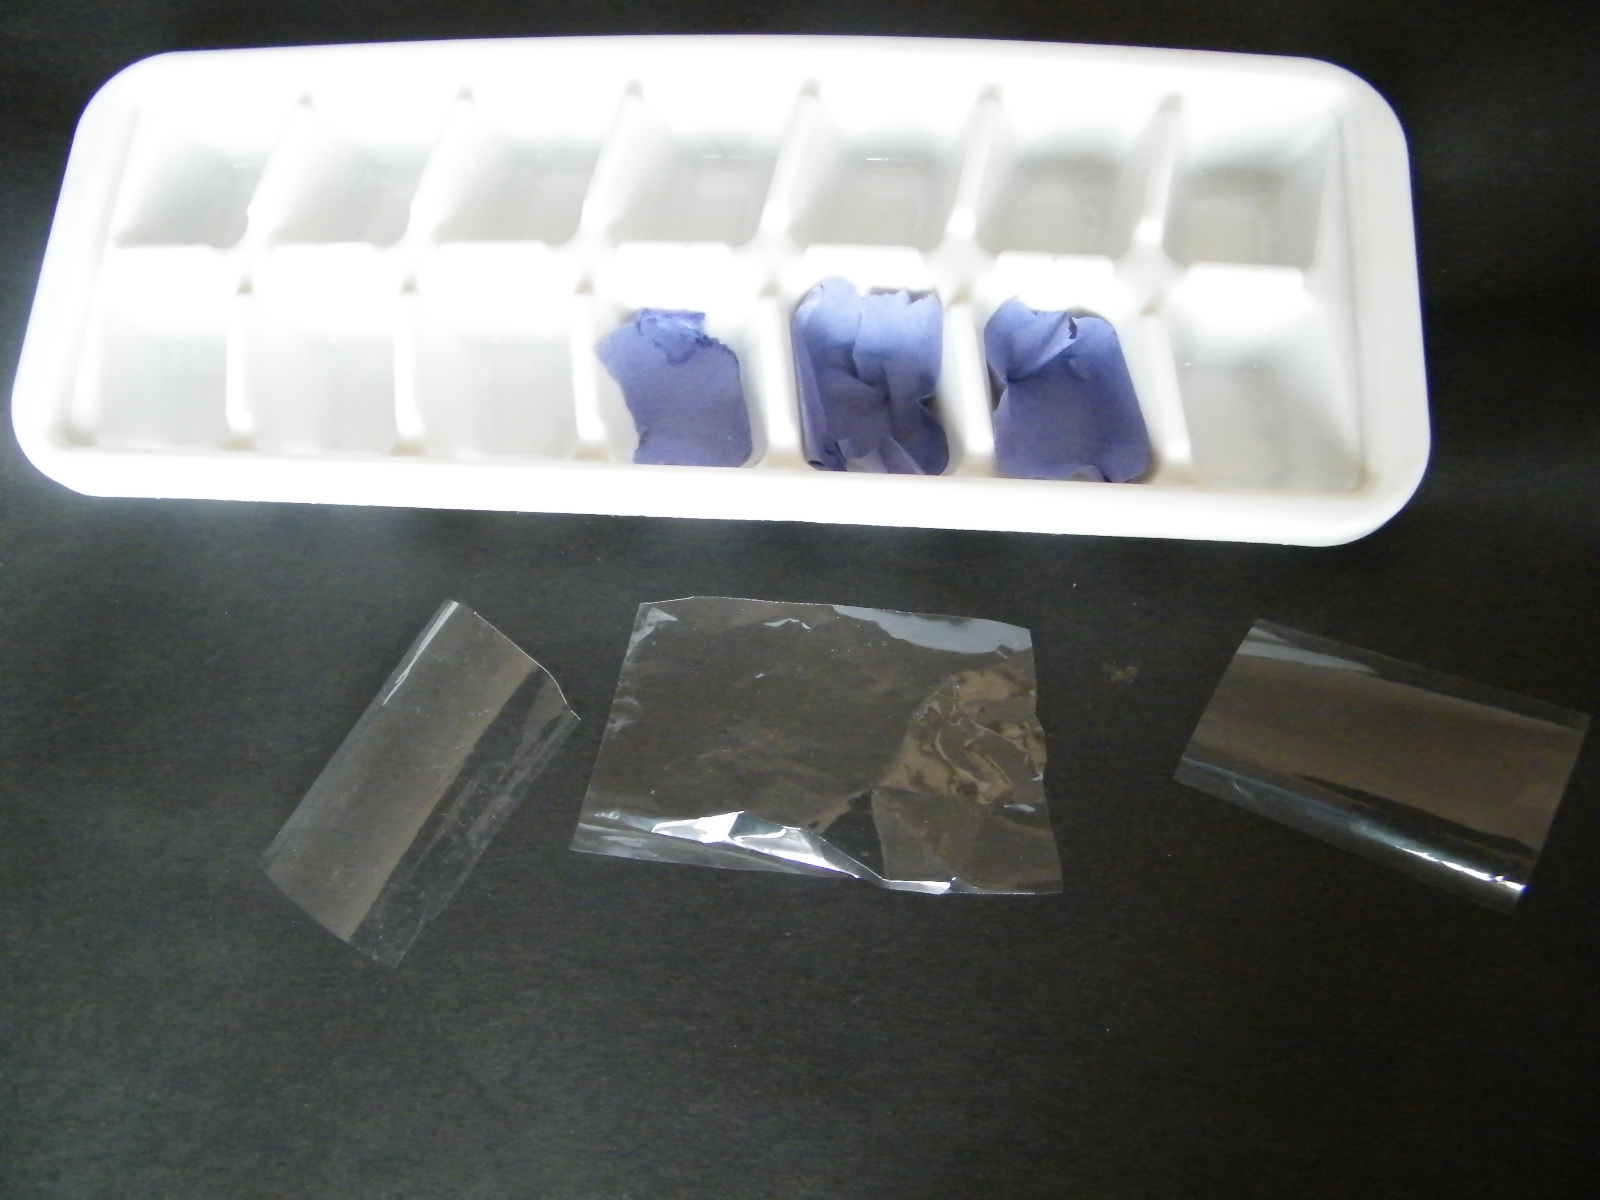
Step 2
Cut a few pieces of cellophane paper and put it in the cubes. Seal the top with a layer of tape to give it a shining top.
Step 3
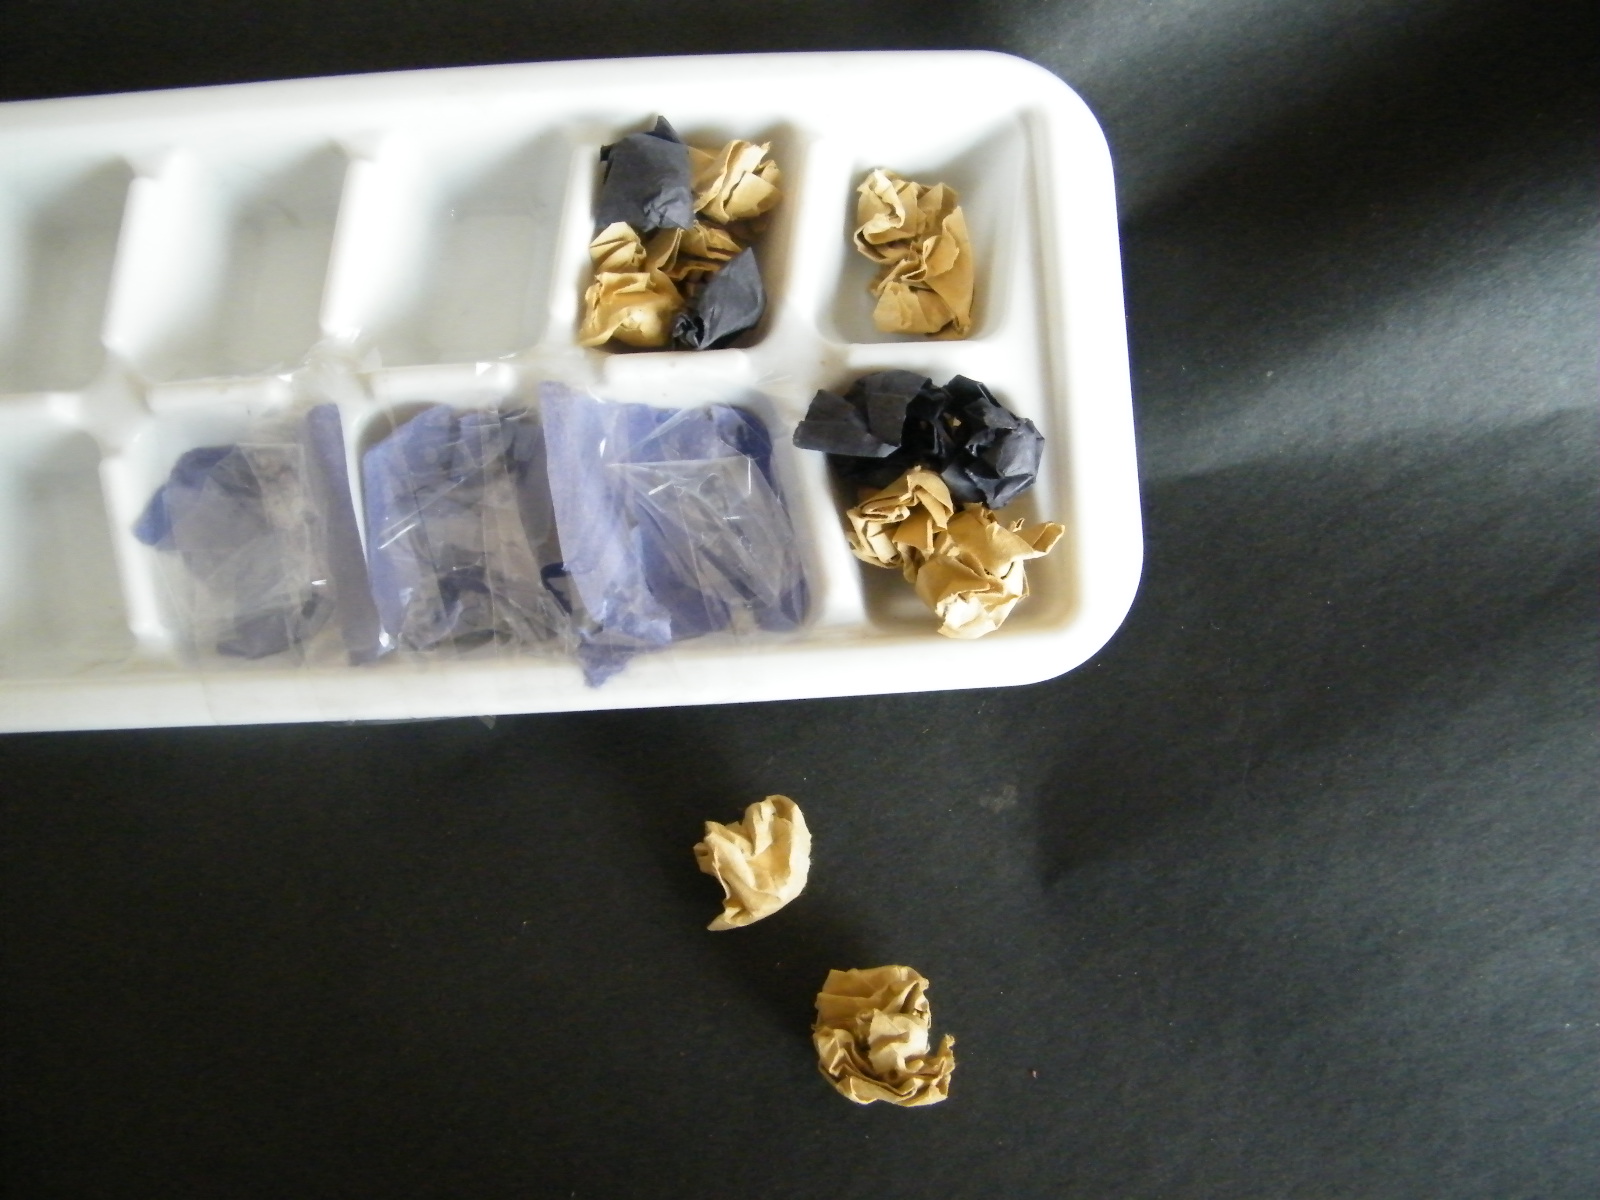
Take brown and black paper and make small balls. Fill up a few cubes to make a rockery.
Step 4
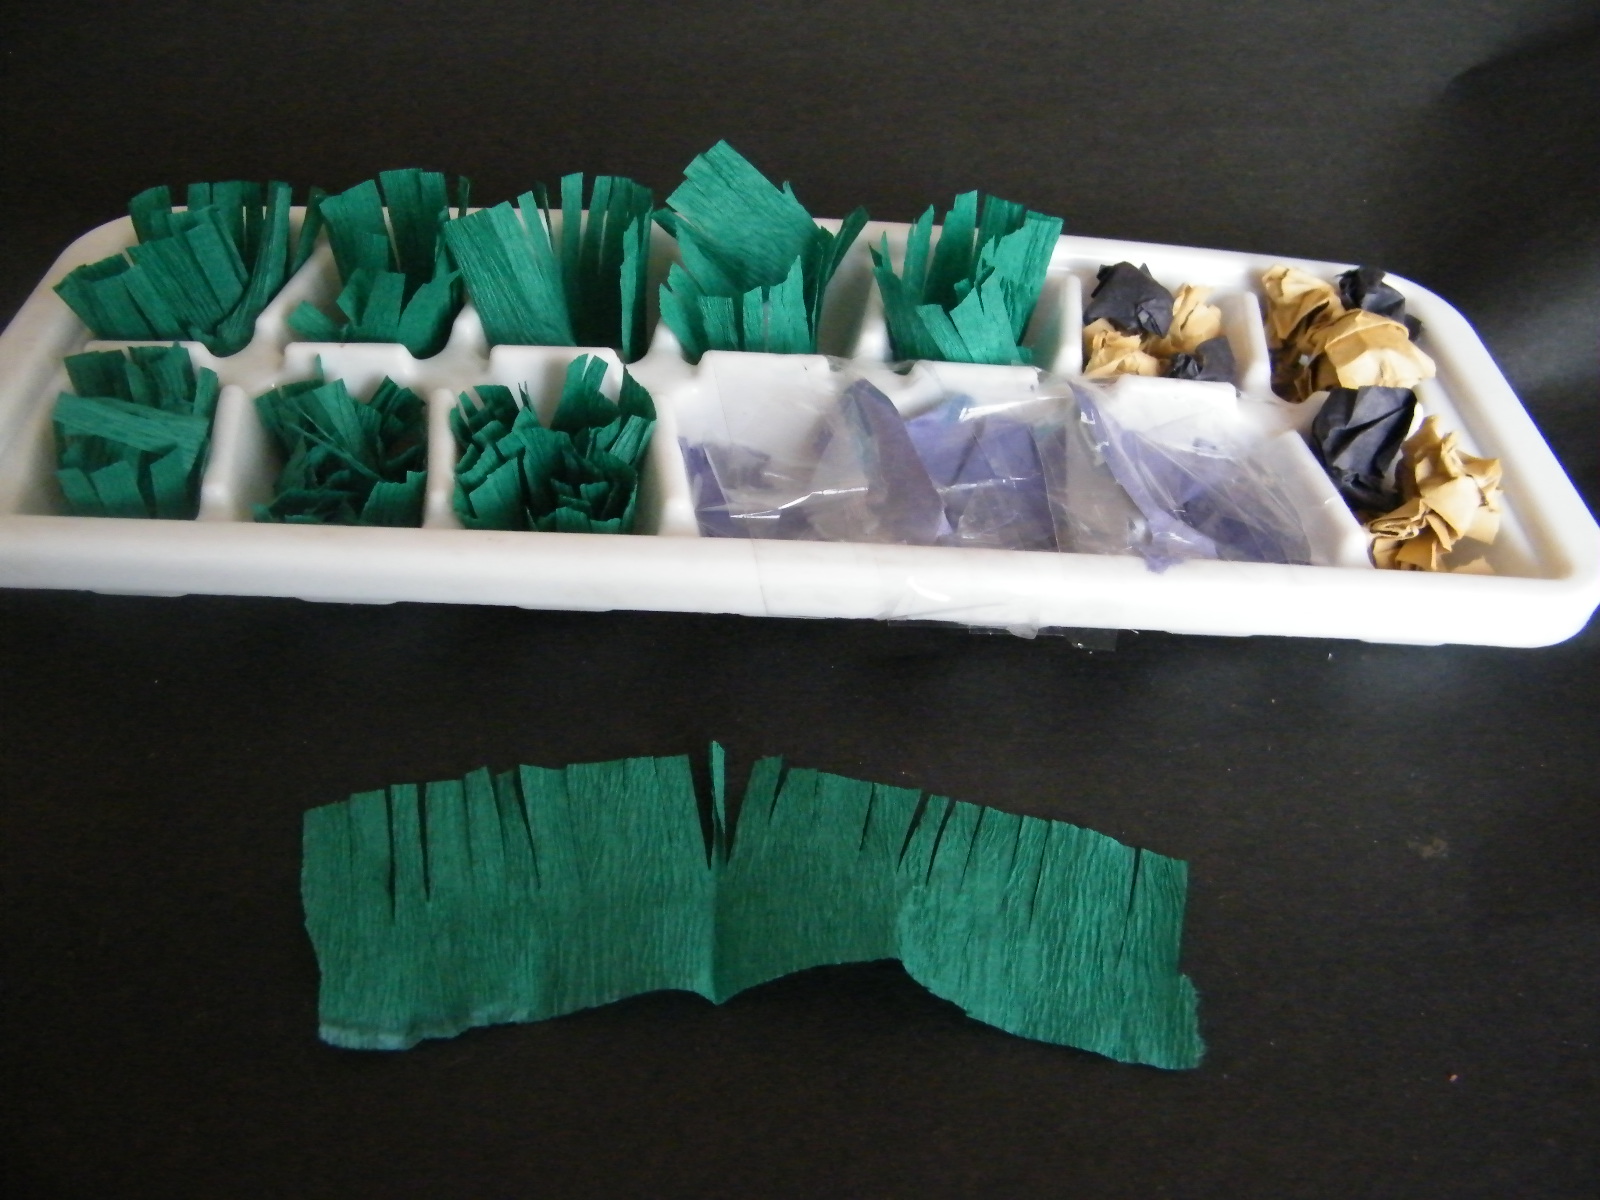
Cut out strips of green crepe paper and make slits on the top as shown and put them in the rest of the cubes for grass. Cut wider strips at the back to make taller grass.
Step 5
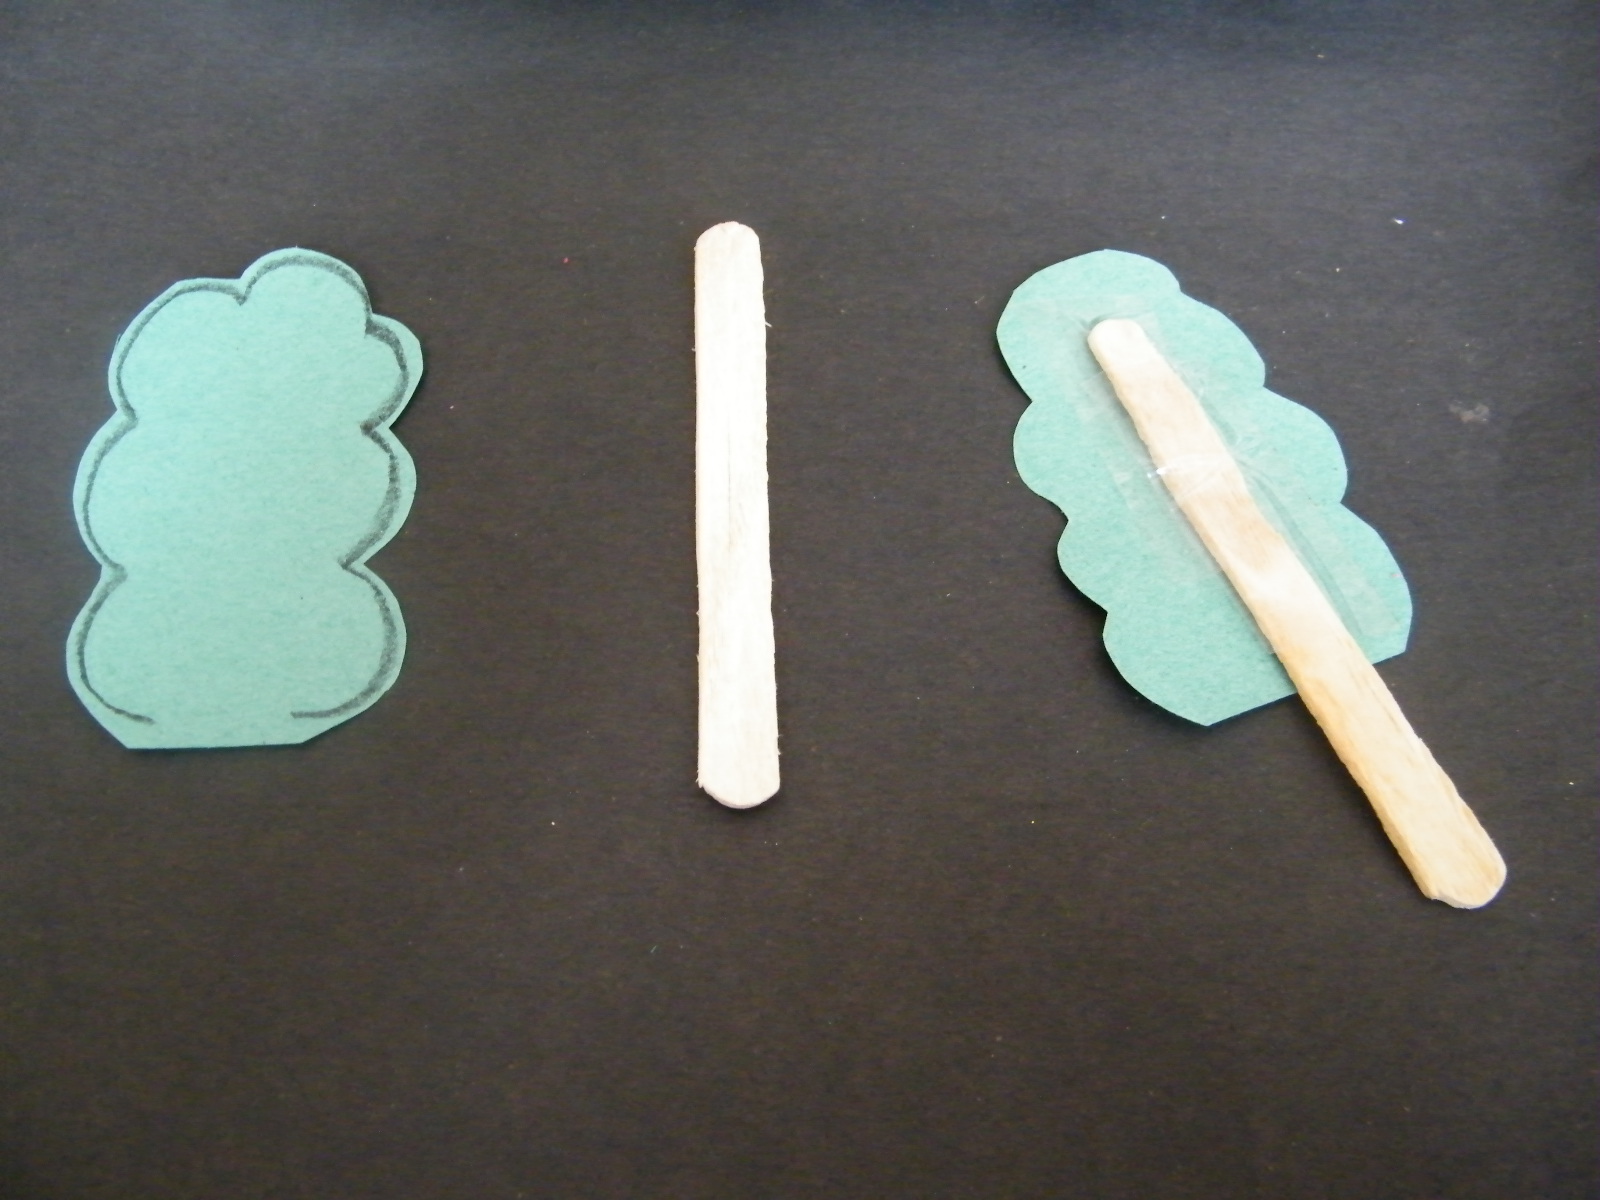
Cut out outlines of trees and tape the back to a Popsicle stick to make trees. Tape them to the edge of the cubes.
Step 6
Cut out flowers and tape them to the back of twigs and tape these to the sides of the cube.

Step 7
Your garden is ready.

And there you go…. you have just finished your very own miniature garden craft. You now have a little touch of spring for your house. Put it on a window sill where you can see it often…. it will remind you that Spring is on its way.
Technorati Tags: Spring crafts, crafts for Spring, garden crafts, flower crafts, tree crafts, spring fever crafts

How cute. We will definitely be trying this!
you could also use an empty egg carton for this craft.