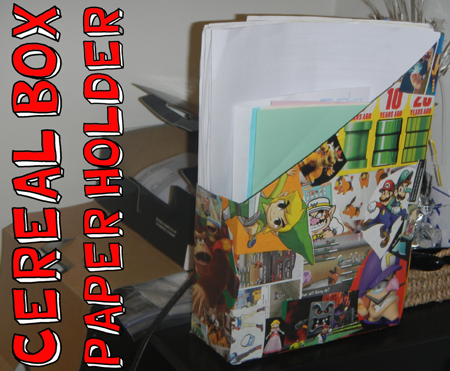
I have a fun and useful back to school craft for you today. In this post I will show you how to transform a cereal box into a Cereal Box Paper Holder. This Cereal Box Paper Holder is perfect for holding all of your back to school materials. It can hold your fun drawings, notebooks, homework, test results and basically anything you want to keep in a safe place. Don’t let you school paperwork build up into unorganized piles…. keep them safe in this Cereal Box Paper Holder. So, grab the materials needed and let’s get started.
Check out our other Back to School Crafts.
Materials Needed
Cereal Box
Scissors
Magazine Pics or Colorful Paper
Mod Podge or 1/2 Glue 1/2 Water Mixture
Paintbrush
Step 1
Get a cereal box…. the bigger the better.
[ad#ahc]
Step 2
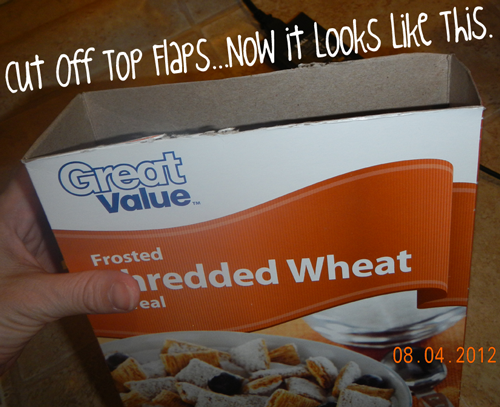
Cut off top flaps…. now it looks like this.
Step 3
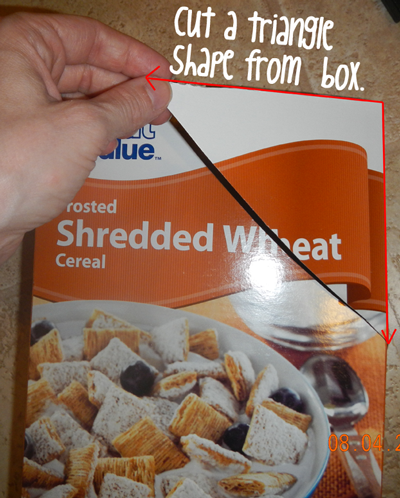
Cut a triangle shape from box.
Step 4
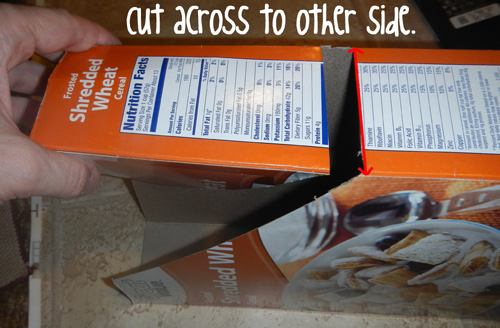
Cut across to other side.
Step 5
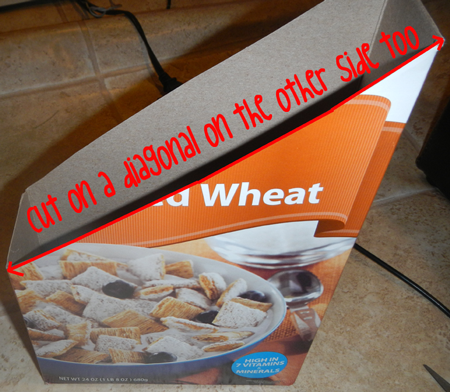
Cut on a diagonal on the other side too.
Step 6
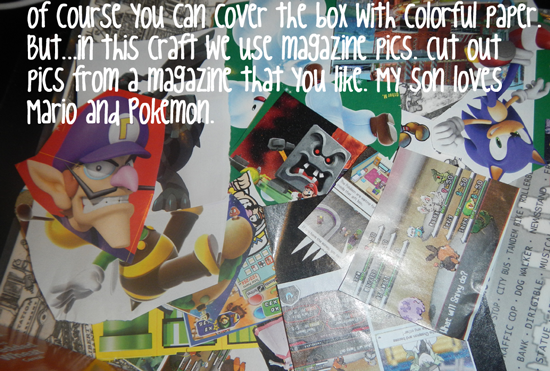
Of course, you can cover the paper with colorful paper. But, in this craft we use magazine pics. Cut out pics from a magazine that you like. My son loves Mario and Pokemon.
Step 7
You need either Mod Podge or a mixture of half glue and half water.
Step 8
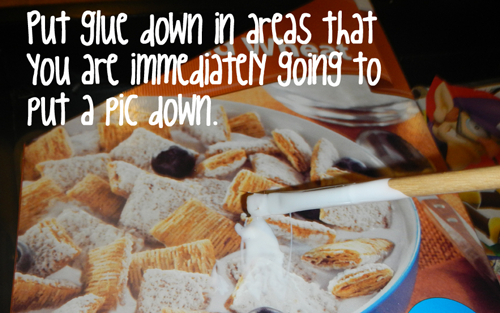
Put glue down in areas that you are immediately going to put a pic down.
Step 9
Stick a pic down on the glue mixture / mod podge…. then brush it over the pic as well.
Step 10
Keep doing this…. wrapping pics around edges. Brush Mod Podge / glue mixture over all at end.
Step 11
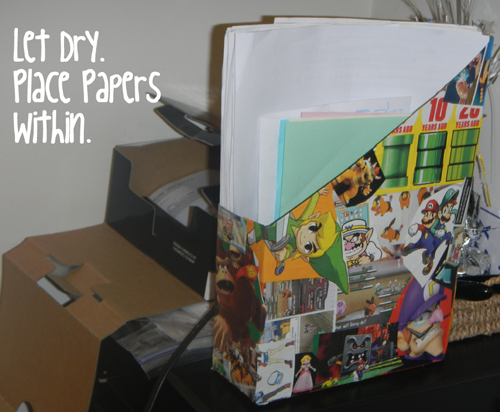
Let dry. Place paper within.
And, there you have it…. Your Cereal Box Paper Holder is ready just in time for Back to School. Now, you have a place to hold on to your important school paperwork.
Here is our video on How to Make a Cereal Box Paper Holder
Technorati Tags: organization crafts, school organization crafts, paper organization crafts, paper organization, school organization, organize schoolwork, organize homework, organization for kids, how to organize, back to school crafts, back to school, back to school activities, paper holder, paper holder crafts, cereal boxes, cereal box crafts





Leave a comment