How to Make Fabric Oatmeal Container Drawstring Bags

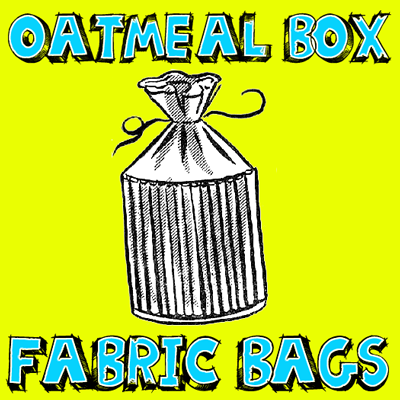
Here is a craft for making a great drawstring bag out of a cylinder oatmeal container, fabric, some cardboard, and a few other items. This bag turns out looking beautiful and would make a great bag for yourself or as a gift to mom, grandma, or someone else you love.


How to Make Fabric Oatmeal Container Drawstring Bags


CRAFTS MATERIAL NEEDED:

Fabric

Oatmeal Container

6″ x 6″ cardboard square

Glue

Magazine pictures

Knitting needle (size 3 or 4)

White shellac

Scissors

Pencil

Ruler

How to Make These Drawstring Bags:

Step 1


fabric-oatmeal-container-drawstring-bags-01


Cut cereal box to 4″ height, as shown by broken line in Figure 1.


Step 2


fabric-oatmeal-container-drawstring-bags-02


Make cardboard pattern, 4″ wide at base and 5″ high to center point, as in Figure 2.

Step 3


fabric-oatmeal-container-drawstring-bags-04


Using cardboard pattern trace triangles on colorful smooth magazine pictures. Cut triangles out, and lay, face down, on work table. Apply glue lightly down middle of triangle, making sure the top point is well covered to prevent unrolling. Place the knitting needle along the 4″ base, and roll triangle tightly around the needle to make a tube, as in Figure 3. Slip the tube off the needle and set aside to dry. It will take about 90 tubes to cover a box, 5 1/2″ in diameter.

Step 4


fabric-oatmeal-container-drawstring-bags-05


fabric-oatmeal-container-drawstring-bags-03


Apply a liberal amount of glue to the outside of the cereal box. Stand tubes, side by side, around the box. Hold in place with rubber bands. When dry, apply several coats of shellac over tubes. Make a drawstring top from a piece of material and sew around top of tube-covered box. Cut a circle of the same material, 1″ larger than bottom of the box. Center and paste circle to bottom of the box with fabric glue. Bend the extra inch of material over and sew to base to cover ends of tubes, as in Figure 4.


Technorati Tags: , , , , , ,

How to Make a Pen Holder by Weaving Magazines Together

Each of us have at home a lot of magazines that we do not need anymore, how about you recycle them by making something useful out of them. This is called upcycling. Here’s a useful way to use them…this would make a great gift for Mom or Dad on Mother’s Day or Father’s Day. It would also be good for your desk when you are doing your homework

Tutorial offered by Laura from  Dacian Moon Handmade  .


CRAFTS MATERIALS NEEDED:

– Magazines
– Transparent tape

Step 1


Open the magazine on the middle and take one (double) page.


Start folding it at 1.5 cm …


… until you have this band.


Repeat until you have about 11 – 12 bands.


Step 2.

Place some of them on the table, like this. Initially I started with 6 but I took one out because my support would be too wide. So you can start directly with 5.


Bring another band and place it perpendicular to the others, putting it over a band, then under the next … and so on… like in the picture.


Add another two, in negative. Where the first band is over, the second band will be under.

It will look like this.


Step 3.

Bend up the remaining part of the bands…


… and put another band through them…


… form the corners…


… and where the band is ending, place a little piece of tape to keep it in place.


Continue adding bands until you reach the top.


Step 4.

Add tape on the upper edge to keep it in place…


… and you have a new pen holder 😀


Technorati Tags: , , , , , , , , , , , , , ,


How to Decoupage Trays Baskets and Boxes

Decoupage is a French word which means “cutting out”. It applies to any material that can be cut out. We are going to do paper decoupage.

How to Decoupage Trays Baskets and Boxes


How to Decoupage Trays Baskets and Boxes


CRAFTS MATERIALS NEEDED

A tray, basket or box

Magazine Pictures

Scissors

Glue

Old playing card

Varnish

Enamel

HOW TO DO PAPER DECOUPAGE

Step 1

Give the article to be covered, a coat of glossy or flat-finish enamel. Allow it to dry.


Step 2

Cut out pictures, or parts of pictures, from magazine pages printed on heavy paper. (Thin paper will show the printing on the reverse side).

Step 3

Arrange the cut-outs on the surface of the article. Shift pictures around until you arrive at the most effective arrangement.

Step 4

Remove a single cut-out, and spread a thin layer of glue on the back of it. Put the cut-out back into position and press down firmly and evenly, using edge of playing card to smooth out wrinkles. Carefully remove excess glue with a damp cloth.

Step 5

Do each cut-out in the same manner, until entire surface is covered.

Step 6

Allow glue to dry for several hours. Then give entire article a coat of clear, waterproof varnish in glossy, semi-gloss or dull finish.

Technorati Tags: , , , , , ,

How to Make a Cereal Box Paper Holder

I have a fun and useful back to school craft for you today.  In this post I will show you how to transform a cereal box into a Cereal Box Paper Holder.  This Cereal Box Paper Holder is perfect for holding all of your back to school materials.  It can hold your fun drawings, notebooks, homework, test results and basically anything you want to keep in a safe place.  Don’t let you school paperwork build up into unorganized piles…. keep them safe in this Cereal Box Paper Holder.  So, grab the materials needed and let’s get started.

Check out our other Back to School Crafts.


How to Make a Cereal Box Paper Holder


Materials Needed

Cereal Box

Scissors

Magazine Pics or Colorful Paper

Mod Podge or 1/2 Glue 1/2 Water Mixture

Paintbrush


Step 1


Get a cereal box


Get a cereal box…. the bigger the better.


Step 2


Cut off top flaps


Cut off top flaps…. now it looks like this.


Step 3


Cut a triangle shape from box.


Cut a triangle shape from box.


Step 4


Cut across to other side.


Cut across to other side.


Step 5


Cut on a diagonal on the other side too.


Cut on a diagonal on the other side too.


Step 6


Cut out pics from a magazine that you like.


Of course, you can cover the paper with colorful paper.  But, in this craft we use magazine pics.  Cut out pics from a magazine that you like.  My son loves Mario and Pokemon.


Step 7


You need either Mod Podge or a mixture of half glue and half water.


You need either Mod Podge or a mixture of half glue and half water.


Step 8


Put glue down in areas that you are immediately going to put a pic down.


Put glue down in areas that you are immediately going to put a pic down.


Step 9


Stick a pic down on the glue mixture


Stick a pic down on the glue mixture / mod podge…. then brush it over the pic as well.


Step 10


Keep doing this.... wrapping pics around edges.


Keep doing this…. wrapping pics around edges.  Brush Mod Podge / glue mixture over all at end.


Step 11


Let dry.


Let dry.  Place paper within.

And, there you have it…. Your Cereal Box Paper Holder is ready just in time for Back to School.  Now, you have a place to hold on to your important school paperwork.

Here is our video on How to Make a Cereal Box Paper Holder

Technorati Tags: , , , , , , , , , , , , , , ,

Coolest Earth Day Craft Ideas – Crafts Made from Recycled Materials


Coolest Earth Day Craft Ideas - Crafts Made from Recycled Materials


Earth Day will be here in just a couple of weeks.  In honor of Earth Day I thought I would scour the internet looking for cool ideas for Earth Day crafts.  All of the crafts that I found and have listed here are made from recycled materials.  Earth Day is a special day to celebrate the Earth and to increase awareness and appreciation of the Earth’s natural environment.  And, I think making crafts from recycled materials such as the ones found here is a great way to teach children about recycling and the importance of doing that to help save our Earth.  So, without further ado….

Coolest Earth Day Craft Ideas

(1)  Newspaper Roses


Newspaper Roses


Look how beautiful these Roses are?  They really are lovely & they are completely made from recycled newspapers.  Check out the craft and all its details over at Zakka Life.


(2)  Serving Tray


Serving Tray


I love, love, love this idea!!  Crafty Nest went to a Salvage Yard and noticed that there were old cupboards there.  She picked up a white one and with a little creativity and a lot of fun she was able to make this beautiful serving tray.  Check out her website so you too can make this.


(3)  Can-Do Robots


Can-Do Robots


Made from tin cans these robots are so freakin cute.  What is really cool is that their features are made of magnets, so they can be removed.  Which makes these robots like a Mr. Potato Head…. How fun is that?!  Check out the craft details over at Family Fun.


(4)  Cardboard Ottoman or Side Table


Cardboard Ottoman or Side Table


What a clever and creative idea!!  Made from recycled cardboard tubes you can choose to make either a side table or an ottoman…. or even make both.  When you look at them from above they are actually daisies.   Check out Esprit Cabane for all the crafting details.


(5)  Smashed Soda Can Animals


Smashed Soda Can Animals


Ok, this cow is really cute, isn’t he?!  But, wait till you check out Fave Crafts….. they have not only a cow, but they will show you how to make a pig and a bear too.  Make all three recycled can crafts and you will have a beginning to your very own recycled animal farm.


(6)  Milk Jug Shade


Milk Jug Shade


Now, this recycled craft turns out beautiful, doesn’t it?  Honestly, if I saw this I would have no idea it was actually made from recycled milk jugs.  But, it is.  I found this craft over at Mother Earth News.  Check out their site for all the wonderful craft details.


(7)  Recycled Picnic Basket


Recycled Picnic Basket


I found this recycled picnic basket over at bron marshall and for the main basket it is actually made from a recycled beer six-pack.  Isn’t that a clever idea?  They other container is actually made from a recycled half dozen egg carton…. they simply added a handle.  Make sure to check out their site for the full craft details.


(8)  Newspaper Basket


Newspaper Basket


This is an amazing basket!!  And, it is completely made from Newspaper.  Look how sturdy it looks too…. I love it.   How About Orange shows you step-by-step how to make this basket yourself.


(9)  Recycled Glass Chandelier


Recycled Glass Chandelier


Oh I just love this recycled craft idea…. it might just be my favorite.  I found this recycled craft over at Casa Sugar.    With a few recycled materials and some tea lights  you too can have this stunning glass chandelier.  I love the way they show this chandelier being outside…. it would be perfect for a fun outside party.


(10)  Creative Notepads


Creative Notepads


Here is a creative way to recycle those leftover notebook pages and even those left over paper scraps.  Esprit Cabane shows us how to take those leftover paper products and make them into cute little pocket size notepads.  Check out her site for the full details.


(11)  Toilet Paper Tube Albums


Toilet Paper Tube Albums


These Toilet Paper Tube Albums are just precious.  They are a beautiful way to store special keepsakes and pictures of events that you don’t want to lose.  Those Northern Skies shows you step-by-step how you too can make these albums from recycled toilet paper tubes.


(12)  Magazine Boxes


Magazine Boxes


Here is a creative and imaginative way to recycle those stacks of magazines you keep at home.  When made like the tutorial on Abstract Octopus you can actually store things in these boxes.  Check out the site for the full craft details.


(13)  Plastic Cup Earrings


Plastic Cup Earrings


Aren’t these earrings adorable?  You would never realize they were made from a plastic cup unless I told you.  I found this idea over at Punk Projects and I think it is a great way to recycle plastic cups… plus the craft is fun to do.  Make sure to check out her website for the details.

Technorati Tags: , , , , , , , , ,

How to Make Paper Strip Belts and Bracelets

In this post I will be showing you how to make a Paper Strip Belt or Bracelet.   The choice is really yours weather you make a belt or a bracelet.  You simply will need to adjust the amount of colored paper you use for the project…. less for the bracelet and more for the belt.  Make a few and give them to your friends or loved ones…. anyone would be sure to enjoy them.  So, grab the materials needed and let’s get started with this fun craft.

Check out our other Friendship Bracelet Instructions.


How to Make Paper Strip Belts and Bracelets


Materials Needed

Thin Colored Paper, Magazine or Cellophane

Cord or Ribbon


Step 1


Thin colored paper, colored magazine pages or cellophane may be used.


Thin colored paper, colored magazine pages or cellophane may be used.  Plan 1 pattern for each inch.


Step 2


Fold on 'A' and 'B' toward 'C'.


Fold on ‘A’ and ‘B’ toward ‘C’.


Step 3


Fold again on 'C'.


Fold again on ‘C’.


Step 4


Fold on center.


Start with about 25 of these.  Fold on center.


Step 5


Fold both ends toward the center.


Fold both ends toward the center.  Completed.


Step 6


Slip one link through the loops of another like a hairpin.


Slip one link through the loops of another like a hairpin.


Step 7


Continue until the length you desire is completed.


Continue until the length you desire is completed.


Step 8


Tie a cord or ribbon on end loops.


Tie a cord or ribbon on end loops.


Completed Paper Link Belt or Bracelet


And, there you go…. you just finished making your Paper Strip Belt or Bracelet.  Wasn’t that fun?  The question I have for you though is…. Did you make a belt or a bracelet?  Let me know in the comments below.  Wear it proudly.

Technorati Tags: , , , , , , , , , , , , , ,

How to Make a Collage for Pi Day 3-14

Today is 3/14….. do you know what that means?  It’s Pi Day.  π (or Pi) is a mathematical constant that is the ratio of any circle’s circumference to its diameter. π is approximately equal to 3.14.  I know it sounds confusing, but in mathematics it is one of the most important mathematical constants.  So, since today is March 14th or 3-14 it is considered Pi Day.  With that being said we are going to work on a collage surrounding all the numbers in Pi.  So, grab the materials needed and let’s get started.


How to Make a Collage for Pi Day 3-14


Materials Needed

Magazines, Brochures, Leaflets, Advertisements

Scissors

Glue

Paper


Step 1

Go through your magazines, leaflets, brochures and advertisements and find the numbers in Pi….. cut them out.  The numbers in Pi are the following:  3.141592653589793238462643383279502884197169399375105820974944592307816406286208998628
034825342117067982148086513282306647093844609550582231725359408128481117450284102701938
521105559644622948954930381964428810975665933446128475648233786783165271201909145648566
923460348610454326648213393607260249141273724587006606315588174881520920962829254091715
3643678925903600113305305488204665213841469519415116094330572703657595919530921861173819
3261179310511854807446237996274956735188575272489122793818301194912983367336244065664308
6021394946395224737190702179860943702770539217176293176752384674818467669405132000568127
1452635608277857713427577896091736371787214684409012249534301465495853710507922796892589
23542019956112129021960864034418159813629774771309960518707211349999998372978049951059731
7328160963185950244594553469083026425223082533446850352619311881710100031378387528865875
3320838142061717766914730359825349042875546873115956286388235378759375195778185778053217
12268066130019278766111959092164201989

Now, obviously Pi is an extremely long number.  Feel free to use as many numbers as you would like on your collage.


Step 2

Glue your Pi numbers in order to a piece of paper.


Step 3

Let your Pi collage dry and then hang it up proudly to celebrate Pi Day.


Pi Day Collage


Technorati Tags: , , , , , , , , , , , , , , ,

How to Make Magazine Folded Hearts for Valentines Day

Valentines Day is just a week away.  And, if you are still looking for ideas for Valentines Day decorations I have the craft for you today.  I’m going to show you how to make Magazine Folded Hearts for Valentines Day.  These Magazine Folded Hearts are the perfect decoration for Valentines Day.  You can hang them from the ceiling or from a door…. either way the craft turns out really cute.  And, what’s really cool…. it gives you something to do with all those extra magazines you have sitting around.  So, let’s get started.

Check out our other Valentines Day Crafts.


How to Make Magazine Folded Hearts


Materials Needed

Magazine

Scissors

Yarn or String


Step 1


Get a magazine like this one.


Get a magazine like this one.


Step 2


Fold top right corner of page down.


Fold top right corner of page down.


Press down crease.


Press down crease.


Step 3


Fold over to middle once more.


Fold over to middle once more.


Press down to sharpen crease.


Press down to sharpen crease.


Step 4


Continue with all of the magazine pages


Continue with all of the magazine pages… I tore the cover off.


Step 5


Cut a curved line at the top of each page.


Cut a curved line at the top of each page… I was able to cut several pages at once.


Step 6


Take yarn or string and tie 2 times around center of heart.


Take yarn or string and tie 2 times around center of heart.  Leave enough yarn to hang heart up.


Finished Magazine Fold Hearts Craft


Now, you are finished with your Magazine Fold Hearts craft.  Didn’t it turn out awesome?  Go hang it up proudly for all to see this Valentines Day.

Here is a video on how to make these Magazine Folded Hearts.

Technorati Tags: , , , , , , , , ,

Block Printing for Kids : Making Block Prints from Cardboard

This method of making a block print will achieve results similar to a linoleum block or wood block, but will avoid the unnecessary cost and dangers of these block printing techniques. This version of block printing is much safer.

Block Printing for Kids : Making Block Prints from Cardboard


Block Printing for Kids : Making Block Prints from Cardboard


CRAFTS MATERIALS NEEDED:

1. Cardboard or pieces of rubber inner tube

2. Scissors

3. Glue

4. Wood block or heavy cardboard

5. Water soluble block printing ink

6. Ink roller (brayer) and rolling surface (glass is good)

7. Newspapers or magazines

8. Paper

HOW TO MAKE THEM:

1. Cut a silhouette shape or shapes from your cardboard or piece of rubber inner tube with a scissors or other suitable tool.

2. Glue the cardboard or rubber shape or shapes firmly to a piece of wood or heavy cardboard. Press under heavy books or some other weight to make sure that the shapes are flat.


3. Place some ink on the glass rolling surface and roll it out until it is smooth and tacky.

4. When the ink roller (brayer) is evenly coated with ink, roll it over the surface of the prepared block. Make sure that the roller makes complete revolutions to thoroughly coat the raised surfaces of your block.

5. Lay your paper on a pad of newspapers or magazines and print the block. Exert heavy pressure for a good print. Standing on the block will assure adequate pressure.

NOTE: This technique is especially suitable for making greeting cards, posters, Christmas cards, and bookplates. It may also be used with permanent printing inks or textile paints to print textiles.

Technorati Tags: , , , , , , ,

How to Make a Colorful Pendant from a Magazine

I have a very easy and fun craft for you today.  I am going to show you how to make a really cute pendant that is made from a magazine page.  Yep, that’s right… a magazine page.  This craft is easy enough that any crafter of any age will have fun making this pendant.  Plus, it turns out so fantastic that you will love wearing it…. or better yet make a few and give it out to your best of friends.  They will love it!!

Check out our other Jewelry Crafts.

Laura from Dacian Moon Handmade  will show you how to make this pendant.


MATERIALS NEEDED

– magazine
– glue
– scissors
– thick thread


Step 1

Cut a rectangle from a magazine page. You should choose one with many colors.


Cut two corners from it to make this triangle.


Step 2

Apply a layer of glue on the back of it.


Like this.


Step 3

Put a piece of thread (folded in half) on the base of the triangle, and glue…


… then roll the paper over it…


Like this.


When you finish rolling the paper it will look like this.


Now, cut the thread that goes down from the paper pendant and let it dry well.


You can put it on a cord or on a chain – and you are good to go.  See how easy that was?  But, it was so much fun, wasn’t it?  Now, are you keeping this adorable pendant for yourself or are you giving it to one of your friends?  That is the true question.  Either way, you will get so many compliments on it.

Here is our video on how to make a Magazine Pendant.

Technorati Tags: , , , , , , , ,

How to Make a Magazine Christmas Tree

I have a really unique Christmas Tree craft for you today.  I say it is unique because the Christmas Tree is a unique one when you see the finished craft.  This Magazine Christmas Tree will make for an awesome Christmas decoration this Holiday Season.  You can decide to paint your tree if you wish to…. whether painted or left natural the Christmas Tree is sure to be a big hit.  So, let’s do it.

Check out our other Christmas Crafts.


How to Make a Magazine Christmas Tree


Materials Needed

Magazine

Paint (optional)


Step 1


Get a magazine like this one.


Get a magazine like this one.


Step 2


Fold top right corner of page down.


Fold top right corner of page down.


Press down crease.


Press down crease.


Step 3


Fold over to middle once more.


Fold over to middle once more.


Press down to sharpen crease.


Press down to sharpen crease.


Step 4


Fold up bottom corner.


Fold up bottom corner.


Step 5


Do this to every page of the magazine.


Do this to every page of the magazine.


Step 6


Take off the front and back cover.


Take off the front and back cover.


Step 7


Let go of sheets of pages and pages will fan out like so


Let go of sheets of pages and pages will fan out like so.  You can paint the pages, but I like it like this.

How did your Magazine Christmas Tree turn out?  Did you paint your pages or leave them natural?  Let me know in the comments below.  And, take a picture and post it too…. I would love to see your Magazine Christmas Tree.

Technorati Tags: , , , , , , , , , , , ,