You have probably seen a windmills before, whether you have seen them on TV, on a farm, or just passed by it when in the car. This is a very cool, working, toy windmill arts and crafts activity for kids. Mom or Dad might need to help the kids make it, especially since one of the steps is placing a knitting needle through a cork, so please don’t start this craft unless you are okay with this step. Please find the directions below to make the toy windmill. Have fun.
Make Toy Windmills from Milk Containers Craft Idea for Kids
Crafts Materials Needed
– Scotch Tape
– Milk Carton
– Cardboard
– Corks
– Knitting Needle
Toy Windmill Diagram Instructions

Step 1
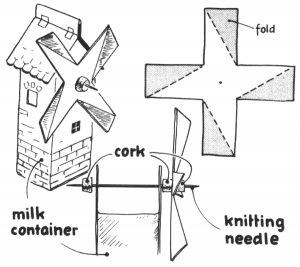
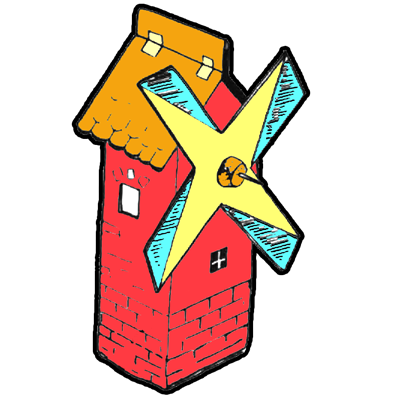
To make this windmill, use an empty milk container for the house.
Step 2
[ad#ahc]
Cut windows on the sides or paste colored paper on it.
Step 3
The roof is made from cardboard, attached with cellophane tape or Scotch tape.
Step 4
Cut the vanes or sails of the windmill from cardboard too, and fold it, following the pattern.
Step 5
Put a knitting needle through the house, with a cork on the back end to hold it in place. (MAKE SURE IT IS OKAY WITH YOUR PARENTS FIRST)
Step 6
Put another cork on the other end of the needle.
Step 7
Slip the sails on, and add a third cork in front. Leave enough space between the corks and the container, as in the picture, and the sails will turn in the wind.
Technorati Tags: make toy windmills, toy windmills, making toy windmills, make windmills, windmill crafts, toy crafts, kids toy crafts, kids crafts, crafts for kids, making toys, make toys

