My Favorite Mayflower Craft Ideas for Thanksgiving

Thanksgiving will be here in no time at all.  And, one of the lessons we try to teach our children about the Thanksgiving Holiday is the Pilgrims and the Mayflower.  What I found during lessons is that teaching them visually is the easiest way to get them to understand…. hence doing a craft.  So, today I thought I would show you my Favorite Mayflower Craft Ideas for Thanksgiving.  I found these Mayflower crafts while searching the internet.  They are all really incredible and a ton of fun.  Surely, you will be able to find some Mayflower craft ideas from this list….. use them to help teach your children about the Pilgrims and their travel on the Mayflower.
Check out our other Thanksgiving Crafts.


My Favorite Mayflower Craft Ideas for Thanksgiving


My Favorite Mayflower Craft Ideas for Thanksgiving

(1)  Model Mayflower


Model Mayflower


Here is a wonderful way to make a model Mayflower.  Made from disposable coffee cups and coffee stirrers this is a great way to recycle items as well as teach your children about the Mayflower.  I found this Mayflower craft over at Parenting.  Make sure to check it out.


(2)  Hand Print Mayflower


Hand Print Mayflower


I love this Mayflower craft.  It is just simply adorable.  And, any young crafter will have a lot of fun making it.  I found this Thanksgiving craft over at Almost Unschoolers.  Make sure to check out her site to get all the Mayflower craft details.


(3)  Mayflower Walnut Boat


Mayflower Walnut Boat


Even we have our own Mayflower crafts.  Here is our first one.  We will show you how to make a Mayflower out of a walnut.  And, what is really cool about this Mayflower craft is that the boat will actually float in water.  Check out How to Make a Mayflower Walnut Boat to make one for yourself.


(4)  Mayflower Paper Plate Craft


Mayflower Paper Plate Craft


Here is a fun Mayflower craft that your little ones will really enjoy.  The Crafty Classroom will show you how to take two paper plates and a popsicle stick and make it into this awesome Mayflower.  Oh boy, this sounds like fun.


(5)  The Mayflower Simplified


Mayflower Simpliefied


I love this bloggers idea.  Her idea was to come up with a Mayflower craft that she could make with young children.  I Can Teach My Child came up with this idea and it is a great one.  Made from a paper towel roll, a straw and some other materials this craft will take on a life of its own.  Share it with your child…. they will love it.


(6)  Mayflower Sandwich


Mayflower Sandwich


I just couldn’t pass this one up.  I know it’s not technically a craft, but it is a Mayflower recipe that you and your little ones can have fun putting together.  Little Nummies put this one together and it is just precious.  Made from bread, cream cheese and pretzels this yummy recipe will be a whole lot of fun to put together… almost as much fun as eating it.


(7)  Mayflower Photo Craft


Mayflower Photo Craft


This is a great Thanksgiving craft to enhance your teachings of the Pilgrims, Mayflower and the first Thanksgiving.  Here Classified Mom adds actual photos of her own children to better engage her children in the lesson.  You can do the same.


(8)  Mayflower Crayon Holder


Mayflower Crayon Holder


I love, love, love this idea.  Made from a creamer container this Mayflower actually holds crayons.  I think this Mayflower craft will be perfect for the Thanksgiving Kids Table.  Imagine every child having one of these Mayflower Crayon Holders on Thanksgiving…. the fun they will have.  Check out It’s Overflowing for all the craft details.


(9)  Mayflower Milk Carton Craft


Mayflower Milk Carton Craft


Made from a milk carton and some tissue paper this Mayflower Craft is sure to be a fun one.  Hidden underneath the tissue paper are some apples…. perfectly festive for the fall season.  Check out Creative Holiday Gift Ideas to find out how you too can make this with your children.


(10)  Mayflower Hats


Mayflower Hats


What kid doesn’t love hats?  They just all do.  And, these Mayflower hats will be no exception.  Spoonful shows you step-by-step how to make these adorable and festive hats.  Make a few and have them ready for the kids table at Thanksgiving.  All the children will love to wear them.


(11)  Mayflower Centerpiece


Mayflower Centerpiece


Why not center your entire Thanksgiving Meal around the Mayflower…. or perhaps the kids table.  Martha Stewart shows you how to with these very detailed instructions on how you too could have a Mayflower Centerpiece.


(12)  Mayflower Cut, Tape & Play


Mayflower Cut Tape Play


Homespun With Love shows you how you can print off this really cool Mayflower and let your kids cut, tape and then play with this Mayflower.  Use this as a visual tool when teaching your children about the Mayflower, the Pilgrims and the first Thanksgiving.


(13)  Mayflower Popsicle Craft


Mayflower Popsicle Craft


Here is a fun Mayflower craft that all the children will love.  Made from Construction Paper and Popsicle Sticks it is very likely you have all the craft materials needed right in your home.  Ramblings of a Crazy Woman will show you in detail how to make this craft…. she even shows you how to make waves to remind us how the Pilgrims endured a lot to find their way here.


(14)  Moving Mayflower


Moving Mayflower


Here is another of our Mayflower crafts from our very own site.  This Mayflower craft is a little bit different than the others because it can actually move.  Made with items like a paper towel roll, craft sticks and string this moveable mayflower will make the kids smile.  Gotta love something that actually moves.  Check out our site to find out how to make this Moveable Mayflower.


(15)  Mini Mayflower


Mini Mayflower


Get the kids excited about the Pilgrims and the Mayflower with this mini mayflower craft.  Made from a milk container this mayflower is the perfect size for little kids hands.  The kids will love to play with this mayflower and it also makes the perfect Thanksgiving decoration.  Check out Parents Connect for all the details.


(16)  Cardboard Tube Mayflower


Cardboard Tube Mayflower


When I found this Mayflower craft I thought it was quite original.  I found this Thanksgiving craft over at Naturally Educational.  Here she uses a cardboard tube along with some twigs to make her original Mayflower craft.  Make sure to check out her site for all the step-by-step details.  She also adds some Mayflower book choices to help you teach your children about the Mayflower.

Technorati Tags: , , , , , , , , , , ,

How to Make a Pumpkin Milk Jug Candy Holder

Last week I showed you how to make a Milk Jug Vampire Candy Holder.  Well, you seemed to have loved that idea, so I thought I would show you another cool Milk Jug Halloween Craft.  Today I’m going to show you how to make a Pumpkin Milk Jug Candy Holder perfect for handing out candy this Halloween.  Kids will love reaching inside this Pumpkin for the treats…. almost as much as your kids will love making it.  Keep in mind you will need some Adult Help for this craft as a knife and/or a scissor will be needed to cut open the milk jug.  So, let’s get started.

Check out our other Halloween Crafts.


How to Make a Pumpkin Milk Jug Candy Holder


Materials Needed

Milk Jug

Scissors

Knife (for adult only)

Orange, White, Green, Black & Red Paint

Brass Fasteners

Black Marker

Green Foam, Felt or Paper

Paper Plate

Glue

Candy


Step 1


Peel labels off milk jug.


Peel labels off milk jug.


Step 2


Cut milk jug in half.


Cut milk jug in half.


Step 3


Paint both sides orange.


Paint both sides orange.


Step 4


Use brass fasteners to attach both sides... to look like mouth is open.


Use brass fasteners to attach both sides… to look like mouth is open.


It should look like this.


Like this.


It looks like this from the back.


It looks like this from the back.


Step 5


 Draw eyes and nose.


Draw eyes and nose.


Step 6


Paint eyes white.


Paint eyes white.  I painted nose a lighter color.


Step 7


Paint red for lips.


Paint red for lips.


Step 8


Draw a leaf on foam, felt or paper.


Draw a leaf on foam, felt or paper.


Cut it out.


Cut it out.


Step 9


Roll some foam on a triangle like angle.


Roll some foam on a triangle like angle… like this.


It should look like this.


Like this.


Push top in and it stays in place on its own.


Push top in and it stays in place on its own.


Step 10


Push into open spout.


Push into open spout.


Step 11


Paint spout green.


Paint spout green.


Step 12


Outline features with black paint.


Outline features with black paint.


Step 13


Draw a letter C for each eye's pupil.


Draw a letter C for each eye’s pupil.


Step 14


 Draw rectangles on paper plate.


Draw rectangles on paper plate.


Glue in mouth.


Glue in mouth.


Step 15


Shove leaf in the spout.


Shove leaf in the spout.


Step 16


Fill with candy.


Fill with candy.

Wonderful!!  Wasn’t that fun?!  But, the fun doesn’t end there.  Use it to hand out candy to the Trick-or-Treaters….. they will love it!!

You might also like the How to make a Milk Jug Vampire Candy Holder ….. both crafts are perfect for Halloween.

Technorati Tags: , , , , , , , , , , , , ,

How to Make a Haunted House Treat Holder for Halloween

Halloween is coming up quickly.  Before you know it it will be the end of the month and Halloween will be here.  Today we are going to make a Halloween craft.  In this post I’m going to show you how to make a Haunted House Treat Holder for Halloween.  Load it with candy and use it as a Halloween party favor.  Or, if you would prefer…. use it as a Halloween decoration for inside the house.  The kids will love putting on display something they made themselves.  So, let’s get started.

Check out our other Halloween Crafts.


How to Make a Haunted House Treat Holder for Halloween


Materials Needed

Milk Carton

Candy

Tape

A Couple Pieces of White Paper

Colored Construction Paper

Paste / Glue

Scissors

Pencil

Crayons, Markers or Colored Pencils


Step 1


If your milk carton has a circle spout, we will take that out.


If your milk carton has a circle spout, we will take that out.


Step 2


Open up the carton


Open up the carton like this…


Step 3


Push out circle spout.


Push out circle spout.  Then add candy.  Tape shut.


It should look like this.


Like this…


Step 4


Wrap paper around base of carton.


Wrap paper around base of carton.  Paste in place.


It should look like this.


Like this…

Step 5


If there is a lot of excess paper at bottom... cut most of it off.


If there is a lot of excess paper at bottom… cut most of it off.


Push two opposite sides inwards and glue in place.


Push two opposite sides inwards and glue in place.


Then push other 2 sides in and paste.


Then push other 2 sides in and paste.


Step 6


Push corner of paper into triangle on milk carton.


Push corner of paper into triangle on milk carton.  Draw a line where you need to cut.


Cut off excess and glue triangle in place.


Cut off excess and glue triangle in place.

Step 7


 Cut out a long, thinnish piece of paper.


Cut out a long, thinnish piece of paper.  It should be long enough to be the roof.


Fold in half.... draw line on fold.  Then draw squiggly lines for roof's design.


Fold in half…. draw line on fold.  Then draw squiggly lines for roof’s design.


Center roof on top of carton


Center roof on top of carton.  Glue in place.


Step 8


Draw a design on the haunted house.


Draw a design on the haunted house.


Step 9


Finished Haunted House Treat Holder


And there you have you…. you just finished your Haunted House Treat Holder for Halloween.  If you want to use your Haunted House as a toy…. no problem.  You can even go to How to Make a Trick-or-Treat Paper Toy craft and print off the Trick-or-Treat figures you see in the above picture.

Technorati Tags: , , , , , , , , , , , , , , , , ,

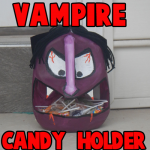
How to Make a Milk Jug Vampire Candy Holder

I have a wonderfully fun Halloween craft for you today.  In this post I’m going to show you how to make a Milk Jug Vampire Candy Holder for Halloween.  What is really cool about this craft is that you probably have all the craft materials needed in your house.  This vampire candy holder is made from a Milk Jug…. just simply wash it out and you are good to go.  You will need a bit of help from an adult cutting the milk jug as it can be difficult to cut.  So, grab the materials needed and let’s get started.

Check out our other Halloween Crafts.


How to Make a Milk Jug Vampire Candy Holder


Material Needed

Milk Jug

Black Marker

Scissors

Paint (color of your choice)

White, Black & Red Paint

Glue

Yarn

Paper Plate

Candy


Step 1


Clean out a milk jug.


Clean out a milk jug.  Take the labels off too.


Step 2


There are indentions in the plastic... I drew lines there for the mouth.


There are indentions in the plastic… I drew lines there for the mouth.


Step 3


Cut out this line.


Cut out this line.  Ask parents for help.


Step 4


 Draw eyes behind the handle.  Draw a nose too.


Draw eyes behind the handle.  Draw a nose too.


Step 5


Paint everything other than the eyes.


Paint everything other than the eyes.  I chose purple… choose any color.


Step 6


Paint eyes white.


Paint eyes white.  I decided to paint the nose a lighter purple… it’s optional.


Step 7


Remember the piece you cut out for the mouth?  Paint it black now.


Remember the piece you cut out for the mouth?  Paint it black now.


Step 8


Draw two triangles.


Draw two triangles on a paper plate.


Step 9


Cut them out.


Cut them out.


Step 10


Glue them in mouth.


Glue them in mouth.


Step 11


Glue black cloak to back of jug.  Outline parts in black.


Glue black cloak to back of jug.  Outline parts in black.


Step 12


Fold lots of yarn in half several times


Fold lots of yarn in half several times…. like this.


Step 13


Tie a string around the middle


Tie a string around the middle…


It should look like this.


Like this.


Step 14


There will be loops on both sides... cut them in half


There will be loops on both sides… cut them in half…


It should look like this.


Like this.


Step 15


Cut off top of jug.  Glue yarn to top of jug for hair.


Cut off top of jug.  Glue yarn to top of jug for hair.


Step 16


Add red paint for blood.... also add candy.


Add red paint for blood…. also add candy.

Isn’t this Milk Jug Vampire Candy Holder so cool?  It is perfect for holding candy this Halloween Season.  You are sure to get lots of comments on this candy holder.

Also, Check out How to Make a Pumpkin Milk Jug Candy Holder.… it’s another great Candy Holder for Halloween.

Technorati Tags: , , , , , , , , , , , , ,

15 Spooky Halloween Crafts using Milk Jugs


14 Spooky Halloween Crafts using Milk Jugs


I had no idea how many super cool crafts are out there for Halloween using Milk Jugs.  There are just so many…. and they all are just so cool.   I was searching the internet for some awesomely creepy Halloween crafts and I found some doozies for you.  In this post I have listed 15 spooky Halloween crafts using Milk Jugs.  What’s so wonderful about these Halloween crafts is that they all use milk jugs…. an item that most of us use every day.  So, you are sure to at least have the most important material for these crafts.  Scroll through all 15 of these Halloween milk jug crafts to find some to do with your kids at home.  They will love it.

15 Spooky Halloween Crafts using Milk Jugs

(1)  Spooky Spider


Spooky Spider


Check out this spider.  It’s super awesome and super big…. I love it!!  It will be a wonderful Halloween Decoration this Season.  It is sure to creep out all who see it.  Check out Family Fun to get all the details on this great Halloween Milk Jug Craft.


(2)  Halloween Table Centerpiece


Halloween Table Centerpiece


I don’t know about you, but I’m always looking for a unique way to show off my Halloween spirit with a great centerpiece.  Well, folks I think I found it.  Check out this awesome Halloween Table Centerpiece.  I found it over at The Ramblings of a Crazy Woman and I absolutely dig it!!


(3)  Spirit Jugs


Spirit Jugs


I have a great Halloween Craft for you to use up those extra Milk Jugs you have along with some old Christmas Lights.  Eighteen25 shows us in great detail how to make this amazing looking outside decoration.  By simply decorating a bunch of milk jugs into ghosts you can have a cheap and fun way to decorate the house this Halloween Season.


(4)  Trick-or-Treat Basket


Trick-or-Treat Basket


Every Halloween I look for original ways for the kids to carry their candy.  How about making a unique Trick-or-Treat Basket using a Milk Jug.  I found this great Milk Jug Halloween Craft over at TLC Family.  What is great about using a Milk Jug for this craft is that the Trick-or-Treat Basket will not only be sturdy, but it will be rain proof too.


(5)  Recycled Halloween Windsock


Recycled Halloween Windsock


Here is another fantastic way to use a Milk Jug to make an outside Halloween Decoration.  Here Thrifty Fun shows you how to take a milk jug along with some plastic garbage bags and make a terrific windsock.  The ghost will actually look like he is flying through the night.


(6)  Milk Jug Storm Trooper Helmet


Milk Jug Storm Trooper Helmet


This has got to be one of the most creative ways to use a milk jug for Halloween.  Filth Wizardry shows us step-by-step how to take an everyday milk jug and make it into a storm trooper helmet perfect for dressing up this Halloween.  Any child will not only love making the craft, but using it to dress up too.


(7)  Halloween Monster Yard Lights


Halloween Monster Yard Lights


Here is a wonderfully colorful way to decorate the outside for Halloween.  Take milk jugs and transform them into Monster Yard Lights.  This is a fun way to decorate your yard or walkway and the kids will absolutely love it.  Do you know what they will love even more?  Making them with you.  Check out Crafts by Amanda for all the craft details.


(8)  Milk Jug Pumpkin


Milk Jug Pumpkins


If you are tired of decorating your usual pumpkins…. why not try something a little bit different this year.  Kiwi shows us how to take a milk jug and decorate it into a pumpkin.  Let the kids decorate whatever way they want to come up with unusual and unique pumpkins.  They will become great Halloween decorations and you will create loving memories of the time you made these together.


(9)  Milk Jug Pinata


Milk Jug Pinata


If you are having a Halloween Party this year this is an excellent Halloween craft for you.  You can make this creepy looking Halloween Pinata with the help of Cathie Filian.  Here she describes in great detail how you too can make this one of a kind scary pinata for your next Halloween party.


(10)  Halloween Masks


Halloween Masks


Why not take those extra milk jugs you have and make them into Halloween Masks.  Your kids can be as creative as they would like to.   These Halloween masks are as much fun to make as they are to wear.  Check out TLC Family for all the how-to’s to make this craft.


(11)  Milk Jug Ghost


Milk Jug Ghost


Here is a great Halloween Decoration….. perfect for inside your house.  Because this craft is made with Christmas lights the ghost actually lights up.  Turn off the lights and check out how your Ghost will actually glow.  Spooky, right?  Sure is.  Get all the craft details at She Knows.


(12)  Monster Light Jug


Monster Light Jug


This friendly little monster is not only cute during the day, but also lights up the night!  Not everything about Halloween has to be scary or spooky.  Some little ones just can’t handle too much scary.  For these little ones this Halloween Milk Jug craft is perfect.  Check out Kaboose for all the details on this craft.


(13)  Milk Jug Skeleton


Milk Jug Skeleton


This Halloween Milk Jug Craft is so creative!!  And, it looks like an incredibly fun craft for the kids as well as the adults.  I found this craft over at The Party Animal and I just love it!!  You will need plenty of Milk Jugs for this craft…. 7 to be exact.  But, if your kids drink a lot of milk like my kids… you will have the 7 milk jugs in no time.


(14)  Halloween Milk Jug Lanterns


Halloween Milk Jug Lanterns


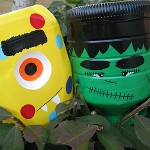
I found this creative Halloween craft over at Ladies Home Journal.    In this post they show you how to take Milk Jugs and make them into Skeletons, Frankensteins and Cats.  Line a bunch of these down your driveway or a path to make a spooky lit area for the trick-or-treaters to walk.


(15)  Milk Jug Vampire Candy Holder


Milk Jug Vampire Candy Holder


We just put up our very own Halloween Milk Jug Craft.  We made a Milk Jug Vampire Candy Holder and it’s perfect for Trick-or-Treat night.  You can actually put tons of candy in the mouth and let the Trick-or-Treaters reach in the Vampire’s mouth and take the candy.  They are sure to get a big kick out of this.

Technorati Tags: , , , , , , , , , ,

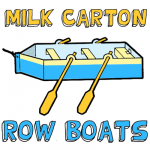
How to Make a Milk Carton Row Boat

Today I have a craft for you that is perfect for the nice warm summer season.  In this post I will show you how to make a Milk Carton Row Boat.  Made from a couple of milk cartons this row boat will actually float.  What is nice about milk cartons is that their waxy surface makes them completely water proof…. perfect for the water.  So, grab the materials needed and let’s get started.

Check out our other Milk Carton Crafts.


How to Make a Milk Carton Row Boat


Materials Needed

2 Milk Cartons

Pen or Pencil

Scissors

Tape

Nail

String


Step 1


Rinse out 2 finished Milk Cartons.


Rinse out 2 finished Milk Cartons.  Let dry.


Step 2


Put carton on its side... draw a line 2 inches from bottom.


Put carton on its side… draw a line 2 inches from bottom.  Cut along this line.

Step 3


Draw what you see above along the top edge of the carton.


Draw what you see above along the top edge of the carton.  For the oar locks…. make a dot in the center of each.


Step 4


Cut along the unwanted part using guidelines from last step.


Cut along the unwanted part using guidelines from last step.


Step 5


Use 2nd milk carton.


Use 2nd milk carton.  Cut a seat that is about 1.5 inches wide.


 Step 6


Cut strips that are a bit wider than the width of the first milk carton.


Cut strips that are a bit wider than the width of the first milk carton.  Fold tabs as seen.


Fold tabs down.


Fold tabs down.


Step 7


Draw oars on extra milk carton.


Draw oars on extra milk carton.  Cut out 4 of them.


Step 8


Tape the seats into the boat.


Tape the seats into the boat.


Step 9


With a nail, poke a hole in each oar lock.


With a nail, poke a hole in each oar lock.  Also, poke a hole in front of boat.  Put an oar in each oar lock.  Tie string around the hole in the front of the boat.  Now go play with your boat.

And that’s it.  You just made yourself your very own Milk Carton Row Boat.  Use it in your pool, bath tub or any body of water.  Enjoy!!

Technorati Tags: , , , , , , , , ,

Coolest Earth Day Craft Ideas – Crafts Made from Recycled Materials


Coolest Earth Day Craft Ideas - Crafts Made from Recycled Materials


Earth Day will be here in just a couple of weeks.  In honor of Earth Day I thought I would scour the internet looking for cool ideas for Earth Day crafts.  All of the crafts that I found and have listed here are made from recycled materials.  Earth Day is a special day to celebrate the Earth and to increase awareness and appreciation of the Earth’s natural environment.  And, I think making crafts from recycled materials such as the ones found here is a great way to teach children about recycling and the importance of doing that to help save our Earth.  So, without further ado….

Coolest Earth Day Craft Ideas

(1)  Newspaper Roses


Newspaper Roses


Look how beautiful these Roses are?  They really are lovely & they are completely made from recycled newspapers.  Check out the craft and all its details over at Zakka Life.


(2)  Serving Tray


Serving Tray


I love, love, love this idea!!  Crafty Nest went to a Salvage Yard and noticed that there were old cupboards there.  She picked up a white one and with a little creativity and a lot of fun she was able to make this beautiful serving tray.  Check out her website so you too can make this.


(3)  Can-Do Robots


Can-Do Robots


Made from tin cans these robots are so freakin cute.  What is really cool is that their features are made of magnets, so they can be removed.  Which makes these robots like a Mr. Potato Head…. How fun is that?!  Check out the craft details over at Family Fun.


(4)  Cardboard Ottoman or Side Table


Cardboard Ottoman or Side Table


What a clever and creative idea!!  Made from recycled cardboard tubes you can choose to make either a side table or an ottoman…. or even make both.  When you look at them from above they are actually daisies.   Check out Esprit Cabane for all the crafting details.


(5)  Smashed Soda Can Animals


Smashed Soda Can Animals


Ok, this cow is really cute, isn’t he?!  But, wait till you check out Fave Crafts….. they have not only a cow, but they will show you how to make a pig and a bear too.  Make all three recycled can crafts and you will have a beginning to your very own recycled animal farm.


(6)  Milk Jug Shade


Milk Jug Shade


Now, this recycled craft turns out beautiful, doesn’t it?  Honestly, if I saw this I would have no idea it was actually made from recycled milk jugs.  But, it is.  I found this craft over at Mother Earth News.  Check out their site for all the wonderful craft details.


(7)  Recycled Picnic Basket


Recycled Picnic Basket


I found this recycled picnic basket over at bron marshall and for the main basket it is actually made from a recycled beer six-pack.  Isn’t that a clever idea?  They other container is actually made from a recycled half dozen egg carton…. they simply added a handle.  Make sure to check out their site for the full craft details.


(8)  Newspaper Basket


Newspaper Basket


This is an amazing basket!!  And, it is completely made from Newspaper.  Look how sturdy it looks too…. I love it.   How About Orange shows you step-by-step how to make this basket yourself.


(9)  Recycled Glass Chandelier


Recycled Glass Chandelier


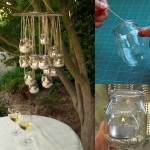
Oh I just love this recycled craft idea…. it might just be my favorite.  I found this recycled craft over at Casa Sugar.    With a few recycled materials and some tea lights  you too can have this stunning glass chandelier.  I love the way they show this chandelier being outside…. it would be perfect for a fun outside party.


(10)  Creative Notepads


Creative Notepads


Here is a creative way to recycle those leftover notebook pages and even those left over paper scraps.  Esprit Cabane shows us how to take those leftover paper products and make them into cute little pocket size notepads.  Check out her site for the full details.


(11)  Toilet Paper Tube Albums


Toilet Paper Tube Albums


These Toilet Paper Tube Albums are just precious.  They are a beautiful way to store special keepsakes and pictures of events that you don’t want to lose.  Those Northern Skies shows you step-by-step how you too can make these albums from recycled toilet paper tubes.


(12)  Magazine Boxes


Magazine Boxes


Here is a creative and imaginative way to recycle those stacks of magazines you keep at home.  When made like the tutorial on Abstract Octopus you can actually store things in these boxes.  Check out the site for the full craft details.


(13)  Plastic Cup Earrings


Plastic Cup Earrings


Aren’t these earrings adorable?  You would never realize they were made from a plastic cup unless I told you.  I found this idea over at Punk Projects and I think it is a great way to recycle plastic cups… plus the craft is fun to do.  Make sure to check out her website for the details.

Technorati Tags: , , , , , , , , ,

11 Cool Outer Space Crafts for Kids


11 Cool Outer Space Crafts for Kids


Today I have some awesome craft ideas for you.  Not just any craft ideas…… today I have cool outer space crafts for you.  I was making my way through the internet looking for some really creative outer space crafts and I think I found them.  I found some that are made from food and others that are made from recycled materials.  I found crafts that are perfect for the youngest of crafters and others that are meant for older children.  But, bottom line…. there is an outer space craft here for you.  So, enough with the chit-chat….. let’s get started.

11 Cool Outer Space Crafts for Kids

(1)  Orbiting Planets


Orbiting Planets


Here is a great craft to help teach your kids about space and all the orbiting planets.  Plus, the craft is a lot of fun.  I found this craft over at BusyBeeKidsCrafts and they have the right idea….. use a fun craft to help teach your children about space.


(2) Recycled Robot Craft

Recycled Robot Craft

Look how cute this robot is….. so cute!!  And, it is made from many recycled materials which makes this robot even cooler.  FreeKidsCrafts shows you how you can take tin foil, an empty container and soda bottle lids and make it into a robot like above.  How fun!!


(3) Alien Pipe Cleaner Craft


Alien Pipe Cleaner Craft


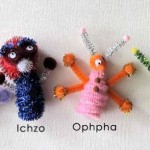
I love this craft…. I just love how these little aliens turn out.  I found this Outer Space craft over at Craft Jr. She shows you step-by-step how to make the aliens as pictured above.  But, she also explains how if you have mismatched colors or pipe cleaners of different sizes it doesn’t matter…. they are aliens after all.


(4) Spiral Galaxy


Spiral Galaxy


What a pretty craft….. I love all the colors in this Spiral Galaxy Craft.  And, believe it or not this Outer Space craft is made with a paper plate and some glow in the dark paint.  TheCraftyClassroom shows you in detail how you too can make this craft.


(5) Out of this World Centerpiece


Out of this World Centerpiece


Here is a cool craft that will be a lot of fun to put together.  Plus, this Out of this World Centerpiece is perfect if you are having an Outer Space birthday party.  Imagine this being the centerpiece at the Birthday table.  Find out how to make this over at MakingFriends.


(6) Grass Head Monster


Grass Head Monster


This is an awesome Outer Space craft because your child is going to have to care for it everyday.  It is actually made with real grass seed so your child will have to care for it everyday for the grass to grow.  Check out FreeKidsCrafts for all the details.


(7) Googly Eyed Green Blobs


Googly Eyed Green Blobs


These are pretty creepy looking…. aren’t they?  I found this craft over at MakeAndTakes and she had it posted as a Halloween craft, but I thought this craft would also fit for an Alien…. so I am including it in this Outer Space crafts list.  Check out her site for all the “how-to” details.


(8)  Rocket Craft


Rocket Craft


Isn’t this Rocket craft just adorable?  I love it!!  And, it is made out of a cardboard box.  What a creative idea.  You will need help from an adult for this craft as they do use a craft knife.  But, it would be so much fun making this with your parents.  Check out Se7en for the step-by-step details.


(9) Space Cake


Space Cake


I just had to add this cake to this post.  I know it really isn’t a craft Per Se, but I think cooking can be quite crafty…. and it is also a ton of fun to do with an adult.  So, check out this Outer Space cake over at FamilyFun and get the recipe to cook with your parents.  This would be great for an Outer Space birthday party.


(10) Puffy Paint Moon Craft


Puffy Paint Moon Craft


AllKidsNetwork shows us how if you mix shaving cream and glue together it makes a lumpy and bumpy surface….. just like the moon.  Actually, what they explain is that while the glue dries it makes a smooth-textured material that puffs while it’s drying and then flattens out.  Isn’t that cool?  Go to AllKidsNetwork to check out the full details.


(11) Space Shuttle Craft


Space Shuttle Craft


Wow, isn’t this space shuttle amazing?!  It’s just so creative.  And, the best part…. It’s made out of mostly all recycled materials.  How cool is that?!  Kids of all ages will love making this space shuttle…. the younger kids will need help from an adult.  Check out LooLeDo for the entire craft tutorial.

Technorati Tags: , , , , , , , , , , ,

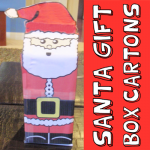
How to Make a Santa Claus Milk Carton Gift Box

Christmas is the Season for gift giving.  Well, today’s craft is right down that alley.  In this post I will show you how to make a Santa Claus Milk Carton Gift Box.  Made from a Milk Carton and a Paper Template this is a perfect way to wrap your gifts this Holiday Season.  Imagine the look on your family and friends’ face when they receive their gift wrapped in this gift box….. they are sure to love it.

Check out our other Christmas Crafts.


How to Make a Santa Claus Milk Carton Gift Box


Materials Needed

Printer & Paper

Milk Carton

Tape

Scissors

Glue Stick


Step 1


Print out Templates


Print out Templates.  Click on this link to open up a new web page to templates and to print off.


Step 2


Line up all the papers


Line up all the papers to see where each one should go.


Step 3


trim off the excess white trim and tape pieces together.


You should now trim off the excess white trim and tape pieces together.


Tape on the back too.


Tape on the back too.


Do this until all 4 sheets line up and are taped.


Do this until all 4 sheets line up and are taped.


Step 4


Cut out on outline AND on dashed lines.  Cut out the yellow parts too


Cut out on outline AND on dashed lines.  Cut out the yellow parts too…  However, if you plan to make a box without a milk carton leave the yellow parts there.


It should look like this.


So, if gluing to milk carton… you should cut out like this.


Step 5


Fold on lines.


Fold on lines.


Step 6


open up the milk carton and then tape closed


To make it easier for gift opener, open up the milk carton and then tape closed.  ***Place gift inside before taping closed.


Tear out spout.


If yours has a spout… You can ask Mom or Dad to tear it out.


Step 7


Put glue stick on milk carton.


Put glue stick on milk carton.


Step 8


Wrap the paper template around milk carton.


Wrap the paper template around milk carton.


Step 9


Finished Santa Claus Gift Box


You just finished your Santa Claus Milk Carton Gift Box.  How did it turn out for you?  Now, go put it under the tree for someone special.  The receiver is sure to love it.

Technorati Tags: , , , , , , , , , , , ,

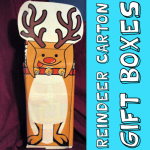
How to Make a Reindeer Milk Carton Gift Box

Christmas is just days away and now is the time to start packaging up your gifts to get them ready for the gift giving fun.  Today I’m going to show you how to make a Reindeer Milk Carton Gift Box.  Made from a milk carton and printed off template this craft is a creative way to package up your gifts this Holiday Season.  So, let’s get started.

Check out our other Christmas Crafts.


How to Make a Reindeer Milk Carton Gift Box


Materials Needed

Printer & Paper

Milk Carton

Scissors

Tape

Glue Stick


Step 1


Print out templates


Print out Templates.  Click on this link to open up a new web page to templates and to print off.


Step 2


Cut outline of template


Cut outline of template and then match up where they should be.  If making a box without a carton then don’t cut out the red lined part of templates.


Step 3


Cut off excess white trims and then tape pages together.


Cut off excess white trims and then tape pages together.


Tape together like this.


Tape together like this.


Step 4


Cut on dotted lines.


Cut on dotted lines.


Step 5


Fold like this.


Fold like this.


Step 6


open up the milk carton and then tape closed.


To make it easier for gift opener, open up the milk carton and then tape closed.  ***Place gift inside before taping closed.


Tear out spout.


If your milk carton has a spout… you can ask Mom or Dad to tear it out.


Put glue stick on milk carton.


Put glue stick on milk carton.


Step 7


Wrap around and glue on milk carton.


Wrap around and glue on milk carton.


Step 8


give to someone special


There you have it…. your finished Reindeer Milk Carton Gift Box.  Now it is ready for you to give to someone special.  I’m sure they will love it!!

Technorati Tags: , , , , , , , , , , ,

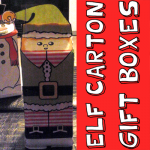
How to Make an Elf Milk Carton Gift Box

Christmas is just around the corner.  Surely, you have an idea of the gifts you are giving your friends and family.  But, have you figured out the gift box you will be placing your gift in?  Well, don’t worry too much about it…. I have the perfect craft for you.  Today I’m going to show you how to make an Elf Milk Carton Gift Box perfect for any gift you are giving this Holiday Season.

Check out our other Christmas Crafts.


How to Make an Elf Milk Carton Gift Box


Materials Needed

Printer & Paper

Milk Carton

Tape

Scissors

Glue Stick


Step 1


Print out Templates.


Print out Templates.  Click on this link to open up a new web page to templates and to print off.


Step 2


Cut out the outline of the template.


Cut out the outline of the template.  If you plan to make a box without a milk carton then don’t cut out red lined areas on template.


Step 3


Cut off white outline trim that is around some of the sides.


Cut off white outline trim that is around some of the sides.  Then tape template pages together where they join.


Tape together to look like this


Tape together to look like this.


Step 4


Cut out on dashed lines.


Cut out on dashed lines.


Step 5


Start folding.


Start folding.


Step 6


To make it easier for gift opener, open up the milk carton and then tape closed.


To make it easier for gift opener, open up the milk carton and then tape closed.  ***Place gift inside before taping closed.


Tear out the spout.


If your milk carton has a spout… you can ask Mom or Dad to tear it out.


Put glue stick on milk carton.


Put glue stick on milk carton.


Step 7


Now wrap paper around carton.


Now wrap paper around carton.


Step 8


Give your gift to someone special.


There you have it…. you just finished your Elf Milk Carton Gift Box.  Now, give your gift to someone special.  They are sure to love the gift box almost as much as they will love the gift inside.

Technorati Tags: , , , , , , , , , , ,

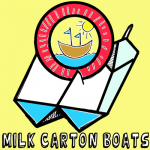
How to Make Milk Carton Boats


making milk carton sail boats


Fall is a great time to play with boats in the water.  There is a nice crisp breeze in the air perfect for giving the boats the momentum to go.  Don’t have a boat?  No problem.  Today I’m going to show you how to make a Boat out of a milk carton and a paper plate.  The craft is an easy one…. perfect for kids of any age.  So, grab a pair of scissors, a milk carton and a paper plate and let’s get started.

Materials Needed

Milk Carton

Paper Plate

Scissors


Step 1


Clean out a milk carton


Clean out a milk carton… then cut the milk carton on a diagonal.


Step 2


Cut a slit in the milk carton.


Cut a slit in the milk carton.


Step 3


Decorate a paper plate to be a beautiful sail


Decorate a paper plate to be a beautiful sail and then place it in the slit you made.

Now, your boat is ready to set sail.  Take your boat to the bathtub, pool or pond and send your boat craft on it’s way.  It’ll be so much fun!!

Technorati Tags: , , , , ,

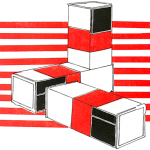
How to Make Connecting Building Blocks

Today I’m going to show you how to make Connecting Building Blocks.  These blocks are made from simple milk cartons or cream containers.  This is a great way to teach young children how items can fit together.  So, let’s get started.


How to Make Connecting Building Blocks


Materials Needed

Milk or Cream Cartons

Aluminum Foil or Cellophane

Tape

Poster Paint

1 Teaspoonful Soap Flakes or Detergent

Construction Paper, Crepe Paper, or Grocery-bag Paper

Rubber Cement


Don’t throw away those empty waxed milk cartons. You haven’t milked the last drop out of them yet! They can be washed, cut, pasted, painted, linked, and eventually thrown away with a clear conscience—after all, they’re free! Milk and cream cartons with flat tops are ideal for preschool block play. The advertising on the outside won’t bother the you at all, but covering the writing can be fun in itself.

Wrappers of aluminum foil will turn these blocks into glittering silver bricks (optionally).  Just cover as you would a gift package, and fasten each end with a tiny piece of tape; or poster paints will stick to the waxed surface if you put a teaspoonful of packaged soap or detergent into the jar of paint before you start; or paper (construction, crepe, or from grocery bags) can be made to adhere, with rubber cement.

These are more fun and more challenging than plain building blocks. They join together with great ease, and the play possibilities are endless.


If two square openings are cut in each carton, the blocks can then be linked together, one into another


If two square openings are cut in each carton, the blocks can then be linked together, one into another.


These blocks can be connected to construct all sorts of shapes and forms


These blocks can be connected to construct all sorts of shapes and forms, then taken apart and put together again, this time in a completely different way. This is more than just a “keep busy” activity —it is an engrossing project, excellent for developing co-ordination, and imagination too!

Technorati Tags: , , , , , ,

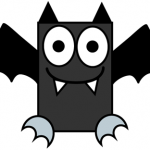
How to Make a Juice Box Vampire Bat

Vampire Bats are SPOOKY!!  And, this Vampire Bat is no exception.  In this post I’m going to show you how to make a Vampire Bat out of a juice box.  In just a few steps you can make this fun and festive juice box Vampire Bat.

Check out our other Halloween Crafts.


How to Make a Juice Box Vampire Bat


Materials Needed:

Juice Box

Black Paper

Printer

Glue

Scissors


Follow the template below to make the vampire parts.

CLICK ON IMAGE TO OPEN IT UP BIGGER TO PRINT.


Follow the template below to make the vampire parts


Step 1


Cover a juice box with black paper


Cover a juice box with black paper.  Glue it down.


Step 2


 Print out template


Print out template… cut out the Vampire parts.


Step 3


Glue pieces on to juice box


Glue pieces on to juice box.


How to Make a Juice Box Vampire Bat


There you go…. you did it.   How did your Halloween juice box Vampire Bat turn out?  Let me know in the comments below.  I’d love to hear about it.  And, remember to keep an eye out for more Halloween Crafts as it gets closer to Halloween.

Technorati Tags: , , , , , , , , ,

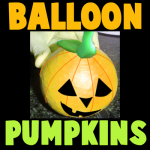
How to Make a Halloween Bean Bag Balloon Pumpkin

If you are looking for new Halloween decorations to put around the house, but are finding the same Halloween decorations at the store as every other year….. I have the perfect Halloween decoration craft for you.  Here I will show you how to make a Halloween bean bag balloon pumpkin perfect for this Halloween season.

Check out our other Halloween Crafts.


How to Make a Halloween Bean Bag Balloon Pumpkin


Materials Needed:

Water Bottle

3 Balloons

Rice or Split Peas

Scissors

Black Felt or Black Marker

Green Clay or Play Doh


Step 1:


Cut water bottle bottom off to make a funnel


Cut water bottle bottom off to make a funnel.


Step 2


Fill balloon to half its size


Fill balloon to half its size.  Wait 15 seconds and then you can deflate the balloon.  This stretches the balloon out.


Step 3


Deflate balloon


This is what the deflated balloon should look like.


Step 4


Stretch the balloon over the top of the bottle.


Stretch the balloon over the top of the bottle.  Place rice or split peas into the cut water bottle…. they will then fill the balloon.


Step 5


Fill up the balloon until it is about this full


Fill up the balloon until it is about this full.


Step 6


Cut off the top of the balloon


Cut off the top of the balloon.


Step 7


Cut bottoms from two more balloons


Cut bottoms from two more balloons.


Step 8


Stretch a balloon over the filled balloon


Stretch a balloon over the filled balloon… covering the side with hole.


Step 9


Stretch 3rd balloon over the 2nd balloon


Stretch 3rd balloon over the 2nd balloon… Again over the side the hole is showing on.


Step 10


This is what your pumpkin bean bag looks like now


This is what your pumpkin bean bag looks like now.


Step 11


Add a triangle for each eye and for the nose


Go to Our – How to Draw a Jack-O-Lantern Drawing Tutorial to draw the face…or just add a triangle for each eye and for the nose.  Draw a smile as well.


Step 12


 Add green clay or play doh stem and leaf to top


Add green clay or play doh stem and leaf to top.


How to Make a Halloween Bean Bag Balloon Pumpkin


And there you go.  You have just made an original Halloween decoration for your house…. a Halloween bean bag balloon pumpkin.  Display it proudly.  And, have a very scary Halloween.

Technorati Tags: , , , , , , ,

How to Make Colorful Milk Carton Candles from Old Candles

Today we will show you how to make a beautiful, colorful candle. This candle is made by using bits and pieces of old candles and placing them in the milk container, which would be used as the mold. You will be able to use this candle for a very, very long time, as it will be a very large candle. Find out how to make this recycled candle below.

How to Make Colorful Milk Carton Candles from Old Candles


How to Make Colorful Milk Carton Candles from Old Candles


CRAFTS MATERIALS NEEDED

Bits of left over candles

Quart milk container

Scotch tape

Paper clip

String

How to Make the Colorful Candle

Step 1


Cut off top of quart milk container


Cut off top of quart milk container (dotted line).  Make hole in center of bottom, as in Figure 1.

Step 2


milk-container-candles-02


Pull a length of string from top through bottom hole. Stick in a pin to hold string in place. Fasten piece of Scotch tape over hole at bottom to prevent wax from escaping, as in Figure 2.

Step 3


When hard, remove mold


From top, pull string taut, and fasten to top of container with a paper clip.

This part an adult must do. The adult should fill container with melted wax and allow to harden.

When hard, remove mold, as in Figure 3.

Now you can enjoy your beautiful, colorful candle that was made from bits and pieces of old candles. It feels good to recycle / upcycle unused items.

Technorati Tags: , , , , , , ,