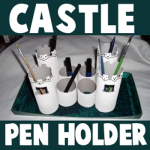
How to make a Castle Pencil Holder

Here is a unique pencil holder made from recycled toilet paper rolls (or paper towel rolls). It is also a special pencil holder  for boys, because every boy is a knight who need a castle… of course 😉 Laura from  Dacian Moon Handmade  will show you, step by step, how to make it.

How to make a Castle Pencil Holder


Cardboard Tube Castle Pencil Holders


CRAFTS MATERIALS NEEDED:

– recycled paper rolls
– scissors
– glue
– paints
– paintbrush
– rectangle cardboard box lid


IMG_6760


Step 1.

Cut every roll in half.


IMG_6761


Like this.


IMG_6762


Step 2.

Use green paint to give the cap color – like grass. You also can use grey for paved roads…


IMG_6764


Cover all the surface with paint.


IMG_6765


Add as many layers of paint until you are happy with the result.


IMG_6769


Step 3.

Let’s give shape to the rolls.


IMG_6771


On two bigger rolls draw battlements and one window…


IMG_6772


… on the other bigger rolls draw only battlements. Like this.


IMG_6773


Cut them off.


IMG_6774


Finally, our towers will look like this.


IMG_6775


Step 4.

Let’s paint the castle. Mine will be white with some black decorations.


IMG_6778


Paint them like this…


IMG_6779


Let them dry, then draw your decorations using a toothbrush.


IMG_6780


Step 5.

Apply a layer of glue on a tower base


IMG_6781


… and put it in its place.


IMG_6782


Do the same with all rolls. Let them dry well.


IMG_6783


Now your castle is ready to be populated with pens and pencils 😀


IMG_6784


Technorati Tags: , , , , , ,

How to Make a Folded Paper Windmill

Today I am going to show you how to make a Folded Paper Windmill.  This windmill is so much fun to make and it is simply made from 4 sheets of paper.  The majority of the craft supplies needed can be found in your home so you can get started with this craft right away.  So, grab the materials needed and let’s get started.

Check out our other Paper Folding Activities.


How to Make a Folded Paper Windmill


Materials Needed

4 Sheets of Paper

Scissors

Paste/Glue

Ruler

Pencil

Paper Fastener


Top of Windmill

Step 1


Cut a square piece of paper


Cut a square piece of paper (such as 8 inches x 8 inches).


Step 2


Fold into 16 squares and then unfold.


Fold into 16 squares and then unfold.  Detailed steps are below.


Fold page in half.


Fold page in half.


Fold page in half again.


Fold page in half again.


Open back up.


Open back up.


Fold in half twice in the other direction.


Fold in half twice in the other direction.


Open back up again.


Open back up again.


Step 3


Cut 3 slits on both sides.


Cut 3 slits on both sides.


I am numbering the squares to help show you how to fold it.


I am numbering the squares to help show you how to fold it.


Step 4


This is the top of the windmill.


This is the top of the windmill.  The square will naturally fold into a house shape.  Paste in place as I will show you below.


Fold #8 over #12.  Paste.


Fold #8 over #12.  Paste.


Fold #9 over #5.  Paste.


Fold #9 over #5.  Paste.


Fold #16 over #4.  Paste.


Fold #16 over #4.  Paste.


Fold #13 over #1.  Paste.


Fold #13 over #1.  Paste.


View from one side.


View from one side.


View from other side.


View from other side.


House

Step 1


Start off again with 8x8 inch piece of paper, folded.


Start off again with 8×8 inch piece of paper, folded.


Step 2


Now, cut off the last column of squares.


Now, cut off the last column of squares.


It now looks like this


It now looks like this, above.


Step 3


Now, cut three slits on both sides.


Now, cut three slits on both sides.


Step 4


Fold the house and paste in place.


Fold the house and paste in place.


Windmill

Step 1


For the tall, lower part of the windmill... fold the paper so there are 15 squares


For the tall, lower part of the windmill… fold the paper so there are 15 squares (3 squares in each column).  Follow directions below.


Cut a piece of paper 8 inches x 10 inches.


Cut a piece of paper 8 inches x 10 inches.  Measure out lines 2 inches apart.  Fold on these lines.


Now fold the paper in half twice in the other direction.


Now fold the paper in half twice in the other direction.  Open back up.


Now cut off rectangle so there are 3 columns with 5 squares in each.


Now cut off rectangle so there are 3 columns with 5 squares in each.


Step 2


Now fold the paper into long rectangle, like above picture.  Glue together.


Now fold the paper into long rectangle, like above picture.  Glue together.


Now fold the paper into long rectangle, like above picture.  Glue together.


Like this.


Pinwheel

Step 1


Fold square piece of paper into fours.  Unfold.


Fold square piece of paper into fours.  Unfold.


Step 2


Cut slits on a diagonal.  Don't go thru to center.


Cut slits on a diagonal.  Don’t go thru to center.


Step 3


Bring all corners to center.


Bring all corners to center.  Put brass fastener thru center and into windmill top as seen in next pic.


Finished Windmill


And, there you have it….. you just finished making your Folded Paper Windmill.  How did you Windmill turn out?  Let me know in the comments below.  And, don’t forget to take a picture of your Windmill and share it in the comment as well.

Technorati Tags: , , , , , , , , , ,

How to Make Cardboard Tubes Log Cabin for Abe Lincoln on Presidents Day

Well it is going to be February in 2 hours, so I figured that I would put up a Toy Log Cabin Craft Building craft to celebrate Abraham Lincoln’s birthday. Why? Because it is Presisents Day soon. Just use paper and cardboard tubes / rolls and then just connect them together easily.


How to Make Cardboard Tubes Log Cabin for Abe Lincoln on Presidents Day


How to Make Cardboard Tubes Log Cabin for Abe Lincoln on Presidents Day

Crafts Materials Needed

– Paper Towel Rolls
– Toilet Paper Rolls
– Construction Paper or Card Stock
– Scissors

Step 1


Step 1 : Making Paper Towel Roll Log Cabin Craft for Kids


First off, take a piece of construction paper and cut 3 or so long strips out. These will be used to connect the tubes (logs) together.

Step 2


Step 2 : Making Paper Towel Roll Log Cabin Craft for Kids


Fold the pieces of construction paper, these will be the corners of the log cabin to hold the tubes together.


Step 3


Step 2.5 : Making Paper Towel Roll Log Cabin Craft for Kids


For all of the cardboard tubes….make slits parallel to each other…as you see in the picture above.

Step 4


Step 3 : Making Toilet Paper Roll Log Cabin Craft for Kids


Here is a picture illustrating how to put the log cabin together…take the piece of folded paper…and stick the cardboard tube onto the piece of paper by inserting the paper into the slits that are on the tubes.

Step 5


Step 4 : Making Toilet Paper Roll Log Cabin Craft for Kids


Here is one of the folded pieces of paper (corner pieces) with 6 tubes on it. This shows you how we will build the log cabin. You don’t have to follow my directions…lay out the cabin the way that you want to.

Step 6


Step 5 : Making Toilet Paper Roll Log Cabin Craft for Kids


This is how you make windows and doors….you can use toilet paper rolls for the parts around the doors and windows…and use long, paper towel rolls for logs that have to go all the way across the structure.

Step 7


Step 6 : Making Toilet Paper Roll Log Cabin Craft for Kids


Use an entire piece of paper for the roof and then just place it within the four corners of your log cabin house.

Step 8


How to Make Cardboard Tubes Log Cabin for Abe Lincoln on Presidents Day


I hope that you enjoyed this building arts and crafts project to help celebrate Abraham Lincoln’s birthday for Presidents’ Day.

Technorati Tags: , , , , , , , , , , , , , , ,

How to Make a Shoe Box Doll House Arts and Crafts Project for Kids

Today we will show you how to make a really great toy doll house out of shoe boxes and other materials. This little two-story doll house with its gabled roof can be made in less than a half hour by any handy boy or girl. To make it you will need the following materials below.

Check Out Our Doll House and Doll House Furniture Making Crafts Section for more of the same types of crafts.


How to Make a Shoe Box Doll House Arts and Crafts Project for Kids


How to Make a Shoe Box Doll House Arts and Crafts Project for Kids

<<Crafts Materials Needed:>>

– shoe boxes

– ruler

– cardboard

– pencil

– scissors

– glue or paste

– paints (optional)

– lace paper doilies (optional)

– brush (optional…needed only if you paint)

– fancy paper (optional…needed only if you want to wallpaper the inside of the house)

Step 1

Remove the covers from four shoe boxes of the same size, and throw them away as you will not need them. Glue one pair of shoe boxes together, end to end.


Glue one pair of shoe boxes together, end to end.


Glue the second pair of boxes the same way.

Step 2

Place the boxes with the open ends towards you, and glue the second pair over the first to make a two-story house.


Place the boxes with the open ends towards you, and glue the second pair over the first to make a two-story house.


Step 3

For the roof, measure a piece of cardboard two inches longer than the width of the house. ( When the roof is folded and placed over the house, the overhang will be one inch on each side. Cut out the roof. Fold the roof section exactly in half, the long way, as in illustration A.


For the roof, measure a piece of cardboard two inches longer than the width of the house.


Step 4

For the gables of the roof, cut two triangular pieces of cardboard, with a little flap on each of the three sides, as in illustration B.

Bend the flaps back.


For the gables of the roof, cut two triangular pieces of cardboard


Step 5

Glue the bottom flap to the box top, and the two other flaps to the underside of the roof section. Do the same to the gable at the other end.


Glue the bottom flap to the box top, and the two other flaps to the underside of the roof section.


Step 6 : Wallpaper or Paint (Either is Optional)

Paint the inside of each of the four rooms a different color. Allow them to dry thoroughly. If you like, you may glue fancy paper to the walls of the rooms, instead.

Step 7 : Cut Out Windows and Curtains

Cut out windows, and glue pieces of lace paper doilies inside the windows, for curtains, as in illustration C.


Cut out windows, and glue pieces of lace paper doilies inside the windows, for curtains


Check Out Our Doll House and Doll House Furniture Making Crafts Section for more of the same types of crafts.

Technorati Tags: , , , , , , , , , , , ,

How to Make Paper Windmills with Paper Modelling Craft Instructions

Today, we will show you how to make a cute paper windmill. Below you will find two printable paper models. All you will need to do is cut and fold the model into the proper shape. Have fun.


How to Make Paper Windmills with Paper Modeling Craft Instructions for Kids


Below you will find 2 pages to print. These are diagrams to print out….then you will need to cut them out. Fold on the dotted lines and glue on the tabs. The picture of the windmill (above) is what you will want your windmill to look like so base your folding on that picture. You might want to draw windows / ladders on the windmill too…to make it unique to you. If you want your windmill to spin….you will need a paper fastener (one of those things that you push it through the paper and close it on the other side.)


How to Fold Paper Windmills craft for Kids


Click on The Above Picture to Print Out the First Set of Instructions


How to Fold Paper Windmills craft for Kids


Click on The Above Picture to Print Out the Second Set of Instructions

To attach the windmill blades to the windmill structure, use a paper fastener so that it can spin. If you don’t have a paper fastener, you can either use two buttons sewed on either side of the paper so that it can still turn, or you can just fasten it with glue (in which case it won’t be able to spin)

Technorati Tags: , , , , , , , , , , , , , ,

Make Toy Windmills from Milk Containers Craft Idea for Kids

You have probably seen a windmills  before, whether you have seen them on TV, on a farm, or just passed by it when in the car. This is a very cool, working, toy windmill arts and crafts activity for kids. Mom or Dad might need to help the kids make it, especially since one of the steps is placing a knitting needle through a cork, so please don’t start this craft unless you are okay with this step. Please find the directions below to make the toy windmill. Have fun.

Make Toy Windmills from Milk Containers Craft Idea for Kids


Crafts Materials Needed

– Scotch Tape
– Milk Carton
– Cardboard
– Corks
– Knitting Needle

Toy Windmill Diagram Instructions


Click on Image Above to See Larger Toy Diagram Instructions

Step 1

To make this windmill, use an empty milk container for the house.

Step 2


Cut windows on the sides or paste colored paper on it.

Step 3

The roof is made from cardboard, attached with cellophane tape or Scotch tape.

Step 4

Cut the vanes or sails of the windmill from cardboard too, and fold it, following the pattern.

Step 5

Put a knitting needle through the house, with a cork on the back end to hold it in place. (MAKE SURE IT IS OKAY WITH YOUR PARENTS FIRST)

Step 6

Put another cork on the other end of the needle.

Step 7

Slip the sails on, and add a third cork in front. Leave enough space between the corks and the container, as in the picture, and the sails will turn in the wind.

Technorati Tags: , , , , , , , , , ,