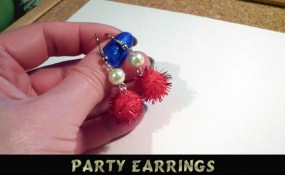
New Years is just around the corner and before New Years the New Years Eve Parties begin. Why not wear an amazing pair of earrings to this years New Years Eve Parties. Today I’m going to show you how to do just that…. I’m going to show you how to make a pair of party earrings for New Years. These New Years earrings have a lot of flash…. perfect for New Years Eve. And, these earrings don’t have to be just worn on New Years Eve…. they are so beautiful you will want to wear them year round.
Check out our other New Years Crafts and Jewelry Crafts.
Step by step tutorial offered by Laura from Dacian Moon Handmade
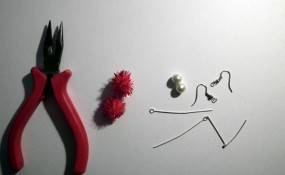
Materials Needed
– 2 sparkle pom-poms
– 2 glass pearls
– 2 head pins
– 2 eye pins
– 2 earring findings
– 1 flat nose pliers
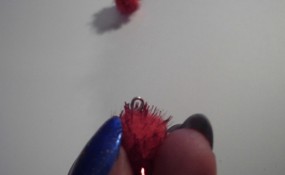
Step 1
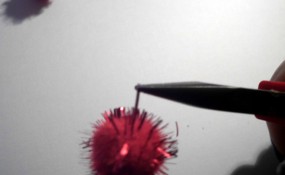
Take a head pin…
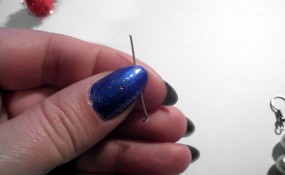
… and put it through a pom-pom.

Use the pliers to make a loop…
… like this.
[ad#ahc]
Step 2
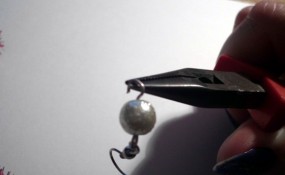
Take the eye pin…
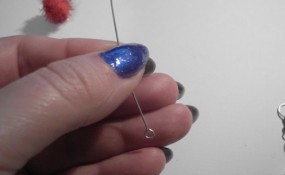
… and put a glass pearl on it.
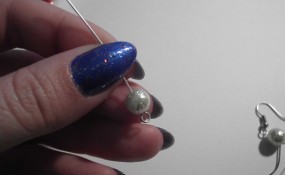
Cut the extra pin (with your pliers if it has a cutting side. If not, you’ll need a cutting pliers too), then make an open loop.
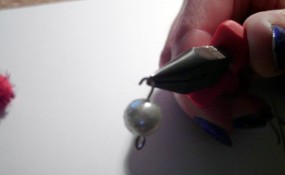
Put the earring finding through the loop…
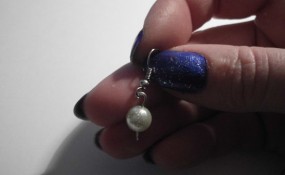
… and close it. Like this.

Step 3
Open the eye of the pin…
… and put it through the loop of the pom-pom.

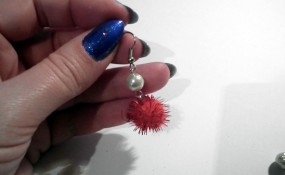
Close the pin’s eye and you have an earring.
Repeat to make the second one. Now is time to shine at the party.
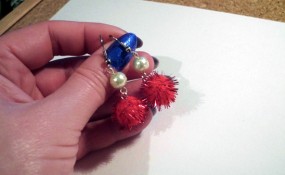
Aren’t these New Years Earrings beautiful? I am sure you will get tons of compliments about these earrings…. even well after New Years Eve has passed.
Technorati Tags: new years crafts, new years day crafts, new years eve crafts, kids crafts, kids new year crafts, kids new years crafts, jewelry, jewelry crafts, new years jewelry crafts, earrings, earring crafts, new years earring crafts

Thanks for the great idea and showing each step to make it easy for kids to follow. I am making a jewelry project at school.