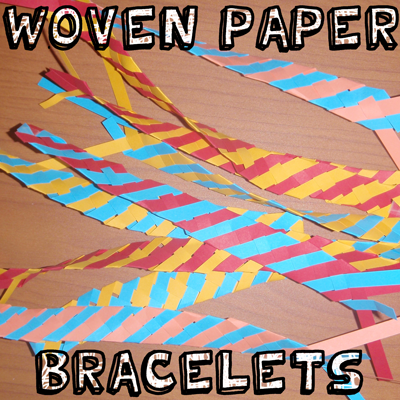
If you love making bracelets, but you are sick of making the same old bracelets all the time…. then I have the bracelet craft for you. I am going to show you how to make woven paper bracelets that you can make for yourself or share with friends. And, don’t worry… they are stronger than you might think. These paper bracelets are woven with many, many different folds causing the bracelets to be quite strong. So, let’s get started.
Check out our other Bracelet Crafts and Jewelry Crafts.
Materials Needed
2 Different Color Sheets of Paper
Tape or Glue
Ribbon
Scissors
Step 1
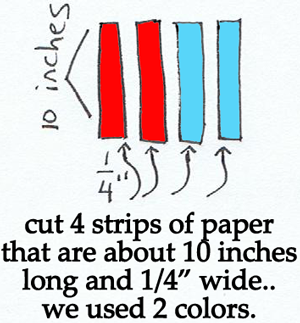
Cut 4 strips of paper that are about 10 inches long and a 1/4 inch wide… we used two different colors.
[ad#ahc]
Step 2
Tape or glue 2 strips end to end twice…. making the strips 20 inches long.
Step 3
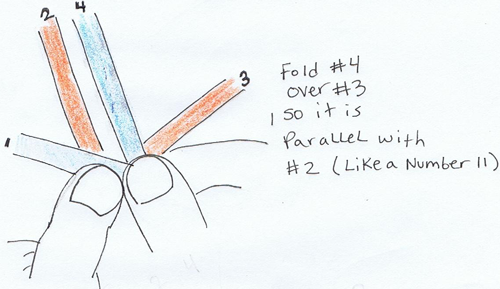
Place one strip horizontal and the other in a letter ‘V’ around the first strip. Number them 1, 2, 3 and 4.
Step 4
Fold #4 over #3, so it is parallel with #2. (Like a number 11)
Step 5
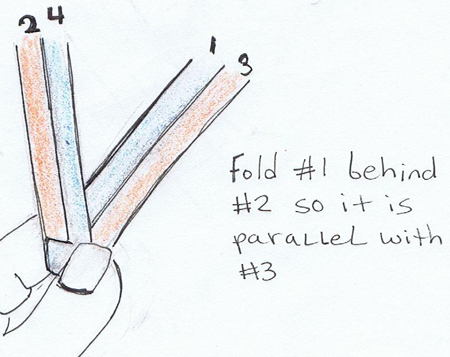
Fold #1 behind #2 so it is parallel with #3.
Step 6
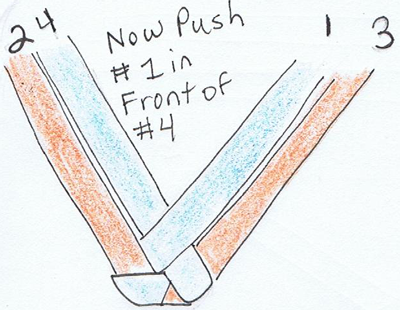
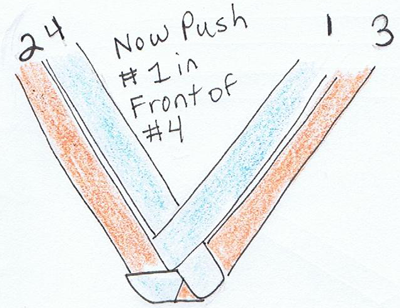
Now, push #1 in front of #4.
Step 7
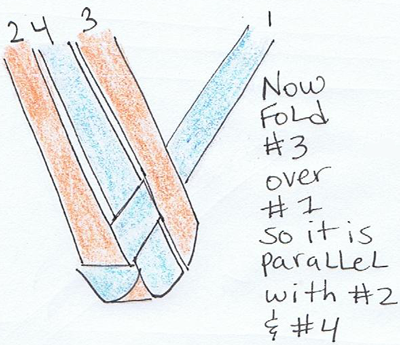
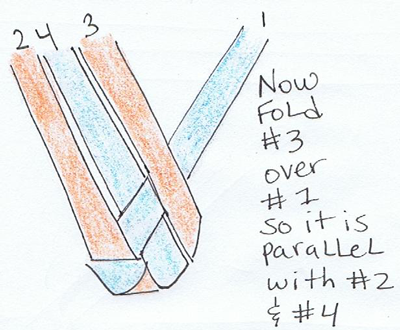
Now, fold #3 over #1 so it is parallel with #2 and #4.
Step 8
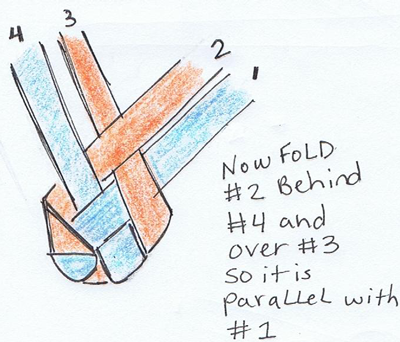
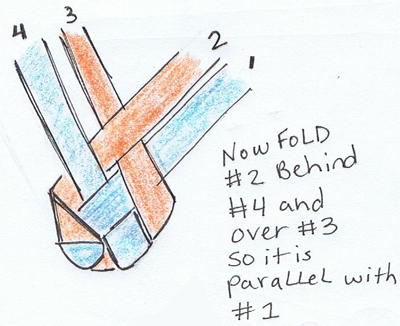
Now, fold #2 behind #4 and over #3 so it is parallel with #1.
Step 9
Push #1 in front of #4.
Step 10
Fold #3 over #1 so it is parallel with #2 and #4.
Step 11
Fold #2 behind #4 and over #3 so it is parallel with #1.
Step 12
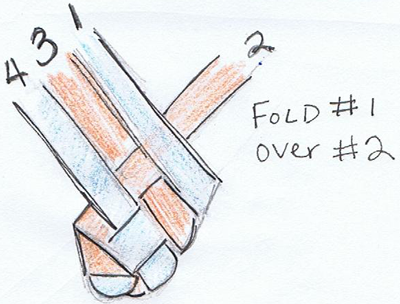
Fold #1 over #2.
Step 13
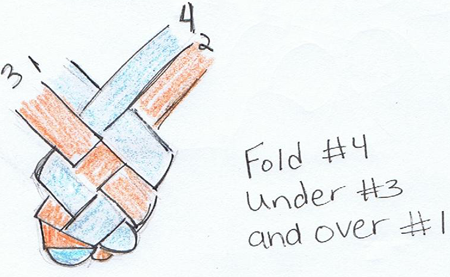
Fold #4 under #3 and over #1.
Step 14
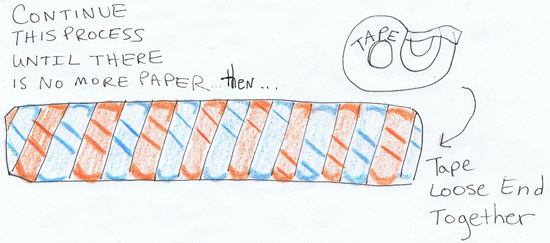
Continue this process until there is no more paper, then… tape loose end together.
Step 15
Put ribbon through spaces to tie bracelet together.
Wow, doesn’t it look beautiful?! Now, the question is…. are you going to keep it for yourself or give it to a friend? Hmmmmm…. what are you going to do?
Technorati Tags: friendship bracelets, friendship bracelets crafts, bracelets, bracelet crafts, paper bracelets, paper bracelet crafts, jewelry crafts, paper crafts, paper jewelry crafts
