Mother’s Day is right around the corner. Have you thought about a gift for your mother yet? Well, if not I got a great Mother’s Day craft for you. I’m going to show you how to make a Coupon Organizer Case. There is not many things more frustrating that going shopping with a pile of coupons and no way of organizing them…. well, your mom won’t have that problem anymore. With the number of envelopes you are going to be adding to this craft she will have more than enough places to organize her coupons. So, let’s get started.
Check out our other Mother’s Day Crafts.
Materials Needed
Cardboard
Paper
Glue or Paste
Hole Punch
10-20 Envelopes
5 Binder Rings, Ribbon or Yarn
Markers, Crayons, Glitter Glue (items to decorate case)
Step 1
Cut 2 pieces of cardboard down to a size that is a tiny bit larger than a business envelope.
[ad#ahc]
Step 2
Cover with paper. Paste in place.
Step 3
Use a hole punch to poke holes on left side.
Step 4
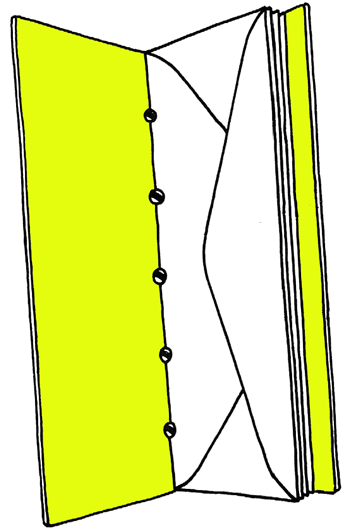
Punch holes in 10-20 envelopes so they will match up with covers.
Step 5
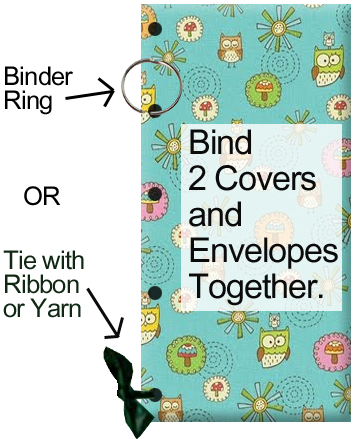
Bind 2 covers and all the envelopes together. You can use binder rings, ribbon or yarn to bind them together.
Step 6
Decorate cover.
And there you have it…. you just finished making your Coupon Organizer Case. Isn’t it a wonderful way to organize coupons? Your mom is going to surely love this!!
Here is our video on How to Make a Coupon Organizer Case
Technorati Tags: mother’s day crafts, mother’s day activities, mother’s day crafts for kids, organization crafts, organization crafts for kids, coupon case, coupon case crafts, coupon crafts, coupon crafts for kids, coupon organizer, coupon organizer crafts, envelope crafts, crafts made with envelopes







this is so creative!!
this is cool i am going to make some
I’m glad you guys like the idea. I hope it turned out great for you guys!