Some Really Cool Perpetual Calendar Crafts for the New Year


Some Really Cool Perpetual Calendar Crafts for the New Year


Today I am going to show you a bunch of some really cool perpetual calendar crafts perfect for the upcoming New Year.  What is great about perpetual calendars is that they can be changed to show any combination of day, month, and year….. which means that the same calendar can be used year after year after year.  Sure, you can purchase a perpetual calendar at a store or online, but I am pretty sure you would spend way too much money and they wouldn’t be as awesome as the perpetual calendars I have listed here.  I have scoured the internet to find you some really cool perpetual calendar crafts.  You will surely find one here that will fit your needs.
Check out our other New Years Crafts and Calendar Crafts.

Some Really Cool Perpetual Calendar Crafts for the New Year

(1)  Nut Can Perpetual Calendar Craft


Nut-Can-Perpetual-Calendar


This is a super cool Perpetual Calendar.  Made from a nut can this perpetual calendar is quite unique.  If you look closely at the image above this perpetual calendar even has a choice for mood.  In this case they chose nutty.  Check this craft out at Design Sponge.


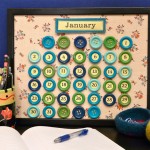
(2)  Perpetual Button Calendar


Perpetual-Button-Calendar


This perpetual calendar is super duper cute.  Make it once, and you can use it forever – just move the numbers to their correct location each month, and change the nameplate!  How fun is that?!  I found this craft over at MakeZine.  Check it out for yourself.


(3)  Paper Box Perpetual Calendar


Paper Box Perpetual Calendar


This is one of our very own perpetual calendar crafts.  Here we use some colorful templates that you glue together to make boxes.  Add some popsicle sticks and you have yourself a perpetual calendar.  Check out our Paper Box Perpetual Calendar for all the details.


(4)  Corkboard Perpetual Calendar


Corkboard Perpetual Calendar


I love the idea of this corkboard perpetual calendar.  Here they use a corkboard and foam to give this perpetual calendar a colorful look.  The corkboard is a wonderful material to use as you can easily thumbtack your notes and errands to the corkboard perpetual calendar to remind you what you need to get done.  Check out Michaels for all the craft details.


(5)  Scrapbooking Paper Perpetual Calendar 


Scrapbooking Paper Perpetual Calendar


I found this perpetual calendar craft at Our Big Earth and it is a wonderful idea.  Here they use coordinating scrapbooking paper to give this a unique look.  This is a flip chart type of calendar…. so it would be great for any desktop.  Check out the site for all the details.


(6)  Magnetic Perpetual Calendar


Magnetic Perpetual Calendar


This is actually a cookie sheet perpetual calendar.  For this craft she spray painted the cookie sheet, duct tape the edges and used playing card numbers for the days.  She also attached a dry erase board for notes and special events.  Being that everything is on magnets things can be easily moved.  Check out A Creative Princess for the info.


(7)  Colorful Perpetual Calendar


Colorful Perpetual Calendar


Look how beautiful and colorful this perpetual calendar is.   Here she uses 31 pictures to represent the days of the month…. you can cut out these pictures from scrapbooking paper or just use stickers.  I found this perpetual craft at Sandy’s Space.  Check it out for yourself.


(8)  Thrifty Box Perpetual Calendar


Thrifty Box Perpetual Calendar


Aren’t these perpetual calendars just absolutely beautiful?  No one would believe that you not only made them yourself, but also they are extremely thrifty.  I found this craft at Amazing Paper Grace.  Here she uses $1.00 boxes that she found at Michael’s.  Check out all the details on how she puts these perpetual calendars together.


(9)  Perpetual Calendar / Memo Board


Perpetual Calendar Memo Board


This is such a clever idea!!  I found this craft over at Curbly and I love it.  Here they use six steel bars painted with punchy colors, numbered magnets, plus seven days of the week and twelve months combine to make a perpetual calendar, which also serves as a memo board.  This would look amazing above anyone’s desk.


(10)  Perpetual Family Photo Calendar


Perpetual Family Photo Calendar


This is just absolutely brilliant…. and you will surely get so many compliments on this perpetual calendar.  What you might not be able to tell from the above picture is that there are 31 pictures on the twine.  You will simply flip each day/photo as the days pass.  Check out Shaken Together to see it for yourself.


(11)  Flipping Perpetual Calendar


Flipping Perpetual Calendar


I found this perpetual calendar craft at MomClick.    This is a really neat perpetual calendar because it uses the flip-chart idea.  Easily flip between day of the week, months and number days.  This perpetual calendar will look terrific on any desk.


(12)  Perpetual Chalkboard Calendar


Perpetual Chalkboard Calendar


This perpetual calendar is so awesome…. not just because it is obviously a wonderful perpetual calendar.  But, the materials to make this perpetual calendar is really thrifty.  Gotta love that!!  I found this perpetual calendar craft at I Will Craft.   Here she shows you how she made a perpetual calendar with metal flashing, game pieces and some scrabble tiles all in a framed vintage chalkboard.

Technorati Tags: , , , , , , , , , , ,

How to Make a Decorative Corn Filled with Treats for Thanksgiving

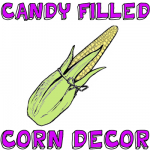
Today I am going to continue with the fun Thanksgiving crafts.  In this post I’m going to show you how to make a decorative corn filled with treats for Thanksgiving.  If you are having Thanksgiving dinner at your house then this is a great craft for you.  You can make these treat filled corns for the children attending your Thanksgiving feast.  Sure, they can’t eat the treats before dinner, but these festive corns will be perfect for the children to take home with them.  They will truly get a kick of out them.  So, let’s get started.

Check out our other Thanksgiving Crafts.


How to Make a Decorative Corn Filled with Treats for Thanksgiving


Materials Needed

Two 12 Inch Pieces of Manilla Paper

Pen or Pencil

Scissor

Green & Yellow Crayons, Markers or Colored Pencils

Glue or Paste

Treats or Candy

String


Step 1


Take a 12 inch piece of manilla paper and draw a pattern like this.


Take a 12 inch piece of manilla paper and draw a pattern like this.


Step 2


 Cut out the pattern like this.


Cut out the pattern like this.


Step 3


Color this green.


Color this green.


Step 4


From a piece of about 5 inches square make a roll similar to a cone.


From a piece of about 5 inches square make a roll similar to a cone.  Before rolling color paper yellow.  Make sure to not get it too pointed.  Paste.


Step 5


You can fill corn with treats or candy.  Fold green part around cone and tie with a string.


You can fill corn with treats or candy.  Fold green part around cone and tie with a string.


Step 6


Lightly draw little ovals for corn kernels.


Lightly draw little ovals for corn kernels.

And there you have it.  You have just made a decorative corn filled with treats.  These are a great idea if you are having a Thanksgiving dinner with children.  They will love these.

Technorati Tags: , , , , , , , , , , , ,

Giving Thanks Thanksgiving Crafts Roundup


Giving Thanks Thanksgiving Crafts Roundup


Thanksgiving is coming up quickly.  This month wouldn’t it be a great idea to fill it with crafts that remind us what this Holiday is all about….. being thankful.  We all have so much to be thankful for.  So, in this link roundup I have scoured the internet to find crafts that all have to do with being thankful.  Each craft is a lot of fun and all can be used as a Thanksgiving decoration…. but most of all they remind us to be thankful.  With these crafts you will be doing them as a family…. and family is one of the most important reasons to be thankful.  So, get ready to spend some time looking at some amazing Thanksgiving “Giving Thanks” Crafts….. you are sure to find one that you will love.

Check out our other Thanksgiving Crafts.

Giving Thanks Thanksgiving Crafts Roundup

(1)  Thanksgiving Countdown Calendar


Thanksgiving Countdown Calendar


This Thanksgiving craft is kind of like a Holiday Advent Calendar.  You and your family can express your thanks and gratitude simply by writing your thanks on your color piece of paper and adding it to the envelopes.  Look at them each day to remind each other what you are Thankful for.  I found this great Thanksgiving craft at Parents.com.


(2)  Give Thanks Napkin Rings


Give Thanks Napkin Rings


In this Thanksgiving thankful craft Jeanne Winters shows you how to create these amazing napkin rings that inspire your Thanksgiving guests to go around the Thanksgiving table before the feast and let everyone know what they are thankful for.


(3)  Give Thanks Yarn Turkey


Give Thanks Yarn Turkey


This Thanksgiving thankful craft was one of our crafts posted last Thanksgiving Season.  It’s a craft that your children will love putting together.  Plus, it is part finished when it is presented at the Thanksgiving table and finished by the guests adding to each feather what they are thankful for.  Check it out.


(4)  Gratitude Tree Advent Calendar


Gratitude Tree Advent Calendar


Here is another advent calendar idea using this time a tree.  Trees are great for this Thanksgiving craft because they have many branches to add your thankful ideas to…. plus trees are perfect for this fall craft.  Oopsey Daisy came up with this Thanksgiving craft and I love it.  Check it out to see how she uses a magnetic sheet and bottle caps for this craft.


(5)  Give Thanks Board


Give Thanks Board


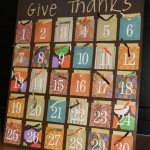
This Thanksgiving thankful craft is similar to the first one, but instead of it being a garland it is actually all out on a board.  What is really cool about this Thanksgiving thankful craft is the use of  a variety of coordinating scrapbook paper giving it an amazing look.  Check it out for yourself at JellybeanJunkyard.


(6)  Thankful Bucket


Thanksgiving Thankful Bucket


Here one family shows you how they use a Thankful Bucket to remind each other what they are thankful for this Thanksgiving season.  Here The Idea Room shows us how to put together this festive bucket.  Have the family fill it with things they are thankful for…. after dinner share these things with the rest of the family.  Great idea.


(7)  Changeable Frames for Thankfulness


Changeable Frames for Thankfulness


Here is a clever idea by Flamingo Toes.  Here the writer of this post shows you how to make a place that your family can write down what they are thankful for.  This particular Thanksgiving thankful craft is made with glass over the embroidery so they can write different things all month long.  They can wipe it clean and start over as often as they would like.


(8)  Thankful Leaf Garland Decoration


Thankful Leaf Garland Decoration


Here is a cute Thanksgiving thankful craft.  And, one that looks awesome as a Thanksgiving decoration.  Full Circle shows you how to make this festive craft.  Simply string together construction paper leaves and have family members write on the leaves what they are thankful for.  String together as garland for all to see.


(9)  Thankful Tree


Thanksgiving Thankful Tree


Here is a great Thanksgiving thankful craft that is perfect for even the youngest of crafters with just a lit bit of help from you.  Playful Learning shows you how to make one of these Thankful Trees for your houses.  Simply have the kids make leaves, color them and cut them out.  Have the children write down what they are thankful for.  She will show you how to finish it off with a tree branch.  Check it out for yourself.


(10)  Thanksgiving Hat


Thanksgiving Hat


Here is a fun Thanksgiving thankful craft that the little kiddies will love.  Dim Sum, Bagels and Crawfish shows you how to make this craft.  The kids will love making it, but even more so love wearing it.  If you are having a Thanksgiving dinner at your house considering doing this craft with the little ones at your feast…. they will love it.


(11)  Paper Cornucopia of Thanks


Paper Cornucopia of Thanks


Flip Flops and Applesauce shows you how to take some paper and posicle sticks and make it into a beautiful and meaningful table centerpiece for Thanksgiving.  Make sure to involve the whole table…. have your guests each write down what they are thankful for and read them out loud.


(12)  Thanksgiving Clothespin Wreath


Thanksgiving Clothespin Wreath


Here is a cool Thanksgiving thankful craft that also works as an awesome Thanksgiving wreath decoration for the Holidays.  I found this Thanksgiving craft over at Chica and Jo.  This amazing Thanksgiving wreath is made from Clothespins.  Add a sharpie to your wreath and let your visitors add what they are thankful for.  Save it for years to come.

Technorati Tags: , , , , , , , , , , , , ,

How to Decorate a Notebook with Paper Squares

We are well into the month of August now…. and with August comes all the preparing you need to do for Back To School.  Well, today’s craft is perfect for back to school as I am going to show you how to Decorate a Notebook with Paper Squares.   Take an ordinary cheap notebook and decorate it with your favorite character or design.  You will be sure to have the most original notebook at school.  So, grab the materials needed and let’s get started.

Check out our other Back to School Crafts.


How to Decorate a Notebook with Paper Squares


Materials Needed

Notebook

Graph Paper

Colored Pencils or Markers

Colored Paper & Scissors or Pre-cut Colored Paper Squares

Glue


Step 1


plan out your design on graph paper with colored pencils or makers.


First, plan out your design on graph paper with colored pencils or makers.  If you need some ideas for art you can make with squares check out these Perler Bead Crafts as well as these Mosaics.  Both the Perler Bead Crafts and Mosaics are made from squares and you should have plenty of ideas to choose from.


Step 2


 Get an ordinary notebook.


Get an ordinary notebook.


Step 3


Cut squares from colored paper


Cut squares from colored paper OR buy a bag of already cut colored paper squares (It’s easier).


Step 4


Put glue where you will place squares.


Put glue where you will place squares.


Step 5


Start putting squares down.


Start putting squares down.


Keep going


Keep going….


and going


and going.


Next step is the red background.


Next step is the red background.


Keep going until the background is finished.


Keep going until the background is finished.


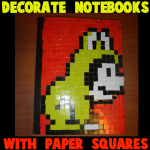
Finished Paper Squares Notebook


Excellent Job!!  You just finished Decorating a Notebook with Paper Squares.  You are surely going to love taking this notebook back to school to show all your friends.  Let me know how your decorated notebook turned out in the comments below.  And, don’t forget to take a picture of it too…. you can add that to the comment as well.

Technorati Tags: , , , , , , , , , , , ,

How to Make a Coupon Organizer Case

Mother’s Day is right around the corner.  Have you thought about a gift for your mother yet?  Well, if not I got a great Mother’s Day craft for you.  I’m going to show you how to make a Coupon Organizer Case.  There is not many things more frustrating that going shopping with a pile of coupons and no way of organizing them…. well, your mom won’t have that problem anymore.  With the number of envelopes you are going to be adding to this craft she will have more than enough places to organize her coupons.  So, let’s get started.

Check out our other Mother’s Day Crafts.


How to Make a Coupon Organizer Case


Materials Needed

Cardboard

Paper

Glue or Paste

Hole Punch

10-20 Envelopes

5 Binder Rings, Ribbon or Yarn

Markers, Crayons, Glitter Glue (items to decorate case)


Step 1


Cut 2 pieces of cardboard down to a size that is a tiny bit larger than a business envelope.


Cut 2 pieces of cardboard down to a size that is a tiny bit larger than a business envelope.


Step 2


Cover with paper.  Paste in place.


Cover with paper.  Paste in place.


Step 3


Use a hole punch to poke holes on left side.


Use a hole punch to poke holes on left side.


Step 4


Punch holes in 10-20 envelopes so they will match up with covers.


Punch holes in 10-20 envelopes so they will match up with covers.


Step 5


Bind 2 covers and all the envelopes together.


Bind 2 covers and all the envelopes together.  You can use binder rings, ribbon or yarn to bind them together.


Step 6


Decorate cover.


Decorate cover.


Finished Coupon Case


And there you have it…. you just finished making your Coupon Organizer Case.  Isn’t it a wonderful way to organize coupons?  Your mom is going to surely love this!!

Here is our video on How to Make a Coupon Organizer Case

Technorati Tags: , , , , , , , , , , , ,

15 Cool Crafts Made with Altoid Tins


15 Cool Crafts Made with Altoid Tins


If you ever had an Altoid mint you know that the mints come in this wonderful little tin.  But, who would have thought all the imaginative things you could do with this little tin.  By scouring the internet I came across a bunch of Altoid crafts you can make.  In this post I am listing 15 of the coolest crafts you can make with Altoid Tins.   The crafts range in skill level between easy and more challenging.  But, you can count on each of them being a lot of fun.   So, scroll through the different Altoid Tin crafts and you are sure to find one that you will like.  So, grab your Altoid Tin Containers and let’s get started on some fun crafts.

15 Cool Crafts Made with Altoid Tins

 (1)  Altoids Mini Flashlight


Altoids Mini Flashlight


This Altoid Tin craft is a little more complicated than we typically list in this blog, but how can I make a post about Altoid Tin Crafts without putting this one in it.  I found this craft over at Instructables and it is an awesome one.  Check out their site to find out how you too can make this Altoid Tin Mini Flashlight.


(2)  Altoids Turtle Keepsake Box


Altoids Turtle Keepsake Box


Check out this elaborate Keepsake Box…. and it is made from an Altoid Tin container and Super Sculpey.  I found this fun Altoid Tin craft over at Sculpey Club….. check out her site for all the fun crafting details.


(3)  Altoids Pincushion


Altoids pincushion


I absolutely love this Altoid Tin Pincushion idea.  What you can’t see here is that inside she added magnets so that inside you can hold pins, needles and such.  Make sure to check out My Recycled Bags so you too can make this Altoid Pincushion.


(4)  Altoid Tin Wallet


Altoid Tin Wallet


Altoid Wallet


Here is a great way to keep your cash….. keep it in an Altoid Tin Wallet.  Roxy Craft shows us how to make this wallet from an Altoid Tin Container…. she explains the craft in a very detailed step-by-step “how-to”.  Check out the site for yourself.


(5)  Magnetic Travel Board Game Set


Magnetic Travel Board Game Set


This Altoid Tin Craft is from our very own site.  I previously posted How to Make a Magnetic Travel Board Game Set from an Altoid Tin Container.  It is a fun craft and the outcome is you will have 8 games to play in the car while traveling.  Make sure to check this one out.


(6)  Altoids Tin Garden


Altoids Tin Garden


Here is another great way to use those extra Altoid Tin Containers…. use them to make a beautiful garden.  Gomi Style shows us how to do just that.  Just by adding a bit of potting soil to the tin you can have your very own small little garden.


(7)  Travel Candle


Travel Candle


I found this idea over at Design Sponge and what a great idea it is.   Here she gives you all the step-by-step details on how to make a travel candle out of an Altoid Tin Container.  She points out how great these can come into handy during an emergency… after all, you never can have enough candles.


(8)  Altoid Tin Mini Toolboxes


Altoid Tin Mini Toolboxes


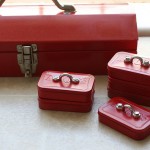
I found this awesome Altoid Tin craft over at Alpha Mom.  She came up with this super creative idea to surprise Dad for Father’s Day.  She made a few so that Dad could hold the bits and bolts of his choice.  Make sure to check out the website for all the crafting details.


(9)  Altoid Tin Gift Card Holder


Altoid Tin Gift Card Holder


Here is a clever way to keep a hold of all those Gift Cards you have accumulated.  Store them in this Altoid Tin Gift Card Holder.  I found this Altoid Tin Craft over at Yahoo Voices and I dig the idea.  Check out the website for the tutorial.


(10)  Altoid Tin Jewelry Box


Altoid Tin Jewelry Box


You would never believe it by looking at it, but this beautiful jewelry box is made from an Altoid Tin and Polymer Clay.  I found this fun Altoid Tin craft over at TLC and I love it.  Get the full crafting “how-to” over at the website.


(11)  Pocket Yard Pool Table


Pocket Yard Pool Table


Ok, how cute is this pool table?  So cute!!  And it is small enough that you can take it pretty much anywhere.  How many other pool tables can you say that about?  You can find the tutorial over at Instructables.   This is just so creative.


(12)  Business Card Holder


Business Card Holder


What a clever way to hold your business cards…. and I must say quite attractive too.   This is a great way to use your left over Altoid Tin for something useful.   Check out Better Homes and Gardens for all the crafting details.


(13)  Altoid Earbud Case


Altoid Earbud Case


This is a fantastic idea.  Did you ever put your earbuds somewhere and when you wanted to use them you found they were tangled up?  Well, this Altoid Earbud Case will prevent that…  put your Earbuds inside and find that they will never tangle again.  Charlotte’s Fancy came up with this brilliant idea.  Check out her site for the details.


(14)  Doll Suitcase


Doll Suitcase


Isn’t this an adorable suitcase for your doll….. and, your doll will surely love it.  Made from an Altoid Tin and masking tape this suitcase has an aged look to it…. like a suitcase that is well traveled.  Check out Crafty Crafts for the full instructions on how to make this.


(15)  First Aid Kit


First Aid Kit


Everyone needs a first aid kit.  You don’t know when you will need some first aid treatment…. so having a kit is very important.  But, sometimes a first aid kit can be bulky and when you are “out & about” you can’t carry a bulky one…. well, how about making a first aid kit out of a Altoid Tin.  Check out Instructables for all the details.

Top image by Alpha Mom

Technorati Tags: , , , , , , , , , , ,

How to Make a Notepad Pencil Gift Set

Today I’m going to show you how to make a Notepad Pencil Gift Set.  This Notepad Pencil Gift Set is a perfect gift for somebody that has a lot going on and needs some organizing.  It would make a great gift for anyone like this.  They could simply hang it up in plain sight and when a note is written on the notepad they are reminded of all the things they need to do.  Or, hang this next to the phone…. this item makes for a perfect place to leave messages for others.  So, let’s get started with this craft.

Check out our other Gift Crafts.


How to Make a Notepad Pencil Gift Set


Materials Needed

Cardboard

Colored Paper

Pencil

Glue

White Paper

Hole Punch

Black Marker

Stapler


Step 1


Cover a piece of cardboard with colored papers.


Cover a piece of cardboard with colored papers.


Step 2


Wrap paper around pencil to figure out where to glue.


Wrap paper around pencil to figure out where to glue.


Step 3


Fold white paper in fours ... then cut 4 pages apart.


Fold white paper in fours … then cut 4 pages apart.  Do this a few times to get a big enough bundle of paper for a pad.


Step 4


Staple paper to center of cardboard


Staple paper to center of cardboard;  Punch hold for hanging;  Glue or tape paper loop above paper pad;  Decorate the background paper with a nice design;  Write notes or something similar.


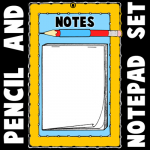
Finished Notepad Pencil Gift Set


And, there you have it…. you just finished your Notepad Pencil Gift Set.  How did it turn out for you?  Let me know in the comments below.  Also, take a picture of the Notepad and share that too in the comments…. I’d love to see it.

Here is our video on how to make a Notepad Pencil Set

Technorati Tags: , , , , , , , , ,

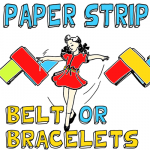
How to Make Paper Strip Belts and Bracelets

In this post I will be showing you how to make a Paper Strip Belt or Bracelet.   The choice is really yours weather you make a belt or a bracelet.  You simply will need to adjust the amount of colored paper you use for the project…. less for the bracelet and more for the belt.  Make a few and give them to your friends or loved ones…. anyone would be sure to enjoy them.  So, grab the materials needed and let’s get started with this fun craft.

Check out our other Friendship Bracelet Instructions.


How to Make Paper Strip Belts and Bracelets


Materials Needed

Thin Colored Paper, Magazine or Cellophane

Cord or Ribbon


Step 1


Thin colored paper, colored magazine pages or cellophane may be used.


Thin colored paper, colored magazine pages or cellophane may be used.  Plan 1 pattern for each inch.


Step 2


Fold on 'A' and 'B' toward 'C'.


Fold on ‘A’ and ‘B’ toward ‘C’.


Step 3


Fold again on 'C'.


Fold again on ‘C’.


Step 4


Fold on center.


Start with about 25 of these.  Fold on center.


Step 5


Fold both ends toward the center.


Fold both ends toward the center.  Completed.


Step 6


Slip one link through the loops of another like a hairpin.


Slip one link through the loops of another like a hairpin.


Step 7


Continue until the length you desire is completed.


Continue until the length you desire is completed.


Step 8


Tie a cord or ribbon on end loops.


Tie a cord or ribbon on end loops.


Completed Paper Link Belt or Bracelet


And, there you go…. you just finished making your Paper Strip Belt or Bracelet.  Wasn’t that fun?  The question I have for you though is…. Did you make a belt or a bracelet?  Let me know in the comments below.  Wear it proudly.

Technorati Tags: , , , , , , , , , , , , , ,

How to Make Origami Boats

Today I’m going to show you how to make Origami Boats.  When made with waterproof paper like waxed paper or cellophane these Origami Boats will actually float.  Use them in the bathtub or in a puddle outside.  Not only is this craft fun to make, but it is equally fun to play with the Origami Boat once made.  You can even add toothpicks to the boat to give the illusion that the boat has oars.  So, grab the materials needed for this craft and let’s get started.

Check out our other Origami Crafts.


How to Make Origami Boats


Materials Needed

Waxed Paper, Cellophane, or Other Waterproof Paper

Toothpicks (optional)


Step 1


Fold a square in half and crease...then unfold.


Fold a square in half and crease…then unfold.


Step 2


Bring lines A and B to center fold and crease.


Bring lines A and B to center fold and crease.


Step 3


Fold on diagonal dotted lines, bringing points C, D, E and F to the center line and crease.


Fold on diagonal dotted lines, bringing points C, D, E and F to the center line and crease.


Step 4


Fold on dotted lines.


Fold on dotted lines.


Step 5


Fold again on dotted lines.


Fold again on dotted lines.


Step 6


Turn boat inside out, holding folds carefully to prevent tearing.


Turn boat inside out, holding folds carefully to prevent tearing.


Step 7


Finished boat, ready for the bathtub or after-rain puddle.


Finished boat, ready for the bathtub or after-rain puddle.  If you wish, use the toothpicks to make the boat look more authentic…. the toothpicks can be the oars.  Enjoy!!

Technorati Tags: , , , , , , , , , , , ,

How to Make a Bookmark of Memories

Throughout the year you have a lot of things that you do with your friends that you would probably like to remember.  For example…. School, Summer Camp, Sports, Work, etc.  With each of these things you make new friends and build new memories.  That is a wonderful thing….. but wouldn’t you like to remember each of these things?  Well, today I’m going to show you how to do just that….. I’m going to show you how to Make a Bookmark of Memories.  So, grab your friends and let’s get started.

Check out our other Keepsake Craft Ideas.

This tutorial offered by Laura from Dacian Moon Handmade.


Materials Needed

– yellow and green paper (or any other colors)
– crystal sticker
– ruler
– scissors
– colored pens
– glue
– friends


Step 1

Cut a piece of green paper, as big as your bookmark will be.


Cut a yellow piece of paper about 1cm shorter than the green one.


Step 2

Apply a layer of glue on the yellow paper…


… and place it on top of the green one.


Step 3

Cut a square of green paper, with the same size width of the bookmark.


Fold it two times on diagonal until you have this small triangle.


Cut one corner in zigzag…


… like this.


Unfold.


Glue this piece on the upper edge of the bookmark.


Step 4

Cut a yellow square about the size of the width of the yellow part of the bookmark and fold it like this.


Cut a heart shape from it.


Cut the margins like in the picture, but don’t cut the corner.


Unfold.


Glue the yellow flower on top of the green one.


Step 5

Place the crystal sticker in the middle of the flower.


Write on petals “Memories Bookmark” and the year.


Decorate it as you please.


Step 6

Ask your friends to write a quote and to sign your bookmark.


Isn’t this a great Keepsake Memories craft?  Keep this in your photo album, memory box or your favorite book to remember the good times you shared with your friends for years to come.

Technorati Tags: , , , , , , ,

How to Make an Owl Mailbox for Valentines Day

Valentines Day is coming up in less than a week.  If you don’t have a Mailbox to collect your Valentines Day Cards in then you are missing out.  No worries…. in this post I’m going to show you how to make an Owl Mailbox for Valentines Day.  This mailbox is perfect for collecting all your Valentines Day Cards.  Don’t be stuck holding a brown paper bag to collect your Valentines in…. that’s just boring.  So, grab the materials needed and let’s get started.

Check out our other Valentines Day Crafts.

Laura from Dacian Moon Handmade will show you, step by step, how to make this.


Materials Needed

– recycled box
– beautifully patterned wrapping paper
– white and red paper
– scissors
– pen
– glue
– glitter glue
– cutter


Step 1

Take the recycled box and draw a “window” on it (a rectangle in the middle) … like this.


Draw another “window” on top. Be careful to not draw too close to the edge.


Cut the “windows” out. Take care not to cut yourself.


It will look like this.


And the “window” on top.


Step 2

Put wrapping paper under the the lid with the “window” and draw its outline.


Cut it out, like this.


Apply a layer of glue on the back of it…


… and stick it in place.


Step 3

Glue wrapping paper on the other sides of the box too.

For the top do the same as in step 2.


Apply a layer of glue inside the box and cover it with white paper (you can cover only the back, because only this part is visible through windows).


Like this.


Step 4

Now, let’s decorate it.  Draw a simple owl outline and 2 wings on white paper.


Draw another one on red paper.


Cut them out.


Now let’s prepare a tree branch to stand on.


You can use your pen to give it some color, like this.


Cut  it out and glue it on a lower corner of the front window.


Step 5

Now you have to assemble owls. We’ll start with the white one. First, color its eyes.


Then, put glue on the upper side of one red wing…


… and stick it in place. Do the same with the other one.


Make sparkling points on its body with glitter glue…


… like this.


What’s missing? Cut a small triangle from the red paper to make its beak.


Do the same with the other owl. Aren’t they cute?!


Step 7

Apply glue where you want to place the owl.


I put them on the left side of the window. To keep them on sturdy, cover a little of the lid with one of them, like this.


The other one will stay near the first, holding hands (or wings). They look so cute together.


Step 8

Draw one circle on white paper and one on red paper (slightly bigger).


Cut them out.


On the white one write “Happy Valentines Day”.


Apply glue on the opposite corner of the window…


… and stick the red circle there.


Over it place the white one.


Your mailbox is now ready to be used.


There you go…. your Owl Mailbox for Valentines Day is ready.  Now, you are all set to collect all your Valentines Day Cards.  Enjoy!!

Technorati Tags: , , , , , , , , , , , , , ,

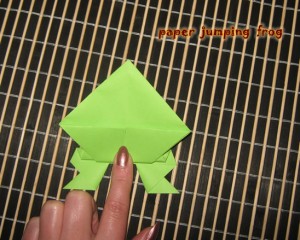
How to Make a Paper Jumping Frog

I have a super duper fun craft for you today.  I’m going to show you how to make a Paper Jumping Frog.  That’s right, a Jumping Frog simply made out of paper.  Folded just the right way this Paper Frog will actually jump… and jump well.  And, the cool part…. you only need paper for this craft.  No other materials needed.  So, grab a green piece of paper (or whatever color paper you would like) and let’s get this fun craft started.

Check out our other Paper Folding Activities.

Laura from Dacian Moon Handmade will show you how to make this step-by-step.


Materials Needed

– green paper (can be white paper too, or any other color you want your frog to be)


Step 1

Bring one corner to the opposite side to form a triangle. Cut out the extra paper.


Unfold and you’ll have a square.


Step 2

Fold on the other diagonal…


… then unfold.


Step 3

Fold the paper in cross and unfold – we will need all those creases.


Step 4

Take the right edge…


… and bring it to the lower one. Press the new formed edge until you reach the center.


Do the same on the left side.


Then flatten the upper part…


… like this.


Step 5

Take the left corner…


… and bring it over the upper one.


Repeat with the right one. It will look like this.


Step 6

Fold the upper corners like in the picture.


Our paper will look like that.


Step 7

Turn the paper.


Bring the left side over the center crease.


Do the same with the right one.


Step 8

Now we will make the feet of the frog.  Fold the right triangle outward, taking care that the base is parallel with the body…


… like in the picture.


Do the same with the the left side.


Step 9

Fold the lower part of the frog over the upper part (almost in half).


Then fold it down again (in half)


Turn it over and the frog is ready.


To play with it simply press where it is shown in the picture and the frog will rise her head and jump.


Isn’t this Paper Jumping Frog a cutie patootie?  It is just simply cute.  It’s even cuter when it jumps.  How did your Paper Jumping Frog turn out?  Let me know in the comments below.

Technorati Tags: , , , , , , , , ,

How to Make a Sailboat candle Holder

If you love candles then today’s craft is going to make you very happy.  I’m going to show you how to make a Sailboat  Candle Holder.  Made from a piece of cardboard and transparent paper this candle turns out beautifully.  The candle shimmers right through the transparent paper onto your wall.  You’ll gonna love it!!  Just keep in mind you will need some help from an adult to light the candle.  Never light it without adult supervision.  So, let’s get started.

Check out our other Candle Crafts.

Laura from Dacian Moon Handmade will show you how to make this Step-by-Step.


MATERIALS NEEDED

– cardboard
– transparent paper
– glue
– recycled jar
– pencil
– red and blue colored pencils
-ruler
– decorative edge scissors
– scissors
– tea candle


Step 1

Measure on the cardboard the height of the jar plus 1 cm …


… and cut it out.


Step 2

Using the decorative scissors, cut along one long side.


It will look like that.


Step 3

Using the jar again, measure its width …


… and mark it on the cardboard. Place the transparent paper over it and draw the new markings on it…


… to help you cut out this rectangle.


Step 4

Fold the cardboard on the marked line…


… like this.


Continue folding around it until you have this.


Step 5

Fold the last side at 0.5 cm – you will use that to close it.


Step 6

Unfold it all.


On the second side draw a boat…


… like this.


Step 7

Using the scissors, cut out the drawing.


It will look like this.


Turn it to the other side and apply a layer of glue on the rectangle with the boat.


Place the transparent paper on it.


Turn it again.


Step 8

Use the red pencil to color the boat …


… like this.

You can place a textured paper under it to have a pattern on the boat.


And blue pencil to color the sail.


Step 9

Apply a layer of glue on the last folded part (the 0.5 cm one)…


… then glue it to  the edge of the first part, like this.


Step 10

Place the jar inside…. along with the candle.


… and have an adult light it.


Notice how beautiful the candle looks shimmering through the sailboat.  Isn’t it just breathtaking.  Don’t forget…. never leave a candle lit unattended.  If you are leaving the room…. blow it out.

Technorati Tags: , , , , , , , ,

How to Make a Sweet Flowers Candle Holder

I have a really fun craft for you today.  I am going to show you how to make a Sweet Flowers Candle Holder.  This craft turns out really magnificent.  With the use of transparent paper around the outside of a candle the glow of the candle looks really lovely glowing through the transparent paper.  Keep in mind, you will need adult supervision for this craft.  Candles aren’t something to play with, so make sure to have an adult around to light the candle as well as stay in the room once the candle is lit.  With that being said…. let’s start the craft.

Check out our other Jar Crafts.

Laura from Dacian Moon Handmade will show you how to make this Step-by-Step.


Materials Needed

– transparent paper with flower print
– scissors
– recycled jar
– tea candle


Step 1

Measure 1 cm over the height of the jar on the transparent paper…


… and cut it out.


You will have a rectangle a little bit taller than the jar.


Step 2

Fan fold the short side…


… until all the rectangle is folded.


Step 3

Apply a layer of glue on the last folded side…


… and place it over the first one.


Step 4

Put the jar (with the candle) inside.


Now you can have an adult light the tea candle.


Notice how beautiful the candle looks shimmering through the transparent paper.  Doesn’t it look gorgeous?  Don’t forget to blow the candle out when you are leaving the room…. never leave a candle unattended.

Technorati Tags: , , , , , ,

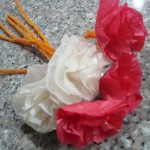
How To Make Paper Carnations

Today I’m going to show you how to make Paper Carnations.  Paper Carnations can be used for many things…. Valentine’s Day, for example.  Valentine’s Day is coming up in just a couple of weeks.  These carnations would be beautiful in a bouquet as a gift for your someone special.  Or, for Mother’s Day…. what mother wouldn’t love receiving a bouquet of hand made paper carnations from their child?   They would certainly love it.  Or, just make these Paper Carnations any day of the week to give to someone special as a surprise.  No one could resist them!  So, let’s get started.

Check out our other Valentine’s Day Crafts.


Materials Needed

tissue papers (the one used for wrapping presents)

pipe cleaners/fuzzy wires

scissors


Step 1

Fold tissue paper into portions, enough to make 3 to 4-inch circles.


Step 2

Stack 7-10 pieces of circles and by folding it, make two small slits in the middle. This is where you slip in the tip of the pipe cleaner, then fold it to lock it in place.


Step 3

Starting in the middle, gently fold the paper up, until all the side are pulled upwards.  Continue doing the same for the other papers underneath.


Step 4

When all the papers are up, gently arrange it to form blooming petals of your carnation flowers.


Step 5

Make a bunch of these flowers and you can place it a flower vase for a more attractive look.

Or better yet, make a bouquet of carnation flowers and give it to somebody for Valentine’s Day.  They are sure to love it.  How did your carnation flowers turn out?  Let me know in the comments below.

Technorati Tags: , , , , , , , , , , , ,

How to Make a Chocolate Bar Box for Valentine’s Day

Valentine’s Day is right around the corner.  It is on February 14th and it will be here before you know it.  Are you prepared yet?  Do you know what you are getting your friends and family for Valentine’s Day?  Or perhaps you have a special person you have been admiring from “a far”.  Either way I have the craft for you today.  In this post I’m going to show you how to make a Chocolate Bar Box for Valentine’s Day.   You are simply going to start off with your receiver’s favorite candy bar and go from there to construct the perfect chocolate bar box for this special occasion.  So, grab the materials needed and let’s get started.

Check out our other Valentine’s Day Crafts.

Laura from DacianMoon Handmade will show you how to make this chocolate box.


Materials Needed

– colored paper (not too thin)
– glitter glue
– scissors
– ribbon (about 40 cm)
– paint marker
– glue
– pencil
– chocolate bar


Step 1

Measure enough space for the chocolate (let’s say 2.5 cm on every side of the chocolate bar) and mark with a line.


Step 2

Fold on this line…


… and once again…


… like this:


Step 3

Cut the last part at 2 cm from the edge.


Step 4

On one of the small sides make a criss-cross cut.


Step 5

Unfold the paper.


Step 6

Apply a layer of glue on the back side of the chocolate bar…


… and place it in the middle.


Step 7

Apply a layer of glue on the ribbon too…


… as long as the width of the paper… then place the paper with the chocolate on top.


Step 8

Take the remaining paper…


… fold it in half…


… and draw a half of a heart on it.


Cut the drawing out.


Unfold.


Step 9

With the marker write in the middle of the heart “Happy Valentine’s Day”.


Step 10

Close the box and tie the ribbon making a knot on one side.


Step 11

Apply a layer of glue on the upper part of the back side of the heart, as I show in this picture.


Then place it on the box. Take care that the glued part does not touch the ribbon.


Step 12

Use glitter glue to decorate the heart.


Here is your elegant chocolate box…. ready to be given away to someone special.


Isn’t this chocolate box just fabulous to give out as a gift?  It really is.  Imagine how excited the receiver would be to receive it.  Now, the real question is….who are you going to give this awesome Chocolate Bar Box to for Valentine’s Day?

Technorati Tags: , , , , , , , , , , , ,