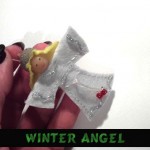
How to Make a Winter Angel Christmas Ornament

I have a fun Christmas craft for you today.  In this post I will show you how to make a Winter Angel Christmas Ornament.  This Angel Christmas Ornament turns out amazing looking.  It would look spectacular on your Christmas Tree.  You could also make this Winter Angel Christmas Ornament as a gift for your friends and family this Christmas.  They will surely love it.   This will surely be a Christmas Ornament that they will save for a long time….. proudly representing something you made yourself.  So, let’s get started.
Check out our Christmas Crafts.

Laura from Dacian Moon Handmade   will show you how to make this, step by step.


Materials Needed

– 1 disc of white felt
– 1 smaller disc of yellow felt
– 1 acorn cap
– 1 wooden bead
– toothpick
– scissors
– needle and pin
– instant glue
– red and black paint
– silver glitter glue
– 2 red beads


Step 1

Take the wooden bead…


… and stick it on a toothpick.


Like this.


Step 2

Put the toothpick through the middle of the white felt.


Fold the felt in half, like this, and start sewing a dress for your angel.


Like this.


Step 3

Cut the extra felt.


It will look like this.


It is time to shorten the hands / wings.


Like this .


Step 4

Apply a layer of glue on the head…


… and put the yellow disc over it, like this. Note: you should do this quickly because the glue is fast drying.


This is the angel with hair.


Step 5

Apply a layer of glue inside the acorn cap…


… and fix it on the angel’s head over the yellow felt.


Step 6

Put a red bead on a piece of thread…


… and make a knot, like this.


Sew this piece of thread as a belt.


… like this. Then add another bead on the other end and tie the belt.


Step 7

Put the needle (with thread) through the yellow felt, and make a hanger.


Like this.


Decorate your angel with glitter glue, make eyes and mouth with black and red paint and your ornament is ready.


Isn’t this Winter Angel Christmas Ornament simply adorable?  It will look beautiful hanging on your Christmas tree.  It would also make a wonderful gift to a friend or family member.

Technorati Tags: , , , , , , , , , , , , ,

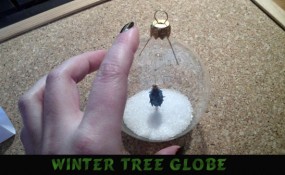
How to Make a Winter Tree Globe Ornament for your Tree

I have a real treat for you today.  I’m going to show you how to make a Winter Tree Globe Ornament perfect for any Christmas tree.  It is really easy to make and it is so much fun too.  Your kids will enjoy helping you make this Christmas tree ornament…. almost as much as they will enjoy looking at what they made on their Christmas tree.  They will certainly be so proud.  So, grab the materials needed for this craft and let’s get started.

Check out our other Christmas crafts.

A cool Christmas ornament tutorial offered by Laura from Dacian Moon Handmade


Materials Needed

– clear Christmas ornament ball
– large tip cotton swab
– square bead
– scissors
– silver glitter glue
– gold glitter
– instant glue
– green paint marker
– sugar
– tweezers


Step 1

Take the cotton swab…


… and cut the stick close to the cotton part.


Like this.


Step 2

Cut a piece of stick – as long as you want the strain to be.


Like this.


Apply a bit of glue on one end of the strain…


… and stick it to the cotton tip, on the other end. Like this. Now it looks like a tree.


Step 3

Paint the cotton part in green.


Step 4

Using your scissors make some cuts…


… like this.


Add more cuts. They are tree branches.


Step 5

Adorn it with glitter glue, then let it dry.


This is our tree.


Step 6

Now is time to fix the strain, using this square bead.


Apply a bit of glue on the strain end…


… and put it through the bead. Add a little more glue around it, just to be sure.


Step 7

Let’s decorate the top of the tree!

Apply glue on the top…


… and put it in gold glitter…


… like this.


Step 8

Use tweezers to gently grasp the top.


Add a layer of glue on the bottom of square bead…


… and put it through the opening of the globe (take the hanger off before that)…


… like this.


Step 9

Make a paper funnel (a paper cone)…


… and put it on the opening of the globe.


Pour sugar through it…


… like this.


Put the hanger back. Now you have a globe with a winter tree and snow.


Isn’t this Winter Tree Globe Ornament adorable?  It is going to look so terrific on your Christmas Tree.  Enjoy it!!

Technorati Tags: , , , , , , , , , , ,

How to Make a Snowmen Family Globe Ornament

I have a Christmas craft that both you and the children will love making.  I’m going to show you how to make a super-cute, super-simple ornament for your Christmas tree.  It is a snowmen family globe ornament.  The children (or yourself) will use white paint and their hand print to make the snowmen on the globe ornament.  With just a little more paint you will create an imaginative snowmen family.  Imagine how thrilled your children will be to have made a Christmas ornament for the tree themselves.

Check out our other Christmas crafts.

Step by step tutorial offered by Laura from Dacian Moon Handmade


Materials Needed

– blue Christmas ornament ball
– white paint
– red and black paint
– paintbrush
– toothpick
– optional glitter glue to add some highlights


Step 1

Put some white paint in your hand…


… and spread it with the paintbrush.


Step 2

Put the globe in your hand…


And close your hand gently but firmly over it.


It will look like this.

Let it dry well.


Step 3

Using the toothpick and black paint…


… make eyes, mouth and buttons for the snowmen…


… like this.


With black you can also do hats and scarves for two of them.


Use red paint to make noses, hats and scarves for the other two.


Aren’t they cute?


And, that is it!!  How simple is that?  Your kids will love using their hand print to make the snowmen.

Technorati Tags: , , , , , , , , , , , ,

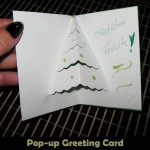
How to Make a Pop-up Christmas Card

Today I’m going to show you how to make a very special greeting card for the Christmas Holiday.  In particular I’m going to show you how to make a Pop-up Christmas card.  Anyone receiving this Christmas card will love it… not only because it came from you, but also because of the 3-D effect of the card.  In this post I will show you how to make a Pop-up Christmas tree that actually sticks out of the card when opened.  Add a special note to your card and it is ready to send out for Christmas to a friend or family member.

Check out our other Christmas crafts.

Laura from  Dacian Moon Handmade will show you how to make this, step by step.


Materials Needed

– cardboard
– green paper
– green pen
– glue
– scissors
– green glitter glue


Step 1

Fold the cardboard in half.


Fold the upper corners outward at about 2/3 of their height…


… like this.


Step 2

At 2/3 of height, cut in waves until you reach the crease…


… it will look like this.


Make another 2 – 3 waved cuts…


… like this.


Step 3

Press the lower part (under the first cut) behind…


… like this. It will look like the tree stem.


Step 4

Fold the green paper in half.


Apply a layer of glue on the cardboard until you reach the creases…


… and place it over the green paper, like this.


Do the same on the other part.


Step 5

Take the green pen …


and write “Seasons Greetings” beside the tree.


Add some glitter glue globes on the tree and your greeting card is ready .


And, there you have it.  You just made a beautiful and festive Pop-up Greeting card for Christmas.  The receiver will love it!!

Technorati Tags: , , , , , , , , , , , ,

How to Make Simple Gift Tags

How you present your gifts this holiday season is so important.  The right gift wrap, the right bows and of course the right gift tags.  But, instead of buying store bought gift tags why not do something more original.  In this post I will show you how to make a simple gift tag for your gifts.  Whether you celebrate Christmas or Hanukkah you can make this gift tag craft work for you.  Simply alter the design on your gift tags to fit your needs.  So, let’s get started.

Check out our other Christmas Crafts.

Today, Laura from  Dacian Moon Handmade will show you how to make a simple but beautiful gift tag.


Materials Needed

– transparent paper
– cardboard
– green pen
– glue
– scissors
– glitter glue
– card punch
– thick thread


Step 1

Cut a rectangle from the cardboard (3 cm x 4.5 cm)


Cut another rectangle of the same dimensions from the transparent paper. You can measure or you can use the cardboard as a template.


… like this.


Try to cut a pattern out of the transparent paper – at about 1 cm of the lower side…


… like this.


Step 2

Apply a layer of glue on the cardboard…


… and place the transparent paper over it, like this. Let it dry.


Step 3

Using your green pen…


… draw two holly leaves on the transparent paper..


Add three red berries with glitter glue.


Let it dry.


 Step 4

Using the card punch make a hole on the upper part.


… like this.

Take the thread and fold it in half…


Put it through the hole, like in the picture…


…then bring the back through the loop, like this.


You can round the corners and your gift tag is ready.


And, there you have it….. simple gift tags that won’t look simple at all on any gift.  How did your gift tags turn out?  Let me know in the comments below.

Technorati Tags: , , , , , , , , , , , ,

How to Make a Simple 3D Christmas Tree Ornament

I will continue with the Christmas crafts with this fun craft.  In this post I will show you how to make a simple 3D Christmas Tree Ornament.  And, just like the title says…. this craft is a simple one.  The kids will love making it…. especially the part where they get to decorate the ornament.  They will have so much fun decorating it…. almost as much as they will have fun decorating your Christmas tree at home.  So, grab the materials needed and let’s get started.

Check out our other Christmas Crafts.

Tutorial offered by Laura from Dacian Moon Handmade.


Materials Needed

– green paper
– scissors
– glitter glue (red, gold, blue)
– glue
– metallic silver paint (or silver glitter glue)
– a small piece of ribbon
– pencil


Step 1

Cut the paper in half.


Take one part and fold it in two.


… like this.


Step 2

Using your pencil draw a half of tree, like this…


… then cut it out.


It will look like this.


Unfold, and you have a tree.


Step 3

Repeat to make a second tree from the other piece of paper.


Step 4

Cut on the crease the upper part of one tree and the lower part of the second tree…


… like this.


Combine the two trees.


Use a small amount of glue to keep in place at the top and and the base.


Step 5

Decorate the tree using glitter glue.


I decorate it with small globes.


Step 6

Take the ribbon and fold it in two…


… then glue it on top of the tree and the ornament is ready.


Isn’t this 3D Christmas Tree Ornament precious?  It simply is.  It will look terrific on your Christmas tree.  It’s so simple you will be able to make a few to spread around your tree.

Technorati Tags: , , , , , , , , , , ,

How to Make a Recycled Lid Christmas Ornament

It’s the Christmas season and I’m going to get into the Christmas mood by showing you a fun Christmas craft.   Today I’m going to show you how to make a recycled lid Christmas Ornament.  I love this craft because this ornament is made from recycled materials.  Not only will we use a recycled jar lid, but we will also use a recycled greeting card.  Plus, it turns out super cute.  Your kids will really enjoy making these Christmas ornaments.  So, let’s get started.

Check out our other Christmas Crafts.

Laura from  Dacian Moon Handmade will show you how to make this recycled lid Christmas ornament.


Materials Needed

– recycled lid
– recycled greeting card
– scissors
– glitter glue (I use gold glitter glue but you can choose another color to match the greeting card you use)
– craft glue
– metallic silver paint
– a small piece of ribbon
– pencil


Step 1

Decide what part of the card you want to use and place the lid over it.


Using your pencil trace the contour of the lid…


… then cut out the desired part…


… like this.


Step 2

Apply a layer of glue inside the lid…


… and place the cut card over it.


Step 3

Use glitter glue to make some highlights on the card. I use it on the red parts.


It will look like this.


Step 4

Use metallic silver paint to add some delicate accents on the snow and to make snowflakes. (Instead of the metallic silver paint you can put small amounts of glue and place glitter or cotton wool on it )


The front of our ornament is ready.


Step 5

Turn it over to fix the back.


Draw a circle on the rest of the card and cut it out.


You can use it like this or turn it over with the white part up, as I did.


Take the ribbon and fold it in two…


… apply a small amount of glue on the upper part of the lid, like this…


… and place the folded ribbon over it.


Apply glue on the card circle too…


… and put it on top of them, like this.


Now you can write “Season Greetings” on it and decorate it with glitter glue if you want.


Let it dry well and you have a unique ornament made of recycled materials.


Isn’t that an adorable Christmas ornament?  And, it’s made from recycled materials…. how cool is that?!

Technorati Tags: , , , , , , , , , , , , , , ,

How to Make a Coupon Organizer Case

Mother’s Day is right around the corner.  Have you thought about a gift for your mother yet?  Well, if not I got a great Mother’s Day craft for you.  I’m going to show you how to make a Coupon Organizer Case.  There is not many things more frustrating that going shopping with a pile of coupons and no way of organizing them…. well, your mom won’t have that problem anymore.  With the number of envelopes you are going to be adding to this craft she will have more than enough places to organize her coupons.  So, let’s get started.

Check out our other Mother’s Day Crafts.


How to Make a Coupon Organizer Case


Materials Needed

Cardboard

Paper

Glue or Paste

Hole Punch

10-20 Envelopes

5 Binder Rings, Ribbon or Yarn

Markers, Crayons, Glitter Glue (items to decorate case)


Step 1


Cut 2 pieces of cardboard down to a size that is a tiny bit larger than a business envelope.


Cut 2 pieces of cardboard down to a size that is a tiny bit larger than a business envelope.


Step 2


Cover with paper.  Paste in place.


Cover with paper.  Paste in place.


Step 3


Use a hole punch to poke holes on left side.


Use a hole punch to poke holes on left side.


Step 4


Punch holes in 10-20 envelopes so they will match up with covers.


Punch holes in 10-20 envelopes so they will match up with covers.


Step 5


Bind 2 covers and all the envelopes together.


Bind 2 covers and all the envelopes together.  You can use binder rings, ribbon or yarn to bind them together.


Step 6


Decorate cover.


Decorate cover.


Finished Coupon Case


And there you have it…. you just finished making your Coupon Organizer Case.  Isn’t it a wonderful way to organize coupons?  Your mom is going to surely love this!!

Here is our video on How to Make a Coupon Organizer Case

Technorati Tags: , , , , , , , , , , , ,

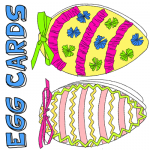
How to Make Easter Egg Cards

Easter is just around the corner.  So, to get ready for the upcoming Easter Holiday I thought we would do a craft in honor of Easter.  Today I will show you how to make beautiful Easter Egg Cards.  These cards turn out really lovely.  They will be perfect to hand out to your loved ones and friends…. so make quite a few.   Each card can be written with a unique saying inside.  So, grab the materials needed and let’s get started with this craft.

Check out our other Easter Crafts.


How to Make Easter Egg Cards


Materials Needed

Printer & Paper

White Paper

2 Pieces of Colorful Paper

Crepe Paper, Sequins, Glitter (Items to Decorate Eggs)

Marker

Hole Punch

Scissors

Ribbon


Click on template image below to make larger and to print.


Easter Egg Card Template


Step 1


Print out template.


Print out template.


Step 2


Use egg template to trace 2 eggs on colorful paper and 1 egg on white paper.


Use egg template to trace 2 eggs on colorful paper and 1 egg on white paper.


Step 3


Decorate the Easter egg with crepe paper, sequins, glitter


Decorate the Easter egg with crepe paper, sequins, glitter or however you wish to.


Step 4


Write a message on the white egg.


Write a message on the white egg.


Step 5


Punch 2 holes on wide part of eggs.


Punch 2 holes on wide part of eggs.


Step 6


Now push ribbon thru both holes (in all 3 eggs) and tie a bow above the top egg


Now push ribbon thru both holes (in all 3 eggs) and tie a bow above the top egg… as seen above.

And, there you have it….. you just finished making an Easter Egg Card.  Now, make a few more and hand them out to loved ones or friends this Easter.  The receiver will be sure to love them.

Technorati Tags: , , , , , , , , , , ,

How to Make an Elegant Mask for Purim

Purim is coming up quickly….. it will be here this year on the evening of March 7th.  So, since Purim is all about hiding ones identity I thought we should make a mask perfect for celebrating Purim.  So, today I will be showing you how to make an Elegant Mask for Purim.  Made from paper and whatever you would like to use to decorate the mask…. the outcome is a Mask that you would be proud to wear.  So, grab the materials you will need and let’s get started.

Check out our other Dressing Up Crafts.

Step by step tutorial offered by Laura from Dacian Moon Handmade


Materials Needed

– colored paper
– leather cord (or any other cord)
– glitter glue (or paint markers / colored pens)
– scissors
– pencil
– synthetic self adhesive crystal


Step 1

Use the cord to measure how big should be the mask…


… and make the markings on the paper, according to your measurements.


Step 2

Draw the lower part of the mask.


Step 3

Make an arch in the middle, where the nose will be.


Step 4

Continue with the upper part of the mask – you can make any shape you like. I made it in the shape of spread wings.


Step 5

Make an inverted arch on the middle.


Step 6

Cut out the mask.


Like this.


Step 7

Measure again and make the markings for the eyes.


Step 8

Draw the eyes…


… and cut them out.


It will look like that.


Step 9

Use the pencil and decorate the mask. I like curved lines and swirls so I used them. I marked the paper near the eyes holes and the corners.


In the middle make space for the crystal.


Step 10

Using glitter glue (or paint markers / colored pens) highlight the decorations. Because my paper is light blue, I use blue glitter glue on the upper part…


… like that,


pink near the eyes…


… like this,


and mauve on the corners.


Step 11

With the scissor make two little holes on the outer edge of the eye holes, like this:


Cut the cord in half.


Make a knot on one side of every half…


… place it through the little holes…
… and the mask is ready to be worn.


Isn’t this mask just simply gorgeous?  Anyone would be proud to wear this elegant mask for Purim.  Did you use your creativity to make your mask differently from mine?  Let me know in the comments below.  And, take a picture of your mask and add that too to the comments…. I’d love to see it.

Technorati Tags: , , , , , , , , , ,

How to Make a New Years Party Hat

It just isn’t a New Years Party if you don’t have a New Years Party Hat.  Well, if you don’t have one yet….. don’t worry.  Today I’m going to show you how to make a New Years Party Hat.  And, this hat turns out awesome.  It actually turns out a lot better than any store bought New Years Party Hat you will find.  Made with glitter glue and crystals this party hat is like no other you will find.  So, let’s get started.

Check out our other New Years Crafts.

Laura from Dacian Moon Handmade  will show you how to make it, step by step.


MATERIALS NEEDED:

– white cardboard
– blue paper
– scissors
– pencil
– glue
– blue and silver glitter glue
– auto-adhesive crystals (blue)
– double adhesive band
– 2 candy wrappers


Step 1

Place the cardboard in front of you.


Make a cone from it…


… like this.


Apply a layer of glue on the last corner you roll to keep the cone in place.


Let it dry.


Step 2

Cut the extra part to let the cone stand.


Now we have a blank cone. The next step is to decorate it.


Step 3

Draw three stars on blue paper…


… then cut them out.


Step 4

Take one wrapper …


… and cut it criss-cross, like in the picture.


Now we have a band with one side criss-crossed.


Cut another two (or as many you need to cover the base of the cone.)


Apply a layer of glue on the back of one…


… and place it on the cone baseline.


Step 5

Make some small bands of wrapper…


… like this.


Apply a layer of glue on the upper part of the cone…


… and place the small bands over it…


… like this.


Step 6

Now is time to add the stars on the cone. Take the double-adhesive band…


…cut a small piece and place it on the cone, where you want one star to be.


Take the protection cover off and place the star over it.


Do the same to add the other two stars.


This is the Party Hat ready for the New Years Party.


See, I told you the hat turns out awesome.  Imagine all the compliments you will get on this hat at the New Years Party.  Plus, no one will have a hat like yours.  How did your hat turn out?  Let me know in the comments below…. add a picture too.  I’d love to see it.

Technorati Tags: , , , , , , , , ,

How to Make a Pair of New Years Earrings

I have a super fun craft for the girls today.  I am going to show you how to make a pair of New Years Earrings.  This craft isn’t as complicated as it sounds…. the earrings are actually made out of paper that is decorated by you.  You can use your imagination to decorate the earrings however you see fit.  Or, if you rather…. you can copy how I decorated my New Years earrings.  Whatever you would like.  So, grab the craft materials and let’s get started.

Check out our other New Years Crafts.

Laura from Dacian Moon Handmade  will show you, step by step, how to make them.


MATERIALS NEEDED:

– yellow paper (or any other color you want your earrings to be)
– colored pen (I used green)
– scissors
– pin
– earring hooks
– 2 jump rings
– glitter glue (I used green, silver and purple)


Step 1

Draw an arc on one corner, like this.


Cut it out.


Use your colored pen to write in the middle “Happy New Year” or “Happy 2012”.


Step 2

Make a cone from it.


Step 3

You will see that the writing is on one side, so we’ll use this side as the front part.


Take the pin and make a hole in the upper part of the cone, like this.


Put a jump ring through it.


Add the earring hook, then close the jump ring.

If the writing does not stay in front (as the earring stays in your ear) you can:

– Open the jump ring and put the hook in reverse (if the writing is to the back side)

– Add another jump ring between the first one and the hook (if the writing is on one side)


It will look like this.


Step 4

Use glitter glue to decorate the cone and let it dry well.


Repeat step 1, 2, 3, 4 to make the second earring.


Now you have cute glittering earrings to wear at a New Years Party.  Did you make your earrings like mine or did you use your imagination to make them differently?  Either way…. I’d love to see them.  Take a picture of them and post it in the comments below.

Technorati Tags: , , , , , , , , , , ,

How to Make a New Years Mask

If you are going to a New Years Party I have the perfect craft for you today.  I am going to show you how to make a beautiful and elegant New Years Mask.  Made from cardboard, crystals and glitter glue this mask turns out beautifully.  You are sure to get many compliments on this mask from all who see it.  And, the cool part….. you get to tell them that you made it yourself.  So, let’s get started.

Check out our other New Years Crafts.

Laura from Dacian Moon Handmade  will show you how to make this mask step-by-step.


MATERIALS NEEDED:

– white cardboard
– blue paper
– colored pen (I used blue)
– scissors
– needle and thick thread
– pencil
– glue
– blue glitter glue
– auto-adhesive crystals (blue)


Step 1

Place the cardboard in front of you.  Use a piece of thread to measure how big the mask should be…


… and make the markings on the cardboard, according to your measurements.


Measure again and make the markings for the eyes.


Step 2

Draw the lower part of the mask.


Make an arch in the middle, where the nose will be, like this.


Step 3

Continue with the upper part of the mask – you can make any shape you like. Make an inverted arch in the middle.


Cut out the mask.


Step 4

Draw the eyes…


… and cut them out.


It will look like this.


Step 5

Take the needle with thread and put it through one corner, like this.


On the end of the thread make a knot, then pull the thread.


The knot will stay in the front of the mask. Do the same for the other corner, and now you can use the threads to tie the mask.


Step 6

Right now we have a blank mask. Let’s decorate it!  Use glitter glue to highlight all the edges of the mask…


… like this.


Draw two stars on the blue paper…


… and cut them out.


Add glue on the back of one…


… and place it on one side, over the eye.


Like this.


Add the second one beside it.


On the other side of the mask write 2012 using your colored pen.


Like this.


Now, take two auto-adhesive crystals and place them over the stars.


You can make a more complicated design, if you want. I am adding just some more points with glitter glue.


Now the mask is ready!  Wear it proudly for all to see on New Years Eve.  How did your mask turn out?  Let me know in the comments below.  Don’t forget to take a picture of the mask… you can add it to your comment so I can check it out.  Now, you are ready to celebrate the New Year.

Technorati Tags: , , , , , , , , ,

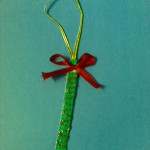
How to Make a Popsicle Stick Ornament

Today I have a fun Christmas craft for the youngest of crafters.  I’m going to show you how to make a Popsicle Stick Ornament.  This craft is super easy, but it is also super duper fun.  This Popsicle Stick Ornament comes out looking pretty and will look great on any Christmas tree this Holiday Season.  So, grab a popsicle stick and the rest of the craft materials needed and let’s get started.

Check out our other Christmas Crafts.


Image034


Materials Needed

Popsicle stick

Ribbon

Gold twine/ cord

Glitter glue

Green acrylic paint

Paintbrush

Tape


Step 1

Paint the popsicle stick green as shown.


Image029


Step 2

Make a design on the stick with glitter glue. You can make any design you like.


Image030


Step 3

Make a small bow with red ribbon.


Image031


Step 4

Use craft glue to glue the ribbon to the top of the popsicle stick.


Image032


Step 5

Take a piece of gold twine and tape the ends together.


Image033


Step 6

Tape the gold loop to the back of the popsicle stick.  Hang your Christmas ornament on your tree.


Image034


Isn’t this Christmas ornament beautiful?  I told you it would be.  Imagine how proud your little one will be to see that something they made is hanging on the tree.  Let me know how your ornament turned out in the comments below.  And, don’t forget to take a picture of it…. you can share that too in the comments.

Technorati Tags: , , , , , , , , , , , ,

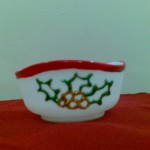
How to Make a Christmas Gift Bowl

Today I’m going to show you how to make a bowl perfect for a Christmas gift.  This bowl would make a special gift for your Mom, Grandma or Aunt this Christmas.  It will mean so much to them and they will surely treasure it for years to come.  You will simply take a plain glass or plastic bowl and use acrylic paint to paint a Christmas design on the front of the bowl.  This craft will be a lot of fun…. almost as fun as it will be to give it as a gift this Christmas.  So, let’s get started.

Check out our other Christmas Crafts.


Image089


Materials Needed

White plastic (or glass) bowl

acrylic glitter glue – gold and green

acrylic paint – red

paintbrush

pencil


Image060


Step 1

Draw a line near the edge of the bowl, around it as shown.


Image061


Step 2

Paint the space between the edge and the line as shown.


Image062


Step 3

Draw holly leaves with a pencil in a few places around the bowl.


Image063


Step 4

Go over the lines with acrylic glitter glue. Allow to dry.


Image089


Step 5

You are done… The bowls can be washed as the acrylic design will stay.

Now, you are ready to wrap your bowl to give as a gift.  You know what you can do….. make a set of 2, 4 or 6 and give them an entire set as a Christmas gift.  They can use them to decorate the table next year for Christmas.  Now, the real question is…. who is the lucky person who is going to receive this Christmas bowl as a gift?  Hmmmmm……

Technorati Tags: , , , , , , , , , , , , ,

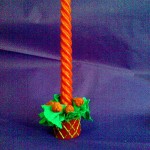
How to Make a Christmas Candle Arrangement

Today I’m going to show you how to make a Christmas Candle Arrangement.  This Christmas Candle Arrangement makes for a beautiful tabletop decoration this Holiday Season.  Make more than one candle arrangement and put them around the house as decorations.  Or, better yet….. make a few of these Christmas Candle Arrangements and give them as a gift this Christmas.  Whatever you decide to do with this craft it is sure to be a big hit this Christmas Season.

Check out our other Christmas Crafts.


Image027


Materials required:

Old toilet paper roll

Crepe paper – red, green

Glitter glue – gold

Glue

Paint – Red

Paintbrush

Scissors

A candle


Step 1

Cut through the toilet paper roll as shown below.


Image008


Step 2

Cut out a small ring of toilet paper roll about 6 cm wide.


Image009


Step 3

Overlap the ends to make a smaller roll. Tape the ends in place as shown.


Image010


Step 4

Place the candle inside the ring and stuff it with bits of torn green crepe paper. Tear the paper long enough that it comes out of the ring as shown below.


Image018


Step 5

Paint the toilet paper roll with red acrylic paint.


Image019


Step 6

Make a design on it with gold glitter glue as shown.


Image023


Step 7

Make small balls out of torn red crepe paper as shown.


Image025


Step 8

Glue the balls near the base of the candle as shown


Image026


Step 9

Place the candle on your table and you’re ready for Chistmas dinner!!


Image027


There you go…. you just finished making a Christmas Candle Arrangement.  Now, make a few more to decorate your house with this Holiday Season.  Or, have you decided to give them away as gifts?  Good for you…. either way they are sure to be enjoyed.

Technorati Tags: , , , , , , , , , , ,