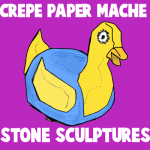
How to Make Crepe Paper Mache Rock Sculptures

HAVE you ever wished you could suggest a use for the interesting stones that children bring home? Here is an idea. By adding crepe-paper mache to these rocks, the children can produce interesting creatures of the imagination. These can be used for paperweight gifts, but the experience of making them has its own reward. With crepe-paper mache children can make rocks into birds, animals, vehicles, fruit, vegetables, holiday novelties.  Sounds fun, right?  Sure does.  So, let’s get started.
Check out our other crafts made from stones and rocks.


How to Make Crepe Paper Mache Rock Sculptures


Materials Needed

Crepe Paper of Different Color

1 Cup Measuring Cup

Bowl

Water

Mixing Spoon

Flour

Salt

Rock


Step 1


Cut up crepe paper into tiny pieces.


Cut up crepe paper into tiny pieces.


Step 2


Make about one cupful of crepe paper.


Make about one cupful of crepe paper.


Step 3


Add enough water to cover paper... soak overnight.


Add enough water to cover paper… soak overnight.


Step 4


Mix and rub wet paper into into fine pulp.


Mix and rub wet paper into into fine pulp.


Step 5


Mix in 4 or 5 tablespoons of flour and 2 tablespoons of salt.


Mix in 4 or 5 tablespoons of flour and 2 tablespoons of salt.  Work until texture of clay.  Add more flour or salt as needed.  Make a different batch for each color.


Step 6


Use the mixture as if it were clay.


Use the mixture as if it were clay.  Use rock as base, and crepe clay as head, wings, feet, tails, or whatever else your sculpture needs.  It will dry as hard as the rock.


Here are more ideas


Here are some more ideas.


And, there you have it.  A great way to mold many different items simply by making Crepe Paper Mache Rock Sculptures.  What did you land up sculpting?  Let me know in the comments below.  And, don’t forget to take a picture of your item as well…. you can add the picture to the comment.  I’d love to see it.

Technorati Tags: , , , , , , , ,

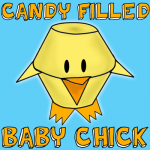
How to Make Candy Filled Baby Chicks for Easter

Are you looking for a way to hand out the Easter Candy this year instead of using the normal Easter eggs?  Well, then I have the craft for you today.  In this post I will be showing you how to make Candy Filled Baby Chicks for Easter.  Make a few and give them to your friends and loved ones this Easter.  Or, if you are having guests over for Easter why not use these Candy Filled Baby Chicks for the Children’s table.  They are sure to be a huge hit.  So, let’s get started.

Check out our other Easter Crafts.


How to Make Candy Filled Baby Chicks for Easter


Materials Needed

Egg Carton

Scissors

Tape

Yellow Paint

Orange & Yellow Construction Paper

Glue

Black Marker


Step 1


Cut up an egg carton so you have 2 cups.


Cut up an egg carton so you have 2 cups.


Step 2


Tape 2 cups together to act as a hinge.


Tape 2 cups together to act as a hinge.


Step 3


Paint yellow.


Paint yellow.


Step 4


Cut out 2 yellow and 2 orange shapes


Cut out 2 yellow and 2 orange shapes (a triangle with a square under it).


Step 5


Attach 4 triangles to the carton cups with glue or tape.


Attach 4 triangles to the carton cups with glue or tape.  Notice orange ones are for beak and yellow ones are for wings.


Step 6


Draw on eyes.


Draw on eyes.


Step 7


Cut feet for the chicks by a letter W with an extra hump.


Cut feet for the chicks by a letter W with an extra hump.


Attach feet to chick with tape or glue.


Attach feet to chick with tape or glue.

Now fill with candy and give this Candy Filled Baby Chick to someone special this Easter.  Or, if you are having Easter Dinner at your house set these Candy Filled Baby Chicks at the Children’s table…. they are sure to love them.

Technorati Tags: , , , , , , , , , , ,