How to Make Candy Corn Stalks for Thanksgiving Treats

Who says that you can only have candy for Halloween. Here is a great treat to use as placeholders at the Thanksgiving table. You make these cute little cornstalks out of candy corn and cardboard tubes from paper towel rolls. This is a  fun way to give treats on Thanksgiving. This tutorial is offered by Laura from Dacian Moon Handmade


How to make Candy Corn Stalks for Thanksgiving treats


How to make Candy Corn Stalks for Thanksgiving treats

Crafts Materials Needed:

– recycled paper roll
– green paint
– yellow and orange candies
– paintbrush
– scissors
– bag


Step 1.

Cut a rectangle with rounded corners out of the paper roll…


… like this.


Step 2.

Using green paint…


… and paintbrush, color the roll.


Let it dry.


Step 3.

Cut triangles on the lower part…


Like this.


Step 4.

Put the candies in the bag…


… and place it inside the tube.


Step 5.

Take the rest of tube (the part that was not painted)…


… and cut thin strips of it.


Like this.


Put them in the tube above the candies, so that a part to go over the edge, outside ..


Step 6.

Squeezes the top to remain fixed (if doesn’t work, you can tie with a cord of similar color, or you can stick it.)


Then bend inward at the bottom…


And that’s all 😀


Technorati Tags: , , , , , , ,

How to Make Cute Halloween Candy Bats

You can’t have Halloween without the treats! So we might as well make them cute 😉  Laura from  Dacian Moon Handmade  will show you, step by step, how to turn a normal candy bar into vampire bats. This bat can close his wings around the candy bar.


Candy Bats


CRAFTS MATERIALS NEEDED:

– black cardboard
– little chocolate
– pen
– scissors
– paper glue
– self adhesive eyes


Step 1.

Measuring the right size, we leave 2 cm above and below the chocolate. On the sides we let 4 cm.


Cut the cardboard to the right size.


Step. 2

We measure chocolate on board, marking the corners.


Draw two lines from the upper markings to the edges, like this.


Step 3.

Draw a bat wing on the right side, based on the markings. Like this.


Draw another one on the left side.


Step 4.

Next, we will draw some feet for our bat – not too complex because you’ll find it hard to cut when is ready.


The feet looks like this, because the bat has claws 😀


To finish our design we must add the head…


… so, draw it as a half of a circle with two pointy ears.


Step 5.

Cut it out.


It will look like this.


Step 6.

Add the eyes.

Bend the wings up…


… like this.


Step 7.

Add a layer of glue on the chocolate…


… and place it on its place.


Join the wings in front and you have the cutest treat ever 😀


Technorati Tags: , , , , ,


How to Make Valentines Day Cards with Fist Holding Lollipops

I saw somewhere a handmade Valentine’s Day card with a little girl or boy holding a lollipop and I thought it was so cool. It stuck in my mind and I decided to try it out for my daughter’s Valentine’s Day card that goes out to her classmates. This is a great way to personalize your child’s Valentine’s Day card … as it display’s your child within the card. Now in a perfect situation, I would have printed this card out with colors, but of course I ran out of ink. And, I also would have printed this out on white card stock, however Walmart only had card stock in bright colors. So, decided for yourself which elements you want your card to have. Have fun.

Also, this is a craft that has to be mostly done by and adult…as a craft knife is needed. Also, you need to prepare the image on the computer…so if you have an older child and they know how to do this, then by all means, let them help.


How to Make Valentines Day Cards with Fist Holding Lollipops


Crafts Materials Needed:

Computer, Printer, Card Stock, Lollipops, Scissors, Craft Knife (for Only Mom or Dad to Use)

Step 1


step1 : Take a Picture of Your Child


Ask your child to hold out their hand in a fist. Do a better job than I did. I am an awful photographer. Oh well.

Step 2


step2 : Print Out Pictures of Child


I too k my picture into Adobe Photoshop. I then cut her cute little arm off and made it bigger so the hand looked closer / larger. This is NOT a necessary step if you are a better photographer. 🙂

Then make 4 of them so they are the right size for a Valentine’s day card.


Step 3


step3 Cut Cards Into Separate Cards


Cut into 4 separate cards.

Step 4


step4 Cut Slits in Card and Put Lollipops Thru


(For Parents / Adults Only). Take a craft knife. and cut on the left AND right side of the fist. Then put the lollipop thru like this.

Step 5


step5 : Hand Out Your Cards


Once you get the hang of it, they are really easy to make. Make sure to make enough for all of your child’s classmates.

Technorati Tags: , , , , , , , , ,

Cool Candy Valentine’s Day Card Ideas for Kids


Cool Candy Valentine’s Day Card Ideas for Kids


Valentine’s Day will be here before we know it.  Kids love handing out Valentine’s Day Cards…. they just love it.  Plus, they love receiving them as well.  I don’t know about you, but every year I try to help my kids come up with different Valentine Card ideas than the year before.   It gets difficult after a while to keep coming up with unique ideas.  Well, I thought I would help you with that by showing you some really cool Candy Valentine’s Day Card Ideas for Kids.  I found them all while scrounging the internet for you.  Each are unique and a ton of fun to make.  I’m sure you and your kids will find something here that they will enjoy making and giving to their friends and family.  So, let’s get started.

Check out our other Valentine’s Day Crafts.


Cool Candy Valentine’s Day Card Ideas for Kids

 (1) Now or Later Valentines Cards


Now or Later Valentines Cards


Better Homes and Gardens shows you how to combine these tasty treats with a clever written label to make a wonderful Valentine’s Day Card.  “Will You Be Mine Now or Later?”  How clever is that?!  The receivers will love it.


(2)  Dynamic Duo Valentine Cards


Dynamic Duo Valentine Cards


We’re two of a kind.   That is the saying you can use when you are putting together this tasty Valentine Card.  I found this cool candy Valentine’s Day card over at Spoonful.  They also offer some other clever sayings to use on other Valentine Cards so you don’t say the same thing to everybody.


(3)  Candy Doggy Card


Candy Doggy Card


Made with Tootsie Rolls this Candy Dog Valentine Card is sure to be a big hit in the classroom this year.  This is one of our fun crafts.  It is an easy craft and is inexpensive too…. gotta love that.  Check it out to find out how to make this Candy Doggy Card.


(4)  Candy Rings


Candy Rings


Here is a fun Candy Valentines craft that the children will love…. both the receiver and the giver.  These are Candy Rings…. perfect for Valentine’s Day.  I found this over at Kaboose.  Here they use a chenille stem per ring plus a wrapped candy.  These are so cute!!


(5)  Cupcake Goodies


Cupcake Goodies


These are simply brilliant…. and I’m sure absolutely delicious.  Made with cupcake liners and your favorite candy these are sure to be a big hit with your family and friends.  Add a special Valentine’s note to add a loving touch.  Check out this craft at Martha Stewart.


(6)  You Rock Valentines


You Rock Valentines


Show somebody how much you love them with this unique Valentines idea.  Made with Pop Rocks candy this Valentines sends out an awesome message…. that the receiver “Rocks”.  I found this Candy Valentines Card at Fiskars.  Check it out for yourself.


(7)  You Make Me Snicker


You Make Me Snicker


This Candy Valentine’s Day card is just simply adorable.  I found this craft over at Craft-O-Maniac.  Here she uses pictures of her daughter with the words, “I Like You, You Make Me Snicker!” on it.  Add a snicker candy and you have yourself a Valentine’s Card.


(8)  Valentines Critter


Valentines Critter


Here is another one of our very own Candy Valentine’s Day Cards.  It is an adorable little critter holding a yummy lollipop and a heart that reads, “Happy Valentine’s Day”.   That pretty much says it all, right?  Check out our How to Make a Valentines Critter for yourself.


(9)  Butterfly Valentines


Butterfly Valentines


This butterfly is so super cute!!  And, it is really a fun and easy Candy Valentine’s Day Card to make.  You can find the craft details at Skip To My Lou.  At that site they offer a printable template that you can print off on card stock.  Do a bit of cutting and add a lollipop.  You will be good to go.


(10)  I’ve Got a Crush on You


I've Got a Crush on You


I just love this Valentine’s Day Card idea…. I just couldn’t pass up adding it to this post.  It is not quite a Valentine Card, but it is definitely an adorable Valentine message to give to a special someone.  Use Crush soda along with a special message…. “I’ve Got a Crush on You”  They will surely love it.  Check out all the details at Design Aglow.


(11)  M&M Tic Tac Toe


M&M Tic Tac Toe


This Candy Valentine’s Day Card is really awesome.  And, it is sure to be so much fun for anyone who receives it.  I found this great Valentine idea at Shim & Sons.  Here they used 2 different color M&M’s and placed plenty in resealable bags.  They also used card stock to create the Tic Tac Toe Valentine Cards.  These are sure to be a ton of fun.


(12)  Lip & Mustache Lollipops


Lip & Mustache Lollipops


This is an awesomely clever idea.  Here Blonde Designs shows you how to use craft foam to trace some mustaches and lips.  Add them to a lollipop with a Valentine note and you have a fun Candy Valentine’s Day Card.  Watch how silly everybody looks sucking on the lollipop… they will look like they have mustaches and funny looking lips.  It is sure to get a lot of laughs.


(13)  Valentine Mice


Valentine Mice


I know what you are thinking…. when you think of Valentine’s Day you don’t think of mice.  I understand that.  But, take a look at these delicious mice made from Hershey Kisses and think again.  The receiver of this special Valentines gift will surely love it.  So much so that they probably will not want to eat it.  Check out Floral Showers for all the details.


(14)  Valentine’s Fuzzy Cake Balls


Valentine's Fuzzy Cake Balls


I found this yummy Valentine’s Day treat at Hungry Happenings and just had to share it with you.  Here they use shaved coconut to make these adorable creatures.  But, as they share with you if you do not like coconut feel free to use shaved chocolate instead.  Add a cute and loving message to your fuzzy cake ball and you have yourself the perfect Valentines.

Top photo by StuartWebster

Technorati Tags: , , , , , , , , , ,

How to Make a Winter Tree Globe Ornament for your Tree

I have a real treat for you today.  I’m going to show you how to make a Winter Tree Globe Ornament perfect for any Christmas tree.  It is really easy to make and it is so much fun too.  Your kids will enjoy helping you make this Christmas tree ornament…. almost as much as they will enjoy looking at what they made on their Christmas tree.  They will certainly be so proud.  So, grab the materials needed for this craft and let’s get started.

Check out our other Christmas crafts.

A cool Christmas ornament tutorial offered by Laura from Dacian Moon Handmade


Materials Needed

– clear Christmas ornament ball
– large tip cotton swab
– square bead
– scissors
– silver glitter glue
– gold glitter
– instant glue
– green paint marker
– sugar
– tweezers


Step 1

Take the cotton swab…


… and cut the stick close to the cotton part.


Like this.


Step 2

Cut a piece of stick – as long as you want the strain to be.


Like this.


Apply a bit of glue on one end of the strain…


… and stick it to the cotton tip, on the other end. Like this. Now it looks like a tree.


Step 3

Paint the cotton part in green.


Step 4

Using your scissors make some cuts…


… like this.


Add more cuts. They are tree branches.


Step 5

Adorn it with glitter glue, then let it dry.


This is our tree.


Step 6

Now is time to fix the strain, using this square bead.


Apply a bit of glue on the strain end…


… and put it through the bead. Add a little more glue around it, just to be sure.


Step 7

Let’s decorate the top of the tree!

Apply glue on the top…


… and put it in gold glitter…


… like this.


Step 8

Use tweezers to gently grasp the top.


Add a layer of glue on the bottom of square bead…


… and put it through the opening of the globe (take the hanger off before that)…


… like this.


Step 9

Make a paper funnel (a paper cone)…


… and put it on the opening of the globe.


Pour sugar through it…


… like this.


Put the hanger back. Now you have a globe with a winter tree and snow.


Isn’t this Winter Tree Globe Ornament adorable?  It is going to look so terrific on your Christmas Tree.  Enjoy it!!

Technorati Tags: , , , , , , , , , , ,

A Collection of Awesomely Yummy Edible Christmas Crafts


A Collection of Awesomely Yummy Edible Christmas Crafts


Crafts come in all different kinds of forms.  Today I’m going to write about Edible Crafts.  And, not just any edible crafts, but Edible Christmas Crafts.  YUMMY!!  Whether you are planning a Christmas party, Christmas decorations or just want to have fun with your kids…. Edible Christmas Crafts will be enjoyed by all.  I scoured the internet looking for yummy edible crafts and I came up with 16 awesome ones that will get your stomach growling.  So, without further ado here is a collection of awesomely yummy edible Christmas crafts for your enjoyment.

Check out our other Christmas Crafts.

A Collection of Awesomely Yummy Edible Christmas Crafts

(1)  Reese’s Peanut Butter Cup Trees


Reese's Peanut Butter Cup Trees


Ok, I love Peanut Butter Cups, so I couldn’t resist this Edible Christmas Craft.  Here Sweet Simple Stuff shows you how to take my favorite candy, Reese’s Peanut Butter Cups and transform them into these adorable Christmas Trees.


(2)  Sipping Snowman


Sipping Snowman


This edible Christmas craft is so cute!!  Busy Bee Kids Crafts shows us how to take marshmallows, white icing, chocolate chips and a straw and create an adorable Sipping Snowman that is delicious!!  It would taste so good in some hot chocolate.


(3)  Gumdrop Penguins


Gumdrop Penguins


I love these crazy pair of penguins!!  And, I bet they are delicious.  I found this edible Christmas craft over at Spoonful.  Not only will your kids love making these gumdrop penguins, but they will absolutely love eating them too.


(4)  Stained Glass Cookie Ornaments


Stained Glass Cookie Ornaments


What a yummy and clever idea.  Kaboose gives us all the details how to take store bought cookie dough and some Lifesaver hard candies and transform them into these beautiful Stained Glass Cookie Ornaments.  Sure, you could just eat the cookies, but imagine how wonderful they would look on your Christmas tree.


(5)  Gingerbread Star Tree


Gingerbread Star Tree


I love how beautiful this Gingerbread Cookie Christmas Tree looks.  But, imagine how your guests at your Christmas party will enjoy this.  They can simply grab a cookie off the tree and nibble on it while they chat with the guests.  How fun!!  Check out Taste of Home for the details.


(6)  Holiday Garland


Holiday Garland


Oh this garland looks so beautiful!!  I love how the colors of the red cranberries contrast against the white popcorn.  It’s just wonderful.  Craft Elf shows you how you too can do this.  This edible Christmas craft takes you back to a simpler time.  And, it makes the Christmas tree just absolutely gorgeous.


(7)  Holiday Fiesta Spread


Holiday Fiesta Spread


I’ve actually had this at a Christmas party before and it is absolutely delicious.  And, it is so cute.  Kraft will show you in great detail how to make this edible Christmas craft for your guests.    This fiesta spread is decorated like a Christmas tree…. so colorful too.


(8)  Marshmallow Wreath


Marshmallow Wreath


Who would have thought marshmallows could look this beautiful as a wreath?  But, it truly does.  It reminds me of a Winter Wonderland.  I found this beautiful wreath at Three Pugs & a Baby.  She explains how the Marshmallow Wreath only takes about 30 minutes.  Can you imagine creating this beautiful wreath in just a half hour?  How wonderful.


(9)  Snowmen Treats


Snowmen Treats


Better Homes & Gardens shows us how to take Hostess Snowballs and transform them into these cutie-patootie Snowmen Treats.  What child wouldn’t love eating this snowmen?  They are just precious…. and I bet absolutely delicious too.


(10)  Gumdrop Wreath


Gumdrop Wreath


I love, love, love the beautiful colors of this wreath.  And, I would imagine the people at your front door will too.  A Pretty Cool Life shows you how to make this beautiful Christmas Wreath in great detail.  If you aren’t crazy about all the colors…. you can even just make a green and red wreath or any color wreath you choose.


(11)  Rudolph the Red Nosed Rein-Pear


Rudolf the Red Nosed Rein Pear


The Lead Chandelier created this adorable Rudolph the Reindeer out of a pear…. hence the name Rudolph the Red Nosed Rein-Pear.  I love the idea!!  It is super cute and the kids will love making it along with you.  Use it as a yummy Christmas decoration.


(12)  Holiday Tree Brownies


Christmas Tree Brownies


Oh these are so festive!!  And, I bet delicious too.  Betty Crocker Recipes gives you all the yummy details on this edible Christmas craft.  I love the miniature candy canes that are stuck into the brownie as a tree stand… it’s just so creative.


(13)  Donut Christmas Tree


Donut Christmas Tree


I know this Donut Tree was used at a Halloween party.  But, I was thinking…. imagine how wonderful this tree would be if it was white powered donuts!!  It would be perfect as a Donut Christmas Tree for a Christmas Party.  Check out One Charming Party for all the details.


(14)  Krispie Treat Christmas Tree


Krispie Treat Christmas Tree


Oh my kids would love this!!  After all, they love Krispie Treats.  Here Cookies & Cups takes some green food coloring and transforms ordinary looking Krispie Treats into a beautiful green Christmas tree.  Add some M&M’s and imagination and your Holiday Christmas tree is born.


(15)  Strawberry Christmas Tree Brownies


Strawberry Christmas Tree Brownies


These adorable bite-size brownies look so tasty…. and so festive too!!  I would have no doubt that they would be a huge hit at any Christmas party.  Erica’s Sweet Tooth shows you how you too can make this yummy edible Christmas craft for yourself.


(16)  Tortilla Christmas Tree


Tortilla Christmas Tree


If you are looking for something yummy and festive to serve your guests at your Christmas party that isn’t sweet…. this is the edible Christmas craft for you.  Better Homes & Gardens shows you how to take mini-wraps or tortillas and create a Christmas Tree.  Let the guests at your party pick at the tree until it’s gone.  Yummy!!

Technorati Tags: , , , , , , , , , , , ,

How to Make Thanksgiving Napkin Rings

People are always wondering how they can make their Thanksgiving festive, but unique at the same time.  In today’s craft I will show you how to do just that.  In this post I will show you how to make Thanksgiving napkin rings made out of walnut shells.  And, inside these walnut shells your guests will find a nice surprise…. a thank you from you.  This is a simple yet fun craft that you and the kids will enjoy making.  Your guests will love these.  So, let’s get started.

Check out our other Thanksgiving Crafts.

Tutorial offered by Laura from Dacian Moon Handmade


Materials Needed

– walnut shells (2 halves)
– ribbon
– pen
– paper
– craft glue
– gold glitter glue
-scissors


Step 1

Cut a small rectangle of paper (about 0.8 cm x 5 cm)…


… and write “Thank you” on it.


Step 2

Apply a bit of glue on one end…


… and place the ribbon on it.


Let it dry.


Step 3

Place the walnut shells on paper and draw a pattern on them with glitter glue.


I made stripes.

Let them dry well.


Step 4

Wrap the note to look like this.


Step 5

Apply a layer of glue on the edges of a walnut shell…


… like this.


Step 6

Put the note inside…


… and close the walnut, like this.


Let it dry well.

Use ribbon to tie napkin.


And, there you have it…. you just made a Thanksgiving Napkin Ring.  Make as many as you need to complete your Thanksgiving table.

Technorati Tags: , , , , , , , , , ,

14 Fun and Festive Thanksgiving Place Card Ideas


14 Fun and Festive Thanksgiving Place Card Ideas


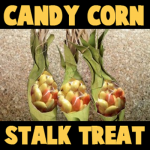
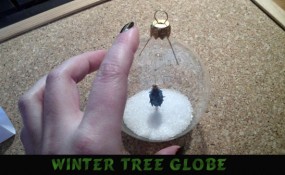
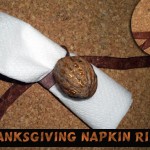
If you are like me you are having a lot of people over at your house for Thanksgiving.  And, with a large amount of people around a table it can sometimes mean a lot of confusion as to where everyone is sitting.  To relieve the stress from you dealing with that during your fun Thanksgiving festivities one way to do this is to have place cards around the table.  This way your guests can easily go to the table and find their seats easily.  Well, with that in mind today’s post will be about fun and festive Thanksgiving place card ideas.  Sure, you can easily just buy place cards in the store, but where is the fun in that?  Today I have put together 14 awesome Thanksgiving place card ideas I have found around the internet.  Surely, you will find the one that is perfect for you and your Thanksgiving get together.

Check out our other Thanksgiving Crafts.

14 Fun and Festive Thanksgiving Place Card Ideas

(1)  Nutshell Place Cards


Nutshell Place Cards


We are going to get right into this Place Card post with this festive Thanksgiving Place Card Idea.  Here Martha Stewart shows us how to take an average walnut and make it into a beautiful Place Card.  Make enough for your entire Thanksgiving party.  I love this idea because it is a beautiful way to give your Thanksgiving table some style without spending too much money.


(2)  Paper Pumpkin Place Cards


Paper Pumpkin Place Cards


These pumpkins are so beautiful.  Made from card stock or patterned paper these pumpkins can be as stylish or simple as your would like.  Passionately Artistic shows us how you could even fill the pumpkin with treats if you want to give the kids at the Thanksgiving Table an extra smile.


(3)  Leaf Place Card


Leaf Place Card


Here is one of our Thanksgiving Place Card Crafts.  Here we use some cardboard and gold paint to give the leaf an authentic look.  We even use a little gold paint on the edges of the cardboard to have the place cards look very elegant.  Check out How to Make Leaf Place Cards.


(4)  Pilgrim Hat Place Cards


Pilgrim Hat Place Cards


These adorable Pilgrim Hat Place Cards are actually made out of black plastic cups.  This Thanksgiving Place Card craft is super easy and the kids will love to make them.  Use a little gold paint to write the names of the people attending on the lip of the hat.  Check out all the craft details at Me and My Insanity.


(5) Terra-Cotta Pilgrim Hat Place Cards


Terra-Cotta Pilgrim Hat Place Cards


Here is a fantastically unique Place Card idea.  Here Mrs. DesignHer shows us how to take some miniature flowerpots and make them into a unique Place Card.  Plus, your guests will have a little treasure to take home to remember your wonderful Thanksgiving party.


(6)  Fun Turkey Place Cards


Fun Turkey Place Cards


Here is a simple and perfectly festive idea for Place Cards.  After all, these place cards have everything you need including a wonderful Thanksgiving Turkey to make both children and adults smile.  I found this place card idea over at Meg Bee Designs.  Here she uses Cardstock and Alphabet Stickers to make her creation.


(7)  Thankful Pilgrim Place Cards


Thankful Pilgrim Place Cards


Here is another one of our Thanksgiving Place Cards crafts.  Here we combine two wonderful things together into this place card.  Firstly, the obvious… it’s a place card.  And secondly, it’s reminds us what Thanksgiving is all about…. being thankful.  On these place cards your guests will write down what they are thankful for and share their thoughts during the festivities.  Make sure to check out how to make these Thankful Pilgrim Place Cards craft.


(8)  Book Page Turkey Place Card


Book Page Turkey Place Card


Oh boy, do I really love these!!  They are just so original and completely unique.  Your guests are sure to love them.  Fiskars shows us how to take discarded book pages or any type of pages you wish and make them into these awesome Place Cards.  Imagine how much your guests will love these.


(9)  Cork Turkey Place Card


Cork Turkey Place Cards


How cool is this Turkey?  So cool!!  And, this turkey is a place card.  Make a whole bunch and you have yourself some Cork Turkey Place Cards.  Made from actual corks…. Parents came up with this splendid idea to make these cork turkeys into place cards.  They are sure to be a big hit at any  Thanksgiving party.


(9)  Whimsical turkey place cards


Whimsical Turkey Place Cards


I know this image is small, but I think you can get the idea that this turkey is awesome.  What is even more awesome about these Turkey Place Cards is that it is made from recycled material.  Got to love that!  Canadian Living shows you how to take yogurt containers and transform them into these cute Place Cards.


(10)  Apple Turkey Place Cards


Apple Turkey Place Cards


Womans Day has the right idea with this one.  Here they take small apples, almonds, fruit lifesavers and some other items and turn it into this awesome looking turkey.  I love the idea…. and I know your guests will too.  Check out their site for the step-by-step how to.


(11)  Rustic Napkin Ring Place Cards


Rustic Napkin Ring Place Cards


Here is another festive and quite elegant Place Card idea from Womans Day.  And, if you don’t mind breaking out the electric drill for a craft… then this is the Place Card craft for you.  Here they take a birch branch and cut them into disks…. write the guest’s name on your disks and your well on your way to replicating these beautiful napkin ring place cards at your house.


(12)  Burlap Button Turkey Place Cards


Burlap Button Turkey Place Cards


I absolutely love these Thanksgiving Place Cards.  I know exactly what it is I like about them…. it is the burlap button.  I love the texture and warmth it gives these place cards.  I found this place card craft over at Factory Direct Craft and I must say you need to check it out for yourself.


(13)  Recycled Paper Place Cards


Recycled Paper Place Cards


This Thanksgiving place card craft is simply adorable.  And, I love that it is made from recycled paper…. that just makes it even better.  I found this craft over at Alpha Mom.  Here she uses junk mail for the feathers.  I love how the junk mail gives the feathers a 3D look.   Make sure your children help you with this place card craft…. they will love helping.


(14)  Finger Stamp Place Cards


Finger Stamp Place Cards


Now, these Thanksgiving Crafts are really festive and cute.  Plus, they are perfect for your children and their little fingers to make.  You can even make these place cards a fun activity for the kids to do before the Thanksgiving meal begins.  Check out Spoonful for all the fun crafty details.

Technorati Tags: , , , , , , , , , , , , , , ,

How to Make a Decorative Corn Filled with Treats for Thanksgiving

Today I am going to continue with the fun Thanksgiving crafts.  In this post I’m going to show you how to make a decorative corn filled with treats for Thanksgiving.  If you are having Thanksgiving dinner at your house then this is a great craft for you.  You can make these treat filled corns for the children attending your Thanksgiving feast.  Sure, they can’t eat the treats before dinner, but these festive corns will be perfect for the children to take home with them.  They will truly get a kick of out them.  So, let’s get started.

Check out our other Thanksgiving Crafts.


How to Make a Decorative Corn Filled with Treats for Thanksgiving


Materials Needed

Two 12 Inch Pieces of Manilla Paper

Pen or Pencil

Scissor

Green & Yellow Crayons, Markers or Colored Pencils

Glue or Paste

Treats or Candy

String


Step 1


Take a 12 inch piece of manilla paper and draw a pattern like this.


Take a 12 inch piece of manilla paper and draw a pattern like this.


Step 2


 Cut out the pattern like this.


Cut out the pattern like this.


Step 3


Color this green.


Color this green.


Step 4


From a piece of about 5 inches square make a roll similar to a cone.


From a piece of about 5 inches square make a roll similar to a cone.  Before rolling color paper yellow.  Make sure to not get it too pointed.  Paste.


Step 5


You can fill corn with treats or candy.  Fold green part around cone and tie with a string.


You can fill corn with treats or candy.  Fold green part around cone and tie with a string.


Step 6


Lightly draw little ovals for corn kernels.


Lightly draw little ovals for corn kernels.

And there you have it.  You have just made a decorative corn filled with treats.  These are a great idea if you are having a Thanksgiving dinner with children.  They will love these.

Technorati Tags: , , , , , , , , , , , ,

How to Make a Mayflower Walnut Boat

I have a fun craft for you…. it is a Thanksgiving craft.  Today I’m going to show you how to make a Mayflower Walnut Boat.  This boat will actually float.  So, it is a craft that will not only be a ton of fun making, but will also be loads of fun playing with.  You will need a bit of help from an adult.  Have an adult break open the walnut with a nutcracker.  It needs to be broken in half…. not crushed.  So, an adult will be able to help you with this.  Let’s get started with this fun craft…. grab the materials needed and we will get to it.

Check out our other Thanksgiving Crafts.


How to Make a Mayflower Walnut Boat


Materials Needed

Walnut

Nutcracker

Paper

Pen or Pencil

Scissors

Clay, Play Doh, Gum or Wax

Toothpick


Step 1


Get a nice walnut.


Get a nice walnut.


Step 2


Adult should split shell without cracking.


Adult should split shell without cracking.


Step 3


Draw a shape that is like a square, but wider at the bottom.


Draw a shape that is like a square, but wider at the bottom.  Now cut it out.


Step 4


Fill with clay, play doh, gum or wax


Fill with clay, play doh, gum or wax (with help).


Step 5


Now take a toothpick and stick it into the gum (or clay or wax) as well as thru the paper twice (as seen).


Now take a toothpick and stick it into the gum (or clay or wax) as well as thru the paper twice (as seen).


Step 6


The boat actually works.... set it to sail in the bathtub.


The boat actually works… set it in the bathtub and blow on its sail.

Technorati Tags: , , , , , , , , , , , ,

How to Make a Pumpkin Milk Jug Candy Holder

Last week I showed you how to make a Milk Jug Vampire Candy Holder.  Well, you seemed to have loved that idea, so I thought I would show you another cool Milk Jug Halloween Craft.  Today I’m going to show you how to make a Pumpkin Milk Jug Candy Holder perfect for handing out candy this Halloween.  Kids will love reaching inside this Pumpkin for the treats…. almost as much as your kids will love making it.  Keep in mind you will need some Adult Help for this craft as a knife and/or a scissor will be needed to cut open the milk jug.  So, let’s get started.

Check out our other Halloween Crafts.


How to Make a Pumpkin Milk Jug Candy Holder


Materials Needed

Milk Jug

Scissors

Knife (for adult only)

Orange, White, Green, Black & Red Paint

Brass Fasteners

Black Marker

Green Foam, Felt or Paper

Paper Plate

Glue

Candy


Step 1


Peel labels off milk jug.


Peel labels off milk jug.


Step 2


Cut milk jug in half.


Cut milk jug in half.


Step 3


Paint both sides orange.


Paint both sides orange.


Step 4


Use brass fasteners to attach both sides... to look like mouth is open.


Use brass fasteners to attach both sides… to look like mouth is open.


It should look like this.


Like this.


It looks like this from the back.


It looks like this from the back.


Step 5


 Draw eyes and nose.


Draw eyes and nose.


Step 6


Paint eyes white.


Paint eyes white.  I painted nose a lighter color.


Step 7


Paint red for lips.


Paint red for lips.


Step 8


Draw a leaf on foam, felt or paper.


Draw a leaf on foam, felt or paper.


Cut it out.


Cut it out.


Step 9


Roll some foam on a triangle like angle.


Roll some foam on a triangle like angle… like this.


It should look like this.


Like this.


Push top in and it stays in place on its own.


Push top in and it stays in place on its own.


Step 10


Push into open spout.


Push into open spout.


Step 11


Paint spout green.


Paint spout green.


Step 12


Outline features with black paint.


Outline features with black paint.


Step 13


Draw a letter C for each eye's pupil.


Draw a letter C for each eye’s pupil.


Step 14


 Draw rectangles on paper plate.


Draw rectangles on paper plate.


Glue in mouth.


Glue in mouth.


Step 15


Shove leaf in the spout.


Shove leaf in the spout.


Step 16


Fill with candy.


Fill with candy.

Wonderful!!  Wasn’t that fun?!  But, the fun doesn’t end there.  Use it to hand out candy to the Trick-or-Treaters….. they will love it!!

You might also like the How to make a Milk Jug Vampire Candy Holder ….. both crafts are perfect for Halloween.

Technorati Tags: , , , , , , , , , , , , ,

How to Make a Haunted House Treat Holder for Halloween

Halloween is coming up quickly.  Before you know it it will be the end of the month and Halloween will be here.  Today we are going to make a Halloween craft.  In this post I’m going to show you how to make a Haunted House Treat Holder for Halloween.  Load it with candy and use it as a Halloween party favor.  Or, if you would prefer…. use it as a Halloween decoration for inside the house.  The kids will love putting on display something they made themselves.  So, let’s get started.

Check out our other Halloween Crafts.


How to Make a Haunted House Treat Holder for Halloween


Materials Needed

Milk Carton

Candy

Tape

A Couple Pieces of White Paper

Colored Construction Paper

Paste / Glue

Scissors

Pencil

Crayons, Markers or Colored Pencils


Step 1


If your milk carton has a circle spout, we will take that out.


If your milk carton has a circle spout, we will take that out.


Step 2


Open up the carton


Open up the carton like this…


Step 3


Push out circle spout.


Push out circle spout.  Then add candy.  Tape shut.


It should look like this.


Like this…


Step 4


Wrap paper around base of carton.


Wrap paper around base of carton.  Paste in place.


It should look like this.


Like this…

Step 5


If there is a lot of excess paper at bottom... cut most of it off.


If there is a lot of excess paper at bottom… cut most of it off.


Push two opposite sides inwards and glue in place.


Push two opposite sides inwards and glue in place.


Then push other 2 sides in and paste.


Then push other 2 sides in and paste.


Step 6


Push corner of paper into triangle on milk carton.


Push corner of paper into triangle on milk carton.  Draw a line where you need to cut.


Cut off excess and glue triangle in place.


Cut off excess and glue triangle in place.

Step 7


 Cut out a long, thinnish piece of paper.


Cut out a long, thinnish piece of paper.  It should be long enough to be the roof.


Fold in half.... draw line on fold.  Then draw squiggly lines for roof's design.


Fold in half…. draw line on fold.  Then draw squiggly lines for roof’s design.


Center roof on top of carton


Center roof on top of carton.  Glue in place.


Step 8


Draw a design on the haunted house.


Draw a design on the haunted house.


Step 9


Finished Haunted House Treat Holder


And there you have you…. you just finished your Haunted House Treat Holder for Halloween.  If you want to use your Haunted House as a toy…. no problem.  You can even go to How to Make a Trick-or-Treat Paper Toy craft and print off the Trick-or-Treat figures you see in the above picture.

Technorati Tags: , , , , , , , , , , , , , , , , ,

18 Cool Mummy Craft Ideas for Halloween


14 Cool Mummy Craft Ideas for Halloween


You are in for a treat today.  I have searched the internet to find what I thought was the best in Mummy crafts for Halloween.  I came up with 18 of my favorite Halloween Mummy crafts.  They are all totally creative and equally creepy.  Some of them are edible, some are meant to be used as decorations and others are actually moveable mummies.  But, I’m sure you will find them all fun and festive.  I hope you have a blast looking at all of these cool mummy craft ideas for Halloween…. I know I did.  So, without further ado…. let’s get started.

Check out our other Halloween Crafts.

18 Cool Mummy Craft Ideas for Halloween

(1)  Craft Stick Mummy


Craft Stick Mummy


I found this silly craft over at First Palette.  This Halloween Mummy Craft is made out of craft sticks and guaze.  And, the finished item is perfectly creepy for Halloween.  Make a few and put them around the house this Halloween.


(2)  Mummy Candy Holder


Mummy Candy Holder


Are you having a Halloween Party this year?  If you are I have the perfect decorations and party favors for you.  How about making this Halloween Mummy Craft.  It’s a Mummy Candy Holder…. the kids are sure to love it.  Check out Parents for all the craft details.


(3) Printable Paper Mummy Toy


Printable Paper Mummy Toy


Here is a paper toy craft from this site…for a paper mummy. This is very easy to make and a lot of fun to play with. Find out how here.

(4)  Bendable Mummy


Bendable Mummy


Here is a great Halloween craft that is made from an old shirt.  This is a great craft to recycle those old T-shirts.  Got to love recyclable crafts.  You want the craft details?  Check out Family Sponge.


(5)  Mummy Cupcakes


Mummy Cupcakes


Ok, I love the yummy crafts…. the edible ones.  Well, these Mummy Cupcakes are certainly no exception.  They are adorable…. and they look delicious.  Get the entire Mummy recipe at The Craft Patch….. make sure to check it out.


(6)  Mummy Sign


Mummy Sign


If you are looking for an outside Halloween decoration craft…. then you have found it here.  I found this Mummy craft over at Woman’s Day.  It is so terribly cute…. I just adore it.  This craft is for the more mature as there is a Saber Saw being used.   Adult Supervision is a must for this craft.

 (7) Mummy Bowling


Mummy Bowling


My daughter’s Girl Scouts troop made these for a Halloween Fair party they had. The Brownies and Daisies loves playing Mummy Bowling. Find out how to make these out of water bottles here.

(8)  Mummy Cookies


Mummy Cookies


Are you throwing a Halloween Party?  If so, you know that you cannot have a Halloween Party without some Halloween Cookies.  And, Halloween is just not Halloween without some Mummy treats.  So, make sure to check out this Mummy Cookie recipe I found over at Crystal and Comp….. the kids are sure to love them!!


(9)  Origami Mummy


Origami Mummy


Here is a simple fun Halloween Mummy craft you are sure to enjoy.  It is an Origami Mummy.  You simply need some origami paper, googly eyes and magic marker and you are good to go.  Make a few and decorate your room for Halloween.  Check out the entire craft at Activity Village.


(10)  Mummy Pumpkins


Mummy Pumpkins


Check out this awesome Halloween Mummy craft.  It combines two of the most popular items for Halloween…. a Pumpkin and Mummy.  It is just so fitting for a Halloween decoration.  You can see the Halloween craft in its entirety by going to Celeb Baby Laundry.

(11) Bead Pipe Cleaner and Bandages Mummy


Bead Pipe Cleaner and Bandages Mummy


Find out how to make these mummies with movable arms and legs. All you will need is bandages, pipe cleaners, and a bead. Learn how to make these mummies with the following instructions.

(12)  Juice Box Mummy


Juice Box Mummy


If you are anything like me…. you have tons of juice boxes at home.  I always try to come up with crafts that use empty juice boxes because I hate just throwing the empty juice boxes away.  Well, when I found this Mummy craft made from recycled juice boxes I was overjoyed.  Check it out for yourself at Kaboose.


(13)  Mummy Jars


Mummy Jars


This is one of my favorite Mummy crafts i found.  It seems to be really easy, but a ton of fun.  Plus, look at the outcome…. you have these glowing mummy jars that can be placed around the house as a Halloween Decoration.  You can take a look at the craft for yourself over at Crafts reDesigned.


(14)  Mummy Door Hanger


Mummy Door Hanger


This Mummy craft is pretty darn cute.  I found the craft over at TLC and I think it is perfect for Halloween.  It can be put on your front door for all the Trick-or-Treaters to see or simply place it on one of your many indoor doors as an inside Halloween Decoration.


(15)  Aged Mummy


Aged Mummy


I love this Mummy craft.  Do you know why?  Because Craftaholics Anonymous made it look pretty authentic by dirtying up the gauze around the mummy’s body.  I love that.    Make sure to check out her site as she will show you too how to make this Aged Mummy.


(16)  Tissue Paper Mummies


Tissue Paper Mummies


I found this great Halloween Mummy craft over at Happy Hooligans.  And, it is super cute!!  They simply used recycled empty toilet paper rolls and white tissue paper…. and these mummies turned out amazing.  They are perfect for decorating…. the kids will love telling everyone they made the mummies themselves.

 (17) Mummy Trick-or-Treat Baskets


Mummy Trick-or-Treat Baskets


Find out how to make these trick-or-treat baskets – it is a lot easier than you would think. They come out looking really unique and fun. Find the instructions here.

(18)  Egyptian Mummy


Egyptian Mummy


Now, I know this isn’t exactly the kind of Mummy you think of when you think of Halloween mummies.  But, I love this craft and had to include it once I found it.  Check it out over at 123 Peppy…. I think you will like it too.

Technorati Tags: , , , , , , ,

Haunted House Crafts Perfect for Halloween


Haunted House Crafts Perfect for Halloween


Halloween is coming up quickly.  After all, it is at the end of this month.  When you think of Halloween what do you think of?  Probably bats, jack-o-lanterns and witches.  But, don’t forget the place they all live.  That’s right…. I’m talking about a Haunted House.  There is not much scarier than a Haunted House.  So, with that being said I am dedicating today’s craft to Haunted Houses.  I scoured the internet looking for an assortment of different kinds of Haunted House crafts perfect for Halloween.  With all 17 of these Haunted House crafts I have listed here you are sure to find one you will love.  So, without further ado….

Haunted House Crafts Perfect for Halloween

(1)   Haunted House Centerpiece


Haunted House Centerpiece


If you are throwing a Halloween party and you are looking for something to have as a centerpiece…. then I have the perfect craft for you.  Busy Bee Kids Crafts shows you how to make this spooky Haunted House Centerpiece step-by-step.


(2)  Paper Bag Haunted House


Paper Bag Haunted House


This Paper Bag Haunted House is perfect for decorating your house for Halloween, but it is also wonderful to use as party favors for a Halloween party.  You can fill these bags with goodies for the kids…. they will love it.  I found this craft over at Kaboose and it looks like a ton of fun.


(3) Haunted House Milk Carton (You can Fill This One with Treats)


Haunted House Milk Carton for Treats


This one is on our site and is made from a simple milk carton or creamer carton. All you have to do is fill with treats or candy, tape closed, wrap with paper, and decorate. Here are the craft instructions.

(4)   Popsicle Stick Haunted House


Popsicle Stick Haunted House


Here is a great Haunted House craft perfect for the youngest of children.  All Kids Network shows you how to make this Halloween craft and it is almost totally made up of Popsicle sticks.  And, we all know how much kids love making things with Popsicle sticks…. almost as much as they love eating the Popsicles.


(5)   Haunted Gingerbread House


Haunted Gingerbread House


Now, tell me how awesome this Haunted House is!!  It is just incredible…. and it is totally edible.  Gotta love that!!  I found this Haunted House craft over at Sisteroo and I hope you love it as much as I do.  This Gingerbread Haunted House makes for a perfect decoration or an edible treat for a Halloween party.

(6) Haunted House Pop Up Cards


Haunted House Pop Up Cards


Here is another Haunted House craft this from this site. Everyone loves pop up cards and this is one of the simplest types that you can make. We will teach you how to make these with just a few slits and a bit of folding. Find out the instructions here.


(7)  Cardboard Box Haunted House


Cardboard Box Haunted House


How cute is this Haunted House?  So cute!!  And, it is made out of an item you probably have laying around the house…. a cardboard box.  I found this Halloween craft over at Spoonful and it is a great find.  Check out this craft and get all the haunted details.


(8)  Spooky S’mores Haunted House


Spooky S'mores Haunted House


YUMMY!!  Here is another edible Haunted House craft.  I love the edible crafts.    If you love S’mores then you are going to surely love this craft.  Check out Kitchen Fun with my 3 Sons for all the yummy spooky details.


(9)  Shoe Box Haunted House


Shoe Box Haunted House


I just love those crafts where you can find the materials needed right in your home.  And, this craft is one of them.  Scribble Press shows you step-by-step how to make this creepy Haunted House out of a shoe box….. very clever!!


(10)  Poster Board Haunted House


Poster Board Haunted House


I love this Haunted House craft!!  I think what I love so much is the fact that this Haunted House is very narrow and tall…. it gives it a very creepy vibe.  Perfect for a Halloween decoration.  I found this Haunted House craft over at Crissy’s Crafts.  You have to check it out for yourself.


(11)  Paper Mâche Haunted House


Paper Mache Haunted House


Kids love working with Paper Mâche…. and making this Paper Mâche Haunted House will be no exception.  And, this haunted house really turns out amazing.  Get all the Halloween craft details over at Woman’s Day.


(12)  Mod Podge Haunted House


Mod Podge Haunted House


How amazing is this Haunted House?  So amazing!!  Mod Podge is a material that kids love working with…. they just do.  I know my children do.  Here B-Inspired Mama shows you how you too can make this incredible Haunted House using Mod Podge.


(13)  Spooky Haunted House


Spooky Haunted House


 AllYou shows you how to take an old dollhouse and make it into this awesome Haunted House.  Your kids are sure to get a kick out of using their old dollhouse and making it into a Haunted House.  Check out the website for all the craft details.


(14)  Heebie Jeebie Haunted House


Heebie Jeebie Haunted House


I found this Haunted House craft over at Crayola.  This Halloween craft is perfect if you are having a Halloween party.  Make a bunch of these Haunted Houses and use them to store candy…. hand them out as a Halloween Party favor.  How fun is that?!


(15)  Cardboard Boxes & Rolls Haunted House


Cardboard Boxes & Rolls Haunted House


Isn’t this a rock’n Haunted House?!  Or, should I say…. Haunted Mansion?!  I love it.  Patheos used different sized cardboard boxes and cardboard rolls to make this Haunted House craft.  It is a clever idea and it came out amazing.  Check out her site to see it for yourself.


(16)  Cereal Box Haunted House


Cereal Box Haunted House


What a great Haunted House.  And, what it totally cool about this Halloween craft is that it is simply made from a cereal box.  I love when you can find your craft materials right at home…. and in this case you can.  Check out Fun Lab Blog for all the Haunted House Craft details.


(17)  Glow in the Dark Haunted House


Glow in the Dark Haunted House


You know what is spooky?  Something that glows in the dark….. like this Haunted House.  I’m not sure why, but an item that has a glowing effect is just 10 times spookier.  And, it’s perfect for Halloween.  Make sure to check out Craft Project Ideas for the step-by-step “how-to” on making this Glow in the Dark Haunted House.

Technorati Tags: , , , , , , , ,

How to Make a Milk Jug Vampire Candy Holder

I have a wonderfully fun Halloween craft for you today.  In this post I’m going to show you how to make a Milk Jug Vampire Candy Holder for Halloween.  What is really cool about this craft is that you probably have all the craft materials needed in your house.  This vampire candy holder is made from a Milk Jug…. just simply wash it out and you are good to go.  You will need a bit of help from an adult cutting the milk jug as it can be difficult to cut.  So, grab the materials needed and let’s get started.

Check out our other Halloween Crafts.


How to Make a Milk Jug Vampire Candy Holder


Material Needed

Milk Jug

Black Marker

Scissors

Paint (color of your choice)

White, Black & Red Paint

Glue

Yarn

Paper Plate

Candy


Step 1


Clean out a milk jug.


Clean out a milk jug.  Take the labels off too.


Step 2


There are indentions in the plastic... I drew lines there for the mouth.


There are indentions in the plastic… I drew lines there for the mouth.


Step 3


Cut out this line.


Cut out this line.  Ask parents for help.


Step 4


 Draw eyes behind the handle.  Draw a nose too.


Draw eyes behind the handle.  Draw a nose too.


Step 5


Paint everything other than the eyes.


Paint everything other than the eyes.  I chose purple… choose any color.


Step 6


Paint eyes white.


Paint eyes white.  I decided to paint the nose a lighter purple… it’s optional.


Step 7


Remember the piece you cut out for the mouth?  Paint it black now.


Remember the piece you cut out for the mouth?  Paint it black now.


Step 8


Draw two triangles.


Draw two triangles on a paper plate.


Step 9


Cut them out.


Cut them out.


Step 10


Glue them in mouth.


Glue them in mouth.


Step 11


Glue black cloak to back of jug.  Outline parts in black.


Glue black cloak to back of jug.  Outline parts in black.


Step 12


Fold lots of yarn in half several times


Fold lots of yarn in half several times…. like this.


Step 13


Tie a string around the middle


Tie a string around the middle…


It should look like this.


Like this.


Step 14


There will be loops on both sides... cut them in half


There will be loops on both sides… cut them in half…


It should look like this.


Like this.


Step 15


Cut off top of jug.  Glue yarn to top of jug for hair.


Cut off top of jug.  Glue yarn to top of jug for hair.


Step 16


Add red paint for blood.... also add candy.


Add red paint for blood…. also add candy.

Isn’t this Milk Jug Vampire Candy Holder so cool?  It is perfect for holding candy this Halloween Season.  You are sure to get lots of comments on this candy holder.

Also, Check out How to Make a Pumpkin Milk Jug Candy Holder.… it’s another great Candy Holder for Halloween.

Technorati Tags: , , , , , , , , , , , , ,

Ideas for Kids to Make Seder Plates for Passover


Ideas for Kids to Make Seder Plates for Passover


Passover will be here in just a couple of days.  And with Passover comes the wonderful Passover Seder.  And, even though we know how fantastic Passover Seder is…. we know how difficult it is to get the kids to sit still and enjoy the Passover Seder.  Well, how about if they help out with the Seder?  The kids can make the Seder Plate for Passover.  Even if it isn’t the main Seder Plate you use for the Seder they can at least work on the Children’s table Passover Seder Plate.  Beings that the children helped make the Passover Seder Plate will hold their attention a little more as they will want to pay attention to see how it will be used during the Seder.  So, scroll through the many Passover Seder Plates crafts below…. you are sure to find the one that works for you and your children.  Have a Happy Passover.

Ideas for Kids to Make Seder Plates for Passover

(1)  Spring Seder Plate


Spring Seder Plate


I found this awesome Seder Plate over at Kaboose.  Here they keep the color green to remind you of spring and all the good times ahead.  What a clever idea!!


(2)  Star of David Seder Plate


Star of David Seder Plate


 Nick Jr. has this Seder Plate Craft all figured out.  They use 6 six inch paper plates to create the Passover Seder Plate…. not to mention a Star of David Coloring Page.  Put it all together to create this awesome Passover Seder Plate.


(3)  Printable Seder Plate Craft


Printable Seder Plate Craft


If you are looking for a super easy Passover Seder Plate Craft then this is the one for you.  Free Kids Crafts gives you this craft that is simply a printable…. print off and cut.  Doesn’t get much easier than that.


(4)  Bright Passover Seder Plate


Bright Passover Seder Plate


Isn’t this a beautiful Passover Seder Plate?  I love the use of bright colors.  Nothing keeps the attention of the little ones more than bright colors.  Parent Dish shows you step-by-step how to make this Seder Plate.


(5)  Porcelain Passover Seder Plate


Porcelain Passover Seder Plate


Family Fun uses an ovenproof plate and glaze paint to prepare their Passover Seder Plate.  They have the right idea as once baked this item is quite durable.  These Seder Plates become special to the child as they will be painting them themselves.


(6) Model Clay Passover Seder Plate


Model Clay Passover Seder Plate


Crayola has an original spin on the traditional Passover Seder Plate.  Their craft is constructed from Model Clay.  Check out their site to get the full details and make this Passover Seder Plate yourself.


(7)  Jeweled Passover Seder Plate


Jeweled Passover Seder Plate


This is a beautiful Passover Seder Plate.  In case you can’t see it, there are lovely stones all around the outside of this plate.  My Activity Maker shows you how you too can make this beautiful Passover Seder Plate.


(8)  Paper Seder Plate


Paper Seder Plate


If you are looking for an easy Passover Seder Plate than this is the craft for you.  Made from a Paper Plate and pictures of the Ceremonial Food this craft doesn’t get any easier.  Check out Joyful Jewish to see how to do this craft.


(9)  Tissue Paper Passover Seder Plate


Tissue Paper Passover Seder Plate


Here is a fun craft to do with the youngest of kids for Passover.  Kids love to work with tissue paper and this Passover Seder Plate Craft has plenty of tissue paper.  Check out Delicate Construction for the full details of the craft.


(10)  Denture Cream Passover Seder Plate


Denture Cream Passover Seder Plate


Yes, you read this right…. this craft was made with Denture Cream.  Holidash used Denture Cream to hold the dishes to the Seder Plate.  Check out the full details on their site… you will have to scroll to the 2nd slide.


(11)  Passover Prep


Passover Prep


I found this Passover Seder Craft over at Maybe Sew.  She has the right idea on how to teach the kids a little bit about each of the foods on the Seder Plate…. she uses different items other than the norm and has the kids guess what they should be.  Check out the site for the full details.

Technorati Tags: , , , , , , , , , , ,