How to Make Pinball Machine Game from Old VCR Tapes Craft

Today we will show you how to make a pinball machine out of an old – recycled VHS / VCR tape. This is a fun craft for older kids and teens.

You might want to check out our other pinball machine making craft


How to Make Pinball Machine Game from Old VCR Tapes Craft


How to Make Pinball Machine Game from Old Recycled VCR Tapes Craft

Crafts Materials Needed

– VCR Tape
– Screw Driver
– Paper
– (optional) Glue Gun (Parental Supervision or Help) or Glue
– (optional) Stickers

Step 1


Step 2 : Making VCR Tape Pinball Machines in Easy Crafts Step


Take the screws out of the vcr / vhs tape to open it up.

Step 2


Step 3 : Making VCR Tape Pinball Machines in Easy Crafts Step


Open up the casing so that the vhs tape looks like this. You can make a Rubber Band Powered Car Out of the 2 Spools if You want.


Step 3


Step 4 : Making VCR Tape Pinball Machines in Easy Crafts Step


Take everything out of the vhs tape so that it looks like this. Store all of the parts as you will use them later.

Step 4


Step 5 : Making VCR Tape Pinball Machines in Easy Crafts Step


Bend the metal part to look like a check mark, as pictured above.

Step 5


Step 6 : Making VCR Tape Pinball Machines in Easy Crafts Step


Use scissors to cut a slit, as pictured above.

Step 6


Step 7 : Making VCR Tape Pinball Machines in Easy Crafts Step


Put check mark through slit and glue it there from the outside of the tape.

Step 7


Step 9 : Making VCR Tape Pinball Machines in Easy Crafts Step


Now cut a hole directly under neath the hole that you see in the metal pieced-check mark that we just glued to the tape.

Step 8


Step 8 : Making VCR Tape Pinball Machines in Easy Crafts Step


Now take a paper clip…


Step 10 : Making VCR Tape Pinball Machines in Easy Crafts Step


And unfold it so that there is a loop on one and … then stick the straight end through the hole in the vhs tape and the metal check mark..

Step 9


Step 11 : Making VCR Tape Pinball Machines in Easy Crafts Step


Now fold the paper clip around the check mark to keep it connected.

Step 10


Step 12 : Making VCR Tape Pinball Machines in Easy Crafts Step


Now glue small parts to inside of the vhs tape for barriers.

Step 11


Step 14 : Making VCR Tape Pinball Machines in Easy Crafts Step


Take the part of the vhs tape that looks like this and…


Step 15 : Making VCR Tape Pinball Machines in Easy Crafts Step


Glue it to the bottom, back side of the tape for a bit of a tilt.

Step 12 (Optional)


Step 16 : Making VCR Tape Pinball Machines in Easy Crafts Step


to make spinners…fold little pieces of paper and fold them like an accordion…backwards and forwards, backwards and forwards…


How to Make Pinball Machine Game from Old VCR Tapes Craft


Then glue the starting piece to the ending piece to form a star like shape.

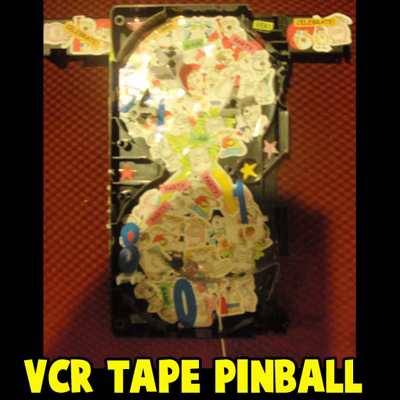
Finished Pinball Machine


How to Make Pinball Machine Game from Old VCR Tapes Craft


I decorated the pinball machine with stickers to make it more fun to look at…but these are optional.

You can use beads or candy to shoot up into the pinball machine…just pull the paper clip down and release.

Now notice that there are numbers on the board. When the marble, or bead or candy lands on one of the barriers, they get that number of points.

You might want to check out our other pinball machine making craft

Here are some other Pinball Making Tutorials Online that will give you some great ideas. Read them below

How to Make a Simple Pinball Machine

FETCH! Pinball Wizard

Design Your Own Pinball Machine.

Use Your Creativity to Make More Obstacles

Fire the marble out of the cannon / plunger by lowering the pencil a bit, putting the marble in the top of the cannon, and then pull the pencil down, and let go. Now hit the flipper to keep the ball up in the air longer. Write the number of points that you get with each turn down on a piece of paper. However…make your pinball machine the way that you WANT it to be…no the way that I want mine to be like.

Have fun!

Technorati Tags: , , , , , , , , , , , , , , , , , , ,

How to Make Rubber band Powered Toy Dump Trucks and Cars Lesson

Today we will show you how to make a rubber band motored dump truck, cars, or other vehicles. It is much easier than you think it would be and it is a lot of fun figuring out ways to make it roll faster or just smoother. If you like a challenge, then go on and find out how to make this rubber band powered vehicle.


How to Make Rubber band Powered Toy Dump Trucks and Cars Lesson


How to Make Rubber band Powered Toy Dump Trucks and Cars Lesson

Crafts Materials Needed

– Plastic Container or Cardboard Box
– Rubber Bands
(optional) Glue Gun (Parental Supervision or Help)
– If can’t use glue gun, then other glue
– Electrical Tape or Duct Tape or Strong Tape
– Old Markers for the Axles (parts that hold the wheels) (however, you can use chopsticks or something else if you want)
– Materials for Wheels (I used Spray Butter Caps and VCR Spools but you can use plastic caps or something else)
– Materials for Top of Truck and Dump Truck Part (I used Disposable plastic and styrofoam containers from around my house)

Step 1 (If You Want to Use VCR Spools)


How to Make Rubber band Powered Toy Dump Trucks and Cars Lesson


Make sure this is a VCR tape that isn’t used any more!! Rewind the tape. Take the screws out of the VCR tape.


How to Make Rubber band Powered Toy Dump Trucks and Cars Lesson


Open up the VCR tape and take out the 2 white / clear spools. You need to take the tape off of the wheels….this is annoying but these are amazing wheels!

These are what the wheels look like now.


Step 2


If you are using old markers for the axles then glue 2 together.

Step 3


Now glue the cap part to the inside of one of the vcr spools.

Step 4


Now poke 2 holes in the truck’s base (mine is a large plastic container).

Make these holes opposite of each other for the back wheels.

Step 5


Now stick the markers through these holes…make sure that the markers looks like they go through the container evenly.

Step 6


Now glue another cap on the end of the marker that doesn’t have a wheel yet. After that is glued, glue the last vcr spool on to that cap.

Step 7


Now lets make the front wheels. I used butter spray caps. Glue the bottom of a marker to the center of the cap.

Glue another marker to the top of the first marker.

Step 8


Now the side that needs a wheel will have a cap on it. Since the cap has a hole in it, I couldn’t get it to glue down to the spray butter cap. But it glued VERY well when I first put electrical tape on the cap and THEN glued it. Try this and hopefully it will work great for you.

Step 9


I then took electrical tape and secured all of the markers together  – just in case.

Step 10


Now cut a hole in the front of the car. I secured the hole with electrical tape so that the hole wouldn’t get bigger with use.

Step 11


Now for the rubber band part of the tutorial. Take a few rubber bands…I used 3. You will need to connect them together like I did above. You loop one around another rubber band and then you pull it through its own self, and then you pull…look at the above pictures to help you.

Do this with all 4 rubber bands.

Step 12


Now wrap it around the markers and pull it through itself.


Electrical tape the rubber band on the back axle.

Then pull it to the front of the car and tie it a few times to make sure that it is secure.

Step 13


To make sure that the car works (before adding to its looks)…get onto the floor (might only work on the rugs if your wooden floors are slippery) and roll the back wheels towards yourself as you crawl backwards. When you feel tension and it feels like it is harder to use, then let go…it should drive all by itself.

Step 14


Now put the plastic cap on the container and then glue the front of the truck onto the surface of the container (in my case I used a mushroom container).

Step 15


I cut out the front of the mushroom container so my kids  can put people in there.

Step 16


To make a dump truck, just tape a plastic container (or cardboard box) on to the back of the truck, but only tape it on the side that is closest to the back of the truck. Now you have a dump truck.


See….

Step 17


How to Make Rubber band Powered Toy Dump Trucks and Cars Lesson


If you want to, you can paint it or draw on it. I also placed the cut-out window part for a decoration on the top of the truck.

I hope that you had fun like I did!

Technorati Tags: , , , , , , , , , , , ,