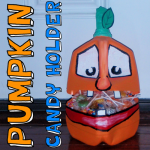
How to Make a Pumpkin Milk Jug Candy Holder

Last week I showed you how to make a Milk Jug Vampire Candy Holder.  Well, you seemed to have loved that idea, so I thought I would show you another cool Milk Jug Halloween Craft.  Today I’m going to show you how to make a Pumpkin Milk Jug Candy Holder perfect for handing out candy this Halloween.  Kids will love reaching inside this Pumpkin for the treats…. almost as much as your kids will love making it.  Keep in mind you will need some Adult Help for this craft as a knife and/or a scissor will be needed to cut open the milk jug.  So, let’s get started.
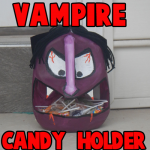
Check out our other Halloween Crafts.


How to Make a Pumpkin Milk Jug Candy Holder


Materials Needed

Milk Jug

Scissors

Knife (for adult only)

Orange, White, Green, Black & Red Paint

Brass Fasteners

Black Marker

Green Foam, Felt or Paper

Paper Plate

Glue

Candy


Step 1


Peel labels off milk jug.


Peel labels off milk jug.


Step 2


Cut milk jug in half.


Cut milk jug in half.


Step 3


Paint both sides orange.


Paint both sides orange.


Step 4


Use brass fasteners to attach both sides... to look like mouth is open.


Use brass fasteners to attach both sides… to look like mouth is open.


It should look like this.


Like this.


It looks like this from the back.


It looks like this from the back.


Step 5


 Draw eyes and nose.


Draw eyes and nose.


Step 6


Paint eyes white.


Paint eyes white.  I painted nose a lighter color.


Step 7


Paint red for lips.


Paint red for lips.


Step 8


Draw a leaf on foam, felt or paper.


Draw a leaf on foam, felt or paper.


Cut it out.


Cut it out.


Step 9


Roll some foam on a triangle like angle.


Roll some foam on a triangle like angle… like this.


It should look like this.


Like this.


Push top in and it stays in place on its own.


Push top in and it stays in place on its own.


Step 10


Push into open spout.


Push into open spout.


Step 11


Paint spout green.


Paint spout green.


Step 12


Outline features with black paint.


Outline features with black paint.


Step 13


Draw a letter C for each eye's pupil.


Draw a letter C for each eye’s pupil.


Step 14


 Draw rectangles on paper plate.


Draw rectangles on paper plate.


Glue in mouth.


Glue in mouth.


Step 15


Shove leaf in the spout.


Shove leaf in the spout.


Step 16


Fill with candy.


Fill with candy.

Wonderful!!  Wasn’t that fun?!  But, the fun doesn’t end there.  Use it to hand out candy to the Trick-or-Treaters….. they will love it!!

You might also like the How to make a Milk Jug Vampire Candy Holder ….. both crafts are perfect for Halloween.

Technorati Tags: , , , , , , , , , , , , ,

How to Make a Milk Jug Vampire Candy Holder

I have a wonderfully fun Halloween craft for you today.  In this post I’m going to show you how to make a Milk Jug Vampire Candy Holder for Halloween.  What is really cool about this craft is that you probably have all the craft materials needed in your house.  This vampire candy holder is made from a Milk Jug…. just simply wash it out and you are good to go.  You will need a bit of help from an adult cutting the milk jug as it can be difficult to cut.  So, grab the materials needed and let’s get started.

Check out our other Halloween Crafts.


How to Make a Milk Jug Vampire Candy Holder


Material Needed

Milk Jug

Black Marker

Scissors

Paint (color of your choice)

White, Black & Red Paint

Glue

Yarn

Paper Plate

Candy


Step 1


Clean out a milk jug.


Clean out a milk jug.  Take the labels off too.


Step 2


There are indentions in the plastic... I drew lines there for the mouth.


There are indentions in the plastic… I drew lines there for the mouth.


Step 3


Cut out this line.


Cut out this line.  Ask parents for help.


Step 4


 Draw eyes behind the handle.  Draw a nose too.


Draw eyes behind the handle.  Draw a nose too.


Step 5


Paint everything other than the eyes.


Paint everything other than the eyes.  I chose purple… choose any color.


Step 6


Paint eyes white.


Paint eyes white.  I decided to paint the nose a lighter purple… it’s optional.


Step 7


Remember the piece you cut out for the mouth?  Paint it black now.


Remember the piece you cut out for the mouth?  Paint it black now.


Step 8


Draw two triangles.


Draw two triangles on a paper plate.


Step 9


Cut them out.


Cut them out.


Step 10


Glue them in mouth.


Glue them in mouth.


Step 11


Glue black cloak to back of jug.  Outline parts in black.


Glue black cloak to back of jug.  Outline parts in black.


Step 12


Fold lots of yarn in half several times


Fold lots of yarn in half several times…. like this.


Step 13


Tie a string around the middle


Tie a string around the middle…


It should look like this.


Like this.


Step 14


There will be loops on both sides... cut them in half


There will be loops on both sides… cut them in half…


It should look like this.


Like this.


Step 15


Cut off top of jug.  Glue yarn to top of jug for hair.


Cut off top of jug.  Glue yarn to top of jug for hair.


Step 16


Add red paint for blood.... also add candy.


Add red paint for blood…. also add candy.

Isn’t this Milk Jug Vampire Candy Holder so cool?  It is perfect for holding candy this Halloween Season.  You are sure to get lots of comments on this candy holder.

Also, Check out How to Make a Pumpkin Milk Jug Candy Holder.… it’s another great Candy Holder for Halloween.

Technorati Tags: , , , , , , , , , , , , ,

15 Spooky Halloween Crafts using Milk Jugs


14 Spooky Halloween Crafts using Milk Jugs


I had no idea how many super cool crafts are out there for Halloween using Milk Jugs.  There are just so many…. and they all are just so cool.   I was searching the internet for some awesomely creepy Halloween crafts and I found some doozies for you.  In this post I have listed 15 spooky Halloween crafts using Milk Jugs.  What’s so wonderful about these Halloween crafts is that they all use milk jugs…. an item that most of us use every day.  So, you are sure to at least have the most important material for these crafts.  Scroll through all 15 of these Halloween milk jug crafts to find some to do with your kids at home.  They will love it.

15 Spooky Halloween Crafts using Milk Jugs

(1)  Spooky Spider


Spooky Spider


Check out this spider.  It’s super awesome and super big…. I love it!!  It will be a wonderful Halloween Decoration this Season.  It is sure to creep out all who see it.  Check out Family Fun to get all the details on this great Halloween Milk Jug Craft.


(2)  Halloween Table Centerpiece


Halloween Table Centerpiece


I don’t know about you, but I’m always looking for a unique way to show off my Halloween spirit with a great centerpiece.  Well, folks I think I found it.  Check out this awesome Halloween Table Centerpiece.  I found it over at The Ramblings of a Crazy Woman and I absolutely dig it!!


(3)  Spirit Jugs


Spirit Jugs


I have a great Halloween Craft for you to use up those extra Milk Jugs you have along with some old Christmas Lights.  Eighteen25 shows us in great detail how to make this amazing looking outside decoration.  By simply decorating a bunch of milk jugs into ghosts you can have a cheap and fun way to decorate the house this Halloween Season.


(4)  Trick-or-Treat Basket


Trick-or-Treat Basket


Every Halloween I look for original ways for the kids to carry their candy.  How about making a unique Trick-or-Treat Basket using a Milk Jug.  I found this great Milk Jug Halloween Craft over at TLC Family.  What is great about using a Milk Jug for this craft is that the Trick-or-Treat Basket will not only be sturdy, but it will be rain proof too.


(5)  Recycled Halloween Windsock


Recycled Halloween Windsock


Here is another fantastic way to use a Milk Jug to make an outside Halloween Decoration.  Here Thrifty Fun shows you how to take a milk jug along with some plastic garbage bags and make a terrific windsock.  The ghost will actually look like he is flying through the night.


(6)  Milk Jug Storm Trooper Helmet


Milk Jug Storm Trooper Helmet


This has got to be one of the most creative ways to use a milk jug for Halloween.  Filth Wizardry shows us step-by-step how to take an everyday milk jug and make it into a storm trooper helmet perfect for dressing up this Halloween.  Any child will not only love making the craft, but using it to dress up too.


(7)  Halloween Monster Yard Lights


Halloween Monster Yard Lights


Here is a wonderfully colorful way to decorate the outside for Halloween.  Take milk jugs and transform them into Monster Yard Lights.  This is a fun way to decorate your yard or walkway and the kids will absolutely love it.  Do you know what they will love even more?  Making them with you.  Check out Crafts by Amanda for all the craft details.


(8)  Milk Jug Pumpkin


Milk Jug Pumpkins


If you are tired of decorating your usual pumpkins…. why not try something a little bit different this year.  Kiwi shows us how to take a milk jug and decorate it into a pumpkin.  Let the kids decorate whatever way they want to come up with unusual and unique pumpkins.  They will become great Halloween decorations and you will create loving memories of the time you made these together.


(9)  Milk Jug Pinata


Milk Jug Pinata


If you are having a Halloween Party this year this is an excellent Halloween craft for you.  You can make this creepy looking Halloween Pinata with the help of Cathie Filian.  Here she describes in great detail how you too can make this one of a kind scary pinata for your next Halloween party.


(10)  Halloween Masks


Halloween Masks


Why not take those extra milk jugs you have and make them into Halloween Masks.  Your kids can be as creative as they would like to.   These Halloween masks are as much fun to make as they are to wear.  Check out TLC Family for all the how-to’s to make this craft.


(11)  Milk Jug Ghost


Milk Jug Ghost


Here is a great Halloween Decoration….. perfect for inside your house.  Because this craft is made with Christmas lights the ghost actually lights up.  Turn off the lights and check out how your Ghost will actually glow.  Spooky, right?  Sure is.  Get all the craft details at She Knows.


(12)  Monster Light Jug


Monster Light Jug


This friendly little monster is not only cute during the day, but also lights up the night!  Not everything about Halloween has to be scary or spooky.  Some little ones just can’t handle too much scary.  For these little ones this Halloween Milk Jug craft is perfect.  Check out Kaboose for all the details on this craft.


(13)  Milk Jug Skeleton


Milk Jug Skeleton


This Halloween Milk Jug Craft is so creative!!  And, it looks like an incredibly fun craft for the kids as well as the adults.  I found this craft over at The Party Animal and I just love it!!  You will need plenty of Milk Jugs for this craft…. 7 to be exact.  But, if your kids drink a lot of milk like my kids… you will have the 7 milk jugs in no time.


(14)  Halloween Milk Jug Lanterns


Halloween Milk Jug Lanterns


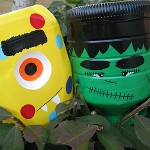
I found this creative Halloween craft over at Ladies Home Journal.    In this post they show you how to take Milk Jugs and make them into Skeletons, Frankensteins and Cats.  Line a bunch of these down your driveway or a path to make a spooky lit area for the trick-or-treaters to walk.


(15)  Milk Jug Vampire Candy Holder


Milk Jug Vampire Candy Holder


We just put up our very own Halloween Milk Jug Craft.  We made a Milk Jug Vampire Candy Holder and it’s perfect for Trick-or-Treat night.  You can actually put tons of candy in the mouth and let the Trick-or-Treaters reach in the Vampire’s mouth and take the candy.  They are sure to get a big kick out of this.

Technorati Tags: , , , , , , , , , ,

How to Make a Cheerful Lunch Box

In this post I’m going to show you how to make a fun and cheerful lunch box.  School has just started and one of the kids favorite times of day is lunch time.  You know what would make it more memorable for them is to make this lunch box craft with your child.  Your child will be so proud to take their homemade lunch box to school with them.  Plus, there will surely be no other person with a matching lunch box.  So, grab the materials needed and let’s get started.

Check out our other Back to School Crafts.

Laura from Dacian Moon Handmade   will show you, step by step, how to make this cheerful and girlish lunch box.


Materials Needed

– recycled box
– cotton cloth
– pen
– craft glue
– scissors
– tulle pieces
– bead
– needle and thread
– auto-adhesive crystal bead


Step 1

Cut 3 squares of tulle…


… place one on top of the other…


… and sew the bead on the middle…


… like this.


Step 2

Place the cloth over the box lid and mark the contour.


Cut it out…


… like this.


Sew the tulle flower on the middle of it…


… like this.


Step 3

Remove (as much as you can) the label on the lid, then add glue on it…


… like this…


… and place the decorated cloth on it.


Step 4

Now, that the lid is ready, is time to decorate the box.


Place the cloth over it and measure the height.


Cut a strip that measures that height.


Apply a layer of glue on it…


… and cover the box. I made some folds on the front to make it less plain.


Take the auto-adhesive crystal…


… and use it to highlight the folds.


Now the decorated lunch box is ready.


Now you have no ordinary lunch box.  You have a very girly and fun lunch box that no other person will have.  Enjoy it!!

Technorati Tags: , , , , , , , ,

Ideas for Kids to Make Seder Plates for Passover


Ideas for Kids to Make Seder Plates for Passover


Passover will be here in just a couple of days.  And with Passover comes the wonderful Passover Seder.  And, even though we know how fantastic Passover Seder is…. we know how difficult it is to get the kids to sit still and enjoy the Passover Seder.  Well, how about if they help out with the Seder?  The kids can make the Seder Plate for Passover.  Even if it isn’t the main Seder Plate you use for the Seder they can at least work on the Children’s table Passover Seder Plate.  Beings that the children helped make the Passover Seder Plate will hold their attention a little more as they will want to pay attention to see how it will be used during the Seder.  So, scroll through the many Passover Seder Plates crafts below…. you are sure to find the one that works for you and your children.  Have a Happy Passover.

Ideas for Kids to Make Seder Plates for Passover

(1)  Spring Seder Plate


Spring Seder Plate


I found this awesome Seder Plate over at Kaboose.  Here they keep the color green to remind you of spring and all the good times ahead.  What a clever idea!!


(2)  Star of David Seder Plate


Star of David Seder Plate


 Nick Jr. has this Seder Plate Craft all figured out.  They use 6 six inch paper plates to create the Passover Seder Plate…. not to mention a Star of David Coloring Page.  Put it all together to create this awesome Passover Seder Plate.


(3)  Printable Seder Plate Craft


Printable Seder Plate Craft


If you are looking for a super easy Passover Seder Plate Craft then this is the one for you.  Free Kids Crafts gives you this craft that is simply a printable…. print off and cut.  Doesn’t get much easier than that.


(4)  Bright Passover Seder Plate


Bright Passover Seder Plate


Isn’t this a beautiful Passover Seder Plate?  I love the use of bright colors.  Nothing keeps the attention of the little ones more than bright colors.  Parent Dish shows you step-by-step how to make this Seder Plate.


(5)  Porcelain Passover Seder Plate


Porcelain Passover Seder Plate


Family Fun uses an ovenproof plate and glaze paint to prepare their Passover Seder Plate.  They have the right idea as once baked this item is quite durable.  These Seder Plates become special to the child as they will be painting them themselves.


(6) Model Clay Passover Seder Plate


Model Clay Passover Seder Plate


Crayola has an original spin on the traditional Passover Seder Plate.  Their craft is constructed from Model Clay.  Check out their site to get the full details and make this Passover Seder Plate yourself.


(7)  Jeweled Passover Seder Plate


Jeweled Passover Seder Plate


This is a beautiful Passover Seder Plate.  In case you can’t see it, there are lovely stones all around the outside of this plate.  My Activity Maker shows you how you too can make this beautiful Passover Seder Plate.


(8)  Paper Seder Plate


Paper Seder Plate


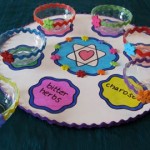
If you are looking for an easy Passover Seder Plate than this is the craft for you.  Made from a Paper Plate and pictures of the Ceremonial Food this craft doesn’t get any easier.  Check out Joyful Jewish to see how to do this craft.


(9)  Tissue Paper Passover Seder Plate


Tissue Paper Passover Seder Plate


Here is a fun craft to do with the youngest of kids for Passover.  Kids love to work with tissue paper and this Passover Seder Plate Craft has plenty of tissue paper.  Check out Delicate Construction for the full details of the craft.


(10)  Denture Cream Passover Seder Plate


Denture Cream Passover Seder Plate


Yes, you read this right…. this craft was made with Denture Cream.  Holidash used Denture Cream to hold the dishes to the Seder Plate.  Check out the full details on their site… you will have to scroll to the 2nd slide.


(11)  Passover Prep


Passover Prep


I found this Passover Seder Craft over at Maybe Sew.  She has the right idea on how to teach the kids a little bit about each of the foods on the Seder Plate…. she uses different items other than the norm and has the kids guess what they should be.  Check out the site for the full details.

Technorati Tags: , , , , , , , , , , ,

11 Cool Outer Space Crafts for Kids


11 Cool Outer Space Crafts for Kids


Today I have some awesome craft ideas for you.  Not just any craft ideas…… today I have cool outer space crafts for you.  I was making my way through the internet looking for some really creative outer space crafts and I think I found them.  I found some that are made from food and others that are made from recycled materials.  I found crafts that are perfect for the youngest of crafters and others that are meant for older children.  But, bottom line…. there is an outer space craft here for you.  So, enough with the chit-chat….. let’s get started.

11 Cool Outer Space Crafts for Kids

(1)  Orbiting Planets


Orbiting Planets


Here is a great craft to help teach your kids about space and all the orbiting planets.  Plus, the craft is a lot of fun.  I found this craft over at BusyBeeKidsCrafts and they have the right idea….. use a fun craft to help teach your children about space.


(2) Recycled Robot Craft

Recycled Robot Craft

Look how cute this robot is….. so cute!!  And, it is made from many recycled materials which makes this robot even cooler.  FreeKidsCrafts shows you how you can take tin foil, an empty container and soda bottle lids and make it into a robot like above.  How fun!!


(3) Alien Pipe Cleaner Craft


Alien Pipe Cleaner Craft


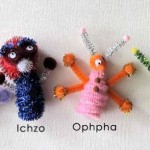
I love this craft…. I just love how these little aliens turn out.  I found this Outer Space craft over at Craft Jr. She shows you step-by-step how to make the aliens as pictured above.  But, she also explains how if you have mismatched colors or pipe cleaners of different sizes it doesn’t matter…. they are aliens after all.


(4) Spiral Galaxy


Spiral Galaxy


What a pretty craft….. I love all the colors in this Spiral Galaxy Craft.  And, believe it or not this Outer Space craft is made with a paper plate and some glow in the dark paint.  TheCraftyClassroom shows you in detail how you too can make this craft.


(5) Out of this World Centerpiece


Out of this World Centerpiece


Here is a cool craft that will be a lot of fun to put together.  Plus, this Out of this World Centerpiece is perfect if you are having an Outer Space birthday party.  Imagine this being the centerpiece at the Birthday table.  Find out how to make this over at MakingFriends.


(6) Grass Head Monster


Grass Head Monster


This is an awesome Outer Space craft because your child is going to have to care for it everyday.  It is actually made with real grass seed so your child will have to care for it everyday for the grass to grow.  Check out FreeKidsCrafts for all the details.


(7) Googly Eyed Green Blobs


Googly Eyed Green Blobs


These are pretty creepy looking…. aren’t they?  I found this craft over at MakeAndTakes and she had it posted as a Halloween craft, but I thought this craft would also fit for an Alien…. so I am including it in this Outer Space crafts list.  Check out her site for all the “how-to” details.


(8)  Rocket Craft


Rocket Craft


Isn’t this Rocket craft just adorable?  I love it!!  And, it is made out of a cardboard box.  What a creative idea.  You will need help from an adult for this craft as they do use a craft knife.  But, it would be so much fun making this with your parents.  Check out Se7en for the step-by-step details.


(9) Space Cake


Space Cake


I just had to add this cake to this post.  I know it really isn’t a craft Per Se, but I think cooking can be quite crafty…. and it is also a ton of fun to do with an adult.  So, check out this Outer Space cake over at FamilyFun and get the recipe to cook with your parents.  This would be great for an Outer Space birthday party.


(10) Puffy Paint Moon Craft


Puffy Paint Moon Craft


AllKidsNetwork shows us how if you mix shaving cream and glue together it makes a lumpy and bumpy surface….. just like the moon.  Actually, what they explain is that while the glue dries it makes a smooth-textured material that puffs while it’s drying and then flattens out.  Isn’t that cool?  Go to AllKidsNetwork to check out the full details.


(11) Space Shuttle Craft


Space Shuttle Craft


Wow, isn’t this space shuttle amazing?!  It’s just so creative.  And, the best part…. It’s made out of mostly all recycled materials.  How cool is that?!  Kids of all ages will love making this space shuttle…. the younger kids will need help from an adult.  Check out LooLeDo for the entire craft tutorial.

Technorati Tags: , , , , , , , , , , ,

How to Make Rubber band Powered Toy Dump Trucks and Cars Lesson

Today we will show you how to make a rubber band motored dump truck, cars, or other vehicles. It is much easier than you think it would be and it is a lot of fun figuring out ways to make it roll faster or just smoother. If you like a challenge, then go on and find out how to make this rubber band powered vehicle.


How to Make Rubber band Powered Toy Dump Trucks and Cars Lesson


How to Make Rubber band Powered Toy Dump Trucks and Cars Lesson

Crafts Materials Needed

– Plastic Container or Cardboard Box
– Rubber Bands
(optional) Glue Gun (Parental Supervision or Help)
– If can’t use glue gun, then other glue
– Electrical Tape or Duct Tape or Strong Tape
– Old Markers for the Axles (parts that hold the wheels) (however, you can use chopsticks or something else if you want)
– Materials for Wheels (I used Spray Butter Caps and VCR Spools but you can use plastic caps or something else)
– Materials for Top of Truck and Dump Truck Part (I used Disposable plastic and styrofoam containers from around my house)

Step 1 (If You Want to Use VCR Spools)


How to Make Rubber band Powered Toy Dump Trucks and Cars Lesson


Make sure this is a VCR tape that isn’t used any more!! Rewind the tape. Take the screws out of the VCR tape.


How to Make Rubber band Powered Toy Dump Trucks and Cars Lesson


Open up the VCR tape and take out the 2 white / clear spools. You need to take the tape off of the wheels….this is annoying but these are amazing wheels!

These are what the wheels look like now.


Step 2


If you are using old markers for the axles then glue 2 together.

Step 3


Now glue the cap part to the inside of one of the vcr spools.

Step 4


Now poke 2 holes in the truck’s base (mine is a large plastic container).

Make these holes opposite of each other for the back wheels.

Step 5


Now stick the markers through these holes…make sure that the markers looks like they go through the container evenly.

Step 6


Now glue another cap on the end of the marker that doesn’t have a wheel yet. After that is glued, glue the last vcr spool on to that cap.

Step 7


Now lets make the front wheels. I used butter spray caps. Glue the bottom of a marker to the center of the cap.

Glue another marker to the top of the first marker.

Step 8


Now the side that needs a wheel will have a cap on it. Since the cap has a hole in it, I couldn’t get it to glue down to the spray butter cap. But it glued VERY well when I first put electrical tape on the cap and THEN glued it. Try this and hopefully it will work great for you.

Step 9


I then took electrical tape and secured all of the markers together  – just in case.

Step 10


Now cut a hole in the front of the car. I secured the hole with electrical tape so that the hole wouldn’t get bigger with use.

Step 11


Now for the rubber band part of the tutorial. Take a few rubber bands…I used 3. You will need to connect them together like I did above. You loop one around another rubber band and then you pull it through its own self, and then you pull…look at the above pictures to help you.

Do this with all 4 rubber bands.

Step 12


Now wrap it around the markers and pull it through itself.


Electrical tape the rubber band on the back axle.

Then pull it to the front of the car and tie it a few times to make sure that it is secure.

Step 13


To make sure that the car works (before adding to its looks)…get onto the floor (might only work on the rugs if your wooden floors are slippery) and roll the back wheels towards yourself as you crawl backwards. When you feel tension and it feels like it is harder to use, then let go…it should drive all by itself.

Step 14


Now put the plastic cap on the container and then glue the front of the truck onto the surface of the container (in my case I used a mushroom container).

Step 15


I cut out the front of the mushroom container so my kids  can put people in there.

Step 16


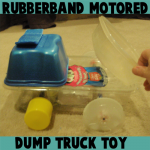
To make a dump truck, just tape a plastic container (or cardboard box) on to the back of the truck, but only tape it on the side that is closest to the back of the truck. Now you have a dump truck.


See….

Step 17


How to Make Rubber band Powered Toy Dump Trucks and Cars Lesson


If you want to, you can paint it or draw on it. I also placed the cut-out window part for a decoration on the top of the truck.

I hope that you had fun like I did!

Technorati Tags: , , , , , , , , , , , ,