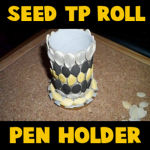
How to make a Pen and Pencil Holder for Fall with Seeds and a Cardboard Tube

Here is a pen and pencil holder craft that is easy to make and a great craft for kids during the Autumn / Fall season. This pencil holder is made with a recycled cardboard tube from a toilet paper roll or a paper towel roll. Use seeds and paint or markers to decorate the cardboard tube. Find the crafts instructions below. Your kids will love this one. Below the Step by step tutorial is offered by Laura from Dacian Moon Handmade
How to Make an Autumn Pencil Holder with Colorful Seeds and a Recycled Toilet Paper Roll


How to make a Pen holder decorated with seeds


CRAFTS MATERIALS NEEDED:

– empty paper towel or toilet paper roll
– lid
– pumpkin seeds
– craft glue
– scissors
– paints (silver, gold, black)
– paintbrush


Step 1.

Take the roll…


… and make some cuts on one end, like this.


Bend them outward…


… like this.


Step 2.

Put glue on the folded part …


… and set it on the lid.


Step 3.

Take a seed and apply a layer of glue on one side of it…


… then place it on the roll.


Cover the roll with seeds…


… like this.


Step 4.

You can let it like this or can use metallic paints to add some style to it…or
you can use any colors that you like. If your parents don’t want you to paint,
you can use markers instead.


Like this 🙂


I hope that your pencil / pen holder looks fantastic. Keep it on your desk or give it to some one that you care about.

Technorati Tags: , , , , , , ,

How to Make a Recycled Lid Christmas Ornament

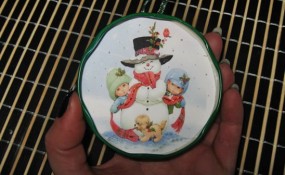
It’s the Christmas season and I’m going to get into the Christmas mood by showing you a fun Christmas craft.   Today I’m going to show you how to make a recycled lid Christmas Ornament.  I love this craft because this ornament is made from recycled materials.  Not only will we use a recycled jar lid, but we will also use a recycled greeting card.  Plus, it turns out super cute.  Your kids will really enjoy making these Christmas ornaments.  So, let’s get started.

Check out our other Christmas Crafts.

Laura from  Dacian Moon Handmade will show you how to make this recycled lid Christmas ornament.


Materials Needed

– recycled lid
– recycled greeting card
– scissors
– glitter glue (I use gold glitter glue but you can choose another color to match the greeting card you use)
– craft glue
– metallic silver paint
– a small piece of ribbon
– pencil


Step 1

Decide what part of the card you want to use and place the lid over it.


Using your pencil trace the contour of the lid…


… then cut out the desired part…


… like this.


Step 2

Apply a layer of glue inside the lid…


… and place the cut card over it.


Step 3

Use glitter glue to make some highlights on the card. I use it on the red parts.


It will look like this.


Step 4

Use metallic silver paint to add some delicate accents on the snow and to make snowflakes. (Instead of the metallic silver paint you can put small amounts of glue and place glitter or cotton wool on it )


The front of our ornament is ready.


Step 5

Turn it over to fix the back.


Draw a circle on the rest of the card and cut it out.


You can use it like this or turn it over with the white part up, as I did.


Take the ribbon and fold it in two…


… apply a small amount of glue on the upper part of the lid, like this…


… and place the folded ribbon over it.


Apply glue on the card circle too…


… and put it on top of them, like this.


Now you can write “Season Greetings” on it and decorate it with glitter glue if you want.


Let it dry well and you have a unique ornament made of recycled materials.


Isn’t that an adorable Christmas ornament?  And, it’s made from recycled materials…. how cool is that?!

Technorati Tags: , , , , , , , , , , , , , , ,

Coolest Earth Day Craft Ideas – Crafts Made from Recycled Materials


Coolest Earth Day Craft Ideas - Crafts Made from Recycled Materials


Earth Day will be here in just a couple of weeks.  In honor of Earth Day I thought I would scour the internet looking for cool ideas for Earth Day crafts.  All of the crafts that I found and have listed here are made from recycled materials.  Earth Day is a special day to celebrate the Earth and to increase awareness and appreciation of the Earth’s natural environment.  And, I think making crafts from recycled materials such as the ones found here is a great way to teach children about recycling and the importance of doing that to help save our Earth.  So, without further ado….

Coolest Earth Day Craft Ideas

(1)  Newspaper Roses


Newspaper Roses


Look how beautiful these Roses are?  They really are lovely & they are completely made from recycled newspapers.  Check out the craft and all its details over at Zakka Life.


(2)  Serving Tray


Serving Tray


I love, love, love this idea!!  Crafty Nest went to a Salvage Yard and noticed that there were old cupboards there.  She picked up a white one and with a little creativity and a lot of fun she was able to make this beautiful serving tray.  Check out her website so you too can make this.


(3)  Can-Do Robots


Can-Do Robots


Made from tin cans these robots are so freakin cute.  What is really cool is that their features are made of magnets, so they can be removed.  Which makes these robots like a Mr. Potato Head…. How fun is that?!  Check out the craft details over at Family Fun.


(4)  Cardboard Ottoman or Side Table


Cardboard Ottoman or Side Table


What a clever and creative idea!!  Made from recycled cardboard tubes you can choose to make either a side table or an ottoman…. or even make both.  When you look at them from above they are actually daisies.   Check out Esprit Cabane for all the crafting details.


(5)  Smashed Soda Can Animals


Smashed Soda Can Animals


Ok, this cow is really cute, isn’t he?!  But, wait till you check out Fave Crafts….. they have not only a cow, but they will show you how to make a pig and a bear too.  Make all three recycled can crafts and you will have a beginning to your very own recycled animal farm.


(6)  Milk Jug Shade


Milk Jug Shade


Now, this recycled craft turns out beautiful, doesn’t it?  Honestly, if I saw this I would have no idea it was actually made from recycled milk jugs.  But, it is.  I found this craft over at Mother Earth News.  Check out their site for all the wonderful craft details.


(7)  Recycled Picnic Basket


Recycled Picnic Basket


I found this recycled picnic basket over at bron marshall and for the main basket it is actually made from a recycled beer six-pack.  Isn’t that a clever idea?  They other container is actually made from a recycled half dozen egg carton…. they simply added a handle.  Make sure to check out their site for the full craft details.


(8)  Newspaper Basket


Newspaper Basket


This is an amazing basket!!  And, it is completely made from Newspaper.  Look how sturdy it looks too…. I love it.   How About Orange shows you step-by-step how to make this basket yourself.


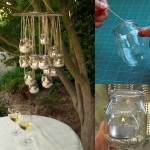
(9)  Recycled Glass Chandelier


Recycled Glass Chandelier


Oh I just love this recycled craft idea…. it might just be my favorite.  I found this recycled craft over at Casa Sugar.    With a few recycled materials and some tea lights  you too can have this stunning glass chandelier.  I love the way they show this chandelier being outside…. it would be perfect for a fun outside party.


(10)  Creative Notepads


Creative Notepads


Here is a creative way to recycle those leftover notebook pages and even those left over paper scraps.  Esprit Cabane shows us how to take those leftover paper products and make them into cute little pocket size notepads.  Check out her site for the full details.


(11)  Toilet Paper Tube Albums


Toilet Paper Tube Albums


These Toilet Paper Tube Albums are just precious.  They are a beautiful way to store special keepsakes and pictures of events that you don’t want to lose.  Those Northern Skies shows you step-by-step how you too can make these albums from recycled toilet paper tubes.


(12)  Magazine Boxes


Magazine Boxes


Here is a creative and imaginative way to recycle those stacks of magazines you keep at home.  When made like the tutorial on Abstract Octopus you can actually store things in these boxes.  Check out the site for the full craft details.


(13)  Plastic Cup Earrings


Plastic Cup Earrings


Aren’t these earrings adorable?  You would never realize they were made from a plastic cup unless I told you.  I found this idea over at Punk Projects and I think it is a great way to recycle plastic cups… plus the craft is fun to do.  Make sure to check out her website for the details.

Technorati Tags: , , , , , , , , ,

How to Make a Glove Bunny for Easter

Get ready for a fun and creative craft because I have just that for you today.  In this post I am going to show you how to make a Glove Bunny for Easter.  That’s right…. it’s an Easter bunny made out of a Glove.  This is a great craft to do to actually use that glove that you no longer have the pair for.  After stuffing the glove you have a nice, cuddly Easter Bunny that would be perfect as an Easter decoration or a nice cuddly friend.  The choice is yours.  So, let’s get started.

Check out our other Easter Crafts.


How to Make a Glove Bunny for Easter


Materials Needed

Glove

2 Safety Pins

Stuffing

Glue

Clothespins or Clips

Cap

yarn

Construction Paper

Ribbon or Twist Tie

Cotton Ball


Step 1


Get a glove.


Get a glove.  Then fold middle finger down and the two outside fingers can be pushed to the back.


This is what the other side looks like.


This is what the other side looks like.


Step 2


Pin middle finger down from inside of glove.


Pin middle finger down from inside of glove.


Step 3


Fill with stuffing.


Fill with stuffing.


Step 4


Fold bottom part inside glove.


Fold bottom part inside glove.


Step 5


Glue and clip shut.


Glue and clip shut.


Step 6


Get a cap.


Get a cap.


Fill cap with glue.


Fill cap with glue.  Fill with tiny, cut pieces of yarn… as well as tiny little paper eggs that you cut out.


For a tiny handle use a ribbon or twist tie.


For a tiny handle use a ribbon or twist tie.


Step 7


Put tiny basket handle over one arm and then pin both arms together.


Put tiny basket handle over one arm and then pin both arms together.  Pin from behind arms.


Step 8


Glue cotton ball to back.


Glue cotton ball to back.

And, that’s it…. you just finished making your Glove Bunny for Easter.  Isn’t he a cutie patootie?!  Let me know how your Glove Bunny turned out in the comments below.  And, take a picture of it too and post that with the comment as well…. I’d love to see it.

Technorati Tags: , , , , , , , , , ,

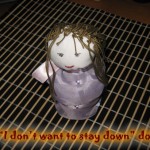
How to Make an “I Don’t Want to Stay Down” Doll

Today I’m going to show you how to make a traditional Romanian Toy.  It is called a “Hopa Mitica” Doll.  But, we will call it an “I Don’t Want to Stay Down” Doll because this doll will not stay down.  When you try to lay it down it will pop right back up.  It’s a cute, funny toy that will be a ton of fun to make…. almost as much fun as it will be playing with the Doll.  So, grab the materials needed and let’s get started with the crafting fun.

Check out our other Doll Making Crafts.

Laura from Dacian Moon Handmade will show you this craft step-by-step.


Our doll will not be made of wood, so …


Materials Needed

– round top (I use a round top from a roll-on)
– scissors
– a red marker and a black one
– 2 cloth pieces – one white or light pink for the face and one colored for the dress
– anti-shock wrap (bubble wrap)
– yarn (whatever color you want her hair to be) and needle
– 1 toothpick
– weights (could be anything heavy but small, it should stay on the bottom of the round top.)
– one piece of ribbon


Step 1

Make a ball (not perfect, of course) from the bubble wrap…


… roll up the white cloth around it…


… and tie it with a piece of yarn. This will be the head.


Step 2

Use the needle to add hair to the head, like in the picture.


Cut the yarn near the needle…


… and make a knot (or two) with the two parts of yarn.


Add as many yarn pieces until you are happy with the result. An alternate method is to glue the yarn to the head of the doll.


Step 3

Now we will place the weights in the round top. They should stay on the bottom of it. You can place there just enough weights to keep the round top up. If you will add more, the doll will not work.


Step 4

Make another ball of bubble wrap …


… and stuff it in the round top, in order to keep the weights in place.


Step 5

Place the toothpick on the lower part of the head, like in the picture.


Step 6

Roll up the rest of the bubble wrap around the toothpick…


… and fix it on top of the other bubble wrap, on the round top.


Step 7

Take the colored cloth …


… and wrap it around the doll, keeping out the head.


Step 8

Tie the cloth with the ribbon, at the base of the head. Take care to let her hair out too.


The doll will look like that.


Step 9

Using the markers, draw eyes and mouth.


And that’s it.


Now try to put her down.


She will jump up …


… waiting to play with you.


And that is how you make your “I Don’t Want to Stay Down” Doll.  Try and knock her over and see what happens…. she pops right back up again ready to play some more.  Have fun!!

Technorati Tags: , , , , , , , , ,

Making an Alphabet Letters Memory Game from Milk Jug Caps with Printables and Instructions for Kids

Today I will show you how to make a really cool Memory game that is great for any age child, but especially good for preschoolers and Kindergarteners who are still working on Alphabet Letters recognition. If you don’t have enough Milk Jug caps, you could also use coins, checkers, cardboard, or whatever else you have lying around the house.

DON’T USE WATER BOTTLE CAPS – USE LARGE MILK CAPS TO ENSURE THE CHILD WON’T BE ABLE TO SWALLOW THEM! EITHER WAY, WATCH THE CHILD TO MAKE SURE THEY DON’T INGEST THE CAPS!


Making a Memory Game from Bottle Caps with Printables and Instructions for Kids


Making a Memory Game from Bottle Caps with Printables and Instructions for Kids

Crafts Materials Needed

– 52  Milk Bottle Caps

– Glue

– Printer and Paper

– Scissors


Step 1 : Print Out the Bottle Cap Letters

Pick the Letters that you want below (choose from color or black and white, as well as milk jug bottle caps or water bottle caps). Print out the templates twice as you are going to be playing a matching game in which you need 2 of every letter.


Black and White Water Bottle Caps Letters


Click on Above Image for BLACK AND WHITE WATER BOTTLE CAPS


Colorized Water Bottle Caps


Click on Above Image for COLORIZED WATER BOTTLE CAPS


Black and White Milk Bottles Caps Letters


Click on Above Image for BLACK AND WHITE MILK BOTTLE CAPS


Black and White Milk Bottles Caps Letters


Click on Above Image for BLACK AND WHITE MILK BOTTLE CAPS Part 2


Colorized Milk Bottle Caps Letters


Click on Above Image for COLORIZED MILK BOTTLE CAPS


Colorized Milk Bottles Caps Letters Part 2


Click on Above Image for COLORIZED MILK BOTTLE CAPS Part 2


Step 2 : Attaching Letters to Bottle Caps


Making a Memory Game from Bottle Caps with Printables and Instructions for Kids


To attach the letters to the milk jug caps, either glue them to the top or simple insert them inside the cap (which depending on the size of the cap, might not even need glue. If you are using coins…simply tape the letters to the coins.

How to Play Alphabet Memory Game

(1) Make sure that all the caps are messed up so that they aren’t in order.

(2)  Turn all of the caps over so you cannot see the letters anymore.

(3) Place them in neat rows.

(4) A player turns over 2 caps.

….. If there is a match, they put those caps in their own pile and then gets to take another turn.

….. If there is NOT a match, the player then turns the caps back over ( in the same spot that they found them) .   The next player then gets to take a turn.

(5) The game is over when all of the matches are found. The player with the most caps wins the game.

Technorati Tags: , , , , , , , , , , , , ,

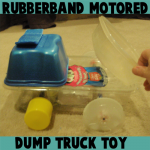
How to Make Rubber band Powered Toy Dump Trucks and Cars Lesson

Today we will show you how to make a rubber band motored dump truck, cars, or other vehicles. It is much easier than you think it would be and it is a lot of fun figuring out ways to make it roll faster or just smoother. If you like a challenge, then go on and find out how to make this rubber band powered vehicle.


How to Make Rubber band Powered Toy Dump Trucks and Cars Lesson


How to Make Rubber band Powered Toy Dump Trucks and Cars Lesson

Crafts Materials Needed

– Plastic Container or Cardboard Box
– Rubber Bands
(optional) Glue Gun (Parental Supervision or Help)
– If can’t use glue gun, then other glue
– Electrical Tape or Duct Tape or Strong Tape
– Old Markers for the Axles (parts that hold the wheels) (however, you can use chopsticks or something else if you want)
– Materials for Wheels (I used Spray Butter Caps and VCR Spools but you can use plastic caps or something else)
– Materials for Top of Truck and Dump Truck Part (I used Disposable plastic and styrofoam containers from around my house)

Step 1 (If You Want to Use VCR Spools)


How to Make Rubber band Powered Toy Dump Trucks and Cars Lesson


Make sure this is a VCR tape that isn’t used any more!! Rewind the tape. Take the screws out of the VCR tape.


How to Make Rubber band Powered Toy Dump Trucks and Cars Lesson


Open up the VCR tape and take out the 2 white / clear spools. You need to take the tape off of the wheels….this is annoying but these are amazing wheels!

These are what the wheels look like now.


Step 2


If you are using old markers for the axles then glue 2 together.

Step 3


Now glue the cap part to the inside of one of the vcr spools.

Step 4


Now poke 2 holes in the truck’s base (mine is a large plastic container).

Make these holes opposite of each other for the back wheels.

Step 5


Now stick the markers through these holes…make sure that the markers looks like they go through the container evenly.

Step 6


Now glue another cap on the end of the marker that doesn’t have a wheel yet. After that is glued, glue the last vcr spool on to that cap.

Step 7


Now lets make the front wheels. I used butter spray caps. Glue the bottom of a marker to the center of the cap.

Glue another marker to the top of the first marker.

Step 8


Now the side that needs a wheel will have a cap on it. Since the cap has a hole in it, I couldn’t get it to glue down to the spray butter cap. But it glued VERY well when I first put electrical tape on the cap and THEN glued it. Try this and hopefully it will work great for you.

Step 9


I then took electrical tape and secured all of the markers together  – just in case.

Step 10


Now cut a hole in the front of the car. I secured the hole with electrical tape so that the hole wouldn’t get bigger with use.

Step 11


Now for the rubber band part of the tutorial. Take a few rubber bands…I used 3. You will need to connect them together like I did above. You loop one around another rubber band and then you pull it through its own self, and then you pull…look at the above pictures to help you.

Do this with all 4 rubber bands.

Step 12


Now wrap it around the markers and pull it through itself.


Electrical tape the rubber band on the back axle.

Then pull it to the front of the car and tie it a few times to make sure that it is secure.

Step 13


To make sure that the car works (before adding to its looks)…get onto the floor (might only work on the rugs if your wooden floors are slippery) and roll the back wheels towards yourself as you crawl backwards. When you feel tension and it feels like it is harder to use, then let go…it should drive all by itself.

Step 14


Now put the plastic cap on the container and then glue the front of the truck onto the surface of the container (in my case I used a mushroom container).

Step 15


I cut out the front of the mushroom container so my kids  can put people in there.

Step 16


To make a dump truck, just tape a plastic container (or cardboard box) on to the back of the truck, but only tape it on the side that is closest to the back of the truck. Now you have a dump truck.


See….

Step 17


How to Make Rubber band Powered Toy Dump Trucks and Cars Lesson


If you want to, you can paint it or draw on it. I also placed the cut-out window part for a decoration on the top of the truck.

I hope that you had fun like I did!

Technorati Tags: , , , , , , , , , , , ,

How to Make Cardboard Tabletop Billiards Pool Table Craft for Kids

So what if you can’t afford a big expensive pool table to play billiards with. Today we will show you how to make a tabletop billiards game that you can make with a recycled cardboard box and some checkers (or bottle caps). If you can flick with your finger, than you will be able to play this game. Instructions for building your own cardboard pool table is illustrated below.


How to Make a Toy Pool Table with Checkers and Cardboard


How to Make Cardboard Tabletop Billiards Pool Table Craft for Kids

Crafts Materials Needed

– A cardboard box, preferably with low sides (but you can also just cut it to be a low box.  (About 30 inches by 20 inches would be good)

– Checkers or milk container crafts … you need 21 caps or checkers.

– felt or paint

– A paper or plastic cup

– tape

– glue

– scissors

– tape

Step 1


Step 1 : Making Cardboard Billiards Pool Table Games Crafts Activity


If you don’t have a low-sides box then cut it down so the sides are low.

Step 2


Step 2 : Making Cardboard Billiards Pool Table Games Crafts Activity


To make this look more like a pool table, you want red or green paint or felt on the bottom of the table. This is just decorative, so if you don’t have either felt or paint, then pass by this step.

Step 3


Step 3 : Making Cardboard Billiards Pool Table Games Crafts Activity


When paint or glue is dry, then you can move on to this step. Take the cut and trace out circles on all 4 corners of the box. Cut out these circles on all 4 sides.

Step 4


Step 4 : Making Cardboard Billiards Pool Table Games Crafts Activity


If your Mom has any old stockings, ask her if you can use them for this project. As a last resort, you can use socks, but stockings are preferable. Cut the feet off of 4 feet on either stockings or socks.

Step 5


Step 5 : Making Cardboard Billiards Pool Table Games Crafts Activity


Turn the box over and paste the stockings around the circles..these will be the pool table’s pockets where the pieces will be caught.

Step 5


Step 6 : Making Cardboard Billiards Pool Table Games Crafts Activity


Now take very thin cardboard and cut a thin strip from it.

Step 6


Step 7 : Making Cardboard Billiards Pool Table Games Crafts Activity


Now wrap this thin cardboard around the third finger…this is your flicking finger. This will help you flick without it being painful. Don’t do it too tight or you will lose circulation in your finger.

Wrap clear tape all around this finger to keep it in place.

Step 7

Do you have checkers? If the answer is yes…then make sure that you have 10 black checkers and 10 red checkers. You also need one piece that is a different color. You can paint that other piece another color or take a white piece of paper and tape or glue it to the extra piece.

If you don’t have checkers, than you will need 21 milk carton caps.  You need 10 caps in one color, 10 in another color, and one cap that is another color. In the example picture below, we have 10 black, 10 red, and 1 white. You can use paint or buy containers with specific color caps, though this could take forever.

Step 8


How to Make a Toy Pool Table with Checkers and Cardboard


The above picture illustrates that way that you set up the table. You put the one white piece in the center of the board and then you put the other pieces the way that you see above.

How to Play Flicking Finger Billiards

Each Player or Team Has a Color. The Team or Player who Has Chosen to be black, goes first.

The player with a black checker, tries to flick it against a red checker to get it into one of the 4 pockets. If he DOES get a red checker into a corner pocket, then he gets to go again. If he does not get a red checker into a pocket, then it is the red checker player’s turn. The player with a red checker, needs to try to flick his red checker into a black checker to make the black checker go into a pocket.

The players should try to avoid hitting the white checker into a pocket. If either player flicks the white checker into a pocket, then he will need to take that white checker  AND one of his checkers out of the pocket and back onto the table.

The first player to flick all of the other players checkers into the pockets wins.

Technorati Tags: , , , , , , , , , ,