How to Make a Bow Tie for New Year Eve Party

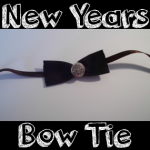
Are you allowed to stay up until midnight on New Years Eve and want to look all dressed up and spiffy? Here is a cute craft for kids to make a bow tie to wear an outfit with a classic style, perfect for any New Year party. Here is the step by step tutorial offered by Laura from Dacian Moon Handmade

You Might Also Like Our Other New Years Crafts


How to Make a Bow Tie for New Year Eve Party


How to Make a Bow Tie for New Year Eve Party

CRAFTS MATERIALS NEEDED:

– material or canvas (a rectangle of  about 8 cm x 5 cm)
– metallic button
– scissors
– ribbon
– needle and thread


IMG_3019


Step 1.

Fold the canvas in two lengthwise.


IMG_3020


Sew the two sides together…


IMG_3021


Like this.


IMG_3022


Step 2.

Bend so that the cloth will be sewn on center.


IMG_3023


Sew the new edge…


IMG_3025


… like this.


IMG_3027


Sew the other edge too.


IMG_3028


Step 3.

Turn it back in front.


IMG_3029


Make a seam in the middle, parallel to the edges.


IMG_3034


Pull the thread…


IMG_3035


… like this.


IMG_3036


Step 4.

Put the button on the needle…


IMG_3037


… and sew it over the middle seam.


IMG_3039


Step 5.

Cut the ribbon in half…


IMG_3041


… and sew it on the back of your bow…


IMG_3042


… like this.


IMG_3043


Your chic bow tie is ready.


IMG_3044


And there you have it, a cute little bow tie to wean on New Years Eve to celebrate the New Year in style! I hope that you had fun!

You Might Also Like Our Other New Years Crafts

Technorati Tags: , , , ,

How to Make Your Own Personal Microphone Broadcast System

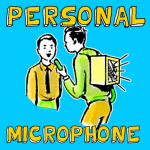
This is a craft to make a simple & personal microphone machine that you wear on your back. There are no wires or technology here, it is made simply with a box, hose, funnel, and a few other items. Any boy or girl can make this simple home broadcasting system, through which you can really “broadcast.” However, mom or dad should probably be there to assist you. This might be good to include with a Halloween costume as you can make creepy sounds broadcast out of your back…depending on what your costume is.

How to Make Your Own Personal Microphone Broadcast System


How to Make Your Own Personal Microphone Broadcast System


CRAFTS MATERIALS NEEDED:

Large cardboard box

Brass paper fasteners

Piece of garden hose (ask mom or dad first)

Piece of window screening (ask mom or dad first)

Funnel

Scotch tape

Old belt or strap

Paints & brush

Scissors

Long nail (ask mom or dad first)

Glue

How to Make Them:

Step 1

Remove the cover from the box and throw it away as you will not need it. On the opposite side of the opening, cut out a window, leaving a 2 inch margin all around.

Step 2


Cut a piece of window screening a little larger  than the window opening, and glue it over the opening from the inside


Cut a piece of window screening a little larger  than the window opening, and glue it over the opening from the inside, as in illustration A.


Step 3


Drive a long nail through the hose to prevent it from slipping out of the hole in the carton


Make a small round hole in the bottom of the box, and pull a piece of garden hose up through the hole. Insert the snout of the tin funnel into the end of the hose inside the carton. Make the hose fit tightly over the funnel snout by wrapping Scotch tape around it. Drive a long nail through the hose to prevent it from slipping out of the hole in the carton, as in illustration B.

Step 4


Fasten the belt shoulder straps to the top and the bottom of the carton with brass paper fasteners


Fasten the belt shoulder straps to the top and the bottom of the carton with brass paper fasteners, as in Illustration C.

Step 5


The person who is broadcasting speaks into the loose end of the hose in the operator's hands


To broadcast thru the system, the user slips the straps over his shoulders, with the open end of the device to his back, and the loose end of the hose in his hand. The person who is broadcasting speaks into the loose end of the hose in the operator’s hands, as in illustration D.  His voice is transmitted through the hose, through the funnel, and out through the screened window at the back of the Walkie-Talkie Like Microphone Machine.

Technorati Tags: , , , , , , ,

How to make a Castle Pencil Holder

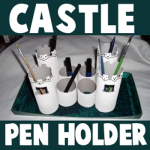
Here is a unique pencil holder made from recycled toilet paper rolls (or paper towel rolls). It is also a special pencil holder  for boys, because every boy is a knight who need a castle… of course 😉 Laura from  Dacian Moon Handmade  will show you, step by step, how to make it.

How to make a Castle Pencil Holder


Cardboard Tube Castle Pencil Holders


CRAFTS MATERIALS NEEDED:

– recycled paper rolls
– scissors
– glue
– paints
– paintbrush
– rectangle cardboard box lid


IMG_6760


Step 1.

Cut every roll in half.


IMG_6761


Like this.


IMG_6762


Step 2.

Use green paint to give the cap color – like grass. You also can use grey for paved roads…


IMG_6764


Cover all the surface with paint.


IMG_6765


Add as many layers of paint until you are happy with the result.


IMG_6769


Step 3.

Let’s give shape to the rolls.


IMG_6771


On two bigger rolls draw battlements and one window…


IMG_6772


… on the other bigger rolls draw only battlements. Like this.


IMG_6773


Cut them off.


IMG_6774


Finally, our towers will look like this.


IMG_6775


Step 4.

Let’s paint the castle. Mine will be white with some black decorations.


IMG_6778


Paint them like this…


IMG_6779


Let them dry, then draw your decorations using a toothbrush.


IMG_6780


Step 5.

Apply a layer of glue on a tower base


IMG_6781


… and put it in its place.


IMG_6782


Do the same with all rolls. Let them dry well.


IMG_6783


Now your castle is ready to be populated with pens and pencils 😀


IMG_6784


Technorati Tags: , , , , , ,

How to Make Leather Wallets with Stitching Craft for Kids & Teens

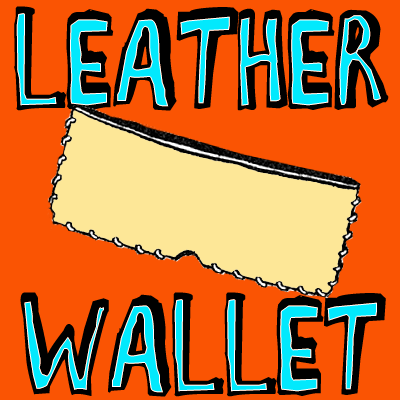
Here is a great project for groups of kids…for Summer Camps, After-school programs, as well as in school settings. This craft is for making a leather wallet that is laced together. This is a very basic leather wallet craft and I think you will be able to follow it with some adult supervision. This craft requires adult supervision and assistance! Please refer to our article about Working with Leather!

You Might Enjoy Our Leather Crafts

How to Make Leather Wallets with Stitching Craft for Kids & Teens


How to Make Leather Wallets with Stitching Craft for Kids & Teens


CRAFTS MATERIALS NEEDED:

Leather

Cutting knife and board (For Adult to Use)

Steel angle (With Adult Supervision)

#0 Punch

3/32″ goatskin (or whatever leather you have on hand)

Rubber cement

How to Make These Leather Laced Wallets

Step 1


leather-wallets-01


(Adult Should Do This Part) Using steel angle and knife, cut two pieces of leather 9″ x 31/2″, as in Figure 1.


 Step 2


leather-wallets-02


Fold one piece of leather in half, and punch a small hole in the center to allow for folding. Open leather up, as in Figure 2.

 Step 3


leather-wallets-03


Run spacing wheel on three sides of both pieces of leather, 1/8 ” from the edge, as in Figure 3.

 Step 4


leather-wallets-04


Skive wrong side of leather on three sides where the pieces are to be joined, as in heavy line in Figure 4. (Here is How You Skive)

 Step 5


leather-wallets-05


Cement skived areas and make holes for lacing using fib and mallet or #0 punch, as in Figure 5.

 Step 6


leather-wallets-06


Lace pieces of wallet together using whip stitch, as in Figure 6.  (Here is How You Use the Whip Stitch)


You Might Enjoy Our Leather Crafts

Technorati Tags: , , , , , , ,

Puppets for Thumb wrestling: Father’s Day Gift

Here’s a Father’s day gift that guarantees hours of fun. Make a set of thumb puppets for your dad and yourself, and play thumb wrestling. The simple illustrated instructions to make the thumb puppets follow:


Craft materials required:

-White fabric

-black yarn

-ribbon

-scissors

-needle and thread

-fabric glue

-Permanent marker


Step 1:

Cut out a piece of cloth double the length of your thumb and about an inch wider than the width of your thumb.


Step 2:

Fold it into half and stitch along the two sides as shown.


Step 3:

Fold it inside out as shown:


Step 4:

Glue small pieces of yarn to make hair


Step 5:

Glue a strip of ribbon along the bottom as shown


Step 6:

Add facial features with a marker.


Make another one for your dad in the same way. Make sure its big enough for your dad’s thumb. Your dad is sure to enjoy this Father’s day gift.

Technorati Tags: , , , , , , , , , ,

How to Make a Fast Straight Paper Airplane

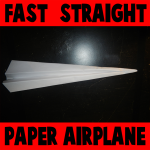
I have a wonderfully fun craft for you today.  And, you only need one material for this craft…. paper.  I’m going to show you how to make a fast straight paper airplane.  It’s so much fun and it will give you hours of enjoyment well after you are finished making it.  Here I will show you step-by-step how to make this paper airplane.  Also, if you scroll down to the bottom of the steps you will see there is a video on how to make this paper airplane as well.  So, grab a piece of paper and let’s get started.

Check out our other Paper Folding Crafts.


How to Make a Fast Straight Paper Airplane


Materials Needed

Paper


Step 1


Fold a piece of paper in half the long ways.


Fold a piece of paper in half the long ways.


Fold a piece of paper in half the long ways.


Like this.


Step 2


Open the paper back up


Open the paper back up…. like this.


Step 3


Fold the top corners in towards the center.


Fold the top corners in towards the center.


Step 4


 Fold in towards center line another time.


Fold in towards center line another time.


Step 5


Fold inwards again.


Fold inwards again.


Step 6


Now fold the entire plane in half.


Now fold the entire plane in half.


Step 7


Now fold down both sides as shown above.


Now fold down both sides as shown above.


And the other side too.


And the other side too.


Step 8


There it is.  Watch the video below if you have any issues.


There it is.  Watch the video below if you have any issues.

Here is our video on How to Make a Fast Straight Paper Airplane

Technorati Tags: , , , , , , , , ,

How to Make a Mayflower Walnut Boat

I have a fun craft for you…. it is a Thanksgiving craft.  Today I’m going to show you how to make a Mayflower Walnut Boat.  This boat will actually float.  So, it is a craft that will not only be a ton of fun making, but will also be loads of fun playing with.  You will need a bit of help from an adult.  Have an adult break open the walnut with a nutcracker.  It needs to be broken in half…. not crushed.  So, an adult will be able to help you with this.  Let’s get started with this fun craft…. grab the materials needed and we will get to it.

Check out our other Thanksgiving Crafts.


How to Make a Mayflower Walnut Boat


Materials Needed

Walnut

Nutcracker

Paper

Pen or Pencil

Scissors

Clay, Play Doh, Gum or Wax

Toothpick


Step 1


Get a nice walnut.


Get a nice walnut.


Step 2


Adult should split shell without cracking.


Adult should split shell without cracking.


Step 3


Draw a shape that is like a square, but wider at the bottom.


Draw a shape that is like a square, but wider at the bottom.  Now cut it out.


Step 4


Fill with clay, play doh, gum or wax


Fill with clay, play doh, gum or wax (with help).


Step 5


Now take a toothpick and stick it into the gum (or clay or wax) as well as thru the paper twice (as seen).


Now take a toothpick and stick it into the gum (or clay or wax) as well as thru the paper twice (as seen).


Step 6


The boat actually works.... set it to sail in the bathtub.


The boat actually works… set it in the bathtub and blow on its sail.

Technorati Tags: , , , , , , , , , , , ,

How to Make a Toy Sword for Halloween or for Play

With Halloween right around the corner, you might be looking to buy or make a toy sword for your costume. Well don’t go out and buy one, today we will tell you how to make a pretty cool toy sword. Laura from  Dacian Moon Handmade  will show you, step by step, how to make a sword fit for every knight 😉


How to Make Toy Swords


CRAFTS MATERIALS NEEDED:

– ruler
– tinfoil
– tape
– auto-adhesive crystal
– permanent markers : black
– scissors


Step 1.

Place ruler over foil…


… and begins to wrap.


Fold the upper corner like this to make the sword pointy.


It will look like this.


Step 2.

Take another piece of foil…


… and crumples it until you get a bar.


Place it over the sword to form the hilt.


Cut some stripes of foil…


… and wrap the hilt in „x” around the sword.


When you reach the lower part again…


continue to wrap the ruler…


until you feel it comfortable in hand.


Step 3.

Wrap the hilt in tape. Cover a little bit over the horizontal bar to keep it in place.


Like this.


Step 4.

Color the hilt in black…


… like this.


Add the self-adhesive crystal…


And your sword is ready.


Have fun trick or treating.

Technorati Tags: , , , , , ,


How to Make a Double Edged Paper Airplane

Paper airplanes are a lot of fun to make and today’s paper airplane craft is no exception.  Put a spin on the traditional paper airplane with this Double Edged Paper Airplane craft.  This paper airplane can not only fly well, but it flies fast too.  Today I will show you step-by-step how to make this plane and if you scroll down towards the end of the post I will even show you how to make this Double Edged Paper Airplane with a video.  So, grab the materials needed and let’s get started.

Check out our other Paper Folding Crafts.


How to Make a Double Edged Paper Airplane


Materials Needed

Standard Printer Paper

Stapler (staples)

Scissors


Step 1


Fold sheet of paper over once.


Fold sheet of paper over once.


Fold sheet a second time.


Fold sheet a second time.


Fold sheet a third time.


Fold sheet a third time.


Step 2


Unfold the paper.


Unfold the paper.


Step 3


Cut center fold about half way down.


Cut a line a little further than half way down the paper


Step 4


Cut a short line... 2 lines up on each side


On the opposite side of the line cut in the last step, you will be making 2 short cuts. Cut 2 short lines on the second line over on both sides.


Here is another look at this step.


Here is another look at this step.


Step 5


Fold triangle on both sides up to the second line


Fold a triangle on each side of the top second line over.


Step 6


Fold over again.... this time to the center.


Fold it over again except to the middle.


Step 7


Fold over tops of each point.


Fold over the tops to the side, as shown.


Step 8


Fold over 2nd top point and then staple together.


Staple over the two flaps, holding the two sides together.


It should then look like this.


It should then look like this.


Step 9


Fold down top third of airplane.


Fold top third of the airplane down.


Like this.


Like this.


Step 10


Fold corner over.


Fold down two triangles from the corners to about the center of the airplane, as shown.


like this.


like this.


Step 11


Now, fold entire flap over.


Fold down two triangles to about the center of the airplane from the sides, as shown.


Fold the other side the same way.


Like this.


Step 12


Fold in half lengthwise.


Fold airplane in half length-wise.


Like this.


Like this.


Step 13


Fold top of each side to bottom of plane.


Fold top of each side to bottom of airplane to make the wings, as shown.


Step 14


now you have your finished Doubled Edged Paper Airplane.


And, now you have your finished Doubled Edged Paper Airplane.  Go fly it and watch it soar.  Enjoy.

Here is our video on How to Make a Double Edged Paper Airplane

Technorati Tags: , , , , , , , ,

How to Make Costume Hats

Costume hats are so much fun to make.  There are so many different hats you can make.  You can make a Medieval Hat or a Nurses Hat…. or maybe even a Pirates Hat.  If you are looking for different costume hats to make then you are going to love today’s post.  Today I have a printable diagram of many, many different Costume Hats you can make.  No matter what mood you are in you are sure to find a hat to fit your taste.  So, print of the printable diagram and get started making your hat today.

Check out our other Costume & Dressing Up Crafts.


How to Make Costume Hats


Click on the image below to make the diagram larger and to print off.


Make costume hat ideas


Leave a comment below and let us know what hats you decided to make.  Better yet, take a picture too and leave that with your comment…. we’d love to see them.

Technorati Tags: , , , , , , , ,

How to Make Paper Darts – Paper Airplanes

Have you ever wanted to know how to make a fast Paper Airplane?  Well, today I’m going to show you how to make one…. it’s fast enough that I even call them Paper Darts.  The traditional Paper Airplanes are pretty slow…. boring.  Make these Paper Darts and race them with your friends.  You can even be creative and color them to give them an original look.  So, let’s get started.

Check out our other Paper Folding Crafts.


How to Make Paper Darts - Paper Airplanes


Materials Needed

Paper


Step 1


Fold paper in half both ways.


Fold paper in half both ways so it has a + crease.


Step 2


Fold a corner into center crease.


Fold a corner into center crease.


Step 3


Fold other corner in.


Fold other corner in.


Step 4


Fold in


Fold in like the above picture.


Step 5


Fold in to center.


Fold in to center.


Step 6


Fold other side


Fold other side to look like the above picture.


Step 7


Fold side inwards.


Fold side inwards.


Step 8


Fold the other side in too.


Fold the other side in too.


Step 9


just fold in half like above.


Then, just fold in half like above.


Finished paper darts


Awesome job….. you just finished making a Paper Dart.  Make a few and have races with your friends.  Find out which dart is the fastest.

Technorati Tags: , , , , , ,

How to Make a Mosaic Super Mario Pixelated Picture from Tiles

Today we will show you how to make a really cool, pixelated Super Mario. This is the Mario from the 1980’s when he just looked like a bunch of squares….this is the classic Nintendo Mario. We have included a pattern for Mario’s complete body…or you can do just part of his body like I did. (and I know that I messed up on Mario’s thumbs…put the pattern below, reflects the correct pattern).

Click here for more mosaic tutorials


How to Make a Mosaic Super Mario Pixelated Picture from Tiles


Materials Needed:


Glue

Cardboard or Wood

Tiles or Cut up Squares from Paper or Foam


Materials Needed


Here is a pattern for you to print or just look at while you are making your mosaic Mario.


Here is a pattern for you to print or just look at while you are making your mosaic Mario.


You can make the surrounding color of Mario, any color that you want. You can also do only part of Mario, like I did, or Mario’s entire body.

Step 1:


Step 1 : Put Glue on Tile


Put Glue on First tile.


Step 2


Put tile down


Place square firmly on cardboard or wood.

Step 3


Wow Your Done


Now continue thru the pattern until finished. Place a heavy book over tiles overnight to make sure that tiles are firmly placed. By morning you should have your finished craft. Your parents will look fondly at the Mario picture.

Technorati Tags: , , , , , ,

How to Make Pencil Toppers Using Pipe Cleaners

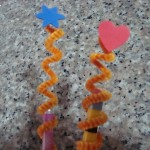
A very simply craft that your kids can do. As easy as 1-2-3. You can do this to add a little fun to your kid’s pens or pencils. Or this can also make a pretty present.

How to Make Pencil and Pen Toppers to Decorate Them for Back to School

Crafts Materials Needed:

pencils, pens

pipe cleaners/fuzzy wires

craft foam shapes

glue

How to Make This Craft:

Step 1

1. Holding the pipe cleaner on your right hand and the pencil on the other. With your left hand, holf the tip of the wire and gently push it against the pencil and swirl it around until you reach the other end.

Step 2


2. With the wire secure in place,  get any foam shape of your liking. Glue it to the upper tip of the wire.

Step 3

3. Gently slide the wire up the pencil, with only half of the wire hugging the pencil now. And you have a cool pencil topper!

Here is our video on how to Make Pencil Toppers.

Technorati Tags: , , , , , , , ,

Making a Velcro Bullseye Ball Tossing Game to Make for Children

Today we will show you how to make a game that is like darts, but safer. This is a Bulls-Eye Velcro Ball Tossing and Aiming game. All you need are a few things that are probably already in your house.

You Might Enjoy Our Other Game Making Crafts


Making a Velcro Bullseye Ball Tossing Game to Make for Children


Making a Velcro Bullseye Ball Tossing Game to Make Crafts Idea for Kids

Crafts Materials Needed

– Felt Pieces of Different Colors
– Scissors
– Glue
– Bowls and Cups to Trace Circles With
– Marker
– Small balls such as Ping Pong Balls or Plastic Golf Balls (found in bulk at Walmart)
– Cardboard
– Ribbon or Yarn or String or Cord
– Strong Tape

Step 1


Make a Velcro Ball


Get a few small balls…at least 3. Glue the Velcro (the side that is scratchy) all over the ball…I used circle Velcro pieces that have adhesive on one side and Velcro on the other…this was easier than gluing for me.

Step 2


Step 1 : Trace Circles of Felt


Get different sized round objects to trace perfect circles onto felt.


Step 2 Outline on Felt


Step 4


Step 3 : Cut Out the Felt Circle


Cut out the felt circle

Step 4


Step 4 Glue all of the circles together


Do this for all the different sizes and colors that you need. I did it with 4 different sizes and colors of felt. Glue them all together.

Step 5


Cut out a start and paste it in the center.

Step 6


Glue the game to a piece of cardboard. When it dries….cut out the circle along with the cardboard. This will keep the game strong.

Also cut out felt number and put them on the game board. If you don’t have the time, just use a sharpie marker.

Step 7


Turn the game board around. Duct Tape (or other type of strong tape) a piece of string, ribbon, yarn, cord, or whatever to the back of the game board, in a loop. This is how you will hang your bullseye board to play with it.

Step 8


Making a Velcro Bullseye Ball Tossing Game to Make for Children


We hung our Velcro Bulls-Eye Ball Game on a Light Switch in our Dining room. The kids love it and the cats have fun trying to attack the hanging balls.

Check out our video on How to Make this Velcro Bullseye Game

You Might Enjoy Our Other Game Making Crafts

Technorati Tags: , , , , , , , , , , ,

How to Make an Ant Farm Jar and Watch an Ant Colony Build Mazes

This is a great project for kids who are interested in nature and bugs. This is an easy project for kids of any age and you get to watch ants build an underground city…so it is pretty cool. This ant farm has no openings, so you don’t have to worry about the ants escaping. You can open the jar outside to feed the ants, and then close it back up and bring it inside to observe.


How to Make an Ant Farm Jar and Watch an Ant Colony Build Mazes Craft Activity for Kids


How to Make an Ant Farm Jar and Watch an Ant Colony Build Mazes Craft Activity for Kids

Crafts Materials Needed

– 2 Jars – One Big, One Smaller
– Loose, Sand-Like Soil
– Water
– Sugar

Step 1

Clean both jars out, and dry them out. Take the outside wrappers off so you will be able to see inside the ant jar.

Step 2


Put the smaller jar, without its lid, upside down, within the bigger jar. Try to center it.


Put the smaller jar, without its lid, upside down, within the bigger jar. Try to center it. Poke a few tiny holes in the jar lid, small enough for ants to not escape.


Step 3


Fill the outside area between both jars, with the sandy-soil.


Fill the outside area between both jars, with the sandy-soil. Make sure that the entire area is filled, but don’t pack it tightly or the ants will not be able to dig their way through it.

Step 4 : Finding and Trapping the Ants

Now you must find the ants for your ant farm jar. Go looking in your back yard or in the local park. If you still can not find any ants then you can build an ant trap. Ants love sugar, so what you should do is put some sugar, mixed with a tiny bit of water, into a jar or can. Put it on its side and keep an eye on it…when you have about 20 ants. Don’t get more than 20 ants…crowding too many ants in the jar will make them less active and less fun to watch. You can close the jar and put them in your ant farm jar (DO THIS OUTSIDE – NOT INSIDE YOUR HOUSE).  Important : Make sure that these ants are from the same colony or they will land up fighting and killing each other.


Step 5 : Close That Jar Tight

Make sure to close that jar tight. Don’t worry about the ants getting enough air because you will be opening it to put food in there. Believe it or not, that is plenty of air for your ants.


How to Make an Ant Farm Jar and Watch an Ant Colony Build Mazes


Feeding Your Ants

Do the feeding of your ants outside to keep them from escaping into your house (or I will get a lot of nasty emails from your Moms). 🙂

Once a week (no more than this) feed the ants a few drops of sugar water. You can put it directly into the soil. You can also drop in there a few grains of bird or grass seed.

FEEDING ANTS TOO MUCH CAN KILL THEM!

Keep Your Ants Safe

– Keep your ant jar away from direct blow of air conditioners, radiators, and heaters…keep them at normal room temperature.

– Keep them out of the direct glare of sunlight.

The Fun Part is Watching Your Ants Build an Underground City

Now just watch and observe your ants build their own littler underground city. They can build them most amazing, intricate mazes. I hope you enjoyed this project.

Technorati Tags: , , , , , , , , , , , , ,

How to Make a Paper Airplane Glider in Easy Illustrated Steps Craft for Kids

Learn how to fold this amazing paper airplane glider that flies really, really far. All you need is a piece of paper and 2 paper clips.


How to Make a Paper Airplane Glider in Easy Illustrated Steps Craft for Kids


How to Make a Paper Airplane Glider in Easy Illustrated Steps Craft for Kids

Crafts Materials Needed

– Piece of Paper
– 2 Paper Clips

Here is a very easy way to make an airplane glider.

Step 1


Fold a rectangular sheet of paper in half the long way. Figure 1


Fold a rectangular sheet of paper in half the long way as in Figure 1.

Step 2


Fold back the corner of one end of the paper. Then fold back the facing corner in just the same way.


Fold back the corner of one end of the paper. Then fold back the facing corner in just the same way. Notice how these corner folds match in Figure 2

Step 3


Now fold down the entire length of both sides of the glider to make its wings


Now fold down the entire length of both sides of the glider to make its wings as seen in  Figure 3.

Step 4

Spread the wings of the glider. Use 2 paper clips to fasten the plane together as seen in Figure 3. The weight of the paper clips will make your plane glide smoothly through the air.

Flying Your Glider


Now fly that airplane glider and have a LOT of fun.


Now fly that airplane glider and have a LOT of fun.

Technorati Tags: , , , , , , , , , ,