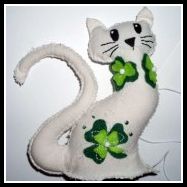
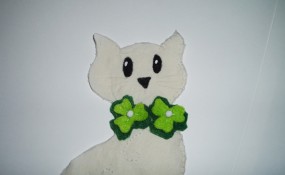
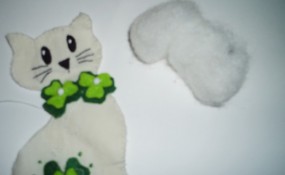
This is a cute and funny toy made especially for St. Patrick’s Day! Do you want to learn how to make and sew a stuffed animal named “Lucky Cat” for Saint Patrick’s Day? This stuffed cat is covered in shamrocks and isn’t too tough to make. Learn how to make this kitty cat in the following craft tutorial.
Laura from Dacian Moon Handmade will show you how to make it, step by step.
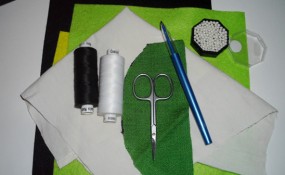
CRAFTS MATERIALS NEEDED:
– white or cream-colored fabric
– light green and dark green felt
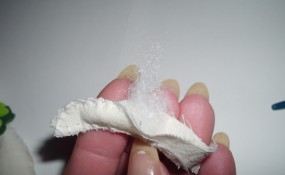
– filling material (I use some cotton pads broken into pieces)
– scissors
– needle and threads (white and black)
– black paint marker
– pen
– 3 small white beads
– pencil
– green beads (optional)
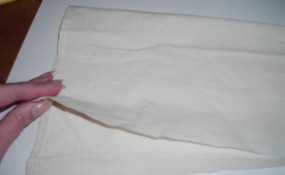
Step 1.
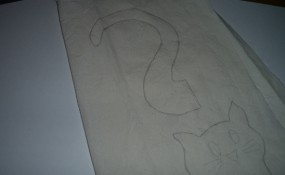
Fold the fabric in half.
Draw a cat outline, like this…
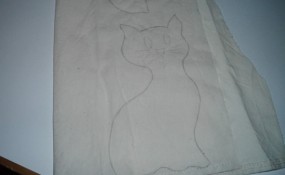
… and the tail.
[ad#ahc]
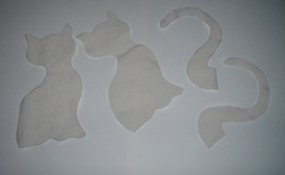
Cut them out, without unfolding the fabric. This way you will have two cats and two tails.
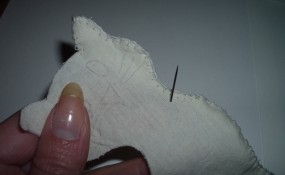
Step 2.
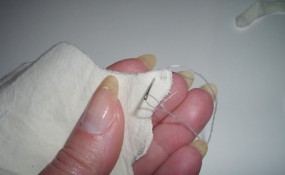
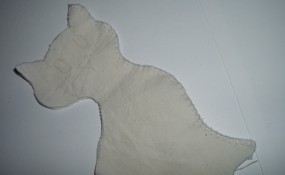
Place one cat over the other and start sewing them together. Start on the lower part.
Go up until you reach the ear.
Step 3.
Draw one big clover and some smaller on dark green felt. Also, draw them a little bit smaller on light green felt.
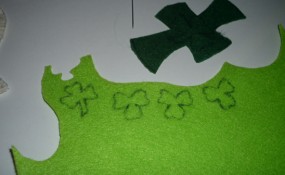
Cut them out.
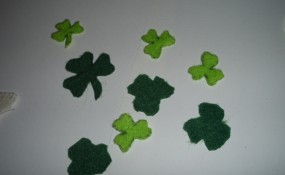
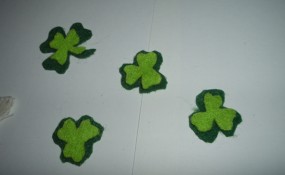
Group one big dark clover with one big light clover, and the smaller ones in the same way.
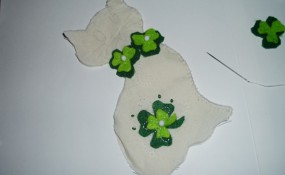
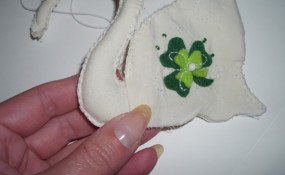
Step 4.
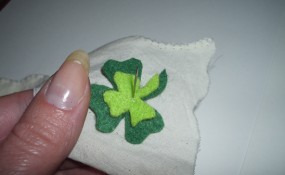
Choose one place for the big clover…
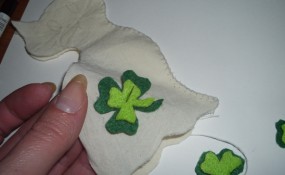
… and sew it in place, using white thread.
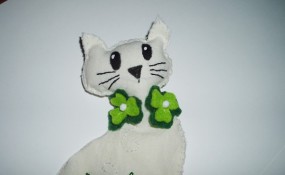
Add one white bead in the middle. Be careful not to sew both cats when you sew decorations.
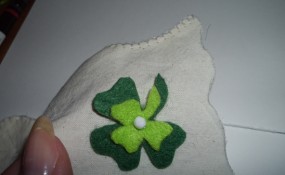
You can let it like this or you can make some decorative stitches with white thread and green beads
Like this.
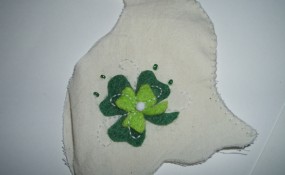
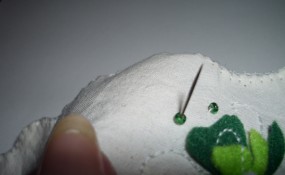
Choose a place for the small clovers also.
I put two of them around the cat’s neck, just like a necklace. Don’t forget to add white beads in the middle and to sew only one cat.
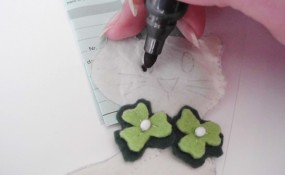
Step 5.
Is time to decorate the head. Place a folded paper or a piece of cardboard between the two cats…
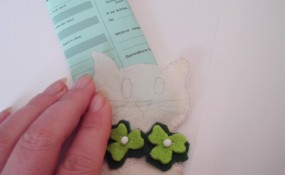
… and color the eyes and nose with black paint marker.
Like this.
Change the thread, and using the black one…
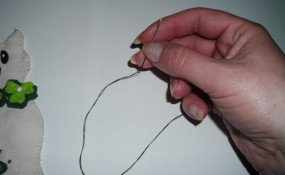
Sew the whiskers.
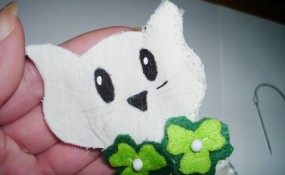
Like this.
Step 6.
Change the thread back to white and continue to sew the two cats together.

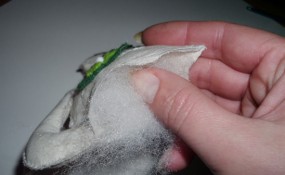
When you reach the neck is time to fill the head.
Tamp the filling to fill all the head and the ears. Like this.
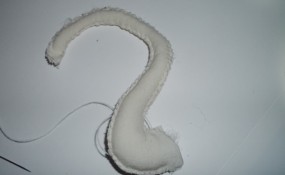
Continue to sew until you almost get down. Here will be the tail, so we must prepare it.
Step 7.
Place the two tails one over the other…
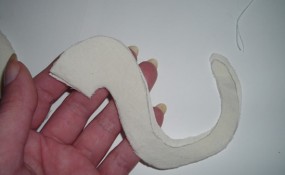
.. and start sewing them together from the lower part.
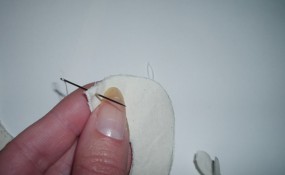
Go until you reach the tip of the tail and start to sew the other part.
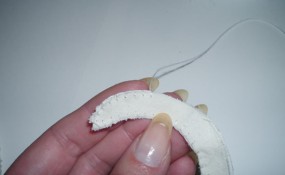
Stop when you make about 10 cm. Take a piece of filling and roll it between your hands.
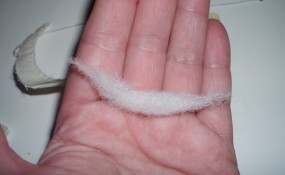
Press it on the stitched part of the tail.
Continue to fill the tail while sewing the two sides together. It will look like this.
Step 8.
Place the tail between the two cats, like this.
Sew it in place.
Step 9.
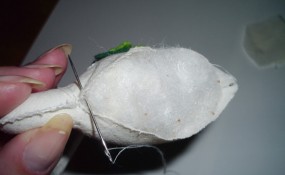
Fill the cat’s body.
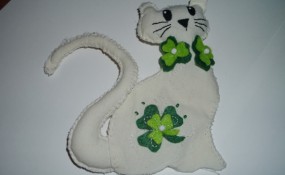
sew the two parts together…
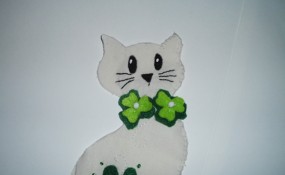
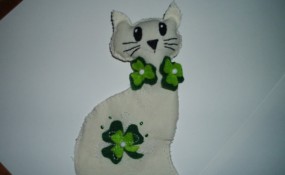
And the cat is ready 😀
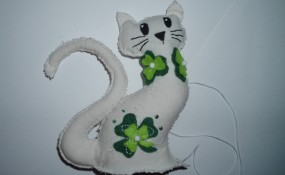
Isn’t this cat adorable!!! I hope you enjoyed the tutorial!
Technorati Tags: shamrocks, shamrock, shamrock crafts, four leaf clover crafts, cat crafts, cats, sewing, sewing crafts, cat stuffed animals, st. patricks day crafts, saint patricks day crafts, saint pattys day crafts, how to make a cat, how to sew a cat
