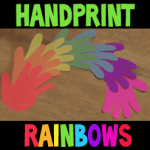
How To Make Hand Print Rainbows for St. Patrick’s Day Preschooler Activity

Rainbows bring smiles to faces everywhere and these hand print rainbow are very easy for children of all ages to make. This is a perfect activity for toddlers, preschoolers, and Kindergartners. They are fun to make and parents just love handprints from their children.
You Might Like Our Other St. Patrick’s Day Crafts Ideas


How To Make Hand Print Rainbows for St. Patrick's Day Preschooler Activity


How To Make Hand Print Rainbows for St. Patrick’s Day Preschooler Activity

Crafts Materials Needed

*Construction Paper in Rainbow Colors (Red, Yellow, Orange, Green, Blue, Indigo, and Violet)

* Pencils or Markers

* Scissors

* Glue


Hand Print Rainbow Instructions

Step 1

Teach the kids about the rainbow and the spectrum of light and all that jazz. If they are very young….teach them the order of the colors in a rainbow by telling them about the name Roy G. Biv (Red, Orange, Yellow, Green, Blue, Indigo, Violet)


Step 2

Have the child trace his or her hand on each color of paper (or trace it for them if they are very young)

Step 3


How To Make Hand Print Rainbows for St. Patrick's Day Preschooler Activity


Glue each hand together, in order (Red, Yellow, Orange, Green, Blue, Indigo, and Violet) in a rainbow-like arc.

You Might Like Our Other St. Patrick’s Day Crafts Ideas

Technorati Tags: , , , , , , , , , ,

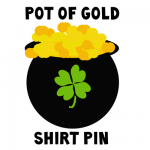
How To Make Pot Of Gold Pins for Saint Patricks Day Arts and Crafts Project

Everyone wants their very own pot of gold decorative pins for St. Patrick’s Day and kids will love having their own to wear. Learn how to make this pot of gold and shamrock out of crafts foam.

You Might Like Our Other St. Patrick’s Day Crafts Ideas


How To Make Pot Of Gold Pins for Saint Patrick's Day Arts and Crafts Project


How To Make Pot Of Gold Pins for Saint Patrick’s Day Arts and Crafts Project

Pot Of Gold Pin Supplies

*Black craft foam

*Yellow or gold craft foam

*(optionol)Green craft foam

*Glue

*Latch pin, usually comes in bags from the craft stores

*Scissors

Pot Of Gold Instructions

Step 1


 ​Cut the black c​raft foam into the shape of a pot.


Cut the black c​raft foam into the shape of a pot by first cutting out a circle.


And then an oval


And then an oval


 And then putting them together to form a pot.


And then gluing them together to form a pot.

Step 2


Cut a smaller oval, in gold / yellow this time and glue it to the black oval...in the center.


Cut a smaller oval, in gold / yellow this time and glue it to the black oval…in the center.


Step 3


Cut the yellow or gold craft foam into small circles for the coins.


Cut the yellow or gold craft foam into small circles for the coins. Glue them on the pot.


Step 4


cut out 4 hearts


We are going to cut out 4 small hearts to make a 4 leaf clover. To do this fold a green scap piece of paper in half length-wise…and draw half of a heart on the fold…then cut it out.


4 hearts


Step 5


glue 4 hearts onto the pot


Glue the 4 hearts on to the pot as pictured above.

Step 6


cut out a stem


Cut out a letter ‘J’ to make the green stem.

Step 7


Take a pin and glue the pot and the gold onto the pin.


Take a pin and glue the pot and the gold onto the pin.


And you are done…now you have something festive and green to wear on St. Patrick’s Day.

You Might Like Our Other St. Patrick’s Day Crafts Ideas

Technorati Tags: , , , , , , , , ,

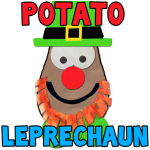
How To Make A Potato Face Leprechaun Preschool Crafts Activity for St. Patricks Day

St. Patrick’s Day must have Leprechauns and this one is sure to make everyone smile. This is a Mr. Potato Head Leprechaun craft for Saint Patrick’s Day. This one is great for younger kids such as Kindergartners, Preschoolers, and First Graders.

You Might Like Our Other St. Patrick’s Day Crafts Ideas


How To Make A Potato Face Leprechaun Preschool Crafts Activity for St. Patricks Day


How To Make A Potato Face Leprechaun Preschool Crafts Activity for St. Patricks Day

Potato Face Leprechaun Supplies

* Small paper bag
* Scissors
* Pencil
* Glue
* Green, red, purple, black and white construction paper

Potato Face Leprechaun Instructions

Step 1


Take the paper bag and cut into the shape of a potato.


Take the paper bag and cut into the shape of a potato.


Take the paper bag and cut into the shape of a potato.

Step 2


Use the white and black construction paper to cut our the eyes and the mouth and glue to the bag piece.


Use the white and black construction paper to cut our the eyes and the mouth and glue to the bag piece.


Step 3


Step 3 Make a Potato Head Leprechaun


Glue a Red Circle to his face…for the nose.

Step 4


step 4.1


Make a hat by folding a green piece of paper in half lengthwise and then drawing a slanted capital Bubble Letter ‘L’ shape (like seen above), along the fold and the cut it out and open it up … it makes a hat.


Step 4 Make a Potato Head Leprechaun


Like this.

Glue this hat to the potato head.

Step 5


Step 6 Make a Potato Head Leprechaun


Cut out a black strip and glue it on the hat.

Step 6


Cut out a yellow square with the center cut out to the hat's black strip.


Cut out a yellow square with the center cut out to the hat’s black strip.


Step 7 Make a Potato Head Leprechaun


Glue the gold buckle to the black paper strip.

Step 7


Step 8 Make a Potato Head Leprechaun


Cut out 2 big green circles and one small green circle and glue them together to look like a bow tie. Glue them to the bottom of the potato head.

Step 8


Step 9 Make a Potato Head Leprechaun


Take an orange piece of paper and cut strips of paper out. Glue them as a beard to the bottom of the face.


You Might Like Our Other St. Patrick’s Day Crafts Ideas

Technorati Tags: , , , , , , , , ,

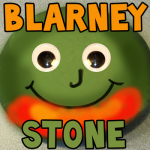
How To Make A Blarney Stone Craft for Saint Patrick’s Day Celebrations

Blarney Stones are for the luck of the Irish and this Blarney Stone is super simple to make too. St. Patrick’s Day is coming up in the middle of March so it is time to star thinking about the arts and crafts projects that you can make to celebrate the grand occasion. Have fun.

You Might Like Our Other St. Patrick’s Day Crafts Ideas


How To Make A Blarney Stone Craft for Saint Patrick's Day Celebrations


How To Make A Blarney Stone Craft for Saint Patrick’s Day Celebrations

Blarney Stone Crafts Materials and Supplies

* Smooth river rock or other smooth rock, medium sized
* Green paint
* Paint brush
* Glue
* Googly eyes
* Green glitter
* Sequins or jewels, small sized
* Black marker

Blarney Stone Instructions

Step 1.


Wipe the rock off to remove any debris that might be on it.


Wipe the rock off to remove any debris that might be on it.


Step 2.


Paint the entire rock green with the green paint.


Paint the entire rock green with the green paint. While the paint is wet, sprinkle on a bit of the green glitter.

Let the rock dry completely.


Step 3.


While the paint is wet, sprinkle on a bit of the green glitter.


Once dry, glue on the googly eyes…or paint eyes.


Step 4.


Let the rock dry completely.


Draw a letter ‘J’ for the nose.

Draw a smiley face by drawing a letter ‘u’ for the mouth….and draw a curved line on both sides of the ‘u’.


Step 5.


Once dry, glue on the googly eyes and use the marker to dry eyebrows.


Paint an orange beard on it.


You Might Like Our Other St. Patrick’s Day Crafts Ideas

Technorati Tags: , , , , , , , , , , ,

How To Make A Cat In The Hat from Dr. Seuss ​Hat Arts and Crafts Project for Kids

What’s more fun than the Cat In The Hat? Making a Cat In The Hat Hat of course! These are very easy to make and a lot of fun to do too….do it to celebrate Dr. Seuss’ birthday this year.


How To Make A Cat In The Hat from Dr. Seuss ​Hat Arts and Crafts Project for Kids


How To Make A Cat In The Hat from Dr. Seuss ​Hat Arts and Crafts Project for Kids

Crafts Materials Needed:

* Red and white construction paper
* Scissors
* Glue
* Pencil

Cat In The Hat Instructions

Step 1


Take a large piece of red construction paper and make sure that it will fit around your head.


Take a large piece of red construction paper and make sure that it will fit around your head.


Step 2


 With the scissors, cut the white construction paper into 1 inch strips and glue them onto the red construction paper.


With the scissors, cut the white construction paper into 1 inch strips and glue them onto the red construction paper. Make sure to leave a space on the red construction paper, so that it is red and white.


Step 3


Make a tube that will fit around the head and glue the edges together.

Step 4


Take a piece of white construction paper and trace the tube around it.


Take a piece of white construction paper and trace the tube around it.

Step 5


 Draw four tabs on the inside of the circle.


Draw four tabs on the inside of the circle.  Cut the circle out and the area in the circle avoiding the tabs that were drawn.

Step 6


cut out the outer circle


Now cut out the outer rim…a bigger circle than what you traced and cut out.

Step 7


Glue the tabs to the inside of the red and white tube, so you can wear as a hat.


Glue the tabs to the inside of the red and white tube, so you can wear as a hat.


Technorati Tags: , , , , , , , , ,