How to make a Tricorn Hat Badge

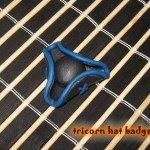
Today I’m going to be showing you how to make a Tricorn Hat Badge.   The Tricorn Hat was a very popular hat in the 18th Century.  The turned-up portions of the brim formed gutters that directed rainwater away from the wearer’s face, depositing most of it over his shoulders.  Well, in this post I’m going to show you had to make this style Hat into a brooch that you can wear.  Because we’ll use oven-hardening polymer clay you’ll need a little help from an adult.

Check out our other Jewelry Pin Crafts.

Laura from Dacian Moon Handmade will show you, step by step how to make this tricorn hat badge.


Materials Needed

– toothpick
– black and blue polymer clay
– roll (you can use anything tubular – I used a vitamins container)
– baking paper
– baking tray
– cutter
– brooch base
– craft glue


Step 1

Cut a piece of black clay.


Condition it by hand, simply mix it and squish it with your fingers. You may want to roll it into a log between your palms, fold it in half, and then roll again.
Finally, make a ball with it.


Step 2

Cut another piece (about the same size as the first).


Condition it too and make another ball.


Place it on a piece of baking paper and flatten it.


Use the roll to flatten it well, until is thin enough.


Like this.


Step 3

Place the ball on the flatten one, in the center.


Step 4

Lift the margins around the ball to form three corners.


Step 5

Take the blue polymer clay…


… and condition it.


Make a roll from it, moving your fingers forward and backward, as in the picture.


Do that until your roll is as thin as the toothpick.


Step 6

Gently, place the blue roll on the edge of the hat, pressing a little bit.


It will look like that.


Cut the extra blue clay…


… and with it make another roll, thinner than the first.


Step 7

Cut the new roll in 6 pieces.


Step 8

Place them two by two into “x’s” on the hat’s sides.


It will look like that.


Step 9

Now you’ll need the help of an adult.
Place the hat (with it’s piece of baking paper) on the baking tray, and bake it according to the instructions on the polymer clay package (they depend on the brand you use: fimo, cernit, sculpey…, but usually it is one half of hour at 230 F or 110 C)


Step 10

Let it cool down.


Step 11

Apply a layer of craft glue on the brooch base…


… place it on the back side of the hat. Let it dry well, and…


… the badge is ready !


And, there you have it…. you just finished making your Tricorn Hat Badge.  How did your badge turn out?  Let me know in the comments below.  And, make sure to take a picture of it too and add it to the comment…. I’d love to see it.  Now, go wear your Tricorn Hat Badge proudly.

Technorati Tags: , , , , , , , , , ,

How to Make a Leather Star Brooch

Today I have a very special craft for you.  I’m going to show you how to make a Leather Star Brooch perfect to be worn all Winter long.  Made from two different shades of leather this craft is sure to turn out beautifully.  Imagine how proud you will be to wear a brooch that you made yourself.  Every compliment you will get will make you feel so good…. because you, in fact, made it yourself.  So, grab the materials needed and let’s get started.

Check out our other Leather Crafts and Jewelry Crafts.

Tutorial offered by Laura from Dacian Moon Handmade .


MATERIALS NEEDED

– red and brown leather
– pen
– scissors
– needle and thread
– brooch base
– craft glue


Step 1

Take the red leather and using your pen…


…draw a star on it.


Draw another star, bigger, on the brown leather.


Cut them out…


… like this.


Step 2

Place the red star over the brown one…


… and start sewing them.


You should sew the red star to the brown one, then continue over the edge of the brown one.


It will look like this.


Step 3

Let’s make the center decoration. Start somewhere on the center part…


… and make this snowflake. When you are finished…. make a knot on the back and cut the thread.


Step 4

Apply a layer of glue on the brooch base…


… and place it on the back of the star, over the knot.


Take a small piece of red leather and glue it over the base. Let it dry well.


That’s all! The brooch is ready.


And, there you have it.  You just finished your Leather Star Brooch.  How did your star turn out?  Let me know in the comments below.  And, don’t forget to take a picture and post that too…. I would love to see it.

Technorati Tags: , , , , , , , , , , , ,

How to Make a Rose Pendant

The Holidays are coming up really quickly.  And, with the Holidays comes the joy of gift giving.  For today’s craft I’m going to show you how to make a Rose Pendant perfect for giving to a special person this Holiday season.  Made from ribbon and a piece of leather….. this craft is sure to be loved by anyone receiving it as a gift.  So, let’s get started.

Step by step tutorial offered by Laura from Dacian Moon Handmade


MATERIALS NEEDED:

– pink satin ribbon
– some burgundy leather
– scissors
– needle and thread


Step 1

Take the ribbon and roll it tight for two – three times.


Secure the base by sewing it. This will make the work a lot easier.


Step 2

Now fold the ribbon against itself …


… and continue to gently roll around the center…


… like that.


Now secure again by sewing it.


Step 3

Repeat step 2: fold….


… and roll … then sew.


Step 4

Do that again and again until the ribbon is ending. It should look like that.


Step 5

Bring the last part of ribbon behind the rose and sew it there.


This is the rose.


Step 6

Take the burgundy leather and put it like that on the back of the rose.


Sew it there.


Now the pendant is ready.


And, there you go…. you made a Rose Pendant perfect for gift giving this Holiday Season.  How did your Rose Pendant turn out?  What color did you make your Rose?  Let me know in the comments below.  Now, the real question is…. who are you going to give it to this Holiday?  Whoever it is…. they are sure to love it.

Technorati Tags: , , , , , , , ,

How to make a Turkey Brooch

What is the most known symbol of Thanksgiving Day? The turkey, of course! Thanksgiving wouldn’t be Thanksgiving without the Turkey.  So, with that being said…. today I’m going to show you how to make a Turkey Brooch perfect for Thanksgiving.  What better way to show your love for the Thanksgiving Holiday than to parade around town wearing a Turkey Brooch?  So, let’s get started.

Check out our other Thanksgiving Crafts and Jewelry Crafts.

Tutorial offered by Laura from Dacian Moon Handmade . You will need help from an adult for this tutorial.


MATERIALS NEEDED

– white, red, green, terracotta polymer clay (and small parts of pink, black and blue)
– black paint
– craft glue
– cutter
– toothpick
– 1 brooch base


Step 1

Take a piece of white polymer clay.


Condition it .

(To condition polymer clay by hand… simply mix it and squish it with your fingers. You may want to roll it into a log between your palms, fold it in half, and then roll again).

Divide it in 4 parts.


Take 1 part, make a ball of it and flatten it…


Squish an end between two fingers, like this…


… then the other. Now it looks like a petal.


Repeat and make another 2 white petals.


Step 2

Take a piece of green polymer clay…


… condition it and divide it in 4 parts too.


Make two green petals and place them over the white ones, between them.


Step 3

Take the last piece of white clay…


… and make a bar under the petals with it…


… then continue with another two green petals, taking care that their edges are over the white bar too. This will make the brooch stronger.


Step 4

It’s time to make his head, so, take a piece of terracotta clay…


…condition it and make a ball with it. Flatten it.


Squish gently one end to look like this.


Place it in the middle of petals. This is the head.


Step 5

Take the blue clay and condition it. Make two bigger parts and one smaller of it.


Make a ball of one bigger part and flatten it.


Squish it gently on one end to look like this.


Place it beside the head and make two lines on it with the toothpick.


Make another one …


… and a small ball flattened in the middle. Now our turkey has a bow.


Step 6

Make a small heart of the pink clay…


… and place it in the middle of his face.


Over it we will put his nose, made of a small piece of red clay. Make it a roll …


… and squish an end.


Then, using the toothpick, place it over the small heart (this is his beak).


Step 7

Take a smaller piece of black clay…


… and part it in half. Those will be his eyes.


Step 8

Place it on the baking tray, and bake it according to the instructions on the polymer clay package (this depends on the brand you use: fimo, cernit, sculpey…, but usually it is one half of an hour at 230 F or 110 C) – this is the part when you could use a little help from an adult.


Let it cool down.


Step 9

The only thing you should do now is glue the brooch base on the back of our turkey… and, using the black paint and the toothpick, write something on the white bar. It can be anything but I think “How about a cheeseburger?” will be funny.


Now your brooch is ready.  Isn’t it adorable?  How did your turkey turn out?  Make sure to let me know in the comments below.  Add a picture to your comments so I can see your turkey.  I’d love to see how it turned out.

Technorati Tags: , , , , , , , , , , , , , ,

How to make a Cute Ghost Brooch

My daughter loves breaking out the Halloween jewelry as soon as October hits.  She will wear all of her Halloween jewelry at the same time… she just loves Halloween so much.  One thing she didn’t have…. until now…. is a cute Halloween brooch to wear on her Fall coat.  This cute ghost brooch is perfect and she loves wearing it proudly for all to see.

Check out our other Halloween Crafts.

Tutorial offered by Laura from Dacian Moon Handmade.  You will need help from an adult for this tutorial.


CRAFT MATERIALS NEEDED:

– night glow polymer clay
– blue, red and pink polymer clay
– eyes
– cutter
– toothpick
– 1 brooch base
– baking tray
– baking paper


Step 1

Take a piece of night glow polymer clay.


Condition it .

(Condition polymer clay by hand… simply mix it and squish it with your fingers. You may want to roll it into a log between your palms, fold it in half, and then roll again).

Make a ball of it and flatten it, then squish an end between two fingers…


…like that.


Step 2

Turn it on its back… on the middle of it place the brooch base.


Put a small amount of night glow polymer clay on it, like in the picture. It will hold it in its place.


Step 3

Using the toothpick or your nails, make the ghost mouth.


Step 4

Take a small piece of blue polymer clay…


… and make a “snake” of it, moving your fingers back and forth like that.


When is ready, bend it…


… to make a “b”…


… then place it on the ghost, like this.


Do the same with the red polymer clay…


… and make an “o”


Place it near the “b” on the ghost.


With the pink polymer clay…


… make another “o”…


… and place it near the red “o”.


Step 5

We’ll use night glow again to make her hands.


Take a small piece and make it like that.


Place it on one side as it holds the pink “o”


Make another hand …


… and make her hold the “b”.


Step 6

Place it on the baking tray, and bake it according to the instructions on the polymer clay package (they depend on the brand you use: fimo, cernit, sculpey…, but usually it is one half hour at 230 F or 110 C)  ***Have an Adult help for this Step.***


Let it cool down.


Step 7

Take an eye and remove the paper on its back.


Place it where the eye belongs and do the same with the second eye.


Isn’t the Ghost Brooch adorable?  It will be so much fun to wear it this Halloween season…. almost as fun as it was to make.  Almost!!

Technorati Tags: , , , , , , , , ,

Make a Graduation Cap and Diploma Pin in 6 Easy Steps

Graduation day is very important and everyone wants to remember it. What are the symbols of this day? The graduation cap / hat and diploma … so, we will add those to our badge pin 🙂 Learn how to make the following decorative pin in easy step by step lesson below … great for the last day of school.

This step by step tutorial is offered by Laura from Dacian Moon Handmade


How to Make Graduation Cap and Diploma Pin Badges


How to Make Graduation Cap and Diploma Pin Badges

CRAFTS MATERIALS NEEDED:

– toothpick
– polymer clay : blue – or any other colour for the background – and black – for the hat
– cutter
– 1 badge base
– thread
– craft glue
– white paper
– baking paper
– baking tray


Step 1

Condition polymer clay by hand, simply mix it and squish it with your fingers. You may want to roll it into a log between your palms, fold it in half, and then roll again.

Fortunately, in the summer the clay is conditioning more easily.

So, condition the blue clay.


Let a small part and from the rest make a ball and flatten it on a piece of baking paper.


Step 2

Place the badge base on it and press.


Use the small piece of blue clay to fix the base…


… like that.


Turn it with the face to you.


Step 3

Take a half of the black clay, condition it…


… and make a almost square form of it.


Place it to the blue background.


From the other half, make a triangle form and place it on top of the square.


Step 4

Place the on the baking tray, and bake it accordingly to the instructions on the polymer clay package (they depend on the brand you use: fimo, cernit, sculpey…, but usually is one half of hour at 230 F or 110 C)

Let it cool down.


Step 5

Take the white paper, make a roll with it…


…and tie it with the thread.


Step 6

Apply a layer of glue on it…


…and place it on the badge.

You can use paints to add the year or anything else you want.


Now you can wear it on your shirt or coat proudly. Congratulations!

Technorati Tags: , , , , , , , , ,

How To Make Pot Of Gold Pins for Saint Patricks Day Arts and Crafts Project

Everyone wants their very own pot of gold decorative pins for St. Patrick’s Day and kids will love having their own to wear. Learn how to make this pot of gold and shamrock out of crafts foam.

You Might Like Our Other St. Patrick’s Day Crafts Ideas


How To Make Pot Of Gold Pins for Saint Patrick's Day Arts and Crafts Project


How To Make Pot Of Gold Pins for Saint Patrick’s Day Arts and Crafts Project

Pot Of Gold Pin Supplies

*Black craft foam

*Yellow or gold craft foam

*(optionol)Green craft foam

*Glue

*Latch pin, usually comes in bags from the craft stores

*Scissors

Pot Of Gold Instructions

Step 1


 ​Cut the black c​raft foam into the shape of a pot.


Cut the black c​raft foam into the shape of a pot by first cutting out a circle.


And then an oval


And then an oval


 And then putting them together to form a pot.


And then gluing them together to form a pot.

Step 2


Cut a smaller oval, in gold / yellow this time and glue it to the black oval...in the center.


Cut a smaller oval, in gold / yellow this time and glue it to the black oval…in the center.


Step 3


Cut the yellow or gold craft foam into small circles for the coins.


Cut the yellow or gold craft foam into small circles for the coins. Glue them on the pot.


Step 4


cut out 4 hearts


We are going to cut out 4 small hearts to make a 4 leaf clover. To do this fold a green scap piece of paper in half length-wise…and draw half of a heart on the fold…then cut it out.


4 hearts


Step 5


glue 4 hearts onto the pot


Glue the 4 hearts on to the pot as pictured above.

Step 6


cut out a stem


Cut out a letter ‘J’ to make the green stem.

Step 7


Take a pin and glue the pot and the gold onto the pin.


Take a pin and glue the pot and the gold onto the pin.


And you are done…now you have something festive and green to wear on St. Patrick’s Day.

You Might Like Our Other St. Patrick’s Day Crafts Ideas

Technorati Tags: , , , , , , , , ,