How to Make a Fairy Crown for Halloween

Girls love pretending to be Fairys.  They can pretend to be Fairys on any day of the year, but they especially love dressing up as a Fairy on Halloween.  Well, a fairy just can’t truly be a fairy without their Fairy Crown.  In this post I will show you how to make a Fairy Crown for Halloween.  Add this to your Fairy Skirt and Fairy Mask to have the most perfect Fairy Costume this Halloween.  Or, use the Fairy Costume to play dress-up all year long.  Let’s get started with the craft.  NOTE: you will need a little bit of help from an adult for this tutorial.
Check out our other Halloween Crafts.

Laura from  Dacian Moon Handmade  will show you, step by step, how to make this.


fairy-crowns-necklaces


Materials Needed

– 2 pieces of tulle: green and cream colored
– ribbon
– red beads
– needle and thread
– pen
– scissors
– a piece of brown cord
– lighter and pliers or tweezers (with Adult help)


Step 1

Draw 5 circles on cream tulle.


Cut them out.


Do the same with green tulle but make those circles smaller.


Step 2

This is the step where you need help. Fold a circle in quarter


… hold it with pliers and burn it a very little on the edges…. enough to wrinkle a bit.  (Must Have Adult Help.)  It is a very quick move with the lighter.


Do the same for all the circles. If you skip this step, the circles will remain flat.


Step 3

Set the pattern and make a mark where you should have the first circle (flower).


Using needle and thread sew the end of the ribbon…


… twist the ribbon…


… and sew it loose.


It will look like this.


Step 4

When you reach the marker, put a white circle on the needle…


… then a red bead …


and sew it to the spot.


Continue twisting the ribbon and sewing it loose, then add a green circle with a red bead… and so on.


Like this.


Step 5

Take the brown cord and put it through the tube of ribbon, under the first stitch.


Let enough cord free and make a knot.


This will keep the cord in place.

Begin to wrap loosely around the necklace…


… along with flowers, like this.


When you reach the other end pass the cord through the ribbon tube again.


The crown will be tied at the back…


… and it is ready to complete your Fairy costume.


Isn’t this Fairy Crown adorable?  Any Fairy would love to wear this crown.  Make sure to make the Fairy Skirt and Fairy Mask to accompany this Fairy Crown.

Technorati Tags: , , , , , , , , , , , ,

How to Make a Fairy Mask for Halloween

Little girls love to be Fairys.  They just do.  But, sometimes those store bought Fairy Masks can be a real nuisance to wear during Trick-or-Treating.  Well, I have a treat for you today.  I’m going to show you how to Make a Fairy Mask for Halloween.  This Fairy Mask is made with Tulle so it is wonderfully light.  Not like those plastic or vinyl store bought Fairy Masks…. this mask is simply beautiful.  Plus, your little girl will have a blast making her mask too…. almost as much as wearing it.  Keep an eye out as I will show you How to Make a Fairy Skirt Costume later today.

Check out our other Halloween Crafts.

Laura from  Dacian Moon Handmade  will show you, step by step, how to make this.


fairy-masks


Materials Needed

– mask template (you can download it from here)
– transparent foil
– scissors
– a piece of tulle
– silver textile paint
– silver ribbon
– tape


Step 1

Print the template and fix it on the table with tape.


Place on top of it the transparent foil and fix it with tape.


Over the foil place the tulle and fix it with tape also.


Now the setting is ready.


Step 2

Take the silver textile paint (multi-surface paint will work fine too)…


… and trace the pattern with it.


Take care to follow every swirl and every line and don’t touch the lines you already painted.


When you finish it will look like this. Let it dry overnight.


Step 3

Gently peel tulle away from the transparent foil.


It will look like this.


Cut out around the mask, including eye holes.


Like this.


Cut the ribbon in two and fix them with paint (or with craft glue) to the mask…


… like this.


Let it dry well and your mask is ready.


Didn’t this Fairy Mask come out amazing?!  Any Fairy would love to wear this Fairy Mask for Halloween.  Keep an eye out as I will be showing you How to Make a Fairy Skirt Costume next.

Technorati Tags: , , , , , , , , , ,

15 Spooky Halloween Crafts using Milk Jugs


14 Spooky Halloween Crafts using Milk Jugs


I had no idea how many super cool crafts are out there for Halloween using Milk Jugs.  There are just so many…. and they all are just so cool.   I was searching the internet for some awesomely creepy Halloween crafts and I found some doozies for you.  In this post I have listed 15 spooky Halloween crafts using Milk Jugs.  What’s so wonderful about these Halloween crafts is that they all use milk jugs…. an item that most of us use every day.  So, you are sure to at least have the most important material for these crafts.  Scroll through all 15 of these Halloween milk jug crafts to find some to do with your kids at home.  They will love it.

15 Spooky Halloween Crafts using Milk Jugs

(1)  Spooky Spider


Spooky Spider


Check out this spider.  It’s super awesome and super big…. I love it!!  It will be a wonderful Halloween Decoration this Season.  It is sure to creep out all who see it.  Check out Family Fun to get all the details on this great Halloween Milk Jug Craft.


(2)  Halloween Table Centerpiece


Halloween Table Centerpiece


I don’t know about you, but I’m always looking for a unique way to show off my Halloween spirit with a great centerpiece.  Well, folks I think I found it.  Check out this awesome Halloween Table Centerpiece.  I found it over at The Ramblings of a Crazy Woman and I absolutely dig it!!


(3)  Spirit Jugs


Spirit Jugs


I have a great Halloween Craft for you to use up those extra Milk Jugs you have along with some old Christmas Lights.  Eighteen25 shows us in great detail how to make this amazing looking outside decoration.  By simply decorating a bunch of milk jugs into ghosts you can have a cheap and fun way to decorate the house this Halloween Season.


(4)  Trick-or-Treat Basket


Trick-or-Treat Basket


Every Halloween I look for original ways for the kids to carry their candy.  How about making a unique Trick-or-Treat Basket using a Milk Jug.  I found this great Milk Jug Halloween Craft over at TLC Family.  What is great about using a Milk Jug for this craft is that the Trick-or-Treat Basket will not only be sturdy, but it will be rain proof too.


(5)  Recycled Halloween Windsock


Recycled Halloween Windsock


Here is another fantastic way to use a Milk Jug to make an outside Halloween Decoration.  Here Thrifty Fun shows you how to take a milk jug along with some plastic garbage bags and make a terrific windsock.  The ghost will actually look like he is flying through the night.


(6)  Milk Jug Storm Trooper Helmet


Milk Jug Storm Trooper Helmet


This has got to be one of the most creative ways to use a milk jug for Halloween.  Filth Wizardry shows us step-by-step how to take an everyday milk jug and make it into a storm trooper helmet perfect for dressing up this Halloween.  Any child will not only love making the craft, but using it to dress up too.


(7)  Halloween Monster Yard Lights


Halloween Monster Yard Lights


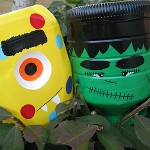
Here is a wonderfully colorful way to decorate the outside for Halloween.  Take milk jugs and transform them into Monster Yard Lights.  This is a fun way to decorate your yard or walkway and the kids will absolutely love it.  Do you know what they will love even more?  Making them with you.  Check out Crafts by Amanda for all the craft details.


(8)  Milk Jug Pumpkin


Milk Jug Pumpkins


If you are tired of decorating your usual pumpkins…. why not try something a little bit different this year.  Kiwi shows us how to take a milk jug and decorate it into a pumpkin.  Let the kids decorate whatever way they want to come up with unusual and unique pumpkins.  They will become great Halloween decorations and you will create loving memories of the time you made these together.


(9)  Milk Jug Pinata


Milk Jug Pinata


If you are having a Halloween Party this year this is an excellent Halloween craft for you.  You can make this creepy looking Halloween Pinata with the help of Cathie Filian.  Here she describes in great detail how you too can make this one of a kind scary pinata for your next Halloween party.


(10)  Halloween Masks


Halloween Masks


Why not take those extra milk jugs you have and make them into Halloween Masks.  Your kids can be as creative as they would like to.   These Halloween masks are as much fun to make as they are to wear.  Check out TLC Family for all the how-to’s to make this craft.


(11)  Milk Jug Ghost


Milk Jug Ghost


Here is a great Halloween Decoration….. perfect for inside your house.  Because this craft is made with Christmas lights the ghost actually lights up.  Turn off the lights and check out how your Ghost will actually glow.  Spooky, right?  Sure is.  Get all the craft details at She Knows.


(12)  Monster Light Jug


Monster Light Jug


This friendly little monster is not only cute during the day, but also lights up the night!  Not everything about Halloween has to be scary or spooky.  Some little ones just can’t handle too much scary.  For these little ones this Halloween Milk Jug craft is perfect.  Check out Kaboose for all the details on this craft.


(13)  Milk Jug Skeleton


Milk Jug Skeleton


This Halloween Milk Jug Craft is so creative!!  And, it looks like an incredibly fun craft for the kids as well as the adults.  I found this craft over at The Party Animal and I just love it!!  You will need plenty of Milk Jugs for this craft…. 7 to be exact.  But, if your kids drink a lot of milk like my kids… you will have the 7 milk jugs in no time.


(14)  Halloween Milk Jug Lanterns


Halloween Milk Jug Lanterns


I found this creative Halloween craft over at Ladies Home Journal.    In this post they show you how to take Milk Jugs and make them into Skeletons, Frankensteins and Cats.  Line a bunch of these down your driveway or a path to make a spooky lit area for the trick-or-treaters to walk.


(15)  Milk Jug Vampire Candy Holder


Milk Jug Vampire Candy Holder


We just put up our very own Halloween Milk Jug Craft.  We made a Milk Jug Vampire Candy Holder and it’s perfect for Trick-or-Treat night.  You can actually put tons of candy in the mouth and let the Trick-or-Treaters reach in the Vampire’s mouth and take the candy.  They are sure to get a big kick out of this.

Technorati Tags: , , , , , , , , , ,

How to Make Costume Hats

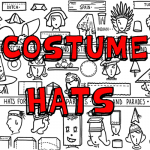
Costume hats are so much fun to make.  There are so many different hats you can make.  You can make a Medieval Hat or a Nurses Hat…. or maybe even a Pirates Hat.  If you are looking for different costume hats to make then you are going to love today’s post.  Today I have a printable diagram of many, many different Costume Hats you can make.  No matter what mood you are in you are sure to find a hat to fit your taste.  So, print of the printable diagram and get started making your hat today.

Check out our other Costume & Dressing Up Crafts.


How to Make Costume Hats


Click on the image below to make the diagram larger and to print off.


Make costume hat ideas


Leave a comment below and let us know what hats you decided to make.  Better yet, take a picture too and leave that with your comment…. we’d love to see them.

Technorati Tags: , , , , , , , ,

How to Make a Leprechaun Hat for St. Patrick’s Day

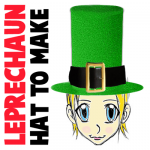
I don’t know about you, but when I think of a Leprechaun I think of the big, green hat he wears.  Today I’m going to show you how to make your very own Leprechaun Hat for St. Patrick’s Day.  After all, St. Patrick’s Day is only a little over a week away.  Now is the time to get started making and displaying your St. Patrick’s Day crafts.  So, grab the materials needed and let’s get started with this fun St. Patrick’s Day craft.

Check out our other St. Patrick’s Day crafts.


How to Make a Leprechaun Hat


Materials Needed

Large Ice Cream Carton or Bucket

Green Craft Foam or Wrapping Paper

Paper Plate

Green Paint

Pencil

Scissors

Glue

Tape

Belt or Black Foam/Paper & Yellow Paper


Step 1


You need a large ice cream carton or bucket.


You need a large ice cream carton or bucket.


Step 2


Wrap with green craft foam or with green wrapping paper.


Wrap with green craft foam or with green wrapping paper.  Leave hole at bottom.


Step 3


Paint a paper plate green.


Paint a paper plate green.


Step 4


Trace carton in center of plate.


Trace carton in center of plate.


Step 5


Now draw tabs.


Now draw tabs.


Step 6


Cut out.... fold tabs inwards.


Cut out…. fold tabs inwards.


Step 7


Glue and tape tabs inside of container.


Glue and tape tabs inside of container.


Step 8


The easy way to add a belt is to borrow your Dad's belt and strap it on hat.


The easy way to add a belt is to borrow your Dad’s belt and strap it on hat.


Or..... just add black strip of foam or paper.  And, yellow square with center cut out.


Or….. just add black strip of foam or paper.  And, yellow square with center cut out.


Step 9


Wear the hat.


Wear the hat.

Isn’t this Leprechaun Hat adorable?  What child wouldn’t enjoy running around the house wearing this Leprechaun Hat for St. Patrick’s Day?  Enjoy.

Technorati Tags: , , , , , , , , , , , , ,

How to Make an Elegant Mask for Purim

Purim is coming up quickly….. it will be here this year on the evening of March 7th.  So, since Purim is all about hiding ones identity I thought we should make a mask perfect for celebrating Purim.  So, today I will be showing you how to make an Elegant Mask for Purim.  Made from paper and whatever you would like to use to decorate the mask…. the outcome is a Mask that you would be proud to wear.  So, grab the materials you will need and let’s get started.

Check out our other Dressing Up Crafts.

Step by step tutorial offered by Laura from Dacian Moon Handmade


Materials Needed

– colored paper
– leather cord (or any other cord)
– glitter glue (or paint markers / colored pens)
– scissors
– pencil
– synthetic self adhesive crystal


Step 1

Use the cord to measure how big should be the mask…


… and make the markings on the paper, according to your measurements.


Step 2

Draw the lower part of the mask.


Step 3

Make an arch in the middle, where the nose will be.


Step 4

Continue with the upper part of the mask – you can make any shape you like. I made it in the shape of spread wings.


Step 5

Make an inverted arch on the middle.


Step 6

Cut out the mask.


Like this.


Step 7

Measure again and make the markings for the eyes.


Step 8

Draw the eyes…


… and cut them out.


It will look like that.


Step 9

Use the pencil and decorate the mask. I like curved lines and swirls so I used them. I marked the paper near the eyes holes and the corners.


In the middle make space for the crystal.


Step 10

Using glitter glue (or paint markers / colored pens) highlight the decorations. Because my paper is light blue, I use blue glitter glue on the upper part…


… like that,


pink near the eyes…


… like this,


and mauve on the corners.


Step 11

With the scissor make two little holes on the outer edge of the eye holes, like this:


Cut the cord in half.


Make a knot on one side of every half…


… place it through the little holes…
… and the mask is ready to be worn.


Isn’t this mask just simply gorgeous?  Anyone would be proud to wear this elegant mask for Purim.  Did you use your creativity to make your mask differently from mine?  Let me know in the comments below.  And, take a picture of your mask and add that too to the comments…. I’d love to see it.

Technorati Tags: , , , , , , , , , ,

How to Make an Abe Lincoln Top Hat for President’s Day

Yesterday I showed you how to make a an Easy George Washington Hat for President’s Day.  Well, it wouldn’t be right to make a hat and celebrate George Washington’s special day if we don’t do the same thing for Abraham Lincoln.  So, today I will show you how to make an Abe Lincoln Top Hat for President’s Day.  After all, President’s Day is about honoring both George Washington and Abraham Lincoln.  And, what better way to honor Abraham Lincoln than to make his top hat.  So, grab the materials needed and let’s get started.

Check out our other President’s Day Crafts.


How to Make an Abe Lincoln Top Hat for President's Day


Materials Needed

Oatmeal Container

Black Felt, Paper or Foam

Paper Plate

Black Paint

Pen or Pencil

Scissors

Glue


Step 1


Grab an Oatmeal Container.


Grab an Oatmeal Container.


Step 2


Take the cap of the rolled oats container and cover with black felt


Take the cap of the rolled oats container and cover with black felt, paper or foam.


Step 3


Put the cap on the box and then wrap black paper, felt or craft foam around the box


Put the cap on the box and then wrap black paper, felt or craft foam around the box.  Leave opening unwrapped.


Step 4


Paint a plate black.


Paint a plate black.


Step 5


Trace the oatmeal box on the center of plate.


Trace the oatmeal box on the center of plate.


Step 6


Draw tabs into circles and then cut out.


Draw tabs into circles and then cut out.


Step 7


Cut out and it will look like this.  Fold tabs inwards.


Cut out and it will look like this.  Fold tabs inwards.


Step 8


Put glue on tabs and glue to inside of box.


Put glue on tabs and glue to inside of box.


Step 9


Let glue dry.


Let glue dry.

And, there you have it…. you just finished your Abe Lincoln Top Hat for President’s Day.  How did it turn out for you?  Let me know in the comments below.  Now, go wear it proudly.

Technorati Tags: , , , , , , , , ,

How to Make an Easy George Washington Hat for President’s Day

President’s Day is coming up later this month…. specifically on February 20th.  On President’s Day we celebrate George Washington’s Birthday.  So, in honor of our first President’s birthday I’m going to show you how to make an easy George Washington Hat.  Your youngest of crafters will love making this George Washington Hat…. almost as much as they love wearing it.  You don’t need many materials for this craft.  As a matter of fact, you probably have most of the materials at home already.  So, grab the materials needed and let’s get started.

Check out our other President’s Day Crafts.


How to Make an Easy George Washington Hat


Materials Needed

Paper

Pen or Marker

Scissors


Step 1


Fold paper in half like picture.


Fold paper in half like picture.


Step 2


Draw a letter 'S' like shape on the paper.


Draw a letter ‘S’ like shape on the paper.


Step 3


Cut out the letter 'S' shape.


Cut out the letter ‘S’ shape.


Step 4


Cut a slit partially thru fold.


Cut a slit partially thru fold.


Step 5


Unfold.


Unfold.

And, there you have it…. you just finished making an Easy George Washington Hat.  How did your George Washington Hat turn out?  Let me know in the comments below.  And, don’t forget to take a picture too…. you can also post a picture with your comment.  I’d love to see it.

Technorati Tags: , , , , , , ,

Chinese New Year Crafts – Year of the Dragon


Chinese New Years Crafts


Chinese New Year falls on January 23rd this Year.  And, in honor of Chinese New Year I put together a list of crafts just about the Chinese New Year.  You will find that most of them are Dragon Crafts and you might wonder why….. well, I will tell you why.  This year is the Year of the Dragon.  So, to honor that fact the majority of the crafts I have listed here will be Dragon Crafts.  Not all of them…. there are plenty of fun other crafts that have nothing to do with Dragons.  So, check out the post and pick a few Chinese New Year Crafts to do with the kids….. they are sure to love them.  So, let’s get started.

Here are Even More Chinese New Years Crafts

Chinese New Year Crafts – Year of the Dragon

(1) Festive Ribbon Dragon


Festive Ribbon Dragon


Here is an adorable dragon perfect for this years Chinese New Years.  This is the mini sized version of the huge size dragon they use in parades for Chinese New Years.  Check out FamilyFun for all the crafting details.


(2) Pop-Up Greeting Card


Pop-Up Greeting Card


Isn’t this Chinese Pop-Up Greeting card gorgeous?  I think it is really beautiful.  Imagine giving this to someone to celebrate the Chinese New Year.  Go to FreePaperCraftTemplate for all the details on how to print off this free template.


(3) Origami Dragon


Origami Dragon


Since this Chinese New Year is the year of the Dragon how could I not include an Origami Dragon in this post.  And, look how awesome this Origami Dragon turns out.  You can get the full instructions for this Origami by going to Origami-Instructions.


(4) Chinese New Year Fish


Chinese New Year Fish


Fish is a very popular dish on Chinese New year.  Fish is a sign of prosperity…. so it is very common to see people eating fish on Chinese New Year.  With that being said I thought it was a good idea to include Fish in this Chinese New Year Post.  Go to Julie K in Taiwan for all the craft details.


(5) Chinese Dragon Door Hanger


Chinese Dragon Door Hanger


Here is a cute craft for the youngest of crafters.  If you go to NickJr they show you how to make a simple Chinese Dragon Door Hanger that is perfect for any kid’s room.  Plus, making this craft with them is the perfect time to explain to your kids a little bit about the Chinese New Year.


(6) Dragon Mask


Dragon Mask


Now, isn’t this Dragon Mask incredible?  What little one wouldn’t love wearing this Dragon Mask all over the house.  After all, children love dressing up.  Find all the Dragon Mask “how-to’s” over at AlphaMom.  This is such a great Chinese New Year craft!!


(7) Pull-A-Long Dragon Craft


Pull-A-Long Dragon Craft


Here is a great way to make a Dragon for Chinese New Year….. made out of paper cups.  How awesome is that?!  It turns out so cute too.  This is a great way to teach your children about the Chinese culture.  Make sure to check out the craft in its entirety over at FreeKidsCrafts.


(8) Toy Spinning Hand Drum


Toy Spinning Hand Drum


Here is a fun toy for the Chinese New Year.  Not only fun to play with…. but also fun to make.  This toy is a great way to make lots of noise during the Chinese New Year.  Make sure to check out 4CrazyKings for all the fun details.


(9) Paper Dragon


Paper Dragon


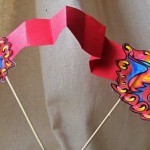
This is a fun craft for the Chinese New Year.  This Paper Dragon turns out so beautiful…. I just love the colors.  I found this craft over at CraftJr and I just love it.  She explains how this craft is really so easy that a toddler can do it.  And, trust me…. the kids will love maneuvering around the dragon with the sticks.


(10) Marbled Red Vinasse Eggs


Marbled Red Vinasse Eggs


This Marbled Egg  is an extremely popular Chinese snack…. and it is extremely popular during Chinese New Year as the egg represents fertility.  To get this marbled effect you first crack the egg and then simmer the egg in colored liquid.  Get the full details at Pig Pigs Corner.


(11) Paper Chain Dragons


Paper Chain Dragons


One of the easiest crafts to teach a young child is how to make a paper chain.  So, let’s use that technique to make a Paper Dragon.  The kids will have such a fun time making this craft.  The Chinese tradition is a rich tradition….. why not show this to your kids by creating this craft.  Check out NaturallyEducational for all the craft details.


(12) Flying Dragon Puppet


Flying Dragon Puppet


Okay, I officially love this craft…. I just love how it turns out.  It turns out so colorful and festive…. just like any New year should be.  Check out JellyFishJelly for the craft details and put this Flying Dragon Puppet together.  I don’t know what your kids will love more…. putting the craft together or playing with the puppet.

Technorati Tags: , , , , , , , , ,

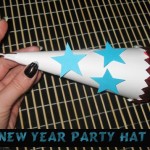
How to Make a New Years Party Hat

It just isn’t a New Years Party if you don’t have a New Years Party Hat.  Well, if you don’t have one yet….. don’t worry.  Today I’m going to show you how to make a New Years Party Hat.  And, this hat turns out awesome.  It actually turns out a lot better than any store bought New Years Party Hat you will find.  Made with glitter glue and crystals this party hat is like no other you will find.  So, let’s get started.

Check out our other New Years Crafts.

Laura from Dacian Moon Handmade  will show you how to make it, step by step.


MATERIALS NEEDED:

– white cardboard
– blue paper
– scissors
– pencil
– glue
– blue and silver glitter glue
– auto-adhesive crystals (blue)
– double adhesive band
– 2 candy wrappers


Step 1

Place the cardboard in front of you.


Make a cone from it…


… like this.


Apply a layer of glue on the last corner you roll to keep the cone in place.


Let it dry.


Step 2

Cut the extra part to let the cone stand.


Now we have a blank cone. The next step is to decorate it.


Step 3

Draw three stars on blue paper…


… then cut them out.


Step 4

Take one wrapper …


… and cut it criss-cross, like in the picture.


Now we have a band with one side criss-crossed.


Cut another two (or as many you need to cover the base of the cone.)


Apply a layer of glue on the back of one…


… and place it on the cone baseline.


Step 5

Make some small bands of wrapper…


… like this.


Apply a layer of glue on the upper part of the cone…


… and place the small bands over it…


… like this.


Step 6

Now is time to add the stars on the cone. Take the double-adhesive band…


…cut a small piece and place it on the cone, where you want one star to be.


Take the protection cover off and place the star over it.


Do the same to add the other two stars.


This is the Party Hat ready for the New Years Party.


See, I told you the hat turns out awesome.  Imagine all the compliments you will get on this hat at the New Years Party.  Plus, no one will have a hat like yours.  How did your hat turn out?  Let me know in the comments below…. add a picture too.  I’d love to see it.

Technorati Tags: , , , , , , , , ,

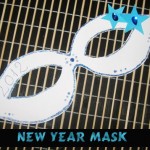
How to Make a New Years Mask

If you are going to a New Years Party I have the perfect craft for you today.  I am going to show you how to make a beautiful and elegant New Years Mask.  Made from cardboard, crystals and glitter glue this mask turns out beautifully.  You are sure to get many compliments on this mask from all who see it.  And, the cool part….. you get to tell them that you made it yourself.  So, let’s get started.

Check out our other New Years Crafts.

Laura from Dacian Moon Handmade  will show you how to make this mask step-by-step.


MATERIALS NEEDED:

– white cardboard
– blue paper
– colored pen (I used blue)
– scissors
– needle and thick thread
– pencil
– glue
– blue glitter glue
– auto-adhesive crystals (blue)


Step 1

Place the cardboard in front of you.  Use a piece of thread to measure how big the mask should be…


… and make the markings on the cardboard, according to your measurements.


Measure again and make the markings for the eyes.


Step 2

Draw the lower part of the mask.


Make an arch in the middle, where the nose will be, like this.


Step 3

Continue with the upper part of the mask – you can make any shape you like. Make an inverted arch in the middle.


Cut out the mask.


Step 4

Draw the eyes…


… and cut them out.


It will look like this.


Step 5

Take the needle with thread and put it through one corner, like this.


On the end of the thread make a knot, then pull the thread.


The knot will stay in the front of the mask. Do the same for the other corner, and now you can use the threads to tie the mask.


Step 6

Right now we have a blank mask. Let’s decorate it!  Use glitter glue to highlight all the edges of the mask…


… like this.


Draw two stars on the blue paper…


… and cut them out.


Add glue on the back of one…


… and place it on one side, over the eye.


Like this.


Add the second one beside it.


On the other side of the mask write 2012 using your colored pen.


Like this.


Now, take two auto-adhesive crystals and place them over the stars.


You can make a more complicated design, if you want. I am adding just some more points with glitter glue.


Now the mask is ready!  Wear it proudly for all to see on New Years Eve.  How did your mask turn out?  Let me know in the comments below.  Don’t forget to take a picture of the mask… you can add it to your comment so I can check it out.  Now, you are ready to celebrate the New Year.

Technorati Tags: , , , , , , , , ,

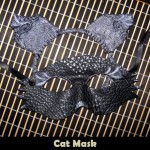
How to make a Cat Mask out of leather

Are you planning on being a cat for Halloween?  Did you want something original that no other person will be wearing?  Why not make it yourself?  I have an awesome Cast Mask craft to show you that turns out outstanding.  In this post I will show you how to make a cat mask out of leather.

Check out our other Halloween Crafts.

Laura from Dacian Moon Handmade will show you how to make a Cat Mask out of leather, step-by-step.


CRAFT MATERIALS NEEDED:

– lace
– pen
– leather (for the best results it must be vegetable tanned leather)
– ribbon
– card stock (or you can use a recycled paper folded in two, to be thicker)
– scissors
– silver paint for textiles
– glue for textiles
– double adhesive tape


Also, you will need a Leather Hole Punch – you can use a thick needle, though, but is easier with this tool.


Step 1 – The Template

Take the sheet of card stock (or, in my case the folded paper)…


And fold it in half.


Use a mirror and hold the folded card stock up to your face. Position the fold of the paper on the middle of the nose.


Using your pen… draw a scribble circle in the area of your eye. Also make a mark where the bottom of your nose is…


…like this.


Using the eye area and the nose mark as a guide, draw half of the mask. The eye is important… you must be sure it is big enough.

It’s time for the first check… Go back to the mirror and hold it up to your face again. Look at the eye hole vs. your real eye. The hole must be a bit bigger. Also, if you want to make some changes… now is time to do them.


Cut out the template.


To cut the eye, poke a hole and then use the scissors.


Unfold the template.

Now you must do the second check… If it doesn’t fit well, it’s time to start over. If you are satisfied… let’s make it permanent.


Step 2 – Cutting the leather

Take your tape…


And put some small pieces on key spots on the back of the template, to prevent it from shifting around.


Find a good spot on the leather and lay out the template.


Using your pen, trace the contour of your template…


… like that.


Now, cut out the mask. The outside is easy enough to do with scissors alone.


It will look like that.


To cut the eye holes you will use the leather hole punch.


Make a hole on the edge of the eye mark…


… then continue with your scissors.


This is the mask.


Step 3 – Forming the mask

This step must be made without any interruption, because otherwise it will ruin your mask.

First, you must soak the mask through. You will see it changing its color a bit (on other colors it is more visible). Make sure you get the back wet as well. Once it is soaked… take it out of the water and pat it dry with a towel.


Put the leather to your face, pressing down on the sides of your nose and the sides of your face (the red marked spots on the image.)

That way the mask will take the form of your face.


Keep the mask like this until it is holding its shape.

It will take some time to do that.


When it is holding its shape you can start adding some personality to it.

Where the mask makes points… pinch into rounded tips.


Also, you can exaggerate the nose fold. This area tends to be the focus of the mask.

Keep placing it onto your face and pushing it into shape.

When you are finished… you can let it somewhere – keeping its form – to completely dry.


Step 4 – Decorating the mask

Since it is in the proper shape now, you can use the hole punch… punch a hole in a good spot for the ribbon to go.  To find out where the holes should be placed…  grab the edges of the mask in your hands and hold it up to your face. Ask yourself… where is the most weight being pulled? That is the place where you must make the holes.


Take the lace and observe it carefully. Are there any parts on it that will enhance the mask? I chose to use the spirals to decorate the eyes…


… so I cut out two.


Apply a layer of glue on one piece of lace…


… and place it on its place. Don’t mind the thick part, we will glue it later. Also, don’t mind the glue – it will be transparent when its dry.


Do the same for the other eye.


Until the glue is dry… you can decorate with the paint.


I made some points on the brow.


Now that the glue is dry enough… apply a new layer on the upper edge of the eye and force the thinner part of lace there. If you hold it a little, it will stay.


Let’s apply a bit of glue on the lower edge of the eyes too.


We don’t put anything there, but when it is dry it will look wet.

Also, you can add some silver paint on the top of the nose and draw some whiskers.  And, you could also add a bit on the edges of the mask.


Step 5 – Finishing the mask

Take the ribbon and cut it in two.


Put one half through one of the holes made with the hole punch…


… and make a knot on it, so it does not slip away.


Do the same on the other side… the mask is ready to go.


Now, THAT is one Rock’n Cat Mask.  You can almost guarantee that your Cat Mask with be different than any other you are sure to see this Halloween.  And, be sure to wear it along with the Cat Ears craft we made earlier today.  Worn together….. you will be a HUGE hit this Halloween.

Technorati Tags: , , , , , , , ,

Mask Making Fun – How to Make 3 Different Style Masks

Everyone knows that Masks are a perfect craft for Halloween.  But, if your kids are anything like my two littlest ones…. Masks are fun ANY time of year.  My children LOVE masks… love them!!  So, today I’m going to show you how to make three different style masks….. make your favorite or make all three.  Plenty of mask making fun.

Check out our other Halloween Crafts.


How to Make 3 Different Style Masks


Mask 1


Mask 1 Directions


Materials Needed

Paper Bag

Chalk

Crayons

Scissors

Paint, Construction paper, yarn…. and anything you would like to decorate the mask with.

Directions:

  1. Put a paper bag over your head. Mark with chalk or crayon the places for eyes and mouth.
  2. Remove the bag and carefully cut these openings.
  3. Funny ears, a nose, and hair may be added by painting and pasting. Color with crayons or water colors.


Mask 2


Mask 2


Materials Needed

Firm Paper (butcher paper would work)

Paint, Construction paper, yarn…. and anything you would like to decorate the mask with.

Pencil

Scissors

Hole Punch

Notebook Reinforcements (makes holes stronger)

String

Rubber Bands

Paper Clips

Directions:

  1. Cut a piece of firm paper large enough to cover your face and reach your ears. Hold the paper to your face and mark places for your eyes and mouth.
  2. Remove the paper and cut the openings.
  3. Punch holes in the sides just above the ears. Put notebook reinforcements or paper rings over the holes.
  4. Decorate the mask however way you would like.
  5. Use string, rubber bands, and paper clips to fasten the mask around your head.


Mask 3


Directions for Mask 3


Materials Needed

Clay

Cardboard, Slate or Wood

Paper Towels

Bright Colored Paint

Directions:

  1. Model a face of clay on a firm base of heavy cardboard, slate, or wood.
  2. Let the model dry. Cover it with a layer of damp strips of paper toweling.
  3. Paste four more layers over the first layer. Each layer should be at right angles to the one under it. When the paper is dry and rigid, remove the mask from the clay model.
  4. Paint the mask with bright colors.

There you have it…. 3 different style masks.  Your child is sure to find a Mask craft that fits their needs.  Have fun!!

Technorati Tags: , , , , , , , ,

How To Make A Cat In The Hat from Dr. Seuss ​Hat Arts and Crafts Project for Kids

What’s more fun than the Cat In The Hat? Making a Cat In The Hat Hat of course! These are very easy to make and a lot of fun to do too….do it to celebrate Dr. Seuss’ birthday this year.


How To Make A Cat In The Hat from Dr. Seuss ​Hat Arts and Crafts Project for Kids


How To Make A Cat In The Hat from Dr. Seuss ​Hat Arts and Crafts Project for Kids

Crafts Materials Needed:

* Red and white construction paper
* Scissors
* Glue
* Pencil

Cat In The Hat Instructions

Step 1


Take a large piece of red construction paper and make sure that it will fit around your head.


Take a large piece of red construction paper and make sure that it will fit around your head.


Step 2


 With the scissors, cut the white construction paper into 1 inch strips and glue them onto the red construction paper.


With the scissors, cut the white construction paper into 1 inch strips and glue them onto the red construction paper. Make sure to leave a space on the red construction paper, so that it is red and white.


Step 3


Make a tube that will fit around the head and glue the edges together.

Step 4


Take a piece of white construction paper and trace the tube around it.


Take a piece of white construction paper and trace the tube around it.

Step 5


 Draw four tabs on the inside of the circle.


Draw four tabs on the inside of the circle.  Cut the circle out and the area in the circle avoiding the tabs that were drawn.

Step 6


cut out the outer circle


Now cut out the outer rim…a bigger circle than what you traced and cut out.

Step 7


Glue the tabs to the inside of the red and white tube, so you can wear as a hat.


Glue the tabs to the inside of the red and white tube, so you can wear as a hat.


Technorati Tags: , , , , , , , , ,

Make Witch’s Hat for Your Halloween Witch Costume with This Crafts Idea

Halloween is coming up sooner than you think…before you know it, you will be wondering what you should be making for your Trick-or-Treat Halloween Costume. How about a witch? This witch’s hat will be fun to have for a Halloween party, to play dress-up, or just to go Trick-or-Treating. Add a mask and broomstick and you can scare your friends. Have fun.


Make Witch’s Hat for Your Witch Costume as an Arts and Crafts Activity

CRAFTS MATERIALS THAT YOU WILL NEED:

– Black Paper

– Other Colors Paper … Red, Blue, and (Gold) Yellow all Would be Perfect, but Other Colors Work Well Too

– Tape

– Paste or Glue

– Scissors

– Cardboard

Step 1


To make the hat, from a cone from a piece of black paper.

Step 2


Paste it together tightly.

Step 3

For the brim, cut a ring from cardboard, making the opening large enough to fit your head.

Step 4


Pull the paper cone through the ring as far as it will go.

Step 5


Now tape the top of the cone to the brim.

Step 6

Cut off the part of the cone that extends under the brim.

Step 7

Cut out stars, moons, and other figures from red, blue, and yellow paper.

Step 8


Now paste them on the hat. Now just let the Witch’s hat dry and then have fun wearing it to a costume party or for Halloween when you Trick-or-Treat. Just don’t scare anyone too much. 🙂 Have fun.

Technorati Tags: , , , , , , , , , , , , , , ,

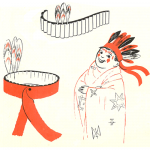
How to Make a Native American / Indian Headdress Headband Costume

This is a really cute idea to make a Native American Indian Headdress for a Costume or to just play dress up. This is easy enough for kids 8 years and older to make themselves. Find the instructions below.


Make Native American Indian Headdress for Halloween Costume

CRAFTS MATERIALS THAT YOU WILL NEED:

-Corrugated Cardboard / Paper

– Ruler

– Scissors

– Feathers

– Red Crepe Paper

– Paste or Glue

– 2 Pronged Paper Fastener

STEP 1


From corrugated cardboard, cut a strip 1 & 1/2 inches wide and 2 inches longer than your head size.

STEP 2


Into the holes of the cardboard, stick feathers.

STEP 3

Then cover the outside of the headband with a strip of bright red crepe paper 2 inches wide and long enough to make long streamers.

STEP 4

Frill the edges of this strip of paper.

STEP 5

Paste in place.

STEP 6

Overlap ends of corrugated headband.

STEP 7

Punch a hole in each end.

STEP 8

Slip a 2-pronged paper fastener through these holes and spread the prongs to keep it in place.


Technorati Tags: , , , , , , , , , , ,

HOW TO MAKE CRAFTS PROJECT : TOTEM LETTER POLE