Haunted House Crafts Perfect for Halloween


Haunted House Crafts Perfect for Halloween


Halloween is coming up quickly.  After all, it is at the end of this month.  When you think of Halloween what do you think of?  Probably bats, jack-o-lanterns and witches.  But, don’t forget the place they all live.  That’s right…. I’m talking about a Haunted House.  There is not much scarier than a Haunted House.  So, with that being said I am dedicating today’s craft to Haunted Houses.  I scoured the internet looking for an assortment of different kinds of Haunted House crafts perfect for Halloween.  With all 17 of these Haunted House crafts I have listed here you are sure to find one you will love.  So, without further ado….

Haunted House Crafts Perfect for Halloween

(1)   Haunted House Centerpiece


Haunted House Centerpiece


If you are throwing a Halloween party and you are looking for something to have as a centerpiece…. then I have the perfect craft for you.  Busy Bee Kids Crafts shows you how to make this spooky Haunted House Centerpiece step-by-step.


(2)  Paper Bag Haunted House


Paper Bag Haunted House


This Paper Bag Haunted House is perfect for decorating your house for Halloween, but it is also wonderful to use as party favors for a Halloween party.  You can fill these bags with goodies for the kids…. they will love it.  I found this craft over at Kaboose and it looks like a ton of fun.


(3) Haunted House Milk Carton (You can Fill This One with Treats)


Haunted House Milk Carton for Treats


This one is on our site and is made from a simple milk carton or creamer carton. All you have to do is fill with treats or candy, tape closed, wrap with paper, and decorate. Here are the craft instructions.

(4)   Popsicle Stick Haunted House


Popsicle Stick Haunted House


Here is a great Haunted House craft perfect for the youngest of children.  All Kids Network shows you how to make this Halloween craft and it is almost totally made up of Popsicle sticks.  And, we all know how much kids love making things with Popsicle sticks…. almost as much as they love eating the Popsicles.


(5)   Haunted Gingerbread House


Haunted Gingerbread House


Now, tell me how awesome this Haunted House is!!  It is just incredible…. and it is totally edible.  Gotta love that!!  I found this Haunted House craft over at Sisteroo and I hope you love it as much as I do.  This Gingerbread Haunted House makes for a perfect decoration or an edible treat for a Halloween party.

(6) Haunted House Pop Up Cards


Haunted House Pop Up Cards


Here is another Haunted House craft this from this site. Everyone loves pop up cards and this is one of the simplest types that you can make. We will teach you how to make these with just a few slits and a bit of folding. Find out the instructions here.


(7)  Cardboard Box Haunted House


Cardboard Box Haunted House


How cute is this Haunted House?  So cute!!  And, it is made out of an item you probably have laying around the house…. a cardboard box.  I found this Halloween craft over at Spoonful and it is a great find.  Check out this craft and get all the haunted details.


(8)  Spooky S’mores Haunted House


Spooky S'mores Haunted House


YUMMY!!  Here is another edible Haunted House craft.  I love the edible crafts.    If you love S’mores then you are going to surely love this craft.  Check out Kitchen Fun with my 3 Sons for all the yummy spooky details.


(9)  Shoe Box Haunted House


Shoe Box Haunted House


I just love those crafts where you can find the materials needed right in your home.  And, this craft is one of them.  Scribble Press shows you step-by-step how to make this creepy Haunted House out of a shoe box….. very clever!!


(10)  Poster Board Haunted House


Poster Board Haunted House


I love this Haunted House craft!!  I think what I love so much is the fact that this Haunted House is very narrow and tall…. it gives it a very creepy vibe.  Perfect for a Halloween decoration.  I found this Haunted House craft over at Crissy’s Crafts.  You have to check it out for yourself.


(11)  Paper Mâche Haunted House


Paper Mache Haunted House


Kids love working with Paper Mâche…. and making this Paper Mâche Haunted House will be no exception.  And, this haunted house really turns out amazing.  Get all the Halloween craft details over at Woman’s Day.


(12)  Mod Podge Haunted House


Mod Podge Haunted House


How amazing is this Haunted House?  So amazing!!  Mod Podge is a material that kids love working with…. they just do.  I know my children do.  Here B-Inspired Mama shows you how you too can make this incredible Haunted House using Mod Podge.


(13)  Spooky Haunted House


Spooky Haunted House


 AllYou shows you how to take an old dollhouse and make it into this awesome Haunted House.  Your kids are sure to get a kick out of using their old dollhouse and making it into a Haunted House.  Check out the website for all the craft details.


(14)  Heebie Jeebie Haunted House


Heebie Jeebie Haunted House


I found this Haunted House craft over at Crayola.  This Halloween craft is perfect if you are having a Halloween party.  Make a bunch of these Haunted Houses and use them to store candy…. hand them out as a Halloween Party favor.  How fun is that?!


(15)  Cardboard Boxes & Rolls Haunted House


Cardboard Boxes & Rolls Haunted House


Isn’t this a rock’n Haunted House?!  Or, should I say…. Haunted Mansion?!  I love it.  Patheos used different sized cardboard boxes and cardboard rolls to make this Haunted House craft.  It is a clever idea and it came out amazing.  Check out her site to see it for yourself.


(16)  Cereal Box Haunted House


Cereal Box Haunted House


What a great Haunted House.  And, what it totally cool about this Halloween craft is that it is simply made from a cereal box.  I love when you can find your craft materials right at home…. and in this case you can.  Check out Fun Lab Blog for all the Haunted House Craft details.


(17)  Glow in the Dark Haunted House


Glow in the Dark Haunted House


You know what is spooky?  Something that glows in the dark….. like this Haunted House.  I’m not sure why, but an item that has a glowing effect is just 10 times spookier.  And, it’s perfect for Halloween.  Make sure to check out Craft Project Ideas for the step-by-step “how-to” on making this Glow in the Dark Haunted House.

Technorati Tags: , , , , , , , ,

How to Make Bunny Rabbit Treat Bags for Easter

Instead of using an Easter Basket to give out Easter treats to people, have you thought of using a Treat Bag?  Today I’m going to show you how to make a Bunny Rabbit Treat Bag for Easter.  These are great if you have a bunch of people to hand out candy to.  Instead of buying an Easter Basket for everyone…. why not just make these cute Bunny Rabbit Treat Bags.  They are super easy and a ton of fun…. plus they are super cute.  So, grab the materials needed and let’s get started.

Check out our other Easter Crafts.


How to Make Bunny Rabbit Treat Bags for Easter


Materials Needed

Brown Bag

Pencil

Scissors

Black Marker

2 Pom Poms

Treats

2 Ribbons


Step 1


Draw top of bunny's head all around a brown bag.


Draw top of bunny’s head all around a brown bag.


Step 2


After cutting out it will look like this.


Cut out the top of the bunny heads you just drew.  After cutting out it will look like this.


Step 3


Draw 2 ovals for eyes


Draw 2 ovals for eyes, draw 3 lines for whiskers and add 2 pom poms where shown.


Step 4


Add treats


Add treats.  Once you have added the treats tie both ears shut on each side.

That’s it!!  You just finished your Bunny Rabbit Treat Bags for Easter.  Now, give this Bunny Rabbit Treat Bag to the receiver….. they are sure to love it!!

Technorati Tags: , , , , , , , , , , , , , ,

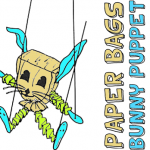
How to Make a Paper Bag Bunny Puppet

I have a fun and creative craft for you today.  I am going to show you how to take a paper bag and make it into a bunny puppet.  Sounds like fun, right?  It really is.  And, the timing of it couldn’t be any more perfect.  After all, Easter is in just a few weeks.  Made with string or yarn the arms and legs of the puppet actually move.  When you aren’t using it as a puppet hang the Paper Bag Bunny up as an Easter decoration.  People are sure to love it when they see it.  So, let’s get started.

Check out our other Easter Crafts and Puppet Crafts.


How to Make a Paper Bag Bunny Puppet


Materials Needed

Paper Bag

Newspaper

String or Yarn

Several Sheets of Paper

Scissors

Glue

Pencil


Step 1


Wad up several sheets of newspaper and put in paper bag until 3/4 full.


Wad up several sheets of newspaper and put in paper bag until 3/4 full.


Step 2


Close the open end of bag with string or yarn.


Close the open end of bag with string or yarn.


Step 3


Cut 8 strips of paper each approximately 3/4 inch by 18 inches long.


Cut 8 strips of paper each approximately 3/4 inch by 18 inches long.


Step 4


Glue ends of 2 strips of paper together at right angle


Glue ends of 2 strips of paper together at right angle (so it looks like a letter L).


Step 5


Keep folding each strip over the other strip until entire strips are used.


I colored each strip a different color to help you visualize how to fold these.  1)  did #1 in last step.  2)  fold blue strip over and crease.  3)  fold red strip over and crease.  4)  fold blue strip down and crease.  Keep folding each strip over the other strip until entire strips are used.  Glue last fold together.


Step 6


You will need 4 all together.


Now you have a springy arm or leg.  You will need 4 all together.


Step 7


Draw and cut out bunny hands, feet, ears, eyes and mouth.


Draw and cut out bunny hands, feet, ears, eyes and mouth.


Step 8


On each side of the bag, glue on arms.


On each side of the bag, glue on arms.  Spread out extra edges of the top of the bag to form a skirt.  Under skirt, glue legs.  Glue on hands and feet to legs and arms.


Step 9


Glue string to hands and feet.


Glue string to hands and feet.

There you go….. you just finished your paper bag bunny puppet.  Isn’t it adorable?  Now move the strings and watch the the bunny dance.  What else can you make him do?

Technorati Tags: , , , , , , , , , , , , , , ,

How to Make a George Washington Wig for President’s Day

Lately I have been showing you some crafts to do for President’s Day.  Well, I’m going to continue with the President’s Day crafting fun by showing you how to make a George Washington Wig.  Made from cotton balls and a large paper shopping bag…. this craft turns out awesome.  Plus, the craft is a lot of fun…. almost as much fun as the child will have running around wearing the George Washington Wig he/she just made.  So, grab the materials needed and let’s get started with this crafting fun.

Check out our other President’s Day Crafts.


How to Make a George Washington Wig


Materials Needed

Large Paper Bag

Pen or Marker

Scissors

Cotton Balls

Glue

Blue Ribbon


Step 1


Draw a number 5 like shape on large bag.


Draw a number 5 like shape on large bag.


Step 2


Now, cut out the shape you drew in last step


Close the bag so it is not open.  Now, cut out the shape you drew in last step so you cut thru both sides.


Step 3


This is the part that will go over your head.


This is the part that will go over your head.


Step 4


Glue cotton balls over the outside of bag.


Glue cotton balls over the outside of bag.


Step 5


Tie ribbon around back for ponytail.


Tie ribbon around back for ponytail.


Finished George Washington Wig


Awesome job… you just finished making your George Washington Wig for President’s Day.  Wasn’t it fun to make?!  Now, put on your wig and act like George Washington.  Fun stuff!!

Technorati Tags: , , , , , , , , ,

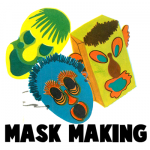
Mask Making Fun – How to Make 3 Different Style Masks

Everyone knows that Masks are a perfect craft for Halloween.  But, if your kids are anything like my two littlest ones…. Masks are fun ANY time of year.  My children LOVE masks… love them!!  So, today I’m going to show you how to make three different style masks….. make your favorite or make all three.  Plenty of mask making fun.

Check out our other Halloween Crafts.


How to Make 3 Different Style Masks


Mask 1


Mask 1 Directions


Materials Needed

Paper Bag

Chalk

Crayons

Scissors

Paint, Construction paper, yarn…. and anything you would like to decorate the mask with.

Directions:

  1. Put a paper bag over your head. Mark with chalk or crayon the places for eyes and mouth.
  2. Remove the bag and carefully cut these openings.
  3. Funny ears, a nose, and hair may be added by painting and pasting. Color with crayons or water colors.


Mask 2


Mask 2


Materials Needed

Firm Paper (butcher paper would work)

Paint, Construction paper, yarn…. and anything you would like to decorate the mask with.

Pencil

Scissors

Hole Punch

Notebook Reinforcements (makes holes stronger)

String

Rubber Bands

Paper Clips

Directions:

  1. Cut a piece of firm paper large enough to cover your face and reach your ears. Hold the paper to your face and mark places for your eyes and mouth.
  2. Remove the paper and cut the openings.
  3. Punch holes in the sides just above the ears. Put notebook reinforcements or paper rings over the holes.
  4. Decorate the mask however way you would like.
  5. Use string, rubber bands, and paper clips to fasten the mask around your head.


Mask 3


Directions for Mask 3


Materials Needed

Clay

Cardboard, Slate or Wood

Paper Towels

Bright Colored Paint

Directions:

  1. Model a face of clay on a firm base of heavy cardboard, slate, or wood.
  2. Let the model dry. Cover it with a layer of damp strips of paper toweling.
  3. Paste four more layers over the first layer. Each layer should be at right angles to the one under it. When the paper is dry and rigid, remove the mask from the clay model.
  4. Paint the mask with bright colors.

There you have it…. 3 different style masks.  Your child is sure to find a Mask craft that fits their needs.  Have fun!!

Technorati Tags: , , , , , , , ,

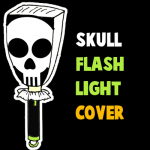
How to Make a Skull Flashlight Cover

Today I’m going to show you how to make a Skull Flashlight Cover.  This Flashlight Cover is very spooky… perfect for carrying around this Halloween season.  It’s a simple craft made from a flashlight and paper bag.  But, don’t let its simplicity fool you…. the outcome is a flashlight cover worthy of being carried around during Trick or Treat for all to see.

Check out our other Halloween Crafts.


How to Make a Skull Flashlight Cover


Materials Needed:

Flashlight

New Lunch Bag

White & Black Paint

Masking Tape

Construction Paper (optional)

Glue (optional)


Step 1


Paint the bag white


Obtain a new brown lunch bag (a used lunch bag would probably be too wrinkled and too hard to use).  Paint the bag white.  Let dry.


Step 2


Wrap bag with tape like a belt


Bulb end of flashlight is inserted 2 inches in open end of the bag…leaving space between the bag and the light. Draw open end of bag together around flashlight and tape with masking tape or tie with string.  Tape bag with tape like a belt.

***Leave space between the flashlight and the end of the bag so that the paper bag doesn’t sit directly on the light. NEVER LEAVE THE FLASHLIGHT COVERED WHILE UNATTENDED AND TURN OFF WHEN NOT IN USE!!!***


Step 3


Now let's start with painting the face


Now let’s start with painting the face.  Bag may be decorated by using tempera or acrylic paints and/or construction paper.  If construction paper is used, the desired portions of the designs are cut out of the paper and glued to one or more faces of the bag.


Step 4


Paint an oval for each eye and draw three thick lines for teeth


Paint an oval for each eye and draw three thick lines for teeth.  While the picture on the paper bag is being designed the flashlight can be lit in a darkened area to obtain the desired effect.


Step 5


Draw a heart shaped nose... or a triangle shaped nose


Draw a heart shaped nose… or a triangle shaped nose.


Step 6


Draw a circle around the eyes and nose... Draw a line around both sides of teeth


Draw a circle around the eyes and nose… Draw a line around both sides of teeth.  Fill in both those areas with black paint.


Finished Skull Flashlight Cover


And, there you have it.  You have just finished making a Skull Flashlight Cover perfect for carrying on Halloween.  And, if you are looking for a matching Trick or Treat basket craft check out How to Make a Skull Trick or Treat Basket… these Skull items carried together will be a HUGE hit!!

Technorati Tags: , , , , , , , ,

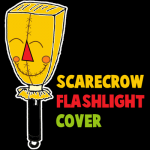
How to Make a Scarecrow Flashlight Cover

I have yet another Flashlight Cover craft to show you how to make.   It’s a Scarecrow Flashlight Cover and it is a cute one!!  This Scarecrow Flashlight will be perfect to carry around on Halloween while trick or treating so that cars will know you are there in the dark.  No child should be walking around in the dark without some sort of lit item….. so this flashlight cover craft is perfect.

Check out our other Halloween Crafts.


How to Make a Scarecrow Flashlight Cover


Materials Needed:

Flashlight

New Lunch Bag

Yellow, Red and Orange Paint

Masking Tape

Brown Marker

Red and Orange Construction Paper (only if not painting facial features)


Step 1


Paint the bag yellow


Obtain a new brown lunch bag (a used lunch bag would probably be too wrinkled and too hard to use).  Paint the bag yellow.  Let dry.


Step 2


Wrap bag with tape like a belt


Bulb end of flashlight is inserted 2 inches in open end of the bag…leaving space between the bag and the light. Draw open end of bag together around flashlight and tape with masking tape or tie with string.  Tape bag with tape like a belt.

***Leave space between the flashlight and the end of the bag so that the paper bag doesn’t sit directly on the light. NEVER LEAVE THE FLASHLIGHT COVERED WHILE UNATTENDED AND TURN OFF WHEN NOT IN USE!!!***


Step 3


Now we will start painting the face


Now we will start painting the face.  Bag may be decorated by using tempera or acrylic paints and/or construction paper.   If construction paper is used, the desired portions of the designs are cut out of the paper and glued to one or more faces of the bag.


Step 4


Draw a line down center of bag... In the center of face paint a triangle


Draw a line down center of bag… In the center of face paint a triangle.  While the picture on the paper bag is being designed the flashlight can be lit in a darkened area to obtain the desired effect.


Step 5


Draw a curved line for each eye.  Draw a circle for each cheek.


Draw a curved line for each eye.  Draw a circle for each cheek.


Step 6


Draw curved line that ends under each cheek circle


Draw curved line that ends under each cheek circle.


Step 7


 Draw letter X shapes for all stitches... all over mouth and center line


Draw letter X shapes for all stitches… all over mouth and center line.


Finished scarecrow flashlight cover


Your finished Scarecrow flashlight cover should look like the image above.   Children will love walking around their community trick or treating with their very own handmade Scarecrow flashlight cover.

Technorati Tags: , , , , , ,

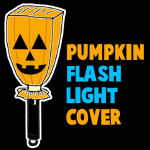
How to Make a Jack-o-Lantern Flashlight Cover

Today I’m going to show you how to make a Jack-o-Lantern flashlight cover to carry on Halloween for trick or treating.  Whether your costume is scary, cute or funny this is the perfect lighted object to carry on Halloween.  And, then you can safely walk around the neighborhood on Halloween no matter how dark it gets.

Check out our other Halloween Crafts.


How to Make a Pumpkin Flashlight Cover


Materials Needed:

Flashlight

New Lunch Bag

Orange Paint

Black Paint or Use Template to Print on Paper

Black Marker

Orange Construction Paper

Masking Tape

Glue

Scissors


If not painting the face follow the printable template below to make the Pumpkin’s facial features.

CLICK ON IMAGE TO OPEN IT UP BIGGER TO PRINT.


Printable template for pumpkin's facial features


Step 1


Paint the bag orange


Obtain a new brown lunch bag (a used lunch bag would probably be too wrinkled and too hard to use).  Paint the bag orange.  Let dry.


Step 2


Tape bag with tape like a belt


Bulb end of flashlight is inserted 2 inches in open end of the bag…leaving space between the bag and the light. Draw open end of bag together around flashlight and tape with masking tape or tie with string.  Tape bag with tape like a belt.

***Leave space between the flashlight and the end of the bag so that the paper bag doesn’t sit directly on the light. NEVER LEAVE THE FLASHLIGHT COVERED WHILE UNATTENDED AND TURN OFF WHEN NOT IN USE!!!***


Step 3


 Now we will start painting the face


Now we will start painting the face.  Bag may be decorated by using tempera or acrylic paints and/or construction paper.   If you are using paper follow the printable template above.  If construction paper is used, the desired portions of the designs are cut out of the paper and glued to one or more faces of the bag.


Step 4


With a thin  black marker draw a line down the center of the bag


With a thin  black marker draw a line down the center of the bag.  Then draw a line curving inwards towards this line… on both sides… as in mine.  While the picture on the paper bag is being designed the flashlight can be lit in a darkened area to obtain the desired effect.


Step 5


Use black marker or paint to draw 2 big triangles for eyes and a smaller one for the nose


Use black marker or paint to draw 2 big triangles for eyes and a smaller one for the nose.  You could also cut out these shapes in black construction paper.


 Step 6


To make a mouth draw a letter U shape... closed and filled in with black


To make a mouth draw a letter U shape… closed and filled in with black.  To add teeth just push down 2 rectangles into that space… In other words, draw the same exact mouth shape… but add 2 rectangles.


Finished Pumpkin Flashlight Cover


And, now you are all ready to go trick or treating safely with your friends this Halloween.  And, keep an eye out for other Halloween Crafts as I will be adding them several times a day.

Technorati Tags: , , , , , , , ,

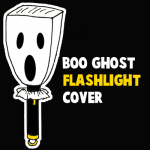
How to Make a “Boo” Ghost Flashlight Cover

It’s important for children to carry some sort of lighted object when trick or treating on Halloween.  But, more often than not all the kids are wearing or carrying the same lighted object as everybody else.  That’s no fun.  How about making one of your very own that no one else will be carrying.  In this post I will show to how to make a “Boo” Ghost Flashlight Cover for an everyday flashlight that you have at home.   Now, THAT’S creative!!

Check out our other Halloween Crafts.


How to Make a "Boo" Ghost Flashlight Cover


Materials Needed:

Flashlight

New Lunch Bag

White & Black Paint

Masking Tape

Construction Paper (optional)

Glue (optional)


Step 1


Paint the lunch bag white


Obtain a new brown lunch bag (a used lunch bag would probably be too wrinkled and too hard to use).  Paint the bag white.  Let dry.


Step 2


Tape bag with tape like a belt


Bulb end of flashlight is inserted 2 inches in open end of the bag…leaving space between the bag and the light. Draw open end of bag together around flashlight and tape with masking tape or tie with string.  Tape bag with tape like a belt.

***Leave space between the flashlight and the end of the bag so that the paper bag doesn’t sit directly on the light. NEVER LEAVE THE FLASHLIGHT COVERED WHILE UNATTENDED AND TURN OFF WHEN NOT IN USE!!!***


Step 3


Now let's start with painting the face


Now let’s start with painting the face.  Bag may be decorated by using tempera or acrylic paints and/or construction paper.  If construction paper is used, the desired portions of the designs are cut out of the paper and glued to one or more faces of the bag.


Step 4


Either paint 3 ovals or cut out 3 black construction paper ovals and paste on the bag


This one is really easy.  Either paint 3 ovals or cut out 3 black construction paper ovals and paste on the bag.  While the picture on the paper bag is being designed the flashlight can be lit in a darkened area to obtain the desired effect.


Finished "Boo" Ghost Flashlight Cover


Isn’t this Halloween “Boo” Ghost Flashlight Cover clever?  And, it was really easy to make too, huh?  Now you have the perfect item to keep your kids safe on Halloween and it won’t take away from their scary costumes.  They’ll love it.

Technorati Tags: , , , , , ,

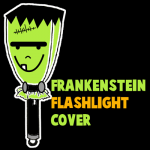
How to Make a Frankenstein Flashlight Cover

Trick or Treat is right around the corner.  The kids are super excited about it and just can’t wait to get out at night and celebrate Halloween with tons of Trick or Treating.  But, before the kids step out the door make sure they have a flashlight in hand to help them not only see, but be seen by cars.  Today I will show you how to make your very own Frankenstein Flashlight Cover perfect for this Halloween.

Check out our other Halloween Crafts.


How to Make a Frankenstein Flashlight Cover


Materials Needed:

Flashlight

New Lunch Bag

Green Paint

Black Paint or Use Template to Print on Paper

Masking Tape or String

Grey Paper or Tin Foil

Glue

Scissors


If not painting the face follow the printable template below to make Frankenstein’s facial features.

CLICK ON IMAGE TO OPEN IT UP BIGGER TO PRINT.


Printable template to make Frankenstein's facial features.


Step 1


Paint a lunch bag green


Obtain a new brown lunch bag (a used lunch bag would probably be too wrinkled and too hard to use).  Paint the bag green.  Let dry.


Step 2


Tape bag with tape like a belt


Bulb end of flashlight is inserted 2 inches in open end of the bag…leaving space between the bag and the light. Draw open end of bag together around flashlight and tape with masking tape or tie with string.  Tape bag with tape like a belt.

***Leave space between the flashlight and the end of the bag so that the paper bag doesn’t sit directly on the light. NEVER LEAVE THE FLASHLIGHT COVERED WHILE UNATTENDED AND TURN OFF WHEN NOT IN USE!!!***


Step 3


Now start painting the face


Now we will start painting the face.  Bag may be decorated by using tempera or acrylic paints and/or construction paper.   If you are using paper follow the printable template above.  If construction paper is used, the desired portions of the designs are cut out of the paper and glued to one or more faces of the bag.


 Step 4


Paint the details of the face on bag


Paint details such as a dot for each eye… for the stitches just draw a long line with short lines covering it.  While the picture on the paper bag is being designed the flashlight can be lit in a darkened area to obtain the desired effect.


Step 5


Draw a thick line over his eyes as a brow


Draw a thick line over eyes for his brows.  Draw a letter U shape for the mouth.  Draw sideways letter C for the nose.


Step 6


Draw a number 7 for the tooth


Draw a number 7 for the tooth.  Cut out two gray or tin foil circles for bolts and glue on his neck.


Frankenstein Flashlight Cover


Now, how cool would this Halloween Flashlight be to carry around?  So cool!!  Do you know what would be even cooler?  How about making the Frankenstein Trick or Treat Basket to carry along with the flashlight on Halloween?  Now, THAT would be fun!!

Technorati Tags: , , , , , ,

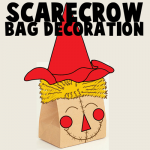
How to Make a Brown Bag Scarecrow Decoration

Scarecrows are a great fall character.  You see them in fall all around corn fields to protect the corn from crows.  Well, what fall holiday do the kids love more than any other???  Halloween, of course.  Here I will show you how to make a brown bag Scarecrow decoration perfect to display this Halloween season…. and why not even the entire fall season!!

Also check out our other Halloween Crafts

How to Make a Brown Bag Scarecrow Decoration


Materials Needed:

Brown Grocery Bag

Tissues, Ripped up Newspaper or other Fillers

Stapler

Markers

Red Paint

Yellow Paper

Paste

Cardboard

Paper or Newspaper

Scissors

Tape


Step 1


Get a grocery bag and fill it with tissues, ripped up newspaper or another type of filler


Get a grocery bag and fill it with tissues, ripped up newspaper or another type of filler… then fold over and staple shut.


Step 2


Draw a line thru the center of the bag... brown markers work well.


Draw a line thru the center of the bag… brown markers work well.


Step 3


Draw two circles for the cheeks and a triangle for the nose


Draw two circles for the cheeks and a triangle for the nose.  Use red marker or paint.


Step 4


Draw a curved line for each eye


Draw a curved line for each eye.


Step 5


Draw a curved line for the mouth


Draw a curved line for the mouth.


Step 6


Draw 'X' shapes all over the mouth and center line


Draw ‘X’ shapes all over the mouth and center line.


Step 7


Cut strips of yellow paper for the hair


Cut strips of yellow paper for the hair.


Step 8


Paste hair all over the top of the bag


Paste hair all over the top of the bag.


Step 9


Form a cone with paper or newspaper


Form a cone with paper or newspaper.


Step 10


Cut a ring from cardboard and tape it to the bottom of the cone


Cut a ring from cardboard and tape it to the bottom of the cone.


Step 11


Now take large paper or newspaper and sloppily wrap it around the cardboard ring


Now take large paper or newspaper and sloppily wrap it around the cardboard ring to make it look like this.  Paint it.


Finished brown bag scarecrow decoration


Ok, that’s super cute, right?!  It is the perfect decoration for the fall Holidays… including Halloween.  Your kids will love helping you decorate for the Holidays…. they will feel so proud.

Technorati Tags: , , , , , , , , ,

How To Make A Potato Face Leprechaun Preschool Crafts Activity for St. Patricks Day

St. Patrick’s Day must have Leprechauns and this one is sure to make everyone smile. This is a Mr. Potato Head Leprechaun craft for Saint Patrick’s Day. This one is great for younger kids such as Kindergartners, Preschoolers, and First Graders.

You Might Like Our Other St. Patrick’s Day Crafts Ideas


How To Make A Potato Face Leprechaun Preschool Crafts Activity for St. Patricks Day


How To Make A Potato Face Leprechaun Preschool Crafts Activity for St. Patricks Day

Potato Face Leprechaun Supplies

* Small paper bag
* Scissors
* Pencil
* Glue
* Green, red, purple, black and white construction paper

Potato Face Leprechaun Instructions

Step 1


Take the paper bag and cut into the shape of a potato.


Take the paper bag and cut into the shape of a potato.


Take the paper bag and cut into the shape of a potato.

Step 2


Use the white and black construction paper to cut our the eyes and the mouth and glue to the bag piece.


Use the white and black construction paper to cut our the eyes and the mouth and glue to the bag piece.


Step 3


Step 3 Make a Potato Head Leprechaun


Glue a Red Circle to his face…for the nose.

Step 4


step 4.1


Make a hat by folding a green piece of paper in half lengthwise and then drawing a slanted capital Bubble Letter ‘L’ shape (like seen above), along the fold and the cut it out and open it up … it makes a hat.


Step 4 Make a Potato Head Leprechaun


Like this.

Glue this hat to the potato head.

Step 5


Step 6 Make a Potato Head Leprechaun


Cut out a black strip and glue it on the hat.

Step 6


Cut out a yellow square with the center cut out to the hat's black strip.


Cut out a yellow square with the center cut out to the hat’s black strip.


Step 7 Make a Potato Head Leprechaun


Glue the gold buckle to the black paper strip.

Step 7


Step 8 Make a Potato Head Leprechaun


Cut out 2 big green circles and one small green circle and glue them together to look like a bow tie. Glue them to the bottom of the potato head.

Step 8


Step 9 Make a Potato Head Leprechaun


Take an orange piece of paper and cut strips of paper out. Glue them as a beard to the bottom of the face.


You Might Like Our Other St. Patrick’s Day Crafts Ideas

Technorati Tags: , , , , , , , , ,