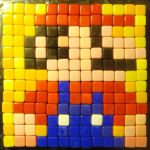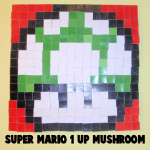
How to Make a Mosaic Super Mario 1-up Mushroom Pixelated Picture from Tiles

If you have ever played any of the Super Mario Series you know what the Super Mario 1-up Mushroom is.  The 1-up mushroom can give you an extra life and its hard to find.  If you are the Super Mario video game lover you are going to want to do this craft.  In this post I will show you how to make a mosaic Super Mario 1-up mushroom pixelated picture from tiles.  Fun, fun!!
Click here for more mosaic tutorials


How to Make a Mosaic Super Mario 1-up Mushroom Pixelated Picture from Tiles


Materials Needed:

Glue

Cardboard or Wood

Tiles or Cut up Squares from Paper or Foam


Materials needed


Here is a pattern for you to print or just look at while you are making your Mosaic Super Mario 1-up Mushroom.


Pattern for the Mosaic Mario 1-up Mushroom


The background of the picture can be any color you would like.  I happened to use red.


Step 1


Put Glue on First Tile


Put glue on first tile.


Step 2


Place square firmly on cardboard


Place square firmly on cardboard or wood.


Step 3


How to Make a Mosaic Super Mario 1-up Mushroom Pixelated Picture from Tiles


After you finished putting all the tiles on the wood  make sure to put a heavy book on top of it overnight.  This will insure the tiles are glued fast and will hold.  There you have it….. easy peasy lemon squeezy.  You have just made an awesome Mosaic Super Mario 1-up Mushroom Pixelated Picture from Tiles.

Technorati Tags: , , , , , , ,

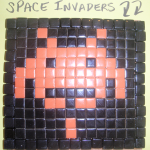
How to Make a Mosaic Space Invaders Pixelated Picture from Tiles

Space Invaders was my absolute favorite arcade game to play back in the 80’s.  I use to beg my dad to give me quarters to play Space Invaders…. I could spend hours in front of that game.  Today I will show you how to make a Space Invaders pixelated picture from Tiles.  I hope you have as much fun making the craft as I did playing the game.

Click here for more mosaic tutorials


How to Make a Mosaic Space Invader Pixelated Picture from Tiles


Materials Needed:

Glue

Cardboard or Wood

Tiles or Cut up Squares from Paper or Foam


Materials needed


Here is a pattern for you to print or just look at while you are making your Mosaic Space Invaders Picture.


Pattern for Mosaic Space Invaders


Step 1


Put Glue on First Tile


Put glue on first tile.


Step 2


Place square firmly on cardboard


Place square firmly on cardboard or wood.


Step 3


How to Make a Mosaic Space Invader Pixelated Picture from Tiles


Any child will love putting this mosaic Space Invaders pixelated picture craft together.  But, more than that they will love hanging it proudly for all to check out.

Technorati Tags: , , , , ,

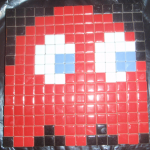
How to Make a Mosaic Red Ghost from Pacman Pixelated Picture from Tiles

The other day I showed you how to make a Mosaic Pacman pixelated picture from tiles.  Today I will continue the Pacman craft fun by showing you how to make a mosaic red ghost from Pacman pixelated picture.  You know you can’t have a Pacman without having at least one ghost for Pacman to have fun with….. he just wouldn’t know what to do.  “Chomp, chomp, chomp.”

Click here for more mosaic tutorials


How to Make a Mosaic Red Ghost from Pacman Pixelated Picture from Tiles


Materials Needed:

Glue

Cardboard or Wood

Tiles or Cut up Squares from Paper or Foam


Materials needed


Here is a pattern for you to print or just look at while you are making your Mosaic Red Ghost.


Pattern for Mosaic Red Ghost from Pacman


Keep in mind that the surrounding area in this pattern can be any color….. I just happened to use black.


Step 1


Put Glue on First Tile


Put glue on first tile.


Step 2


Place square firmly on cardboard


Place square firmly on cardboard or wood.


Step 3


How to Make a Mosaic Red Ghost from Pacman Pixelated Picture from Tiles


Place a heavy book on top of your mosaic craft overnight to make sure that the tiles are glued fast.  After that, make sure to place your mosaic red ghost craft with the Pacman craft and see who wins the battle this time around.  “Chomp, chomp, chomp.”

Technorati Tags: , , , , , , , , , ,

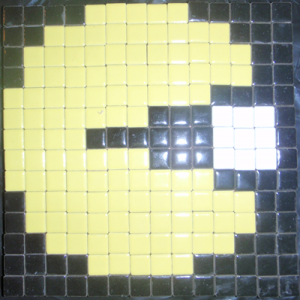
How to Make a Mosaic Pacman Pixelated Picture from Tiles

Pacman was the hottest arcade game from the 1980’s and it is still crazy popular today.  I’m going to show you how to make a super cool pixelated Pacman picture that is very easy and fun to make…. just follow the easy-to-follow pattern and you are as good as gold.

Click here for more mosaic tutorials


Mosaic Pacman Pixelated Picture from Tiles


Materials Needed:

Glue

Cardboard or Wood

Tiles or Cut up Squares from Paper or Foam


Materials Needed


Here is a pattern for you to print or just look at while you are making your Mosaic Pacman.


Mosaic Pacman Pattern


The surrounding area of your Mosaic Pacman can be any color you would like.  I made this area black, but feel free to use any color.

Step 1:


Put Glue on First Tile


Put glue on first tile.


Step 2


Place square firmly on cardboard


Place square firmly on cardboard or wood.

Step 3


Finished Mosaic Pacman


Once you have the pattern completely finished make sure to place a heavy book on top of your finished craft overnight.  This will insure that your Mosaic Pacman craft is glued fast and ready to be shown proudly for all to see.

Technorati Tags: , , , , ,

How to Make a Mosaic Super Mario Pixelated Picture from Tiles

Today we will show you how to make a really cool, pixelated Super Mario. This is the Mario from the 1980’s when he just looked like a bunch of squares….this is the classic Nintendo Mario. We have included a pattern for Mario’s complete body…or you can do just part of his body like I did. (and I know that I messed up on Mario’s thumbs…put the pattern below, reflects the correct pattern).

Click here for more mosaic tutorials


How to Make a Mosaic Super Mario Pixelated Picture from Tiles


Materials Needed:


Glue

Cardboard or Wood

Tiles or Cut up Squares from Paper or Foam


Materials Needed


Here is a pattern for you to print or just look at while you are making your mosaic Mario.


Here is a pattern for you to print or just look at while you are making your mosaic Mario.


You can make the surrounding color of Mario, any color that you want. You can also do only part of Mario, like I did, or Mario’s entire body.

Step 1:


Step 1 : Put Glue on Tile


Put Glue on First tile.


Step 2


Put tile down


Place square firmly on cardboard or wood.

Step 3


Wow Your Done


Now continue thru the pattern until finished. Place a heavy book over tiles overnight to make sure that tiles are firmly placed. By morning you should have your finished craft. Your parents will look fondly at the Mario picture.

Technorati Tags: , , , , , ,

How to Paint, Glaze, and Fire Ceramic Tiles without a Kiln

Do you want to learn how to make your own customized ceramic tile? Well, then you’re in luck because today we will show you how to take a pencil design and then transfer it to your tile. From there you can take your liquid glaze and paint your design onto the tile. You don’t need a kiln to fire your ceramic tile, you just need a normal kitchen oven. Learn all about firing & glazing your ceramic tiles at home in the step by step tutorial below.

How to Paint, Glaze, and Fire Ceramic Tiles without a Kiln


How to Paint, Glaze, and Fire Ceramic Tiles


Crafts Materials Needed:

Blank glazed tiles

Low Fire Liquid Glaze

Watercolor brush

Tracing paper

Pencil

Paints or crayons

How to Design and Paint on a Ceramic Tile

Step 1


How to Design and Paint on a Ceramic Tile


On a piece of paper that is the same size as tile, draw a design.  Color design with paints or crayons, as in picture above.

Step 2


With pencil and tracing paper, trace off colored design outline, omitting most of the details


With pencil and tracing paper, trace off colored design outline, omitting most of the details. Remove tracing paper and scratch the back with soft pencil


Step 3


Place tracing paper, scratched side down, over tile


Place tracing paper, scratched side down, over tile, and trace design on tile, as in picture above.

Step 4


Stir liquid glaze, and thin with reducer if necessary with watercolor brush, fill in tile


Stir liquid glaze, and thin with reducer if necessary with watercolor brush, fill in tile, as in picture above.

HOW TO FIRE A CERAMIC TILE


oven


Place tile in a cold oven and heat slowly to 250°F. Keep oven at the same temperature, with the oven slightly open, for 2 hours. Turn off oven, and leave tiles in oven until cool. Ask an adult to remove tile, and when thoroughly dry, wash with soap and water to remove all traces of pencil marks.

Technorati Tags: , , , , , , , ,