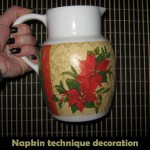
How to Make a Christmas Decorated Jug with Napkins

Today I’m going to show you how to transform an ordinary jug into a wonderful Christmas decoration.  You can use a jug that you can pick up at any discount store and change it into a spectacular Christmas decoration or give it out as a Christmas gift this Holiday.  Using this special napkin technique changes an ordinary jug into something so much more.  Plus, the craft itself is so much fun.  So, grab the kids and the materials needed and let’s get started.
Check out our other Christmas crafts.

Laura from  Dacian Moon Handmade will show you how to make this.


Materials Needed

– blank jug
– craft glue
– metallic gold paint
– napkin with the motif you want to use
– scissors
– paintbrush


Step 1

Take the napkin…


… and cut out the motif you want to use…


… like this.


Step 2

Remove the white layers. It is easier to start in the middle, where the napkin was folded.


Most napkins are either 2-ply or 3-ply so you must remove all the white layers.


Step 3

Using the paintbrush…


… apply a layer of glue on the item where the motif will be.


Place the napkin as flat as you can, following the contours of the item.


Wet the brush slightly with glue and spread evenly on the surface of the napkin until it is completely covered. Work slowly and be careful not to tear the napkin. Work from the center out towards the edge of the pattern.


Let it dry.


Step 4

To give it shine you can add a thin layer of metallic paint over the motif.


Let it dry well…


… and the jug is ready.


Now place the Christmas decorated Jug somewhere special this Christmas.  It is a perfect decoration for the Holiday that you can use for years to come.

Technorati Tags: , , , , , , , , , , ,

How to make a Pine Cone Christmas Figurine Ornament

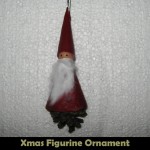
Today I’m going to continue with another Christmas Craft.  This one will be a Pine Cone Christmas Figurine Ornament.  It is super cute and will look terrific on the Christmas Tree.  Let each of the kids make one of these figurine ornaments…. they will love hanging something up on the tree that they made themselves.  Plus, it is so much fun.  So, grab the materials needed and let’s get started.
Check out our other Christmas Crafts.

Tutorial offered by Laura from Dacian Moon Handmade .


Materials Needed

– cardboard
– red leather
– a cotton pad
– 1 wooden bead (big enough to be the head)
– scissors
– 1 piece of ribbon
– 1 pine cone
– craft glue
– black paint
– toothpick


Step 1

Take the cardboard…


…and make a cone of it: bring one side over the middle.. .


… then the other. Glue the two parts together.


Place the pine cone inside, to measure how long the cardboard cone should be.


Cut the extra cardboard.


It will look like this.


Step 2

Apply a border of glue inside the cardboard cone…


… like this.


Then fix it over the pine cone.


Step 3

Take the wooden bead…


And place the toothpick inside.


Make a collar of glue where the toothpick comes out…


… and place it inside the cardboard cone, like in the picture. Keep it a little pressed, until the glue is dry.


Step 4

Take the leather and put it over the cardboard cone.


Measure the length and trace it with a pen.


Cut it out…


… like this


Apply glue on the back of the leather…


… and place it again over the cardboard cone.


Let it dry.


Step 5

Make another cardboard cone, narrower than first. This will be the cap.


Glue the cardboard cone.


Apply a layer of glue on the lower part that goes down from the cone and fold it over it.


Now cut the extra cardboard.


Measure the cone cover on the leather…


… like this.


Cut it out.


It will look like this now.


Apply glue on it…


… and place the cardboard cone on it.


Cover it with the leather.


Apply glue on the back…


… and place there the folded ribbon. Keep it in place until the glue is dry.


Now, let’s put it on the head. Put glue over the upper part of the head…


… like this…


…and fix the cap on it. Let it dry.


Step 6

Take the cotton pad…


… and break it into pieces to make one beard like this.


Apply glue on the lower part of the head and on the front part of the coat…


… and place the beard on it, fix it well on the face.


Take a little black paint with a toothpick…


… and draw its eyes.


Now you have a funny figurine to put on your Xmas tree.


The figurine is cute, huh?!  It will look wonderful on the Christmas Tree.  Enjoy!!

Technorati Tags: , , , , , , , , , , , , , ,

A Collection of Fun Nativity Scene Crafts for Kids


A Collection of Fun Nativity Scene Crafts for Kids


One thing you see at most houses at Christmas time is a Nativity Scene.  But, the problem with the store bought Nativity Scenes is that they are usually very delicate…. too delicate for the children to actually play with.  And, the thing about that is…. children love to play with the Nativity Scenes.  I mean, what’s not to want to touch…. there are small people, animals and a manger.  There is an entire scene for the kids to want to act out with the characters.  Well, why not make a Nativity Scene craft ….. put together a Nativity Scene of your very own that the children can actually play with.  So, today I have put together a bunch of Fun Nativity Scene Crafts that I have found around the internet.  All are a ton of fun…. and they are all meant to be played with.

Check out our other Christmas Crafts.

A Collection of Fun Nativity Scene Crafts for Kids

(1)  Pipe Cleaners & Yarn Nativity Scene


Pipe Cleaners and Yarn Nativity Scene


Here Spoonful shows us how to make an entire Nativity Scene using such materials as yarn and pipe cleaners.  She is very detailed, so this nativity craft is very enjoyable.  This Nativity Scene would look wonderful as a Christmas decoration and it surely will be so much fun to make.


(2)  Printable Nativity Scene


Printable Nativity Scene


I love this idea.  I found this Nativity Scene Craft at Catholic Icing and it is so cute.  Here you will be able to print off about 8 pages of templates.  Cut them out, decorate them and glue them to toilet paper tubes.  It’s so much fun.  check it out.


(3)  Flower Pot Nativity Scene


Flower Pot Nativity Scene


Ok, this is really cute, right?!  Suite 101 shows us how to transform 3 terra cotta flower pots (along with some other materials) into a ridiculously cute Nativity Scene.  The craft promises to be a lot of fun.  Plus, no doubt, you will be tempted to keep this Nativity Scene out year round.


(4)  Basket Nativity Scene


Basket Nativity Scene


This Nativity Scene craft is one of ours from last Christmas.   This Nativity surely will be one that you will keep for years to come.  We show you how to make each of the figures in great detail including the Three Wise Men, Baby Jesus & Cradle, Mary & Joseph, sheep and the donkey.  It’s so much fun.  Check it out for yourself.


(5)  Rock Nativity Scene


Rock Nativity Scene


Here is another super cute and original Nativity Scene Craft.  Here Roper 5 shows us how to make this fantastic Nativity Scene completely out of backyard rocks and markers.  So, no need to buy any craft materials…. you can have fun with the kids hunting in the backyard for the perfect rocks.


(6)  Wooden Block Nativity Scene


Wooden Block Nativity Scene


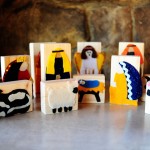
Here is an awesome Nativity Scene craft you can make with your kids with some wooden blocks, felt, glue and a few embellishments.  Imagine the fun you will have putting this craft together with your kids.  Fun part is that they are durable enough the kids can even play with this Nativity Scene.  Check out The Pioneer Woman for all the details.


(7)  Lego Nativity Scene


Lego Nativity Scene


This is such a clever idea for all you Lego fans.  Here Johan van Benthem shows us all how to make an entire Nativity Scene out of Legos.  Imagine the excitement of your kids as well as anyone who sees your Nativity Scene made completely out of Legos.  They will absolutely love it!!


(8)  Nativity Hand Puppets


Nativity Hand Puppets


What child doesn’t love hand puppets?  They all love them.  Here eHow shows us how you and your children can make these Nativity Hand Puppets for yourself.  Imagine the fun Christmas show your kids can put on with these hand puppets?  They will love using their imaginations to put on their very own program.


(9)  Nativity Blocks


Nativity Blocks


These blocks are just simply adorable.  I am a Momma – Hear Me Roar came up with this idea and I love it!!  She used homemade blocks, stickers and modge podge to make her Nativity Scene, but you can also print off Nativity Scene characters from the computer and do it that way as well.


(10)  Sun Catcher Nativity Scene


Sun Catcher Nativity Scene


Here is a clever idea by Peace Creek on the Prairie.  She uses wax paper, crayon shavings and an iron to make this beautiful Sun Catcher Nativity Scene.  Because of some of the materials used in this craft it does require some adult help.  You will have so much fun doing this Nativity Scene with your kids.


(11)  Gingerbread Nativity Scene


Gingerbread Nativity Scene


This Nativity Scene is absolutely delicious!!  Made from some of my most favorite treats this Nativity Scene craft is sure to be a big hit with the kids.  I found this craft at AOK Corral and it looks like so much fun.  You and your kids will surely enjoy putting this together.


(12)  Cardboard Tubes Nativity Scene


Cardboard Tubes Nativity Scene


Here is a simple yet fun Nativity Scene craft that all children will love putting together…. plus they can even play with this Nativity Scene once they are done.  Nurture Store shows us how to make this Nativity Scene out of toilet paper rolls.  How fun is that?!


(13)  Clothespin Nativity Scene


Clothespin Nativity Scene


This is truly a clever idea and almost all the materials used in this Nativity Scene craft can already be found in your home.  Our Dish shows us how to use a cardboard box, sharpie and a couple of clothespins (as well as a few other things) to put together this fun Nativity Scene craft.


(14)  Foam Nativity Craft


Foam Nativity Craft


Craft foam is a wonderful material that children love working with.  And, this Nativity Scene craft will be no exception.  Piggy Giggles shows us how to make a unique Nativity Scene out of craft foam.  The craft is wonderfully detailed, so believe me when I say they have covered everything.


(15)  Egg Carton Nativity Scene


Egg Carton Nativity Scene


Made from egg carton bottoms and beads this Nativity Scene is really cute.  Plus, the great thing about it is the kids will have just as much fun playing with this Nativity Scene as they had making it.  I found this craft at April Showers.  Check it out for all the craft details.

Technorati Tags: , , , , , , , , , , , , , , , ,

Fun Kwanzaa Crafts for Kids


Fun Kwanzaa Crafts for Kids


Top Image by TheBlackHour.com

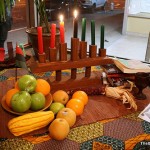
Oh boy…. do I have a treat for you today.  In this post I have compiled 14 Kwanzaa crafts from around the internet.  They are all perfect for your children to make.  Whether you celebrate Kwanzaa or not these crafts are great to help teach your children about Kwanzaa and the African culture.  Many of them not only incorporate the three colors of Kwanzaa (red, green & black), but they also help teach you about the 7 Principles of Kwanzaa…. Unity, Self Determination, Collective Work & Responsibility, Collective Economics, Purpose, Creativity and Faith.   These are wonderful principles to have and to teach your children.  So, check out these Kwanzaa crafts…. you are sure to find a few to do with your children.

Fun Kwanzaa Crafts for Kids

(1)  Kwanzaa Flag Garland


Kwanzaa Flag Garland


Here is a festive Kwanzaa craft perfect to help teach your children about Kwanzaa.  Here Kaboose shows you how to make this Kwanzaa Flag Garland in great detail.  It uses the symbolic colors of the holiday… red, green and black.


(2)  Kwanzaa Greeting Card


Kwanzaa Greeting Card


Here is one of our very own Kwanzaa crafts.  In this Kwanzaa Greeting Card craft we will show you how to make a greeting card for the Holiday Kwanzaa.  It is a very easy craft, so even young children will enjoy this craft.  You simply need some paper , scissors and glue.


(3)  Kwanzaa Mobile


Kwanzaa Mobile


I found this Kwanzaa craft over at Spoonful.  Here they use the 3 colors of Kwanzaa as well as the 7 principles of Kwanzaa to make this adorable mobile.  This will make an awesome Kwanzaa decoration as well as teach your children about Kwanzaa.


(4)  Handprint Kinara


Handprint Kinara


Here is a fun craft that children of all ages will love to make.  Activity Village shows us how to take your handprint and make it into a very cute Kinara.  It’s a quick, fun and messy Kwanzaa craft for kids!  They will love it.


(5)  Doll Pin Kinara


Doll Pin Kinara


I have another fun Kinara craft for you.  This one came from Kaboose and it promises to be tons of fun.  Here they use doll pins, spools, paint and some other materials to make this festive Kinara.  Kaboose even has tons of information to teach you more about the Holiday of Kwanzaa.


(6)  Kwanzaa Placemat


Kwanzaa Placemat


Here is another entertaining Kwanzaa craft.  In this craft Making Friends shows you how to incorporate the 3 colors of Kwanzaa into this colorful placemat.  Your kids will have fun weaving strips of red, green and black craft foam into this festive Kwanzaa placemat.


(7)  Kwanzaa Bracelet


Kwanzaa Bracelet


Here is a great Kwanzaa craft that both boys and girls will love making.  I found this craft at Yahoo! Voices and it’s a good one.  Make these Kwanzaa bracelets with the colors of Kwanzaa and give them to your family and friends as gifts.  They will love it.


(8)  Bubble Wrap Corn


Bubble Wrap Corn


Kwanzaa is about the festival of the first harvest of the crops.  So, this Bubble Wrap Corn just makes sense as a craft for Kwanzaa.  Give your child all the details about Kwanzaa as you make this fun bubble wrap craft with them.  Check out No Time for Flashcards for all the details.


(9)  Kwanzaa Bead Candles


Kwanzaa Bead Candles


Here Spoonful shows us another wonderful Kwanzaa craft.  This time they make these cute Kwanzaa bead candles.  Here they use craft cubes, oval beads as well as other materials to make these festive candles.  This is a great way to introduce the seven principles of Kwanzaa.


(10)  Kwanzaa Flag Decoration


Kwanzaa Flag Decoration


Family Education shows us a great way to teach your children a little bit about Kwanzaa and the African culture.  Here they use different flags of Africa to make a great decoration for Kwanzaa.  As you are making these flags of Africa with your children it is a great time to teach them about Kwanzaa.


(11)  Corn Necklace


Corn Necklace


Remember Kwanzaa is the festival of the first harvest of the crops.  Corn was a very important crop.  So, this Corn Necklace craft is perfect for Kwanzaa.  Here Better Homes & Gardens explains how each ear of corn represents a child in the family.  Check out the craft for all the details.


(12)  Papier Mache Bowl


Papier Mache Bowl


Check out this gorgeous and super festive Papier Mache Bowl perfect for Kwanzaa.  I found this at Crafts Holidays site and thought it was beautiful.  Here they use Papier Mache to make this bowl…. so it is sure to be a lot of fun for the kids.  Use this bowl to hold the Mazao (or fresh fruits and vegetables) at your Kwanzaa table.


(13)  Kid-Friendly Kinara


Kid Friendly Kinara


Nick Jr. has the right idea with this Kinara Kwanzaa craft.  It is just adorable and the children will love making it.   Here they use craft sticks as well as clothespins to put this Kinara together.  They also don’t forget the colors of Kwanzaa with this Kinara.


(14)  Cardboard & Tissue Paper Kinara


Cardboard & Tissue Paper Kinara


Kids love to do crafts with tissue paper and cardboard rolls.  And, this Kwanzaa craft will be no exception.  I found this craft over at PBS and thought it was a great one to include.  Make sure to check this Kinara craft out.  Plus, they also go into great detail of the 7 Principles of  Kwanzaa…. great to teach your children.

Technorati Tags: , , , , , , , ,

A Collection of Awesomely Yummy Edible Christmas Crafts


A Collection of Awesomely Yummy Edible Christmas Crafts


Crafts come in all different kinds of forms.  Today I’m going to write about Edible Crafts.  And, not just any edible crafts, but Edible Christmas Crafts.  YUMMY!!  Whether you are planning a Christmas party, Christmas decorations or just want to have fun with your kids…. Edible Christmas Crafts will be enjoyed by all.  I scoured the internet looking for yummy edible crafts and I came up with 16 awesome ones that will get your stomach growling.  So, without further ado here is a collection of awesomely yummy edible Christmas crafts for your enjoyment.

Check out our other Christmas Crafts.

A Collection of Awesomely Yummy Edible Christmas Crafts

(1)  Reese’s Peanut Butter Cup Trees


Reese's Peanut Butter Cup Trees


Ok, I love Peanut Butter Cups, so I couldn’t resist this Edible Christmas Craft.  Here Sweet Simple Stuff shows you how to take my favorite candy, Reese’s Peanut Butter Cups and transform them into these adorable Christmas Trees.


(2)  Sipping Snowman


Sipping Snowman


This edible Christmas craft is so cute!!  Busy Bee Kids Crafts shows us how to take marshmallows, white icing, chocolate chips and a straw and create an adorable Sipping Snowman that is delicious!!  It would taste so good in some hot chocolate.


(3)  Gumdrop Penguins


Gumdrop Penguins


I love these crazy pair of penguins!!  And, I bet they are delicious.  I found this edible Christmas craft over at Spoonful.  Not only will your kids love making these gumdrop penguins, but they will absolutely love eating them too.


(4)  Stained Glass Cookie Ornaments


Stained Glass Cookie Ornaments


What a yummy and clever idea.  Kaboose gives us all the details how to take store bought cookie dough and some Lifesaver hard candies and transform them into these beautiful Stained Glass Cookie Ornaments.  Sure, you could just eat the cookies, but imagine how wonderful they would look on your Christmas tree.


(5)  Gingerbread Star Tree


Gingerbread Star Tree


I love how beautiful this Gingerbread Cookie Christmas Tree looks.  But, imagine how your guests at your Christmas party will enjoy this.  They can simply grab a cookie off the tree and nibble on it while they chat with the guests.  How fun!!  Check out Taste of Home for the details.


(6)  Holiday Garland


Holiday Garland


Oh this garland looks so beautiful!!  I love how the colors of the red cranberries contrast against the white popcorn.  It’s just wonderful.  Craft Elf shows you how you too can do this.  This edible Christmas craft takes you back to a simpler time.  And, it makes the Christmas tree just absolutely gorgeous.


(7)  Holiday Fiesta Spread


Holiday Fiesta Spread


I’ve actually had this at a Christmas party before and it is absolutely delicious.  And, it is so cute.  Kraft will show you in great detail how to make this edible Christmas craft for your guests.    This fiesta spread is decorated like a Christmas tree…. so colorful too.


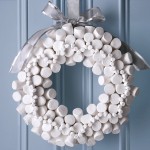
(8)  Marshmallow Wreath


Marshmallow Wreath


Who would have thought marshmallows could look this beautiful as a wreath?  But, it truly does.  It reminds me of a Winter Wonderland.  I found this beautiful wreath at Three Pugs & a Baby.  She explains how the Marshmallow Wreath only takes about 30 minutes.  Can you imagine creating this beautiful wreath in just a half hour?  How wonderful.


(9)  Snowmen Treats


Snowmen Treats


Better Homes & Gardens shows us how to take Hostess Snowballs and transform them into these cutie-patootie Snowmen Treats.  What child wouldn’t love eating this snowmen?  They are just precious…. and I bet absolutely delicious too.


(10)  Gumdrop Wreath


Gumdrop Wreath


I love, love, love the beautiful colors of this wreath.  And, I would imagine the people at your front door will too.  A Pretty Cool Life shows you how to make this beautiful Christmas Wreath in great detail.  If you aren’t crazy about all the colors…. you can even just make a green and red wreath or any color wreath you choose.


(11)  Rudolph the Red Nosed Rein-Pear


Rudolf the Red Nosed Rein Pear


The Lead Chandelier created this adorable Rudolph the Reindeer out of a pear…. hence the name Rudolph the Red Nosed Rein-Pear.  I love the idea!!  It is super cute and the kids will love making it along with you.  Use it as a yummy Christmas decoration.


(12)  Holiday Tree Brownies


Christmas Tree Brownies


Oh these are so festive!!  And, I bet delicious too.  Betty Crocker Recipes gives you all the yummy details on this edible Christmas craft.  I love the miniature candy canes that are stuck into the brownie as a tree stand… it’s just so creative.


(13)  Donut Christmas Tree


Donut Christmas Tree


I know this Donut Tree was used at a Halloween party.  But, I was thinking…. imagine how wonderful this tree would be if it was white powered donuts!!  It would be perfect as a Donut Christmas Tree for a Christmas Party.  Check out One Charming Party for all the details.


(14)  Krispie Treat Christmas Tree


Krispie Treat Christmas Tree


Oh my kids would love this!!  After all, they love Krispie Treats.  Here Cookies & Cups takes some green food coloring and transforms ordinary looking Krispie Treats into a beautiful green Christmas tree.  Add some M&M’s and imagination and your Holiday Christmas tree is born.


(15)  Strawberry Christmas Tree Brownies


Strawberry Christmas Tree Brownies


These adorable bite-size brownies look so tasty…. and so festive too!!  I would have no doubt that they would be a huge hit at any Christmas party.  Erica’s Sweet Tooth shows you how you too can make this yummy edible Christmas craft for yourself.


(16)  Tortilla Christmas Tree


Tortilla Christmas Tree


If you are looking for something yummy and festive to serve your guests at your Christmas party that isn’t sweet…. this is the edible Christmas craft for you.  Better Homes & Gardens shows you how to take mini-wraps or tortillas and create a Christmas Tree.  Let the guests at your party pick at the tree until it’s gone.  Yummy!!

Technorati Tags: , , , , , , , , , , , ,

How to Make Paper Christmas Globe Ornaments

I have a super fun craft for you today…. and it is perfect for the Christmas holiday.  Today I’m going to show you how to make a Paper Christmas Globe Ornament that will look beautiful on any Christmas tree.  You could even make a few of them to spread throughout the tree.  This is a perfect way to adorn the Christmas tree using decorations you made yourself.  Imagine the joy it will give you to see these on the tree.  So, grab the materials needed and let’s get started.
Check out our other Christmas Crafts.

Laura from  Dacian Moon Handmade will show you how to make this step-by-step.


Materials Needed

– pattern cardboard
– pencil
– small piece of ribbon
– glue
– scissors
– auto-adhesive crystals (optional)


Step 1

Draw 20 circles on the cardboard.


Cut them out.


Step 2

Fold one margin upward…


… then another one…


…and the third to close the triangle.


Step 3

Repeat step 2 for all the 20 circles.


Step 4

Start to connect the pieces by applying a layer of glue on one side…


… and press on it a side from another piece, like this.


Do the same to glue all the upper sides…


Continue with the lower sides.


When you will have only one piece to add, it will look like this.


Step 5

Add a small amount of glue on one corner and place the folded ribbon on it.


Then glue the last piece like all the others.


Step 6

This step is optional.

Take one auto-adhesive crystal…


… and place it on one triangle. You can use that to add more of a shine to your globe.


Now your globe is ready to take its place on the Xmas tree.


Beautiful!!  Now your Paper Christmas Globe Ornament is all finished.  You can even make a few more to spread around the Christmas Tree.

Technorati Tags: , , , , , , , , , , , , ,

A Collection of Hanukkah Menorah Crafts


A Collection of Hanukkah Menorah Crafts


Hanukkah is just days away.  And, with the beginning of Hanukkah comes the lighting of the candles.  How about making a unique and creative Menorah yourself?  Don’t think you can?  Well, take a look at the following 15 Hanukkah Menorah Crafts I found on the internet.  All are amazing and you are sure to love them all.  Some are easier than others, but surely you can find one that will meet your needs…. and you will enjoy making them yourself no doubt.

Check out our other Hanukkah Crafts.

A Collection of Hanukkah Menorah Crafts

(1)  Styrofoam Hanukkah Menorah Craft


Styrofoam-Menorah-Craft


This is a super cute craft.  It’s made from Styrofoam and some birthday candles.   It’s a whole lot of fun and it’s not difficult to make at all.  I found this craft over at All Kids Network and it is definitely worth checking out.


(2)  Plastic Toy Menorah


Plastic Toy Menorah


Isn’t this Hanukkah Menorah craft adorable?!  It really is.  I found this craft over at Aunt Peaches and I just love it.  Here she shows you how to take a toy, some clay, paint and glitter and presto you can make a super cute Hanukkah Menorah.


(3)  Plaster of Paris Hanukkah Menorah 


Plaster of Paris Hanukkah Menorah


Here with this creative Hanukkah Menorah craft you will be making 9 individual candle holders.  You and your children will be able to arrange them any way you would like to celebrate the 8 nights of Hanukkah.  Check out Kveller for all the craft details.


(4)  Birthday Candle Menorah


Birthday Candle Menorah


This might look like you are celebrating a child’s birthday that is turning 9, but it’s not.  This is a Birthday Candle Hanukkah Menorah.  Made from Birthday candles, clay and paint you and your kids will have a blast making this Hanukkah Menorah.  I found this craft over at Activity Village.  Make sure to check it out for yourself.


(5)  Tot Friendly Hanukkah Menorah


Tot Friendly Hanukkah Menorah


Here is a kid-friendly Menorah that everyone in the family will enjoy making… and lighting.  Instructables shows you how to take a few recycled materials, some Mod Podge and LED tea lights and make your very own tot friendly Hanukkah Menorah for your home.  Check it out.


(6)  Handprint Menorah


Handprint Menorah


Well, I know this isn’t exactly a Hanukkah Menorah you can light…. but it is a super fun Menorah craft for the youngest of Crafters.  This is one of our very own Menorah crafts and the kids love it.  Simply made from paint and your child’s hands your little one will love making this Handprint Menorah.


(7)  Baby Food Jar Menorah


Baby Food Jar Menorah


Here is a unique spin on the traditional Hanukkah Menorah.  Aparently Speaking shows us how to take some baby food jars and make them into a beautiful Hanukkah Menorah.  I love the way this Menorah looks.  Check out her site for all the craft details.


(8)  Glass Bottle Menorah


Glass Bottle Menorah


I love this Hanukkah Menorah craft.  I just love how natural and clean the white bottle look against the blue candles.  This is an easy craft that is sure to be a lot of fun.  Ready Made shows you how to get this same Menorah look for yourself in great detail.


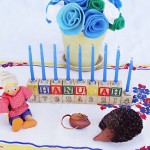
(9)  Alphabet Blocks Menorah Craft


Alphabet Blocks Menorah Craft


If you have little ones at home you surely have some alphabet blocks.  Your kids will get a kick out of this Hanukkah Menorah Craft.  Here Creative Jewish Mom shows you how to take ordinary alphabet blocks and transform them into this creative Hanukkah Menorah.


(10)  Wood Menorah


Wood Menorah Craft


I love this creative Menorah Craft.  It’s so colorful and just makes me happy to look at it.  I found this Menorah craft at Better Homes & Gardens.  Here they use different sized wooden beads and spools to create the individualized candlesticks used for this Menorah.  Check it out for yourself.


(11)  Cookie Menorah


Cookie Menorah


Here is a tasty Menorah you are sure to love.  Using a lollipop stick attached to the cookies you are able to attach them to a Menorah.  This Hanukkah Menorah craft looks beautiful finished and added as a centerpiece to any table.  Go to Sweet Designs to check it out.


(12)  Spool Menorah


Spool Menorah


This is a cool idea.  Here Parents explains how you can make this adorable and colorful Hanukkah Menorah for yourself.  Made from spools, colored pencils and yellow erasers (and some other materials) you can create this same look for yourself.  And, there is no flame…. so this Menorah your child can touch.


(13)  Macaroni Menorah


Macaroni Menorah Craft


I love macaroni crafts…. and so do kids.  Here is a Hanukkah Menorah Macaroni craft.  Free Kids Crafts shows you how you can take macaroni and lentils and make a festive Menorah.  Hang it up proudly during Hanukkah for all to see.  You can even talk about the Festival of Lights while doing this craft.


(14)  Sparkly Hanukkah Menorah


Sparkly Hanukkah Menorah Craft


Here is a fun Hanukkah Menorah craft that you and your kids are sure to love.  Upper West Side Mom shows us how to take a block of wood, hex nuts and some other materials and create these elegant looking Menorahs.  Check out the site for all the craft details.


(15)  Manzanita Branch Hanukkah Menorah


Manzanita Branch Hanukkah Menorah


How beautiful is this Hanukkah Menorah?  So beautiful.  And, Martha Stewart shows us how you too can have this Manzanita Branch Hanukkah Menorah.  I love how this Menorah looks as a centerpiece at the table.  It’s breathtaking.

Technorati Tags: , , , , , , , , , , , , ,

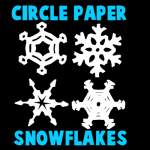
How to Make Circle Paper Snowflakes – 4 Patterns

When you think of winter what do you think of?  I know what I think of….. snow.  Today I’m going to show you how to make circle paper snowflakes.  And, not just one type…. I will show you four different patterns.   These snowflakes are a lot of fun to make.  But, what is really cool about paper snowflakes…. they look great as winter decorations around your house.  Put them up in your windows to add to your Winter Holiday decorations.  So, let’s get started.

Check out our other Winter crafts.


How to Make Circle Paper Snowflakes - 4 Patterns


Materials Needed

Lid or Bowl

Paper

Pencil

Scissors


Step 1


Trace a lid or a bowl to make a perfect circle.


Trace a lid or a bowl to make a perfect circle.


Step 2


Fold circle in half.


Fold circle in half.


Step 3


Fold in half again.


Fold in half again.


Step 4

Draw a pattern.  Here are 4 pattern ideas….


Pattern 1


Pattern 1


Pattern 2


Pattern 2


Pattern 3


Pattern 3


Pattern 4


Pattern 4


Step 5


Cut out patterns and open up.


Cut out patterns and open up.

Aren’t these snowflakes great?!  And, you don’t have to limit yourself to the patterns we are showing you here.  Feel free to use your imagination and create some of your very own unique snowflakes.

Technorati Tags: , , , , , , , , , , , , , ,

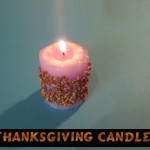
How to Make a Thanksgiving Candle

Today I’m going to continue with some Thanksgiving crafts by showing you how to make a Thanksgiving candle.   This candle is very easy to make, but it turns out beautifully.  You will see how just by adding some seeds to an average candle can make it into something spectacular.  Make a bunch of these and add them to your Thanksgiving table or put them around the house as Thanksgiving decorations.  Either way it will look beautiful.  So, let’s get started.

Check out our other Thanksgiving Crafts.

Tutorial offered by Laura from Dacian Moon Handmade


Materials Needed

– candle
– seeds
– glue
– paper


Step 1

Spread the seeds on the paper.


Step 2

Apply a layer of glue on the candle…


… like this.


Step 3

Roll the candle over seeds.


Step 4

Let it dry a little.


Before it dries out, use a toothpick to create a model (removing extra seeds.)


Step 5

Let it dry well.


You can use it now as a decoration for Thanksgiving.


Isn’t this candle pretty?  It’s beautifully festive…. perfect for Thanksgiving.  Make a few and use them to decorate the house for Thanksgiving.

Technorati Tags: , , , , , , , , ,

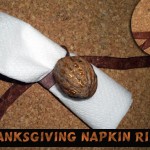
How to Make Thanksgiving Napkin Rings

People are always wondering how they can make their Thanksgiving festive, but unique at the same time.  In today’s craft I will show you how to do just that.  In this post I will show you how to make Thanksgiving napkin rings made out of walnut shells.  And, inside these walnut shells your guests will find a nice surprise…. a thank you from you.  This is a simple yet fun craft that you and the kids will enjoy making.  Your guests will love these.  So, let’s get started.

Check out our other Thanksgiving Crafts.

Tutorial offered by Laura from Dacian Moon Handmade


Materials Needed

– walnut shells (2 halves)
– ribbon
– pen
– paper
– craft glue
– gold glitter glue
-scissors


Step 1

Cut a small rectangle of paper (about 0.8 cm x 5 cm)…


… and write “Thank you” on it.


Step 2

Apply a bit of glue on one end…


… and place the ribbon on it.


Let it dry.


Step 3

Place the walnut shells on paper and draw a pattern on them with glitter glue.


I made stripes.

Let them dry well.


Step 4

Wrap the note to look like this.


Step 5

Apply a layer of glue on the edges of a walnut shell…


… like this.


Step 6

Put the note inside…


… and close the walnut, like this.


Let it dry well.

Use ribbon to tie napkin.


And, there you have it…. you just made a Thanksgiving Napkin Ring.  Make as many as you need to complete your Thanksgiving table.

Technorati Tags: , , , , , , , , , ,

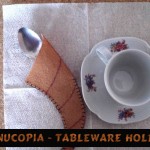
How to Make a Cornucopia Silverware Holder

Thanksgiving is coming up quickly.  But, don’t stress you still have plenty of time to make your Thanksgiving festivities unique.  Today I will show you how to make Cornucopia Silverware Holders for your Thanksgiving table.   These Thanksgiving silverware holders are in the shape of a cornucopia…. they are the perfect shape and size to hold your silverware.  This is a great way not only to add a Thanksgiving flair to your dinner table, but it is also a great way to keep all the silverware in place.  So, let’s get started.

Check out our other Thanksgiving Crafts.

Laura from Dacian Moon Handmade  will show you, step by step, how to make these.


Materials Needed

– brown felt
– pen (or permanent marker)
– needle and thread
– scissors
– pins


Step 1

Draw the outline of the horn on felt (using your pen or marker), like this.


Fold the felt sheet on one side of the horn, like this.


Pin it in place.


Step 2

Cut it out (keeping the felt folded).


Unfold. It will look like this.


Step 3

Decorate the horn with lines (or any other decorations, if you want. I think swirls could look great too)…


… like this.


Step 4

Fold it again…


… and sew the two parts.


This is the complete tableware holder.


Imagine how festive your Thanksgiving table will look with these Cornucopia Silverware Holders.  Your Thanksgiving guests will love them.

Technorati Tags: , , , , , , , , , ,

My Favorite Mayflower Craft Ideas for Thanksgiving

Thanksgiving will be here in no time at all.  And, one of the lessons we try to teach our children about the Thanksgiving Holiday is the Pilgrims and the Mayflower.  What I found during lessons is that teaching them visually is the easiest way to get them to understand…. hence doing a craft.  So, today I thought I would show you my Favorite Mayflower Craft Ideas for Thanksgiving.  I found these Mayflower crafts while searching the internet.  They are all really incredible and a ton of fun.  Surely, you will be able to find some Mayflower craft ideas from this list….. use them to help teach your children about the Pilgrims and their travel on the Mayflower.

Check out our other Thanksgiving Crafts.


My Favorite Mayflower Craft Ideas for Thanksgiving


My Favorite Mayflower Craft Ideas for Thanksgiving

(1)  Model Mayflower


Model Mayflower


Here is a wonderful way to make a model Mayflower.  Made from disposable coffee cups and coffee stirrers this is a great way to recycle items as well as teach your children about the Mayflower.  I found this Mayflower craft over at Parenting.  Make sure to check it out.


(2)  Hand Print Mayflower


Hand Print Mayflower


I love this Mayflower craft.  It is just simply adorable.  And, any young crafter will have a lot of fun making it.  I found this Thanksgiving craft over at Almost Unschoolers.  Make sure to check out her site to get all the Mayflower craft details.


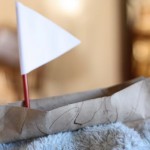
(3)  Mayflower Walnut Boat


Mayflower Walnut Boat


Even we have our own Mayflower crafts.  Here is our first one.  We will show you how to make a Mayflower out of a walnut.  And, what is really cool about this Mayflower craft is that the boat will actually float in water.  Check out How to Make a Mayflower Walnut Boat to make one for yourself.


(4)  Mayflower Paper Plate Craft


Mayflower Paper Plate Craft


Here is a fun Mayflower craft that your little ones will really enjoy.  The Crafty Classroom will show you how to take two paper plates and a popsicle stick and make it into this awesome Mayflower.  Oh boy, this sounds like fun.


(5)  The Mayflower Simplified


Mayflower Simpliefied


I love this bloggers idea.  Her idea was to come up with a Mayflower craft that she could make with young children.  I Can Teach My Child came up with this idea and it is a great one.  Made from a paper towel roll, a straw and some other materials this craft will take on a life of its own.  Share it with your child…. they will love it.


(6)  Mayflower Sandwich


Mayflower Sandwich


I just couldn’t pass this one up.  I know it’s not technically a craft, but it is a Mayflower recipe that you and your little ones can have fun putting together.  Little Nummies put this one together and it is just precious.  Made from bread, cream cheese and pretzels this yummy recipe will be a whole lot of fun to put together… almost as much fun as eating it.


(7)  Mayflower Photo Craft


Mayflower Photo Craft


This is a great Thanksgiving craft to enhance your teachings of the Pilgrims, Mayflower and the first Thanksgiving.  Here Classified Mom adds actual photos of her own children to better engage her children in the lesson.  You can do the same.


(8)  Mayflower Crayon Holder


Mayflower Crayon Holder


I love, love, love this idea.  Made from a creamer container this Mayflower actually holds crayons.  I think this Mayflower craft will be perfect for the Thanksgiving Kids Table.  Imagine every child having one of these Mayflower Crayon Holders on Thanksgiving…. the fun they will have.  Check out It’s Overflowing for all the craft details.


(9)  Mayflower Milk Carton Craft


Mayflower Milk Carton Craft


Made from a milk carton and some tissue paper this Mayflower Craft is sure to be a fun one.  Hidden underneath the tissue paper are some apples…. perfectly festive for the fall season.  Check out Creative Holiday Gift Ideas to find out how you too can make this with your children.


(10)  Mayflower Hats


Mayflower Hats


What kid doesn’t love hats?  They just all do.  And, these Mayflower hats will be no exception.  Spoonful shows you step-by-step how to make these adorable and festive hats.  Make a few and have them ready for the kids table at Thanksgiving.  All the children will love to wear them.


(11)  Mayflower Centerpiece


Mayflower Centerpiece


Why not center your entire Thanksgiving Meal around the Mayflower…. or perhaps the kids table.  Martha Stewart shows you how to with these very detailed instructions on how you too could have a Mayflower Centerpiece.


(12)  Mayflower Cut, Tape & Play


Mayflower Cut Tape Play


Homespun With Love shows you how you can print off this really cool Mayflower and let your kids cut, tape and then play with this Mayflower.  Use this as a visual tool when teaching your children about the Mayflower, the Pilgrims and the first Thanksgiving.


(13)  Mayflower Popsicle Craft


Mayflower Popsicle Craft


Here is a fun Mayflower craft that all the children will love.  Made from Construction Paper and Popsicle Sticks it is very likely you have all the craft materials needed right in your home.  Ramblings of a Crazy Woman will show you in detail how to make this craft…. she even shows you how to make waves to remind us how the Pilgrims endured a lot to find their way here.


(14)  Moving Mayflower


Moving Mayflower


Here is another of our Mayflower crafts from our very own site.  This Mayflower craft is a little bit different than the others because it can actually move.  Made with items like a paper towel roll, craft sticks and string this moveable mayflower will make the kids smile.  Gotta love something that actually moves.  Check out our site to find out how to make this Moveable Mayflower.


(15)  Mini Mayflower


Mini Mayflower


Get the kids excited about the Pilgrims and the Mayflower with this mini mayflower craft.  Made from a milk container this mayflower is the perfect size for little kids hands.  The kids will love to play with this mayflower and it also makes the perfect Thanksgiving decoration.  Check out Parents Connect for all the details.


(16)  Cardboard Tube Mayflower


Cardboard Tube Mayflower


When I found this Mayflower craft I thought it was quite original.  I found this Thanksgiving craft over at Naturally Educational.  Here she uses a cardboard tube along with some twigs to make her original Mayflower craft.  Make sure to check out her site for all the step-by-step details.  She also adds some Mayflower book choices to help you teach your children about the Mayflower.

Technorati Tags: , , , , , , , , , , ,

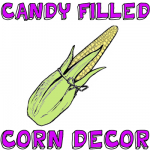
How to Make a Decorative Corn Filled with Treats for Thanksgiving

Today I am going to continue with the fun Thanksgiving crafts.  In this post I’m going to show you how to make a decorative corn filled with treats for Thanksgiving.  If you are having Thanksgiving dinner at your house then this is a great craft for you.  You can make these treat filled corns for the children attending your Thanksgiving feast.  Sure, they can’t eat the treats before dinner, but these festive corns will be perfect for the children to take home with them.  They will truly get a kick of out them.  So, let’s get started.

Check out our other Thanksgiving Crafts.


How to Make a Decorative Corn Filled with Treats for Thanksgiving


Materials Needed

Two 12 Inch Pieces of Manilla Paper

Pen or Pencil

Scissor

Green & Yellow Crayons, Markers or Colored Pencils

Glue or Paste

Treats or Candy

String


Step 1


Take a 12 inch piece of manilla paper and draw a pattern like this.


Take a 12 inch piece of manilla paper and draw a pattern like this.


Step 2


 Cut out the pattern like this.


Cut out the pattern like this.


Step 3


Color this green.


Color this green.


Step 4


From a piece of about 5 inches square make a roll similar to a cone.


From a piece of about 5 inches square make a roll similar to a cone.  Before rolling color paper yellow.  Make sure to not get it too pointed.  Paste.


Step 5


You can fill corn with treats or candy.  Fold green part around cone and tie with a string.


You can fill corn with treats or candy.  Fold green part around cone and tie with a string.


Step 6


Lightly draw little ovals for corn kernels.


Lightly draw little ovals for corn kernels.

And there you have it.  You have just made a decorative corn filled with treats.  These are a great idea if you are having a Thanksgiving dinner with children.  They will love these.

Technorati Tags: , , , , , , , , , , , ,

Giving Thanks Thanksgiving Crafts Roundup


Giving Thanks Thanksgiving Crafts Roundup


Thanksgiving is coming up quickly.  This month wouldn’t it be a great idea to fill it with crafts that remind us what this Holiday is all about….. being thankful.  We all have so much to be thankful for.  So, in this link roundup I have scoured the internet to find crafts that all have to do with being thankful.  Each craft is a lot of fun and all can be used as a Thanksgiving decoration…. but most of all they remind us to be thankful.  With these crafts you will be doing them as a family…. and family is one of the most important reasons to be thankful.  So, get ready to spend some time looking at some amazing Thanksgiving “Giving Thanks” Crafts….. you are sure to find one that you will love.

Check out our other Thanksgiving Crafts.

Giving Thanks Thanksgiving Crafts Roundup

(1)  Thanksgiving Countdown Calendar


Thanksgiving Countdown Calendar


This Thanksgiving craft is kind of like a Holiday Advent Calendar.  You and your family can express your thanks and gratitude simply by writing your thanks on your color piece of paper and adding it to the envelopes.  Look at them each day to remind each other what you are Thankful for.  I found this great Thanksgiving craft at Parents.com.


(2)  Give Thanks Napkin Rings


Give Thanks Napkin Rings


In this Thanksgiving thankful craft Jeanne Winters shows you how to create these amazing napkin rings that inspire your Thanksgiving guests to go around the Thanksgiving table before the feast and let everyone know what they are thankful for.


(3)  Give Thanks Yarn Turkey


Give Thanks Yarn Turkey


This Thanksgiving thankful craft was one of our crafts posted last Thanksgiving Season.  It’s a craft that your children will love putting together.  Plus, it is part finished when it is presented at the Thanksgiving table and finished by the guests adding to each feather what they are thankful for.  Check it out.


(4)  Gratitude Tree Advent Calendar


Gratitude Tree Advent Calendar


Here is another advent calendar idea using this time a tree.  Trees are great for this Thanksgiving craft because they have many branches to add your thankful ideas to…. plus trees are perfect for this fall craft.  Oopsey Daisy came up with this Thanksgiving craft and I love it.  Check it out to see how she uses a magnetic sheet and bottle caps for this craft.


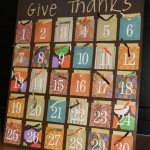
(5)  Give Thanks Board


Give Thanks Board


This Thanksgiving thankful craft is similar to the first one, but instead of it being a garland it is actually all out on a board.  What is really cool about this Thanksgiving thankful craft is the use of  a variety of coordinating scrapbook paper giving it an amazing look.  Check it out for yourself at JellybeanJunkyard.


(6)  Thankful Bucket


Thanksgiving Thankful Bucket


Here one family shows you how they use a Thankful Bucket to remind each other what they are thankful for this Thanksgiving season.  Here The Idea Room shows us how to put together this festive bucket.  Have the family fill it with things they are thankful for…. after dinner share these things with the rest of the family.  Great idea.


(7)  Changeable Frames for Thankfulness


Changeable Frames for Thankfulness


Here is a clever idea by Flamingo Toes.  Here the writer of this post shows you how to make a place that your family can write down what they are thankful for.  This particular Thanksgiving thankful craft is made with glass over the embroidery so they can write different things all month long.  They can wipe it clean and start over as often as they would like.


(8)  Thankful Leaf Garland Decoration


Thankful Leaf Garland Decoration


Here is a cute Thanksgiving thankful craft.  And, one that looks awesome as a Thanksgiving decoration.  Full Circle shows you how to make this festive craft.  Simply string together construction paper leaves and have family members write on the leaves what they are thankful for.  String together as garland for all to see.


(9)  Thankful Tree


Thanksgiving Thankful Tree


Here is a great Thanksgiving thankful craft that is perfect for even the youngest of crafters with just a lit bit of help from you.  Playful Learning shows you how to make one of these Thankful Trees for your houses.  Simply have the kids make leaves, color them and cut them out.  Have the children write down what they are thankful for.  She will show you how to finish it off with a tree branch.  Check it out for yourself.


(10)  Thanksgiving Hat


Thanksgiving Hat


Here is a fun Thanksgiving thankful craft that the little kiddies will love.  Dim Sum, Bagels and Crawfish shows you how to make this craft.  The kids will love making it, but even more so love wearing it.  If you are having a Thanksgiving dinner at your house considering doing this craft with the little ones at your feast…. they will love it.


(11)  Paper Cornucopia of Thanks


Paper Cornucopia of Thanks


Flip Flops and Applesauce shows you how to take some paper and posicle sticks and make it into a beautiful and meaningful table centerpiece for Thanksgiving.  Make sure to involve the whole table…. have your guests each write down what they are thankful for and read them out loud.


(12)  Thanksgiving Clothespin Wreath


Thanksgiving Clothespin Wreath


Here is a cool Thanksgiving thankful craft that also works as an awesome Thanksgiving wreath decoration for the Holidays.  I found this Thanksgiving craft over at Chica and Jo.  This amazing Thanksgiving wreath is made from Clothespins.  Add a sharpie to your wreath and let your visitors add what they are thankful for.  Save it for years to come.

Technorati Tags: , , , , , , , , , , , , ,

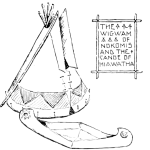
How to Make Wigwams and Canoes for Thanksgiving

Today I’m going to show you how to Make Wigwams and Canoes for Thanksgiving.  These items are perfect to use as decorations for Thanksgiving.   Actually, add these items to our Indian Village Craft and have an entire Indian Village to Display for Thanksgiving.  Wouldn’t that be wonderful?  You can use both of these crafts to talk about the Native Americans and what they have given our Country.  Remind the children about the story of Thanksgiving.  Do a fun craft and a wonderful lesson at the same time.

Check out our other Thanksgiving Crafts.


How to Make Wigwams and Canoes for Thanksgiving


Materials Needed

Printer & Paper

Scissors

Paste

Twigs

Crayons, Markers or Colored Pencils (optional)


Template 1

Black & White Template

Indian Canoe Template black & white


Colored Template


Indian Canoe Template Color


1.  Click on one of the images above.  Click on the black and white image if you want to color it later.  Or, print off the colored image and there is no need to color it later.   Once the new page opens up print off the template.

2.  Cut out the canoe.

3.  Slit at ‘A’.

4.  Fold in half along center line.  And, paste both halves together at ‘B’.

5.  Where you slit at ‘A’, fold towards each other and paste together.


Template 2

Black & White Template


Template 2 Black & White


Colored Template


Template 2 Colored


1.  Click on one of the images above.  Click on the black and white image if you want to color it later.  Or, print off the colored image and there is no need to color it later.   Once the new page opens up print off the template.

2.  Cut out the Wigwam.

3.  Cut on the slits that are noted.

4.  Cut out portion ‘A’.

5.  Bend back the flaps ‘D’, bring ‘C’ flaps together and paste together.

6.  Optionally, get a few twigs (or some raffia) and glue at the top of the Wigwam.


Finished Wigwams and Canoes for Thanksgiving


And, there you have it…. that’s how you make Wigwams and Canoes for Thanksgiving.  Use these as Thanksgiving Decorations…. everyone will surely love them.

Technorati Tags: , , , , , , , , , , , , , , , , , , , ,

11 Cool Door Decorating Crafts for Halloween


11 Cool Door Decorating Crafts for Halloween


Halloween door decorations are so important….. After all, this is the first thing people will see when they come trick or treating at your house.  Sure, you can purchase a nice door decoration for Halloween, but if you are a crafty person or just want to save some money why not make a Halloween door decoration yourself?  I have searched the internet for what I thought was some of the coolest door decorating crafts for Halloween.  I came up with 11 of them….. you are sure to find at least one you love.  So, without further ado….

Check out our other Halloween Crafts.

11 Cool Door Decorating Crafts for Halloween

(1)  Candy Corn Door Decoration


Candy Corn Door Decoration


There is one candy in particular that is very popular during the Halloween season.  Can you guess which candy it is that I’m talking about?  Candy Corn, of course.  Better Homes and Gardens shows you how to make this adorable Candy Corn Door Decoration.  It is very festive!!


(2)   Wriggling Snake Wreath


Wriggling Snake Wreath


Isn’t this wreath dark and scary?  It is perfect for Halloween.  I found this Door Decorating craft over at Martha Stewart and I thought it was really beautiful…. in a dark, morbid way.  I love the snakes that are wriggling all over this wreath.  Check out the site for all the craft details.


(3)  Felt Bats


Felt Bats


I love these bats…. they are very realistic looking.  I love how they have them gathered all around the front door.  This is perfectly scary….. just like Halloween should be.  Check out Country Living for all the batty details.


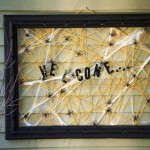
(4)  Halloween Welcome Sign


Halloween Welcome Sign


Halloween isn’t about scaring people away….. It is about bringing them closer.  Sure we like to scare people and creeping them out during this Holiday…. but it is also about welcoming them to your house and offering them either a Trick or a Treat.  Why not welcome them with this Welcome Door Sign I found over at the DIY Network.


(5)  Gaudy Halloween Wreath


Gaudy Halloween Wreath


This is a really cool Halloween Door Decorating Craft.  It looks like something you could buy at a store, but it’s not.  It’s completely hand made and the items that were used for this craft you can pick them up at a Dollar Store…  making this craft very cheap to make.  Get all the details at La La Bliss.


(6)  Felt Flower Halloween Wreath


Felt Flower Halloween Wreath


I love this wreath….. it is absolutely beautiful.  No one will believe you actually made it yourself…. they will think you bought it.  I found this gorgeous Halloween Wreath at Living Locurto…. you need to check it out for yourself.


(7)  BOOtiful Burlap Wreath


BOOtiful Burlap Wreath


Here is another awesome Halloween Door Decorating Craft…. it is a BOOtiful Burlap Wreath.  The black burlap is perfect for Halloween.  I found this Halloween craft over at Craftaholics Anonymous and I love it.  You will be using this Halloween Wreath for years to come.


(8)  Spooky “EEK” Wreath


Spooky EEK Wreath


Isn’t this Halloween Wreath cool?  It is made from wired ribbon with skulls on it.  She cut them into strips and ties them on a wreath.  I love the idea…. not only fun, but it turned out to be a really awesome wreath.  Check out The Evolution of Home for all the crafty details.


(9)  Frankenstein the Door


Frankenstein the Door


Ok, this door is just AMAZING!!  I found this door decorating idea over at Mel Designs and I love, love, love it!!  She took her green colored door and made it into Frankenstein.  I know, not everyone’s door is green…. but with just a little bit of imagination any door can be a Halloween Character.


(10)  Witches Broom Door Decoration


Witches Broom Door Decoration


I love this Halloween door decoration.  I like that it isn’t the usual Halloween Wreath…. instead Martha Stewart shows us how you can take 2 brooms and wire them together to make an “unwelcoming” door decoration.  Great idea!!


(11)  Eyeball Wreath


Eyeball Wreath


This craft made from glow-in-the-dark eyeballs is a cool Door Decorating Craft…. it is PERFECT for Halloween.  Kids will love staring at this eerie Eyeball Wreath.  But, more than that…. kids will love making this wreath.  You can get all the craft details at at Country Living.

Technorati Tags: , , , , , , , , , , , ,