Giving Thanks Thanksgiving Crafts Roundup


Giving Thanks Thanksgiving Crafts Roundup


Thanksgiving is coming up quickly.  This month wouldn’t it be a great idea to fill it with crafts that remind us what this Holiday is all about….. being thankful.  We all have so much to be thankful for.  So, in this link roundup I have scoured the internet to find crafts that all have to do with being thankful.  Each craft is a lot of fun and all can be used as a Thanksgiving decoration…. but most of all they remind us to be thankful.  With these crafts you will be doing them as a family…. and family is one of the most important reasons to be thankful.  So, get ready to spend some time looking at some amazing Thanksgiving “Giving Thanks” Crafts….. you are sure to find one that you will love.
Check out our other Thanksgiving Crafts.

Giving Thanks Thanksgiving Crafts Roundup

(1)  Thanksgiving Countdown Calendar


Thanksgiving Countdown Calendar


This Thanksgiving craft is kind of like a Holiday Advent Calendar.  You and your family can express your thanks and gratitude simply by writing your thanks on your color piece of paper and adding it to the envelopes.  Look at them each day to remind each other what you are Thankful for.  I found this great Thanksgiving craft at Parents.com.


(2)  Give Thanks Napkin Rings


Give Thanks Napkin Rings


In this Thanksgiving thankful craft Jeanne Winters shows you how to create these amazing napkin rings that inspire your Thanksgiving guests to go around the Thanksgiving table before the feast and let everyone know what they are thankful for.


(3)  Give Thanks Yarn Turkey


Give Thanks Yarn Turkey


This Thanksgiving thankful craft was one of our crafts posted last Thanksgiving Season.  It’s a craft that your children will love putting together.  Plus, it is part finished when it is presented at the Thanksgiving table and finished by the guests adding to each feather what they are thankful for.  Check it out.


(4)  Gratitude Tree Advent Calendar


Gratitude Tree Advent Calendar


Here is another advent calendar idea using this time a tree.  Trees are great for this Thanksgiving craft because they have many branches to add your thankful ideas to…. plus trees are perfect for this fall craft.  Oopsey Daisy came up with this Thanksgiving craft and I love it.  Check it out to see how she uses a magnetic sheet and bottle caps for this craft.


(5)  Give Thanks Board


Give Thanks Board


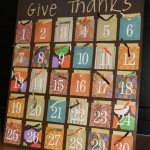
This Thanksgiving thankful craft is similar to the first one, but instead of it being a garland it is actually all out on a board.  What is really cool about this Thanksgiving thankful craft is the use of  a variety of coordinating scrapbook paper giving it an amazing look.  Check it out for yourself at JellybeanJunkyard.


(6)  Thankful Bucket


Thanksgiving Thankful Bucket


Here one family shows you how they use a Thankful Bucket to remind each other what they are thankful for this Thanksgiving season.  Here The Idea Room shows us how to put together this festive bucket.  Have the family fill it with things they are thankful for…. after dinner share these things with the rest of the family.  Great idea.


(7)  Changeable Frames for Thankfulness


Changeable Frames for Thankfulness


Here is a clever idea by Flamingo Toes.  Here the writer of this post shows you how to make a place that your family can write down what they are thankful for.  This particular Thanksgiving thankful craft is made with glass over the embroidery so they can write different things all month long.  They can wipe it clean and start over as often as they would like.


(8)  Thankful Leaf Garland Decoration


Thankful Leaf Garland Decoration


Here is a cute Thanksgiving thankful craft.  And, one that looks awesome as a Thanksgiving decoration.  Full Circle shows you how to make this festive craft.  Simply string together construction paper leaves and have family members write on the leaves what they are thankful for.  String together as garland for all to see.


(9)  Thankful Tree


Thanksgiving Thankful Tree


Here is a great Thanksgiving thankful craft that is perfect for even the youngest of crafters with just a lit bit of help from you.  Playful Learning shows you how to make one of these Thankful Trees for your houses.  Simply have the kids make leaves, color them and cut them out.  Have the children write down what they are thankful for.  She will show you how to finish it off with a tree branch.  Check it out for yourself.


(10)  Thanksgiving Hat


Thanksgiving Hat


Here is a fun Thanksgiving thankful craft that the little kiddies will love.  Dim Sum, Bagels and Crawfish shows you how to make this craft.  The kids will love making it, but even more so love wearing it.  If you are having a Thanksgiving dinner at your house considering doing this craft with the little ones at your feast…. they will love it.


(11)  Paper Cornucopia of Thanks


Paper Cornucopia of Thanks


Flip Flops and Applesauce shows you how to take some paper and posicle sticks and make it into a beautiful and meaningful table centerpiece for Thanksgiving.  Make sure to involve the whole table…. have your guests each write down what they are thankful for and read them out loud.


(12)  Thanksgiving Clothespin Wreath


Thanksgiving Clothespin Wreath


Here is a cool Thanksgiving thankful craft that also works as an awesome Thanksgiving wreath decoration for the Holidays.  I found this Thanksgiving craft over at Chica and Jo.  This amazing Thanksgiving wreath is made from Clothespins.  Add a sharpie to your wreath and let your visitors add what they are thankful for.  Save it for years to come.

Technorati Tags: , , , , , , , , , , , , ,

11 Cool Door Decorating Crafts for Halloween


11 Cool Door Decorating Crafts for Halloween


Halloween door decorations are so important….. After all, this is the first thing people will see when they come trick or treating at your house.  Sure, you can purchase a nice door decoration for Halloween, but if you are a crafty person or just want to save some money why not make a Halloween door decoration yourself?  I have searched the internet for what I thought was some of the coolest door decorating crafts for Halloween.  I came up with 11 of them….. you are sure to find at least one you love.  So, without further ado….

Check out our other Halloween Crafts.

11 Cool Door Decorating Crafts for Halloween

(1)  Candy Corn Door Decoration


Candy Corn Door Decoration


There is one candy in particular that is very popular during the Halloween season.  Can you guess which candy it is that I’m talking about?  Candy Corn, of course.  Better Homes and Gardens shows you how to make this adorable Candy Corn Door Decoration.  It is very festive!!


(2)   Wriggling Snake Wreath


Wriggling Snake Wreath


Isn’t this wreath dark and scary?  It is perfect for Halloween.  I found this Door Decorating craft over at Martha Stewart and I thought it was really beautiful…. in a dark, morbid way.  I love the snakes that are wriggling all over this wreath.  Check out the site for all the craft details.


(3)  Felt Bats


Felt Bats


I love these bats…. they are very realistic looking.  I love how they have them gathered all around the front door.  This is perfectly scary….. just like Halloween should be.  Check out Country Living for all the batty details.


(4)  Halloween Welcome Sign


Halloween Welcome Sign


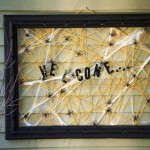
Halloween isn’t about scaring people away….. It is about bringing them closer.  Sure we like to scare people and creeping them out during this Holiday…. but it is also about welcoming them to your house and offering them either a Trick or a Treat.  Why not welcome them with this Welcome Door Sign I found over at the DIY Network.


(5)  Gaudy Halloween Wreath


Gaudy Halloween Wreath


This is a really cool Halloween Door Decorating Craft.  It looks like something you could buy at a store, but it’s not.  It’s completely hand made and the items that were used for this craft you can pick them up at a Dollar Store…  making this craft very cheap to make.  Get all the details at La La Bliss.


(6)  Felt Flower Halloween Wreath


Felt Flower Halloween Wreath


I love this wreath….. it is absolutely beautiful.  No one will believe you actually made it yourself…. they will think you bought it.  I found this gorgeous Halloween Wreath at Living Locurto…. you need to check it out for yourself.


(7)  BOOtiful Burlap Wreath


BOOtiful Burlap Wreath


Here is another awesome Halloween Door Decorating Craft…. it is a BOOtiful Burlap Wreath.  The black burlap is perfect for Halloween.  I found this Halloween craft over at Craftaholics Anonymous and I love it.  You will be using this Halloween Wreath for years to come.


(8)  Spooky “EEK” Wreath


Spooky EEK Wreath


Isn’t this Halloween Wreath cool?  It is made from wired ribbon with skulls on it.  She cut them into strips and ties them on a wreath.  I love the idea…. not only fun, but it turned out to be a really awesome wreath.  Check out The Evolution of Home for all the crafty details.


(9)  Frankenstein the Door


Frankenstein the Door


Ok, this door is just AMAZING!!  I found this door decorating idea over at Mel Designs and I love, love, love it!!  She took her green colored door and made it into Frankenstein.  I know, not everyone’s door is green…. but with just a little bit of imagination any door can be a Halloween Character.


(10)  Witches Broom Door Decoration


Witches Broom Door Decoration


I love this Halloween door decoration.  I like that it isn’t the usual Halloween Wreath…. instead Martha Stewart shows us how you can take 2 brooms and wire them together to make an “unwelcoming” door decoration.  Great idea!!


(11)  Eyeball Wreath


Eyeball Wreath


This craft made from glow-in-the-dark eyeballs is a cool Door Decorating Craft…. it is PERFECT for Halloween.  Kids will love staring at this eerie Eyeball Wreath.  But, more than that…. kids will love making this wreath.  You can get all the craft details at at Country Living.

Technorati Tags: , , , , , , , , , , , ,

18 Cool Mummy Craft Ideas for Halloween


14 Cool Mummy Craft Ideas for Halloween


You are in for a treat today.  I have searched the internet to find what I thought was the best in Mummy crafts for Halloween.  I came up with 18 of my favorite Halloween Mummy crafts.  They are all totally creative and equally creepy.  Some of them are edible, some are meant to be used as decorations and others are actually moveable mummies.  But, I’m sure you will find them all fun and festive.  I hope you have a blast looking at all of these cool mummy craft ideas for Halloween…. I know I did.  So, without further ado…. let’s get started.

Check out our other Halloween Crafts.

18 Cool Mummy Craft Ideas for Halloween

(1)  Craft Stick Mummy


Craft Stick Mummy


I found this silly craft over at First Palette.  This Halloween Mummy Craft is made out of craft sticks and guaze.  And, the finished item is perfectly creepy for Halloween.  Make a few and put them around the house this Halloween.


(2)  Mummy Candy Holder


Mummy Candy Holder


Are you having a Halloween Party this year?  If you are I have the perfect decorations and party favors for you.  How about making this Halloween Mummy Craft.  It’s a Mummy Candy Holder…. the kids are sure to love it.  Check out Parents for all the craft details.


(3) Printable Paper Mummy Toy


Printable Paper Mummy Toy


Here is a paper toy craft from this site…for a paper mummy. This is very easy to make and a lot of fun to play with. Find out how here.

(4)  Bendable Mummy


Bendable Mummy


Here is a great Halloween craft that is made from an old shirt.  This is a great craft to recycle those old T-shirts.  Got to love recyclable crafts.  You want the craft details?  Check out Family Sponge.


(5)  Mummy Cupcakes


Mummy Cupcakes


Ok, I love the yummy crafts…. the edible ones.  Well, these Mummy Cupcakes are certainly no exception.  They are adorable…. and they look delicious.  Get the entire Mummy recipe at The Craft Patch….. make sure to check it out.


(6)  Mummy Sign


Mummy Sign


If you are looking for an outside Halloween decoration craft…. then you have found it here.  I found this Mummy craft over at Woman’s Day.  It is so terribly cute…. I just adore it.  This craft is for the more mature as there is a Saber Saw being used.   Adult Supervision is a must for this craft.

 (7) Mummy Bowling


Mummy Bowling


My daughter’s Girl Scouts troop made these for a Halloween Fair party they had. The Brownies and Daisies loves playing Mummy Bowling. Find out how to make these out of water bottles here.

(8)  Mummy Cookies


Mummy Cookies


Are you throwing a Halloween Party?  If so, you know that you cannot have a Halloween Party without some Halloween Cookies.  And, Halloween is just not Halloween without some Mummy treats.  So, make sure to check out this Mummy Cookie recipe I found over at Crystal and Comp….. the kids are sure to love them!!


(9)  Origami Mummy


Origami Mummy


Here is a simple fun Halloween Mummy craft you are sure to enjoy.  It is an Origami Mummy.  You simply need some origami paper, googly eyes and magic marker and you are good to go.  Make a few and decorate your room for Halloween.  Check out the entire craft at Activity Village.


(10)  Mummy Pumpkins


Mummy Pumpkins


Check out this awesome Halloween Mummy craft.  It combines two of the most popular items for Halloween…. a Pumpkin and Mummy.  It is just so fitting for a Halloween decoration.  You can see the Halloween craft in its entirety by going to Celeb Baby Laundry.

(11) Bead Pipe Cleaner and Bandages Mummy


Bead Pipe Cleaner and Bandages Mummy


Find out how to make these mummies with movable arms and legs. All you will need is bandages, pipe cleaners, and a bead. Learn how to make these mummies with the following instructions.

(12)  Juice Box Mummy


Juice Box Mummy


If you are anything like me…. you have tons of juice boxes at home.  I always try to come up with crafts that use empty juice boxes because I hate just throwing the empty juice boxes away.  Well, when I found this Mummy craft made from recycled juice boxes I was overjoyed.  Check it out for yourself at Kaboose.


(13)  Mummy Jars


Mummy Jars


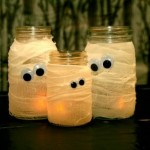
This is one of my favorite Mummy crafts i found.  It seems to be really easy, but a ton of fun.  Plus, look at the outcome…. you have these glowing mummy jars that can be placed around the house as a Halloween Decoration.  You can take a look at the craft for yourself over at Crafts reDesigned.


(14)  Mummy Door Hanger


Mummy Door Hanger


This Mummy craft is pretty darn cute.  I found the craft over at TLC and I think it is perfect for Halloween.  It can be put on your front door for all the Trick-or-Treaters to see or simply place it on one of your many indoor doors as an inside Halloween Decoration.


(15)  Aged Mummy


Aged Mummy


I love this Mummy craft.  Do you know why?  Because Craftaholics Anonymous made it look pretty authentic by dirtying up the gauze around the mummy’s body.  I love that.    Make sure to check out her site as she will show you too how to make this Aged Mummy.


(16)  Tissue Paper Mummies


Tissue Paper Mummies


I found this great Halloween Mummy craft over at Happy Hooligans.  And, it is super cute!!  They simply used recycled empty toilet paper rolls and white tissue paper…. and these mummies turned out amazing.  They are perfect for decorating…. the kids will love telling everyone they made the mummies themselves.

 (17) Mummy Trick-or-Treat Baskets


Mummy Trick-or-Treat Baskets


Find out how to make these trick-or-treat baskets – it is a lot easier than you would think. They come out looking really unique and fun. Find the instructions here.

(18)  Egyptian Mummy


Egyptian Mummy


Now, I know this isn’t exactly the kind of Mummy you think of when you think of Halloween mummies.  But, I love this craft and had to include it once I found it.  Check it out over at 123 Peppy…. I think you will like it too.

Technorati Tags: , , , , , , ,

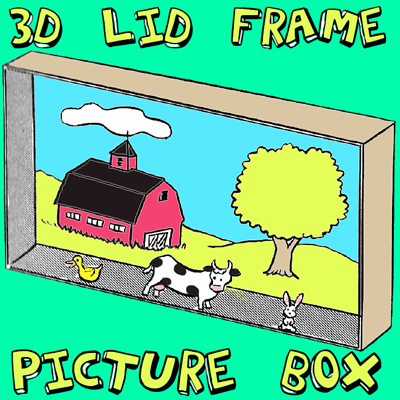
How to Make 3d Box Cover Shadow Box Framed Pictures

Don’t throw away those box lids because I have a fun use for them. Make these 3-dimensional pictures and use the box lids as the shadow box frame. The pictures seem to come out towards you and that is what makes them 3 dimensional. Find out how to make these with the step by step instructions found below.


How to Make 3d Box Cover Framed Pictures


Crafts Materials Needed

Box cover ( 2″ deep)

Paints

Pictures

Glue

Cardboard

Cork

Scissors

How to Make the 3D Frames

Step 1


Box Lids


Paint box cover, either oblong or square and 2″ deep, on both sides with a solid color paint, as in illustration above.

Step 2


3d-framed-box-cover-pictures-02


Inside the cover, as a background, either paint a scene, or cut a colorful scene from a magazine and glue to background, as in image above. If you want to make a barnyard scene like we did, the draw / paint a barn, some hills, and a tree.


Step 3


3d-framed-box-cover-pictures-03


Cut out or paint small pictures of people or animals. Mount on cardboard and glue to small slices of cork to make them stand (an adult should slice the cork for you), as in image above. If you want to make a barnyard scene, you might want to try some farm animals such as cows, chickens, pig, horses, sheep, and maybe some ducks. Here are some animal crafts that might help you.

Step 4


3d-framed-box-cover-pictures-04


Glue figures in place on floor of picture for 3-D effect, as in illustration above.

Technorati Tags: , , , , , , , ,

How to Make Cone May Baskets

I have a fun craft for you that will totally get you in the Spring mood.  I’m going to show you how to make a Cone May Basket.  May is all about the Spring flowers.  Well, imagine how beautiful a basket will be filled with some of those magnificent flowers.  Or, perhaps you want to give this Cone May Basket to someone special…. well, why not fill it with candy.  The receiver will surely love it!!  Either way this Cone May Basket will surely be enjoyed.  So, grab the materials needed and let’s get started.

Check out our other Spring Crafts.


How to Make Cone May Baskets


Materials Needed

Printer

Paper

Scissors

Crayons or Markers

Paste

Items to Fill the Basket With


Click on template images below to make larger and to print.

8×11 Template


May Basket Template 8x11


Larger Template


May Basket Larger Template


Step 1


Print out template.


Print out template.


Step 2


Cut out pattern.


Cut out pattern.


Step 3


Decorate paper.


Decorate paper.


Step 4


Fold to look like image above.  Paste the tab to the other edge.


Fold to look like image above.  Paste the tab to the other edge.


Step 5


Cut a long strip of paper and use for the handle.


Cut a long strip of paper and use for the handle.  Paste the handle.


Step 6


Fill with flowers or treats.


Fill with flowers or treats.  Now your basket is finished.  What did you fill your basket with?  Are you keeping it for yourself or are you giving it away as a gift this May?  Let me know in the comments below.

Technorati Tags: , , , , , , , , , , , ,

How to Make a Notepad Pencil Gift Set

Today I’m going to show you how to make a Notepad Pencil Gift Set.  This Notepad Pencil Gift Set is a perfect gift for somebody that has a lot going on and needs some organizing.  It would make a great gift for anyone like this.  They could simply hang it up in plain sight and when a note is written on the notepad they are reminded of all the things they need to do.  Or, hang this next to the phone…. this item makes for a perfect place to leave messages for others.  So, let’s get started with this craft.

Check out our other Gift Crafts.


How to Make a Notepad Pencil Gift Set


Materials Needed

Cardboard

Colored Paper

Pencil

Glue

White Paper

Hole Punch

Black Marker

Stapler


Step 1


Cover a piece of cardboard with colored papers.


Cover a piece of cardboard with colored papers.


Step 2


Wrap paper around pencil to figure out where to glue.


Wrap paper around pencil to figure out where to glue.


Step 3


Fold white paper in fours ... then cut 4 pages apart.


Fold white paper in fours … then cut 4 pages apart.  Do this a few times to get a big enough bundle of paper for a pad.


Step 4


Staple paper to center of cardboard


Staple paper to center of cardboard;  Punch hold for hanging;  Glue or tape paper loop above paper pad;  Decorate the background paper with a nice design;  Write notes or something similar.


Finished Notepad Pencil Gift Set


And, there you have it…. you just finished your Notepad Pencil Gift Set.  How did it turn out for you?  Let me know in the comments below.  Also, take a picture of the Notepad and share that too in the comments…. I’d love to see it.

Here is our video on how to make a Notepad Pencil Set

Technorati Tags: , , , , , , , , ,

How to Make a Hand Print Lamb

I have a fun and adorable craft for you today.  I’m going to show you how to make a Hand Print Lamb.  This craft is great for all ages….. even the youngest of crafters can enjoy this craft.  Made from cotton, a bow, a googly and of course your hand print…. this craft turns out super cute.  Any child will be so proud they made this.  So, grab the materials needed and let’s get started.

Check out our other Cotton Crafts.


How to Make a Hand Print Lamb


Materials Needed

Black Paint

Paper

Cotton

Googly Eye

Bow

Glue


Step 1


Put black paint on hand.


Put black paint on hand.


Step 2


Press hand on paper.


Press hand on paper.


Step 3


Leave print on paper.


Leave print on paper.


Step 4


Glue on cotton


Glue on cotton…. leave fingers showing.


Step 5


Add a googly eye and a bow.


Add a googly eye and a bow.

That’s all there is to it!!  You just finished making a Hand Print Lamb.  How did your lamb turn out?  Let me know in the comments below.  And, add a picture of it too to the comments…. I’d love to see it.

Here is a video on How to Make a Hand Print Lamb.  Watch our step-by-step tutorial.

Technorati Tags: , , , , , , , , , , , , , ,

How to Make an Easter Bunny Chain

Have you ever made a people chain with paper?  If so, I have an Easter craft that is very similar to that.  Today I’m going to show you how to make an Easter Bunny Chain out of paper.  This craft can be made by the youngest of crafters.  And, it is so much fun.  Once you are done cutting out the Easter Bunny Chain decorate it and hang it up as an Easter Decoration.  People will love it!!  So, grab the materials needed and let’s get started.

Check out our other Easter Crafts.


How to Make an Easter Bunny Chain


Materials Needed

Printer

2 Sheets of Paper

Pencil

Scissors

Marker


Click on template image to make larger and to print.


Easter bunny chain template


Step 1


Fold piece of paper forward and backwards in accordion fold.


Fold piece of paper forward and backwards in accordion fold.


Step 2


Use template to trace a bunny on the front fold.


Use template to trace a bunny on the front fold… Make sure both arms and feet are along edges.


Step 3


Push folded pages together and cut bunny out.


Push folded pages together and cut bunny out.  Don’t cut on red portions of bunny.


Step 4


Open up the folded bunny.


Open up the folded bunny.


Step 5


Now draw bunny faces on all the bunnies.


Now draw bunny faces on all the bunnies.


Draw an oval for the eyes


Draw an oval for the eyes; A rounded triangle for the nose; A sideways #3 for the mouth.

And there you have it…. you have your Easter Bunny Chain.  Now, go hang it up as an Easter Decoration…. viewers will love it!!

Technorati Tags: , , , , , , , , , , ,

How to Make a Flying Bird Decoration

Today I’m going to show you how to make a flying bird decoration.  When made correctly this bird will flap his wings with just a bit of movement of the string.  Crafters of all ages will enjoy making this craft…. even the youngest.  We provide many templates that you can choose from to make this flying bird.  You can choose one of the colored templates or you can print off the black & white template and color the bird yourself.  The choice is yours.  So, grab the materials needed and let’s get started.

Check our our other Toy Crafts.


How to Make a Flying Bird Decoration


Materials Needed

Printer & Paper

Scissors

Glue or Tape

String

Crayons, Markers or Colored Pencils (optional)


Click on template images below to make larger and to print.

Black & White Template


flying bird black & white template


Aqua template


flying bird aqua template


Blue Template


flying bird blue template


Red template


flying bird red template


Yellow template


flying bird yellow template


Step 1


Print template.


Print template.


Step 2


color in your bird and wings


If you printed the black & white template…. color in your bird and wings.


Step 3


Cut out wings and bird.


Cut out wings and bird.


Step 4


Fold wings in middle.


Fold wings in middle.


Step 5


Glue or tape wings on bird's body cut-out.


Glue or tape wings on bird’s body cut-out.


Step 6


Fasten string to bird.


Fasten string to bird.  Raise string up and down and bird will flap wings.

And, that’s it… you just finished making your flying bird decoration.  Isn’t it cool with just raising your string up and down you can make the bird appear as if he is flying.  Enjoy playing with your flying bird.

Technorati Tags: , , , , , , , , ,

How to Make Yarn Bird Cages

I have a fun and creative craft for you today.  I’m going to show you how to make Yarn Bird Cages.   These Yarn Bird Cages are colorful decorations for all sorts of occasions, and can be made by children aged six and up.  You will simply dip yarn in flour and water and wrap around a balloon…. it is so much fun.  Kids will love dipping their yarn into the flour and water mixture.  So, grab the materials needed and let’s get started.

Check out our other Balloon Crafts.


How to Make Yarn Bird Cages


Materials Needed

Balloon

Flour

Water

Yarn

String

Shallow Bowl


Step 1


Blow up a balloon and tie a knot at the end.


Blow up a balloon and tie a knot at the end.


Step 2


Mix flour and water.


Mix flour and water.


Step 3


Dip yarn into flour mixture.


Dip yarn into flour mixture.


Step 4


Start at top and criss-cross.


Start at top and criss-cross.


Step 5


Wrap more yarn around balloon and then you should pop the balloon.


Wrap more yarn around balloon and then you should pop the balloon.


Step 6


Tie string at the top to hang the bird cage.


Tie string at the top to hang the bird cage.

And there you go…. you just finished your Yarn Bird Cage.  How did your bird cage turn out?  Let me know in the comments below.  And, since every bird cage is different take a picture of your bird cage and post it with your comment below…. I’d love to see it.

Technorati Tags: , , , , , , , ,

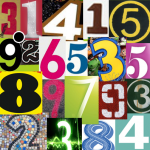
How to Make a Collage for Pi Day 3-14

Today is 3/14….. do you know what that means?  It’s Pi Day.  π (or Pi) is a mathematical constant that is the ratio of any circle’s circumference to its diameter. π is approximately equal to 3.14.  I know it sounds confusing, but in mathematics it is one of the most important mathematical constants.  So, since today is March 14th or 3-14 it is considered Pi Day.  With that being said we are going to work on a collage surrounding all the numbers in Pi.  So, grab the materials needed and let’s get started.


How to Make a Collage for Pi Day 3-14


Materials Needed

Magazines, Brochures, Leaflets, Advertisements

Scissors

Glue

Paper


Step 1

Go through your magazines, leaflets, brochures and advertisements and find the numbers in Pi….. cut them out.  The numbers in Pi are the following:  3.141592653589793238462643383279502884197169399375105820974944592307816406286208998628
034825342117067982148086513282306647093844609550582231725359408128481117450284102701938
521105559644622948954930381964428810975665933446128475648233786783165271201909145648566
923460348610454326648213393607260249141273724587006606315588174881520920962829254091715
3643678925903600113305305488204665213841469519415116094330572703657595919530921861173819
3261179310511854807446237996274956735188575272489122793818301194912983367336244065664308
6021394946395224737190702179860943702770539217176293176752384674818467669405132000568127
1452635608277857713427577896091736371787214684409012249534301465495853710507922796892589
23542019956112129021960864034418159813629774771309960518707211349999998372978049951059731
7328160963185950244594553469083026425223082533446850352619311881710100031378387528865875
3320838142061717766914730359825349042875546873115956286388235378759375195778185778053217
12268066130019278766111959092164201989

Now, obviously Pi is an extremely long number.  Feel free to use as many numbers as you would like on your collage.


Step 2

Glue your Pi numbers in order to a piece of paper.


Step 3

Let your Pi collage dry and then hang it up proudly to celebrate Pi Day.


Pi Day Collage


Technorati Tags: , , , , , , , , , , , , , , ,

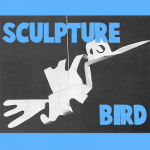
How to Make Paper Sculpture Birds

Today I have a fun craft for you.  I’m going to show you how to make a Paper Sculpture Bird.  When made correctly the birds are 3 dimensional and look so cool hanging from a ceiling.  These Paper Sculpture Birds can be used to decorate a classroom or  child’s bedroom.  A great number of birds and animals can be made by using this technique…. so feel free to use your imagination,  Grab the materials needed and let’s get started.

Check out some other Paper Folding Activities.


How to Make Paper Sculpture Birds


Materials Needed

8 1/2″ x 11″ typewriting or mimeograph paper

Scissors

Ruler

Pencil Paper punch

Thread


Step 1


8 1/2 x 11" typewriting paper is folded in half and a freehand cut is made to suggest the bird form.


8 1/2 x 11″ typewriting paper is folded in half and a freehand cut is made to suggest the bird form.


A paper punch is used to make the eyes.


A paper punch is used to make the eyes.


Step 2


Unfolding the paper reveals a symmetrical design.


Unfolding the paper reveals a symmetrical design.


Step 3


Using a ruler as a straight edge, fold upward the wings of the bird at points "A''.


Using a ruler as a straight edge, fold upward the wings of the bird at points “A”.


Step 4


draw two triangular peaks lightly with pencil as shown in Figure 4


In making the pleat, draw two triangular peaks lightly with pencil as shown in Figure 4. Carefully fold the pleats down; this will bring the tail of the bird up.


Step 5


The wing tips are curled by rolling them tightly around a pencil.


The wing tips are curled by rolling them tightly around a pencil.


Step 6


In Figure 6 another pleat is made at the neck; and the bird is suspended from the ceiling with thread.


In Figure 6 another pleat is made at the neck; and the bird is suspended from the ceiling with thread.

And, there you have it…..you just finished making a Paper Sculpture Bird.  This Paper Sculpture Bird would look so cool hanging from your bedroom ceiling.  Where are you going to hang your bird?

Technorati Tags: , , , , , , , , , , , ,

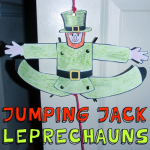
How to Make Jumping Jack Leprechauns for St. Patrick’s Day

I have a fun and easy craft for you today.  In this post I’m going to show you how to make a Jumping Jack Leprechaun for St. Patrick’s Day.  When made the way that I describe in this post the arms and legs are movable making this leprechaun actually do jumping jacks when the string is pulled.  The youngest of crafters will enjoy not only making this leprechaun craft, but also playing with it once it is finished.  So, grab the materials needed and let’s get started.

Check out our other St. Patrick’s Day crafts.


How to Make Jumping Jack Leprechauns


Materials Needed

Printer & Paper

Crayons (optional)

Scissors

Glue

Cardboard (optional)

Hole Punch

Paper Fasteners

String


Click on template image below to make larger and to print.

Color Template


Color Template


Black & White Template


Black & White Template


Step 1


Print out


Print out…. If you printed the black & white template then color it in.


Step 2


Cut out and glue to cardboard


Cut out and glue to cardboard if you want it really sturdy.


Step 3


Punch a hole in top hole on both arms and legs


Punch a hole in top hole on both arms and legs… Leave bottom hole on limbs unpunched.


Step 4


Now use paper fasteners and push thru body thru to bottom hole on legs and arms.


Now use paper fasteners and push thru body thru to bottom hole on legs and arms.


Step 5


String holes the way image says to


The red circles are where the paper fasteners have been placed.  Now, put string thru hole 1…. under and up into hole 2…. then tie knot.  Then pull under hole 3 and over and into hole 4.  Tie knot.


Like this


Like this… Make sure arms and legs are down before tying knot.


Tie knot.


Tie knot.


Do the same for leg holes.  Tie knot.


Do the same for leg holes.  Tie knot.


Step 6


Punch hole in hat and hang on door by string.


Punch hole in hat and hang on door by string.


Step 7


pull the string and his hands and legs pop up.


Hang it on a door knob…. pull the string and his hands and legs pop up.

And, there you go…. you just finished making a Jumping Jack Leprechaun for St. Patrick’s Day.  This is a wonderful decoration for St. Patrick’s Day and it is equally fun to play with.  Enjoy!!

Technorati Tags: , , , , , , , , ,

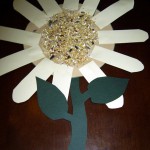
How to Make a Sunflower Full of Seeds

Spring is literally right around the corner.  And, I thought since Spring is almost here that we could make a beautiful sunflower full of seeds to hang up in your house to get you in the Spring spirit.  If you are feeling a bit of the early spring blah’s, or simply want an easy craft to do with your children, then this is the perfect craft for you.  The finished sunflower was made by a 4 year old so this is an excellent preschool craft.  So, grab the materials needed and let’s get this fun Spring craft started.

Check out our other Spring Crafts.


sunflower-finished


Materials Needed

  • Construction paper (brown, yellow (I used light yellow), green)
  • Scissors
  • White Glue
  • Seeds (I used a mixed seed but you can use sunflower seeds only)
  • Small Plate (to create a circle)
  • Markers


supplies


Step 1

After you have gathered your supplies, place the plate on the brown construction paper.  If you have a compass, you can use that but many times, I find that people don’t have some things handy.  Using a marker, trace around the plate to make a circle.  Cut out the circle and set aside.


circle


Step 2

With the yellow paper, cut out small finger shaped (or petal shaped) strips with a rounded edge on the top.  Cut about a dozen of the shapes and set aside for later. If your child is skilled at cutting, you can draw out the shapes and then have her cut them for you.


Sunflower Leaves


Step 3

Draw the stem and leaves in the green construction paper and either cut it out yourself or have your child cut it.


sunflower-stem


Step 4

Once you have everything cut out, it is time to assemble the sunflower.  Start by gluing the “petals” around the outer edge of the circle.  Once your child has placed all the petals, have them place a small dot of glue onto the front of the stem and then attach it to the back of the sunflower.


supplies-2


Step 5

Spread glue to the center of the sunflower on the front and then spread seeds across the glued surface.  Tap off the excess and then lay it flat to dry.


seeds


Once the artwork is dry, you can hang it on the wall or in a window to bring a bit of sunshine into your house…. even if it is raining outside.  Enjoy!!

Technorati Tags: , , , , , , , , , , ,

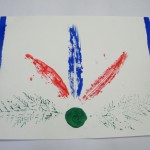
How to Make a Leaf Print Picture

Spring will be here before you know it.  And this activity is a great excuse to spend some time outdoors.   With this activity you will need to go outdoors and collect leaves of different shapes and sizes.  You will paint them and use them as a stamp to create a picture of your choosing.  This craft is a lot of fun and the cool part is that no Leaf Print Picture will ever be the same.  Use your creativity to paint a bunch of different pictures.  So, grab some leaves and let’s get started.

Check out our other Garden & Plant Crafts.


Materials Needed

Leaves

Tempera paints

Paintbrush

Paper


Step 1

Collect leaves of different shapes and sizes.  Arrange them to form a design that you like.


Step 2

Apply paint on the underside of a leaf.


Step 3

Press it on the paper to form a print.


Step 4

Print more leaves similarly to form a design.


Step 5

Add a border and other details.


And, there you have it….. now, put it up on your wall and celebrate the coming of Spring!!  How did your Leaf Print Picture turn out?  Let me know in the comments below.  And, make sure to take a picture of it and add that to the comments as well…. I’d love to see it.

Technorati Tags: , , , , , , , , , ,

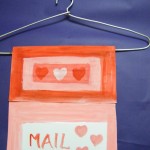
How to Make a Mail Holder from a Wire Hanger

Today I’m going to show you a great craft that you can make from an old wire hanger.  That’s right…. I’m going to show you how to make a Mail Holder from an Old Wire Hanger.  This mail holder can be given to your parents so that they have a place to hold onto their bills, or save it for yourself to hang on your door so that you can receive notes from your siblings or parents.  Either way this Mail Holder is sure to be enjoyed.  So, let’s get started.

Check out our other Wire Hanger Crafts.


Materials Needed

wire Hanger

thick card paper

paints

glue

brush

scissors


Step 1

Cut a piece of thick card paper as long and wide as desired, but the width should be less than that of the hanger.


Step 2

Fold about 2 inches from the edge of the paper as shown


Step 3

Tape or glue the end to fix it as shown.


Step 4

Cut another piece of paper, smaller than the first piece to hold the mail.


Step 5

Glue the two sides and the bottom on to the first piece of card as shown to form a pocket.


Step 6

Decorate the paper with paint.


And, that’s it….. you made a Mail Holder from an old Coat Hanger.  How did your mail holder turn out?  Now hang it on your door to receive mail from your siblings or give it to your parents for a place for them to save their bills.

Technorati Tags: , , , , , , , , , ,