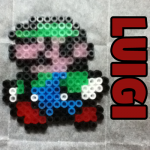
How to Make a Perler Bead Luigi from Super Mario Bros.

Today I am going to show you how to make a Perler Bead Luigi from Super Mario Bros.  Done in Perler Beads this Luigi looks very much like the classic version from the 80’s… when I use to love playing the Mario games.  Any Mario Bros. fan would know this, but in case you weren’t already aware… Luigi is Mario‘s younger twin brother… his taller and thinner twin brother.
Check out our other Super Mario Bros. Perler Bead Crafts and other Perler Bead Crafts.


How to Make a Perler Bead Luigi from Super Mario Bros.


Materials Needed

Perler Beads and Board

Iron

Wax Paper


Below are printable templates for this craft.  You can choose to print off  a colored template or the black and white version.

Click on template image to make larger and to print.


Color template for Luigi perler bead craft


Black & white template for Luigi perler bead craft


Step 1


Lay out the perler beads on the board as per the template included with this tutorial


Lay out the perler beads on the board as per the template included with this tutorial.  When done, carefully take the board up to an adult to iron the design.


Step 2


Ask an adult to iron the first side on medium heat


Ask an adult to iron the first side on medium heat.  Place wax paper over the beads.  Then for 30 seconds, iron in a circular motion.  Let cool for a few minutes and then come back to it.


Step 3


After cooled... Turn plate over and take item off of plate


After cooled… Turn plate over and take item off of plate.  Now adult can place wax paper over back side of item and iron this side for 30 seconds as well.


Finished Luigi perler beads craft


This Perler Bead Luigi is so cute, isn’t he?  And, it was so fun to make.  Keep an eye out for more later today and tomorrow…. I will be adding some of Luigi’s friends and enemies.  Make them all and you can create your own Super Mario Bros village.  🙂

Technorati Tags: , , , , , , , , ,

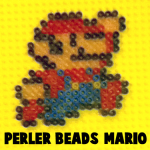
How to Make a Perler Bead Mario from Super Mario Bros.

In this post I’m going to show you how to make a Perler Bead Mario from Super Mario Bros.  Mario needs no introductions.  After all, he is been around since the mid 80’s. This craft is great for kids of all ages…. especially the Super Mario fans.  Keep in mind you will need a bit of parental help later in the craft as there is some ironing.

Check out our other Super Mario Bros. Perler Bead Crafts and other Perler Bead Crafts.


How to Make a Perler Bead Mario from Super Mario Bros.


Materials Needed

Perler Beads and Board

Iron

Wax Paper


Below are printable templates for this craft.  You can choose to print off  a colored template or the black and white version.

Click on template image to make larger and to print.


Color Template for Mario Perler Beads Craft


Black & White Template for Mario Perler Beads Craft


Step 1


Use the template to guide you thru placing the perler beads


Use the template to guide you thru placing the perler beads… like the above picture.


Step 2


Ask an adult to iron the first side on medium heat


Ask an adult to iron the first side on medium heat.  Place wax paper over the beads.  Then for 30 seconds, iron in a circular motion.  Let cool for a few minutes and then come back to it.


Step 3


When cooled off... turn the board over.  Your new creation should come right off of the board


When cooled off… turn the board over.  Your new creation should come right off of the board.  Now, place wax paper over the back side of your perler bead creation and again, have an adult use an iron for 30 seconds.  Let it cool off for a few minutes and then peel the wax paper of… it should be done now.


Finished Perler Bead Mario


Now, your Perler Bead Mario is all done.  Doesn’t he look cool?  He looks pixelated like he did back in the original Mario Bros in the mid 80’s.  Make sure to check back later today… I will be showing you how to make some of Mario’s friends and even enemies.

Technorati Tags: , , , , , , , , ,

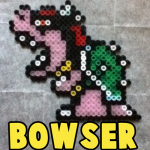
How to Make a Perler Bead Bowser from Super Mario Bros.

Today I’m going to show you how to make Bowser from Super Mario Bros. using Perler Beads.  Bowser is Mario‘s archnemesis and if you ever played any of the Super Mario Bros. games then you are sure to know who Bowser is.   Just follow the perler bead template below and you will have it done in no time at all.

Check out our other Super Mario Bros. Perler Bead Crafts and other Perler Bead Crafts.


How to Make a Perler Bead Bowser from Super Mario Bros.


Materials Needed

Perler Beads and Board

Iron

Wax Paper


Below are printable templates for this craft.  You can choose to print off  a colored template or the black and white version.

Click on template image to make larger and to print.


Black and white printable template


Color printable template


Step 1


Use the template to put the perler beads in the right location


Use the template to put the perler beads in the right location.  Then bring the board to an adult so that they could iron it for you.


Step 2


Ask an adult to iron the first side on medium heat


Ask an adult to iron the first side on medium heat.  Place wax paper over the beads.  Then for 30 seconds, iron in a circular motion.  Let cool for a few minutes and then come back to it.


Step 3


After cooled... turn plate over and take item off of plate


After cooled… turn plate over and take item off of plate.  Now adult can place wax paper over back side of item and iron this side for 30 seconds as well.


Finished Bowser from Super Mario


There you have it… you have finished the Perler Bead Bowser.  It should look like the above picture.  The perler fun doesn’t have to stop here… Keep an eye out for more Perler Bead templates later today.

Technorati Tags: , , , , , , , ,

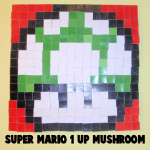
How to Make a Mosaic Super Mario 1-up Mushroom Pixelated Picture from Tiles

If you have ever played any of the Super Mario Series you know what the Super Mario 1-up Mushroom is.  The 1-up mushroom can give you an extra life and its hard to find.  If you are the Super Mario video game lover you are going to want to do this craft.  In this post I will show you how to make a mosaic Super Mario 1-up mushroom pixelated picture from tiles.  Fun, fun!!

Click here for more mosaic tutorials


How to Make a Mosaic Super Mario 1-up Mushroom Pixelated Picture from Tiles


Materials Needed:

Glue

Cardboard or Wood

Tiles or Cut up Squares from Paper or Foam


Materials needed


Here is a pattern for you to print or just look at while you are making your Mosaic Super Mario 1-up Mushroom.


Pattern for the Mosaic Mario 1-up Mushroom


The background of the picture can be any color you would like.  I happened to use red.


Step 1


Put Glue on First Tile


Put glue on first tile.


Step 2


Place square firmly on cardboard


Place square firmly on cardboard or wood.


Step 3


How to Make a Mosaic Super Mario 1-up Mushroom Pixelated Picture from Tiles


After you finished putting all the tiles on the wood  make sure to put a heavy book on top of it overnight.  This will insure the tiles are glued fast and will hold.  There you have it….. easy peasy lemon squeezy.  You have just made an awesome Mosaic Super Mario 1-up Mushroom Pixelated Picture from Tiles.

Technorati Tags: , , , , , , ,

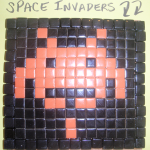
How to Make a Mosaic Space Invaders Pixelated Picture from Tiles

Space Invaders was my absolute favorite arcade game to play back in the 80’s.  I use to beg my dad to give me quarters to play Space Invaders…. I could spend hours in front of that game.  Today I will show you how to make a Space Invaders pixelated picture from Tiles.  I hope you have as much fun making the craft as I did playing the game.

Click here for more mosaic tutorials


How to Make a Mosaic Space Invader Pixelated Picture from Tiles


Materials Needed:

Glue

Cardboard or Wood

Tiles or Cut up Squares from Paper or Foam


Materials needed


Here is a pattern for you to print or just look at while you are making your Mosaic Space Invaders Picture.


Pattern for Mosaic Space Invaders


Step 1


Put Glue on First Tile


Put glue on first tile.


Step 2


Place square firmly on cardboard


Place square firmly on cardboard or wood.


Step 3


How to Make a Mosaic Space Invader Pixelated Picture from Tiles


Any child will love putting this mosaic Space Invaders pixelated picture craft together.  But, more than that they will love hanging it proudly for all to check out.

Technorati Tags: , , , , ,

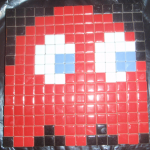
How to Make a Mosaic Red Ghost from Pacman Pixelated Picture from Tiles

The other day I showed you how to make a Mosaic Pacman pixelated picture from tiles.  Today I will continue the Pacman craft fun by showing you how to make a mosaic red ghost from Pacman pixelated picture.  You know you can’t have a Pacman without having at least one ghost for Pacman to have fun with….. he just wouldn’t know what to do.  “Chomp, chomp, chomp.”

Click here for more mosaic tutorials


How to Make a Mosaic Red Ghost from Pacman Pixelated Picture from Tiles


Materials Needed:

Glue

Cardboard or Wood

Tiles or Cut up Squares from Paper or Foam


Materials needed


Here is a pattern for you to print or just look at while you are making your Mosaic Red Ghost.


Pattern for Mosaic Red Ghost from Pacman


Keep in mind that the surrounding area in this pattern can be any color….. I just happened to use black.


Step 1


Put Glue on First Tile


Put glue on first tile.


Step 2


Place square firmly on cardboard


Place square firmly on cardboard or wood.


Step 3


How to Make a Mosaic Red Ghost from Pacman Pixelated Picture from Tiles


Place a heavy book on top of your mosaic craft overnight to make sure that the tiles are glued fast.  After that, make sure to place your mosaic red ghost craft with the Pacman craft and see who wins the battle this time around.  “Chomp, chomp, chomp.”

Technorati Tags: , , , , , , , , , ,

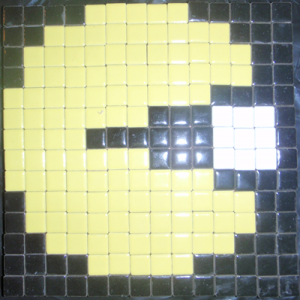
How to Make a Mosaic Pacman Pixelated Picture from Tiles

Pacman was the hottest arcade game from the 1980’s and it is still crazy popular today.  I’m going to show you how to make a super cool pixelated Pacman picture that is very easy and fun to make…. just follow the easy-to-follow pattern and you are as good as gold.

Click here for more mosaic tutorials


Mosaic Pacman Pixelated Picture from Tiles


Materials Needed:

Glue

Cardboard or Wood

Tiles or Cut up Squares from Paper or Foam


Materials Needed


Here is a pattern for you to print or just look at while you are making your Mosaic Pacman.


Mosaic Pacman Pattern


The surrounding area of your Mosaic Pacman can be any color you would like.  I made this area black, but feel free to use any color.

Step 1:


Put Glue on First Tile


Put glue on first tile.


Step 2


Place square firmly on cardboard


Place square firmly on cardboard or wood.

Step 3


Finished Mosaic Pacman


Once you have the pattern completely finished make sure to place a heavy book on top of your finished craft overnight.  This will insure that your Mosaic Pacman craft is glued fast and ready to be shown proudly for all to see.

Technorati Tags: , , , , ,

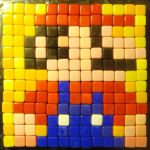
How to Make a Mosaic Super Mario Pixelated Picture from Tiles

Today we will show you how to make a really cool, pixelated Super Mario. This is the Mario from the 1980’s when he just looked like a bunch of squares….this is the classic Nintendo Mario. We have included a pattern for Mario’s complete body…or you can do just part of his body like I did. (and I know that I messed up on Mario’s thumbs…put the pattern below, reflects the correct pattern).

Click here for more mosaic tutorials


How to Make a Mosaic Super Mario Pixelated Picture from Tiles


Materials Needed:


Glue

Cardboard or Wood

Tiles or Cut up Squares from Paper or Foam


Materials Needed


Here is a pattern for you to print or just look at while you are making your mosaic Mario.


Here is a pattern for you to print or just look at while you are making your mosaic Mario.


You can make the surrounding color of Mario, any color that you want. You can also do only part of Mario, like I did, or Mario’s entire body.

Step 1:


Step 1 : Put Glue on Tile


Put Glue on First tile.


Step 2


Put tile down


Place square firmly on cardboard or wood.

Step 3


Wow Your Done


Now continue thru the pattern until finished. Place a heavy book over tiles overnight to make sure that tiles are firmly placed. By morning you should have your finished craft. Your parents will look fondly at the Mario picture.

Technorati Tags: , , , , , ,