Soap Carving for Kids and Making Soap Sculptures Safely

Soap can be a great first-time sculpting activity as soap is soft enough for small hands to work with. Your child can have fun and be creative without worrying that he might mess up the soap, since soap is cheap enough to replace.  Your child will be able to find his or her inner artist and find out about new skills that they didn’t know they even had. One of the first times I realized that I had any sort of artistic skills was when someone put clay in front of me and I sculpted Abe Lincoln’s face and it ACTUALLY looked like him. Let your child have that Ah-Hah moment too.
Soap Carving for Kids and Making Soap Sculptures Safely


Soap Carving for Kids and Making Soap Sculptures Safely


CRAFTS MATERIAL NEEDED

Ivory Soap

Pencil

Either Clay Sculpting Tools or Pumpking Carving Tools

(Optionally) Toothpicks

Instructions About Safely Carving Soap

Instead of using a paring knife to sculpt soap, kids should use safer options. I suggest using either Child-Safe Pumpkin Carving Tools or Clay Sculpting Tools. A toothpick can be used for fine carving. This way if the child slips or makes a mistake, he or she won’t get too hurt. However, whenever a child is carving, an adult should always be present in order to ensure the child is carving in a safe fashion.

There are two ways of applying a design to soap.

1. With a pencil or pointed tool, draw design directly on soap.

2. Place a cake of soap on a piece of paper and draw outline of soap on paper. Draw design on paper, within the pencilled outline. Trace drawing on soap.

For large projects join two cakes of soap. In carving soap keep the silhouette simple. Don’t carve too long in one place; turn the work often. Hold in different lights and at different angles. Keep the heavy masses at the bottom. Soap may be colored with waterproof India ink.

Safely Carving Soap for Soap Sculptures

1. Scrape lettering from one side of soap, removing only enough to reveal a smooth even surface.


2. Allow soap to dry for about an hour before starting in to work.


Trace design on soap


3. Trace design on soap (see above instructions)


Rough out design by cutting away small pieces at a time


4. Rough out design by cutting away small pieces at a time, within 1/4 ” of the outline.


Round out figure, turning project as you work


5. Proceed slowly. Round out figure, turning project as you work. Work in details.

6. Polish by rubbing.

(Optional) Joining Two Cakes of Soap

1. Scrape down sides that are to be joined.

2. (Parent or Adult Should Complete this Step!) Place soap, scraped sides down, into a shallow pan over low heat.

3. Insert toothpicks where they will not interfere with the carving.

4. After 30 minutes, press cakes together. Wait 24 hours to carve

Technorati Tags: , , , , , , ,

How to Make a Fish out of a Heart Valentines Day Box

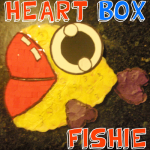
Today I have a fun craft to do with your left over Valentines Day Heart Shaped Box.  I’m going to show you how to make a Fish out of a Heart Valentines Day Box.   This craft is not only a lot of fun, but it is a great way to recycle those used Valentines Day Boxes…. so you don’t have to just throw them away.   And, the fish not only turns out totally cute, it also gives you a secret storage box to store your small secret things in.  Now, that is fun!!  So, grab the materials needed and let’s get started.

Check out How to Make a Kitty Cat out of a Heart Valentines Day Box.


How to Make a Fish out of a Heart Valentines Day Box


Materials Needed

Valentines Heart Box

Black Marker

Red Craft Foam, Felt or Paint

White & Black Craft Foam

Colorful Tissue Paper (2 different colors)

Pencil

Scissors

Glue Stick

Lid or Bowl (for tracing)

Paper Plate

Paper

Glue


Step 1


Get your chocolate hearts box.


Get your chocolate hearts box.


Step 2


Draw lips with backwards E shape.


Draw lips with backwards E shape.


Step 3


I used sticky craft foam square tiles and filled in space in the lips.


I used sticky craft foam square tiles and filled in space in the lips.  Use anything that you want to use though…. even paint or felt.


Step 4


Draw an outline around the lips


Draw an outline around the lips.  Draw curved rectangles for white highlights.


Step 5


Fill curved rectangles with white craft foam.


Fill curved rectangles with white craft foam.


Step 6


Use colorful tissue paper for next part.


Use colorful tissue paper for next part.


Draw circle on a stack of square tissue paper.


Draw circle on a stack of square tissue paper.


Cut out circles.


Cut out circles.


Step 7


Dot glue all over the rest of heart.


Dot glue all over the rest of heart.


Layer circles on top of box and on top of each other.


Layer circles on top of box and on top of each other.


Until it looks like this.


Until it looks like this.


Step 8


Use a lid or bowl to trace a big circle on white foam.


Use a lid or bowl to trace a big circle on white foam.


Trace a smaller circle on black craft foam.


Trace a smaller circle on black craft foam.


Cut out 2 small white circles and glue together like this.


Cut out 2 small white circles and glue together like this.


Step 9


Glue eye on fish face.


Glue eye on fish face.


Step 10


Draw a heart with a rectangle on lef


Draw a heart with a rectangle on left….. do this on a paper plate.


Bend and glue rectangle on to side of heart box furthest from lips.


Bend and glue rectangle on to side of heart box furthest from lips.


Now fish should look like this.


Now fish should look like this.


Step 11


Draw half of a heart on folded paper.


Draw half of a heart on folded paper.


Cut out heart.


Cut out heart.


Cover with tissue paper circles too.


Cover with tissue paper circles too.  Make two of these.


Step 12


Glue fin to fish face.


Glue fin to fish face.

And, your fish is now done. Wasn’t that fun?  Now, you have a secret storage box that is decorated as a fish.  The real question is now ….. what are you going to fill your secret box with?  Enjoy.

Technorati Tags: , , , , , , , , , ,

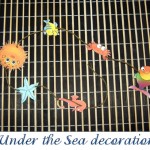
How to Make an Under the Sea Decoration

Do you like Under the Sea creatures?  If you do then I have a craft for you today that you will truly enjoy.  I’m going to show you how to make an Under the Sea Decoration that will look so wonderful hung up in your bedroom.  Imagine how lovely it will look hung up on your ceiling as your stare at it below from your bed.  Well, you don’t have to imagine anymore… let’s help it become a reality.  Today I’m going to show you how to make this Under the Sea Decoration step-by-step.  So, let’s get started.

Laura from Dacian Moon Handmade will show you, step by step, how to make this decoration.


Materials Needed

– “Under the Sea Friends” template: download here
– thick paper or card stock
– glue (transparent)
– thread and needle
– scissors


Step 1

Print the template on thick paper and cut out the drawings.


That is what you’ll have when you are finished.


Step 2

Take one fish and apply a layer of glue on it’s back.


… then place it’s pair on it.


Step 3

Repeat step 2 until every friend has the two sides glued.


Step 4

We will start with the last one saved. Take the rainbow colored fish and, with the needle make a hole on its top, like in the picture.


Let the thread go through the hole …


… and, when you have a little thread left, make a knot. That way, the fish won’t fall again.


Measure about 5 cm and make another knot.


This is where you will place the crab. With the needle make a hole in one jaw…


…and take him down until you reach the knot.


Make another hole in his other jaw…


That way, the little crab is secured with the rope. He will not fall again.


Do the same with the other friends.


Step 5

Make a knot around the seahorse’s tail and wrap around the rope once, take it just under his head – it is easier to use the needle here too.


Step 6

The final step: make a knot on the end of the thread.


And. look at that…. you just finished making the entire “Under the Sea” Decoration.  Isn’t it just adorable?!  Imagine how cute it will look hung up.  Enjoy it.

Technorati Tags: , , , , , , , , ,