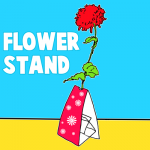
How to Make a Flower Stand for Mother’s Day

Mother’s Day is coming up in less than a couple of weeks.  Do you know what you are giving your Mother yet?  If you know you would like to give her a flower…. why not make this flower stand craft to go with it.  First of all, you know she loves when you make her things yourself.  Second of all, this way you don’t have to just hand her a single flower all by itself…. with this flower stand craft you have something to hand your flower in.  You can choose to print off the color template flower stand or the black and white template and decorate the flower stand yourself…. the choice is yours.  So, let’s get started.

Check out our other Mother’s Day Crafts.


How to Make a Flower Stand for Mother's Day


Materials Needed

Printer & Paper

Scissors

Flower

Crayons or Markers (optional)


Click on template images below to make larger and to print off.

Black & White Template


Black & White Template


Color Template


Color Template


Step 1


Print out template.


Print out template.


Step 2


Cut on solid lines.


Cut on solid lines.


Step 3


Fold on dotted lines.


Fold on dotted lines.


Finished flower stand


Put a flower in the hole.  And, that’s it…. you just finished making your flower stand for Mother’s Day.  Present this flower stand and flower to your Mother for Mother’s Day…. she is sure to love it!!

Technorati Tags: , , , , , , , , , , ,

How to Make a Personalized Journal

Spring and summer is coming up.  And, one of the best parts of Spring and Summer is that the weather is usually beautiful enough to get outside and have adventures.  Why not record your adventures so you are able to look back at them and relive your adventures for years to come.  How do you do that?  With a Journal, of course.  A journal is like a diary…. it is a place to record your daily doings so that you can read them later and remember those times.  Today I’m going to show you how to make a Personalized Journal.  So, grab the materials needed and let’s get started.

Check out our other Keepsake Craft Ideas.

Laura from Dacian Moon Handmade will show you how to make this journal step-by-step.


Materials Needed

– blank journal / notebook
– dried plants (you can gather yourself or buy a potpourri – I used orange, brown and yellow plants)
– 1 polymer flower (or plastic, glass…)
– one auto-adhesive crystal
– colored pens
– one pencil
– glue


Step 1

Using the pencil make a sketch of how you want the journal to look like.


Step 2

Use the appropriate colors to give life to the sketch. I used red for the contour…


… and for the lace style drawing.


Step 3

Use green to make twigs and leaves.


Step 4

In the middle you may want to write “Summer Journal” like I did…. or whatever title you would like.


Step 5

Let’s place the auto-adhesive crystal under the title.


Step 6

Add a layer of glue on the polymer / plastic / glass flower…


… and place it on one exterior corner.


I added glue on two orange dried leaves…


… and placed them beside the flower.


Step 7

Take the brown dried plants,  glue them…


… and place them on the next corners.


Step 8

In the opposite corner glue another orange leaf.


You can add the yellow one beside the crystal.


Or you can make a completely different design as long as you have fun.  How did your Personalized Journal turn out?  Did you make it like my design or do something different?  Let me know in the comments below.  Make sure to take a picture of the journal too and add it to the comment….. I’d love to see it.

Technorati Tags: , , , , , , , , , ,

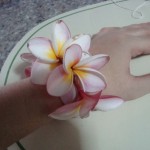
How To Make a Fresh Flower Bracelet

Spring is so close you could almost taste it.  And, with that being said I thought we would celebrate Spring with doing a craft that is totally about flowers.  Today I’m going to show you how to make a Fresh Flower Bracelet.  If you would prefer you could make this into a garland by making the Fresh Flower bracelet even longer.  The choice is yours.  I used the Temple Flower for this craft.  Fresh flowers look best.  So, let’s get started.

Check out our other Spring Crafts.


Materials Needed

8-10 pieces of fresh flowers (per bracelet, more for garland)
string
needle (medium hole)
scissors


Step 1

Clean flowers, make sure bugs or insects are not present. You do not necessarily need to wash them.


Step 2

Place string inside the needle hole and poke it inside the flower, with its petals facing towards you.


Step 3

With the needle point slightly out on the back, gently pull it out and do the same procedure until the desired length.


Step 4

Check length if it is enough to cover the wrist. With a scissors, cut the string.


Step 5

Make a knot to securely tie both ends. Adjust accordingly.

And, your gorgeous Fresh Flower Bracelet is complete.  Doesn’t it look absolutely beautiful…. and if you used fresh flowers like I did it should smell equally lovely.  Enjoy!!

Technorati Tags: , , , , , , , , , ,

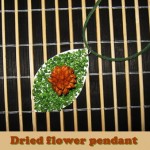
How to Make a Dried Flower Pendant

Today I’m going to show you how to make a Dried Flower Pendant.  I know we are smack dab in the middle of Winter, but I thought this would be a great way to bring a bit of Spring back in our lives.  Using a few dried flowers, or whatever materials you would rather use, you can make this super beautiful Pendant.  Imagine all the comments you would get on this pendant when you wore it…. and your excitement telling them that you made it yourself.  You would be so proud.  So, grab the materials needed and let’s get started.

Check out our other Jewelry Crafts.

Step by step tutorial offered by Laura from Dacian Moon Handmade


Materials Needed

– cardboard (4 cm x 4 cm)
– dried flower
– dried moss (or you can use decorative green scented sand from the store, like me)
– craft glue
– scissors
– pin


Step 1

Cut the cardboard in the shape you want your pendant to be.


I chose this shape because this way my pendant will be easier to match with my clothes.


Step 2

Make a hole on the upper part of the pendant, so you can put it on chain or cord when it is ready. For the moment keep the pin there, to prevent the glue from going there.


Step 3

Apply a generous layer of glue.


Step 4

Carefully place the moss on the glue, or pour decorative sand on it (plenty of it).


Step 5

Let it dry well.


Step 6

When is completely dried, turn it upside down so the extra decorative sand falls off.

*If you use dried moss you don’t need to do that.


Step 7

Apply a layer of glue on the dried flower (on one part of it)…


… and place it where you want on the pendant. Press as hard as you can without destroying the flower.


Step 8

Let it dry well.


This is the finished pendant, ready to be worn.


Doesn’t it turn out nice?  Did you make your pendant like mine or were you super creative and did it differently from mine?  Let me know in the comments below.  Don’t forget you can take a picture of your Dried Flower Pendant and leave it in your comments as well.  I’d love to see it.

Technorati Tags: , , , , , , , , ,