How to Make a Painted Snail or Sea Shell Crafts Ideas for Kids

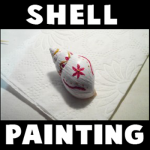
Nature is beautiful so why not take advantage of that natural beauty to create a fun craft. Find either a sea shell or a snail’s shell on the beach (or wherever). Then get the paints out and get creative! Laura from Dacian Moon Handmade  will show you, step by step, how to make this fun project for summer.

How to Make a Painted Snail or Sea Shell Crafts Ideas for Kids


How to Make a Painted Snail or Sea Shell Crafts Ideas for Kids


CRAFTS MATERIALS NEEDED:

– snail shell or sea shell
– paints
– paintbrush
– toothpick


IMG_6586


Step 1. 

We start with a base color. I choose white.


IMG_6587


Cover the shell entirely (using the paintbrush, of course)


IMG_6588


Add as many layers as necessary, until it looks as you wish. Let it dry.


IMG_6597


Step 2.

Now is time to decorate it. For decoration we will use the toothpick or a very thin paintbrush.


IMG_6598


I made a flower with red paint…


IMG_6599


.. two lines around it…


IMG_6600


and some triangles on the shell lines.


IMG_6601


Then I use golden paint to highlight the design.


IMG_6602


Like this.


IMG_6603


You now have a beautiful painted shell that you can keep on your knick knack shelf forever. Or even better, give the painted shell to someone you love or care about. I hope that you had a lot of fun!

Technorati Tags: , , , , , ,

How to Make Lava Lamps with a Mini Empty Jar or Bottle Craft Idea for Kids

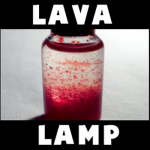
This is a fun and easy project for Summer-time and it is very inexpensive to make. This craft is to make a beautiful, homemade lava lamp. You most likely have all the crafts materials already in your house and kitchen. Laura from Dacian Moon Handmade  will show you, step by step, how to make a mini – lava lamp. You can even make it bigger so that the cool effects will be easier to see.

How to Make Lava Lamps with a Mini Empty Jar or Bottle Craft Idea for Kids


How to Make Lava Lamps with a Mini Empty Jar or Bottle Craft Idea for Kids


CRAFTS MATERIALS NEEDED:

– mini – bottle
– food coloring
– vegetable oil
– Alka Seltzer
– water


IMG_6533


Step 1.

Fill the bottle a little more than half with oil.


IMG_6534


like this.


IMG_6535


Add water until almost full…


IMG_6536


… like this.


IMG_6537


Step 2.

Add some drops of food coloring.


IMG_6539


Step 3.

Take a quarter of  an Alka Seltzer, make it small pieces and add one at a time to the bottle. (If you want to make a bigger lamp, and use a 1 liter bottle, you should add a full pill of Alka Seltzer)


IMG_6540


Wait until the first piece stops bubbling before you drop in the next.  If you add too much Alka Seltzer, the solution gets all cloudy.


IMG_6541


Let it calm down.


IMG_6547


… then watch the bubbles start going up, again and again.


IMG_6589


I think if you would add a bit of very fine glitter the effect would be even nicer.


IMG_6590bis


Technorati Tags: , , , , ,

How to make a Chalk Pastel Jars for Valentines Day or for Summer Fun

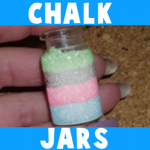
Today we will show you how to make a really cool item that you have never made before. This project is to make a jar filled with beautiful pastel chalk…it looks like sand art, but instead with chalk. Look below to find out how to make these awesome jars…great for a Valentines Day gift or for a Cool Summer Project. Laura from Dacian Moon Handmade   will show you today how to make a cute gift for your Valentine.

How to make a Chalk Pastel Jars for Valentines Day or for Summer Fun


Chalk Pastel Jars


CRAFTS MATERIALS NEEDED:

– chalk: blue, pink, green
– sugar
– small jar
– paper


IMG_3796


Step 1.

Put some sugar on a piece of paper.


IMG_3798


Spread it.


IMG_3799


Rub the blue chalk over the sugar…


IMG_3800


… and the sugar will become blue.


IMG_3801


Use the paper as a funnel to put the blue sugar into the jar.


IMG_3802


like this.


IMG_3803


Step 2.

Repeat step 1 using pink chalk. Put pink sugar over the blue one.


IMG_3805


 Step 3.

Add a layer of white sugar on the jar, then make some green sugar (repeating step 1, with green chalk).


IMG_3809


Add the green layer over the white one, like this.


IMG_3810


Seal the jar and the gift is ready.


IMG_3811


Technorati Tags: , , , , , , , , , ,

How to Make Fairy Lights with Bubbles and Paint

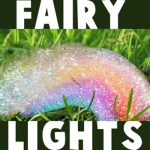
This is a cool and fun project for summer. What can be more pleasant than playing with water on a hot Summer day? How about painting with colorful bubbles, just the way a fairy would. Laura from  Dacian Moon Handmade will show you, step by step, how to make this.

How to Make Fairy Lights by Blowing Bubbles


How to Make Fairy Lights with Bubbles and Paint


CRAFTS MATERIALS NEEDED:

– plastic bottle
– 1 sock
– paints
– tape
– scissors
– liquid soap / shower gel… mixed with water


IMG_6670


Step 1.

Cut off the lower part of the bottle.


IMG_6672


Like this.


IMG_6673


Step 2.

Put the sock on the cut.


IMG_6674


Like this. You can use tape to fix it in place.


IMG_6676


Step 3.

Add some paint on the sock.


IMG_6677


Dip the sock in the soap / water mixture …


IMG_6678


Then gently blow through the mouth of the bottle. Take care not to suck in air through the bottle, because of the soap and paint.


IMG_6681


It is a fun project and you can make very beautiful fairy lights 😉


IMG_6679


Technorati Tags: , , , , , , , , , , , , ,