How to Make an Earth Day Soda Bottle flower light

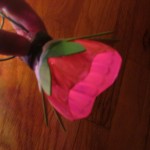
This flower light bulb craft is a great way to spend a rainy weekend, and also a terrific way to teach kids about recycling and reusing everyday objects. Explain to your child that there’s more than one way to recycle one thing into something else. You can turn used soda bottles into a string of flower lights for spring!
How to Make an Earth Day Soda Bottle Flower Light


flower-light-bulb-main


Crafts Materials Needed


flower-light-bulb-what-youll-need


String of small lights
A 16 oz soda bottle
Craft foam
Paint suitable for plastic (I used Calypso All-Purpose Acrylic Paint which dried nicely and fast)
Craft foam in green
Floral wire
Scissors
Tape (green tape or floral tape optional)


flower-light-bulb-step-one


1. Cut off the top section of the bottle.

2. Trim the cut end into petal shapes. Child-size scissors (and hands!) are good for this as they can maneuver more easily inside the bottle.


flower-light-bulb-step-three


3. Paint the outside of the bottle and allow to dry.


flower-light-bulb-step-four


4. While the paint is drying, cut two 5″ pieces of floral wire. Wrap around the base of the flower as shown, twisting the ends on each side of the base.


flower-light-bulb-step-five


5. Cut petal shapes into a 2″ x 5″ piece of green craft foam.


flower-light-bulb-step-six


6. When paint is dry, wrap petal piece around the base of the flower as shown. I used green floral tape to cover the regular clear tape I had used to make it look neater and prettier.


flower-light-bulb-step-seven


7. Insert a light into the hole in the base. Then take each set of two floral wire ends and wrap around the light string as seen above.


flower-light-bulb-finished-product


Voila, you have your own flower light! Repeat the process as many times as you’d like to string the lights around the yard for a party or in your child’s room.

Technorati Tags: , , , , , , ,

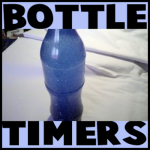
How to Make Glitter Bottle Timers for Timing Reading or Homework or Time Outs

Most kids have gone back to school by now, so I’m sure that you’re kids have too. We thought that this would be a good craft to post because sometimes when doing school work, you need to know how much time has passed. With this timer you can check it in 30 minutes or one hour (60 minutes).  Laura from  Dacian Moon Handmade  will show you how to make a cute timer.

How to Make Glitter Bottle Timers for Timing Reading or Homework or Time Outs


How to Make Glitter Bottle Timers for Kids


CRAFTS MATERIALS NEEDED:

– 0.5 liter recycled plastic bottle
– one and a half glitter glue bottle
– some extra fine glitter
– instant glue
– hot water


IMG_6731


Step 1.

Fill about 3/4 of the bottle with hot water.


IMG_6734


Step 2.

Add the glitter glue…


IMG_6735


like this.


IMG_6736


Step 3.

Add the extra glitter.


IMG_6737


It will look like this. You should shake the bottle until the glue melts.  Now you can play with the quantities. If you want it go clear faster, just add more water. If you want it to clear slower, add more glitter glue.


IMG_6738


When you are happy with the result, use instant glue to fix the cap.


IMG_6742


Shake well the timer to start it.


IMG_6739


In a half of hour it will look like this.


IMG_6740


When an hour is gone, the bottle is clear.


IMG_6741


Technorati Tags: , , , , , , , , ,

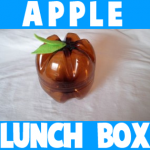
How to Make Apple Lunch Boxes with Recyled Plastic Soda Bottles

This project is perfect as a “back to school” project. It is very simple and fun, as well as a great way to store your packed lunch. This is also a great way to recycle / upcycle plastic soda bottles. Laura from  Dacian Moon Handmade  got inspiration for this craft from Creative Jewish Mom. Laura will show you, step by step, how to make this new lunch box.


How to Make Apple Lunch Boxes with Recyled Plastic Soda Bottles


CRAFTS MATERIALS NEEDED:

– two 2.5l plastic bottles (the sort where the bottom looks a bit like a flower with five petals)
– scissors
– instant glue
– green felt
– pen


IMG_6745


Step 1.

Clear the bottles – remove the labels.


IMG_6746


Step 2.

Use the scissors to cut off the end of one bottle.


IMG_6747


Like this.


IMG_6748


Cut also the end of the other bottle .


IMG_6749


Take care to cut one a centimeter taller than the other…


IMG_6750


… so you could overlap them and they stick together.


IMG_6751


Like this.


IMG_6752


Step 3.

Draw two leaves on the felt…


IMG_6753


… then cut them out.


IMG_6754


Step 4.

Add a bit of glue on the middle of one “flower”…


IMG_6755


… and place one leaf on it.


IMG_6756


Add the second leaf.


IMG_6757


Let it dry and you have an apple lunch box 😉


IMG_6759


Technorati Tags: , , , , , ,

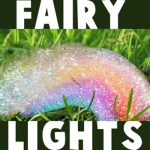
How to Make Fairy Lights with Bubbles and Paint

This is a cool and fun project for summer. What can be more pleasant than playing with water on a hot Summer day? How about painting with colorful bubbles, just the way a fairy would. Laura from  Dacian Moon Handmade will show you, step by step, how to make this.

How to Make Fairy Lights by Blowing Bubbles


How to Make Fairy Lights with Bubbles and Paint


CRAFTS MATERIALS NEEDED:

– plastic bottle
– 1 sock
– paints
– tape
– scissors
– liquid soap / shower gel… mixed with water


IMG_6670


Step 1.

Cut off the lower part of the bottle.


IMG_6672


Like this.


IMG_6673


Step 2.

Put the sock on the cut.


IMG_6674


Like this. You can use tape to fix it in place.


IMG_6676


Step 3.

Add some paint on the sock.


IMG_6677


Dip the sock in the soap / water mixture …


IMG_6678


Then gently blow through the mouth of the bottle. Take care not to suck in air through the bottle, because of the soap and paint.


IMG_6681


It is a fun project and you can make very beautiful fairy lights 😉


IMG_6679


Technorati Tags: , , , , , , , , , , , , ,

How to Make Spider Web Bracelets for Halloween

I have a fun girly craft for you today.  In this post I’m going to show you how to make a festive Halloween bracelet that any girl would love to wear this Halloween season.  Made from a recycled soda bottle and some paint this bracelet craft is an easy and fun one.  Plus, you will get a good feeling from recycling an old soda bottle instead of throwing it away.  Isn’t that wonderful?!  So, grab that cleaned out used soda bottle and let’s get this fun craft started.

Check out our other Halloween Crafts.

Laura from  Dacian Moon Handmade  will show you, step by step, how to make this.


How to Make Spider Web Bracelets for Halloween


Materials Needed

– recycled plastic bottle
– black multi-surface paint
– scissors
– nail file


Step 1

Cut the middle part of the recycled plastic bottle (the one without writing or patterns)…


… like this. Now you have the base of the bracelet.


Step 2

Round the edges using nail file.


Step 3

Take the lower part of the bottle…


And put the bracelet around it.   This will help you to paint it.


Step 4

Make a line on the lower part with the black paint.


Then, choose a point somewhere and make some rays around it, like this.


Connect them with curves, like this.


Continue until you have a full spider web.


I added two more smaller cobwebs on one side and the other.


Step 5

Let it dry overnight.


Take it off the bottle…


… and you have the coolest bracelet for this Halloween!


How cool is this bracelet?!  Any girl will love wearing this bracelet for Halloween.  And, I can promise you no one will have one exactly like it.  Enjoy!!

Technorati Tags: , , , , , , , ,

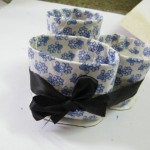
How to Make an Organizer out of Old Plastic Bottles

Today I have a super easy craft that is very useful.  I’m going to show you how to make an Organizer out of Old Plastic Bottles or Jars.  This craft is a great way to recycle those old plastic bottles and jars.  And, the outcome is a beautiful organizer.  You will need a little bit of adult help as you will need to use a cutter to cut the plastic bottles all different sizes.  So, grab the materials needed and let’s get this craft started.

Check out our other Plastic Bottle Crafts.


Materials Needed

Old plastic bottles and jars

Fabric

Glue

Scissors, cutters (Adult Help)

Ribbon


Step 1

Collect a few jars and cut them in different heights as shown.


Step 2

Cover the jars with fabric and glue it in place as shown. Place the jars together and glue them on a piece of cardboard.


Step 3

Draw around the jars and cut it out so that the base looks like it is shown


Step 4

Add a ribbon and your Organizer is finished.


And, that is it…. you have a beautiful organizer made simply out of old Plastic Bottles and Jars.  Now, the question is….. what are you going to organize?  What are you waiting for… get started.

Technorati Tags: , , , , , , , , , , ,

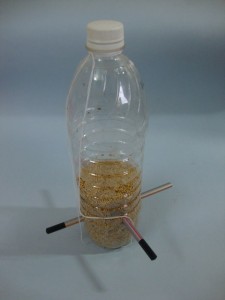
How to Make a Plastic Bottle Bird Feeder

Welcome birds into your neighborhood this spring…. Make your own bird feeder with recycled materials and place it on your windowsill, porch or garden. The birds can perch on the pencils and pull out seeds from the holes on the sides of the water bottle. Plus, it is super easy to refill your Bird Feeder by the cap of the top of the water bottle.  Imagine watching the birds feed off of the Bird Feeder you made yourself…. wouldn’t that be so wonderful?!  So, grab the materials needed and let’s get started with the craft.

Check out our other Plastic Bottle Crafts.


Materials Needed

plastic bottle

pencils

bird seed

knife/ blade (use with an adult’s help)

twine


Step 1

Make 2 holes (adult help) opposite to each other near the bottom of the bottle to allow the pencil to go through it as shown.


Step 2

Pierce another two holes (adult help) to put another pencil through it at 90 degree angles.


Step 3

Pierce holes (adult help) above the perches a little larger than the size of the seeds.


Step 4

Tie some twine on top of the bottle to hang it.


Step 5

Fill the bottle with bird seed.


Step 6

Hang your bird feeder on a branch, or outside your window and enjoy the chirping of the birds.


And, there you have it….. your very own Plastic Bottle Bird Feeder.  Now go hang it up outside and enjoy watching the birds feed off of the bird feeder you made yourself.  Enjoy!!

Technorati Tags: , , , , , , , , , ,

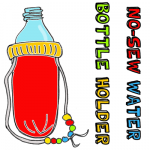
How to Make a No-Sew Water Bottle Holder

I have a very useful craft for you today.  I’m going to show you how to make a No-Sew Water Bottle Holder.  No more holding on to a wet and cold water bottle with your bare hands.  The water bottle cover-up will keep your hands nice and warm while keeping your water bottle cold.  Let’s do it.

Check out our other No-Sew Crafts.


How to Make a No-Sew Water Bottle Holder


Materials Needed

2 Different Color Socks

Water Bottle

More than 48″ of String

Beads

Scissors


Step 1


Cut cuffs off 2 socks in different colors.


Cut cuffs off 2 socks in different colors.


Step 2


Place one cuff over bottle up to the very top.


Place one cuff over bottle up to the very top.  Tie closed with 48 inch long string.


Step 3


Cut slits at the top of the socks like in image above.


Cut slits at the top of the socks like in image above.  Pull string through slits.


Step 4


Place beads on string and then tie strings closed.


Place beads on string and then tie strings closed.


Step 5


Turn second sock inside out.


Turn second sock inside out.


Step 6


Tie cut end closed with string.


Tie cut end closed with string.  Turn right side out.


Step 7


Now your item looks like this.


Now your item looks like this.


Step 8


Pull second sock over first sock.


Pull second sock over first sock.


Finished water bottle holder


There you have it.  You just finished your No-Sew Water Bottle Holder out of socks.  Now grab your water bottle with holder and go off and have some fun.

Technorati Tags: , , , , , , , ,

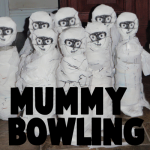
How to Make a Mummy Bowling Game for Halloween

Today I’m going to show you How to Make a Mummy Bowling Game for Halloween.  This is an awesome craft if you have a group of kids or better yet…. at a Halloween Party.  Made with water bottles and toilet paper its a fun craft that doesn’t end when the craft is finished.  Once you finished making the Mummies it’s time to play… Roll the ball and knock over those Mummies.

Check out our other Halloween Crafts.


How to Make a Mummy Bowling Game for Halloween


Materials Needed

10 Ball Pit Balls or Cheapo Balls from the Dollar Store

10 Water Bottles

Gravel, Sand or Water

Toilet Paper

Black Marker

Basketball or Kickball

Scissors


Step 1


We used ball pit balls for the heads... but you can use other types of cheapo balls from Dollar Store for the heads


We used ball pit balls for the heads… but you can use other types of cheapo balls from the Dollar Store for the heads.  Cut a hole big enough that you will be able to fit it on top of a water bottle.


Step 2


We filled the water bottle with just a little bit of gravel, but you could also use some sand or water


We filled the water bottle with just a little bit of gravel, but you could also use some sand or water to make the bottles heavy enough that they won’t tip over on their own… but are easy enough to topple over with a ball.


Step 3


Now, place the ball on the water bottle as the new cap


Now, place the ball on the water bottle as the new cap.


Step 4


 Now, wrap the bottle with toilet paper


Now, wrap the bottle with toilet paper.  Tape down in a few different spots.


Step 5


Draw the face


Draw the face.  The mouth is just a line with lines thru it.  Each eye is a circle, but partly hidden by bandages.


Step 6


You need to make 10 mummies... so this is a great project for groups of kids to make


You need to make 10 mummies… so this is a great project for groups of kids to make.  Just use a kickball or a toddler basketball for the bowling ball.

Now, tell me that isn’t a great project for a Halloween party?  I don’t know which will be more fun…. making the craft or playing Mummy Bowling.  Have fun!!

Technorati Tags: , , , , , , ,

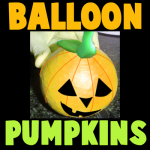
How to Make a Halloween Bean Bag Balloon Pumpkin

If you are looking for new Halloween decorations to put around the house, but are finding the same Halloween decorations at the store as every other year….. I have the perfect Halloween decoration craft for you.  Here I will show you how to make a Halloween bean bag balloon pumpkin perfect for this Halloween season.

Check out our other Halloween Crafts.


How to Make a Halloween Bean Bag Balloon Pumpkin


Materials Needed:

Water Bottle

3 Balloons

Rice or Split Peas

Scissors

Black Felt or Black Marker

Green Clay or Play Doh


Step 1:


Cut water bottle bottom off to make a funnel


Cut water bottle bottom off to make a funnel.


Step 2


Fill balloon to half its size


Fill balloon to half its size.  Wait 15 seconds and then you can deflate the balloon.  This stretches the balloon out.


Step 3


Deflate balloon


This is what the deflated balloon should look like.


Step 4


Stretch the balloon over the top of the bottle.


Stretch the balloon over the top of the bottle.  Place rice or split peas into the cut water bottle…. they will then fill the balloon.


Step 5


Fill up the balloon until it is about this full


Fill up the balloon until it is about this full.


Step 6


Cut off the top of the balloon


Cut off the top of the balloon.


Step 7


Cut bottoms from two more balloons


Cut bottoms from two more balloons.


Step 8


Stretch a balloon over the filled balloon


Stretch a balloon over the filled balloon… covering the side with hole.


Step 9


Stretch 3rd balloon over the 2nd balloon


Stretch 3rd balloon over the 2nd balloon… Again over the side the hole is showing on.


Step 10


This is what your pumpkin bean bag looks like now


This is what your pumpkin bean bag looks like now.


Step 11


Add a triangle for each eye and for the nose


Go to Our – How to Draw a Jack-O-Lantern Drawing Tutorial to draw the face…or just add a triangle for each eye and for the nose.  Draw a smile as well.


Step 12


 Add green clay or play doh stem and leaf to top


Add green clay or play doh stem and leaf to top.


How to Make a Halloween Bean Bag Balloon Pumpkin


And there you go.  You have just made an original Halloween decoration for your house…. a Halloween bean bag balloon pumpkin.  Display it proudly.  And, have a very scary Halloween.

Technorati Tags: , , , , , , ,

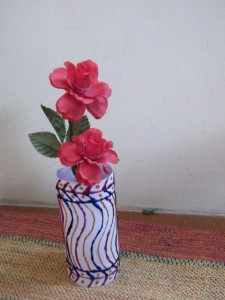
How to Make Flower Vases With Recycled Plastic Bottles

This is a recycling and a Mother’s Day Present Arts and Crafts Activity for Kids to Make. Recycling can be your way of taking care of the environment. Here’s a great craft activity that makes it really fun to recycle. Make a flower vase out of an old plastic bottle and then put fresh flowers in it for Your Mom. The simple step by step illustrated instructions follow.

How to Make Flower Vases With Recycled Plastic Bottles Gift for Mom on Mother’s Day


Craft Materials Needed

Plastic bottle

White paper

acrylic glitter glue

scissors

glue

pencil


Step 1

With the help of an adult cut off the top of the bottle


Step 2

Cut a piece of paper wider than the circumference of the bottle and slightly longer than the length of the bottle


Step 3

Roll the paper around the bottle and glue it in place.


Step 4

Draw a design on the outside of the bottle


Step 5

Go over the design with acrylic glue. Allow to dry. Put some flowers in the vase and surprise mum!!


Technorati Tags: , , , , , , , , , , , , , , ,