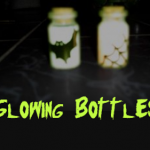
How to make Glowing Bottles for Halloween Craft for Kids

Here is a funny decoration idea for Halloween time. This is really easy to do and it glows in the in the dark, which is always fun! This craft tutorial was by Laura from Dacian Moon Handmade  will show you, step by step, how to do it .

How to make Glowing Bottles for Halloween Craft for Kids


How to make Glowing bottles for Halloween


CRAFTS MATERIALS NEEDED:

– two mini bottles
– black permanent marker
– orange glow in the dark acrylic paint
– white glow in the dark acrylic paint
– water


Step 1.

First we decorate bottles, using the black marker.


Draw 5 lines starting at the bottle base, as in the picture…


… then we will connect them with curves.


Add two more rows of curves to finish the spider web.


Step 2.

We will decorate the second one with a bat. Draw a large curve – this will be the upper part.


Starting from one end of the curve, draw a bat wing, like this.


Draw another one on the other side, joining them.


Add a „M”-like head in the middle of the curve.


Color the bat with black, leaving two holes for the eyes.


Step 3.

Put some orange glow paint in the spider web bottle (about 1/3 of it)


Like this.


Fill it with water.


Put the cap and mix well


Step 4.

We will do the same for the bat bottle.


Add white glow paint (about 1/3 of the bottle)


Fill with water.


Put the cap and mix well.


These are our bottles.


And if the lights go out … 😀


I hope that you enjoyed this craft. Come back soon for more crafts ideas that are great for children.

Technorati Tags: , , , ,

How to Make Cute Halloween Candy Bats

You can’t have Halloween without the treats! So we might as well make them cute 😉  Laura from  Dacian Moon Handmade  will show you, step by step, how to turn a normal candy bar into vampire bats. This bat can close his wings around the candy bar.


Candy Bats


CRAFTS MATERIALS NEEDED:

– black cardboard
– little chocolate
– pen
– scissors
– paper glue
– self adhesive eyes


Step 1.

Measuring the right size, we leave 2 cm above and below the chocolate. On the sides we let 4 cm.


Cut the cardboard to the right size.


Step. 2

We measure chocolate on board, marking the corners.


Draw two lines from the upper markings to the edges, like this.


Step 3.

Draw a bat wing on the right side, based on the markings. Like this.


Draw another one on the left side.


Step 4.

Next, we will draw some feet for our bat – not too complex because you’ll find it hard to cut when is ready.


The feet looks like this, because the bat has claws 😀


To finish our design we must add the head…


… so, draw it as a half of a circle with two pointy ears.


Step 5.

Cut it out.


It will look like this.


Step 6.

Add the eyes.

Bend the wings up…


… like this.


Step 7.

Add a layer of glue on the chocolate…


… and place it on its place.


Join the wings in front and you have the cutest treat ever 😀


Technorati Tags: , , , , ,


How to make Halloween Glasses

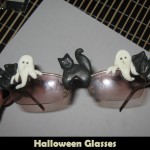
I love making a big deal about Halloween…. dressing up in festive Halloween clothing and wearing funky Halloween jewelry.  But, have you ever thought of doing more?  Something that will undoubtedly get everyone’s attention?  How about wearing blinged out Halloween Glasses?  In this post I will show you how to transform everyday glasses into a fun pair of Halloween Glasses.

Check out our other Halloween Crafts.

Tutorial (a long one but easy to do) offered by Laura from Dacian Moon Handmade . You will need help from an adult for this tutorial.


CRAFT MATERIALS NEEDED:

– night glow polymer clay
– black polymer clay
– cutter
– toothpick
– glasses (they must be made of glass because we will bake them)
– baking tray
– baking paper


Step 1 – The Ghosts

Take a piece of night glow polymer clay.


Condition it .

(Condition polymer clay by hand, simply mix it and squish it with your fingers. You may want to roll it into a log between your palms, fold it in half, and then roll again)

Take the night glow clay and make a ball of it and flatten it… then squish an end between two fingers to form a ghost, like that.


Place it on the glasses frame, as if it is staying on the edge. You can see that it is not very firm, so we better add its hands.


Add a small night glow piece on one side…


… and split it in two on the lower part… like in the picture. These are her fingers.


Do the same on the other part. Now, the ghost is firm on her position.


Repeat making another ghost…


… and place it on the other side of the frame…


… like this


Using the toothpick …


Make them some mouths.


Step 2 – the Bats

Take the black polymer clay.


Split it in 3 parts. Two smaller and one bigger.


Take one smaller piece and condition it.


Lay a small piece aside… from the remainder make a ball.


Flatten it.


Using your nails mark the middle of it…


… then squish the new formed part like this…


… to form two corners.


Do the same on the lower part and on the side, until it looks like that.


Using your toothpick …


… define the center part.


This will be the body of the bat.


Use your nails to separate the body from the wings a little… in the lower part, like this.


Now, let’s make his wings. Press the toothpick on the sides to form the wing bones.


Like this.


Do the same on the other wing. Now it looks almost like a bat… he’s just missing his head.


Take the small part you left aside and make a little ball of it. Flatten it a little…


… and place it on the upper part.


Almost done. With two even smaller pieces of clay make its ears…


… and put them on their places.


You can make a mouth too.


Let’s put the bat on the frame corner, to mask it.


Repeat this step to make another bat for the other side.


Step 3 – The Cat

Take the bigger part of black polymer clay and condition it.


Make it in the form of a bread stick…


… then bend its ends.


Flatten it a little…


… and place it on the middle of the frame, between the ghosts.


Take a smaller part of black clay and make a ball with it.


Squish between two fingers to form a cat ear…


… then the other.


With your toothpick make her mouth and nose.


Make two small balls of white (or night glow) clay…


… to make her eyes.


And two even smaller black ones …


… to complete the eyes.


What do we still need? A tail!

So, let’s make another “bread stick” – a little thinner than the first one.


Curl it to look like a tail and put it on its place.


Then add the head… the black cat is ready.


Step 4 – the Baking

Place the glasses on the baking tray, and bake them according to the instructions on the polymer clay package (they depend on the brand you use: fimo, cernit, sculpey…, but usually it is one half hour at 230 F or 110 C).  *Must have adult supervision*


Let them cool down.


Now, the last thing is to make eyes for the ghosts, so use a paint marker to do that.


There you go…. you have finished your Halloween Glasses.


Now, those are some cool and unique Halloween Glasses.  You are going to look so festive this Halloween with your homemade Halloween Glasses.  Put them on and wear them proudly.

Technorati Tags: , , , , ,

How to Make a Bats Mobile for Halloween

Bats come out at night….. and Halloween is no exception.  Why not totally spook out your house by adding this creative Bats Mobile decoration inside this Halloween.  Or, better yet…. have your child make a few of these mobile crafts and they can fill their bedroom with these spooky Halloween creatures.

Check out our other Halloween Crafts.


How to Make a Bats Mobile for Halloween


Materials Needed

Sticks of Different Sizes

Thread

Printer

Hole Punch

Scissors


CLICK ON IMAGE TO OPEN IT UP BIGGER TO PRINT.


Printable Template for Bats Mobile


You will be printing the above template shortly.


Step 1


Fasten a few sticks of different sizes together with thread


Fasten a few sticks of different sizes together with thread.  Tie some pieces of thread from these sticks.


Step 2


Print bat templates.  Cut out... Punch a hole in each bat


Print bat templates.  Cut out… Punch a hole in each bat.


Step 3


Now just pull thread thru hole and tie a knot


Now just pull thread thru hole and tie a knot.


How to Make a Bats Mobile for Halloween


Now, THAT’S a fun craft that is pretty easy to make.  Have fun decorating for Halloween and don’t forget to get a little “Batty”.   🙂

Technorati Tags: , , , , , , , , ,